How to Make a Rose Rangoli Easy Design Step by Step
A rose rangoli easy design brings warmth and color to any home entrance, puja room, or festive space. Roses are one of the most loved flowers in Indian art and decoration, and using their shape in rangoli makes the floor come alive. Whether you are decorating for Diwali, a wedding, or a simple weekend puja, a rose-inspired pattern is always a good choice. This guide walks you through everything you need to know, from basic tools to step-by-step design ideas, so you can create something beautiful with confidence.
Why Choose a Rose Rangoli Easy Design
Roses are a natural fit for rangoli because their petal shapes are easy to draw and repeat. Even if you have never made rangoli before, rose designs are forgiving and flexible. You can make them as simple or as detailed as you like.
Here is why rose rangoli is popular with beginners and experienced artists alike:
- The round petal shape is easy to trace with your fingers or a cone
- Rose motifs look elegant even with just two or three colors
- They work well in small spaces like doorways or altar areas
- Rose designs adapt easily to any size or occasion
If you are just getting started with floor art, a rose rangoli easy design is one of the best places to begin. You can also explore beginner-friendly 3D rangoli techniques to add depth to your floral patterns once you feel comfortable.
Tools and Materials You Need
Before you start drawing, gather the right supplies. Having everything ready saves time and keeps your workspace tidy.
Basic materials for a rose rangoli easy design:
- Dry rangoli colors (pink, red, yellow, white, green)
- A chalk stick or white pencil for sketching
- A small squeeze bottle or cone for fine details
- A flat brush or spoon for filling large areas
- Fresh rose petals (optional, for a natural look)
You do not need expensive tools. Many artists use a simple plastic bottle with a small hole at the tip as a color dispenser. This gives you smooth lines and clean fills.
How to Make a Rose Rangoli Easy Design Step by Step
Step 1: Clean and Prepare the Surface
Start with a clean, dry floor. Wipe the area with a damp cloth and let it dry fully. A smooth, dust-free surface helps the colors stay bright and even.
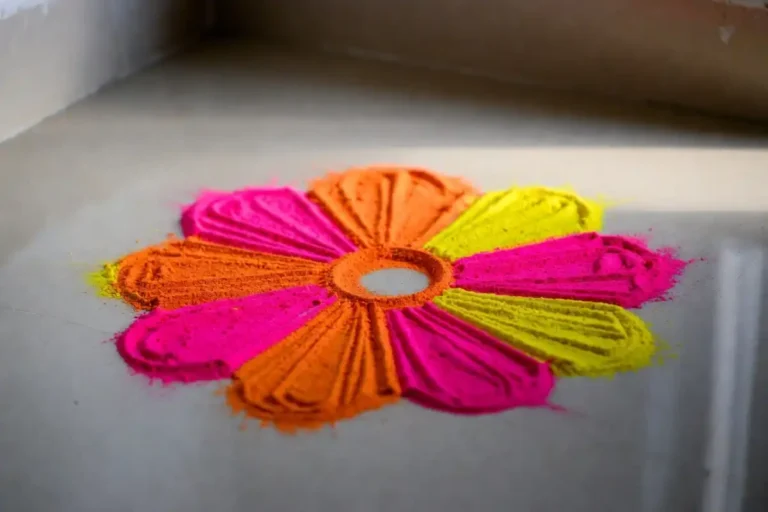
Step 2: Draw the Base Grid
Use chalk to mark the center point of your design. Draw a small circle in the middle. This becomes the center of your rose. Lightly sketch a larger circle around it to define the outer boundary of the full design.
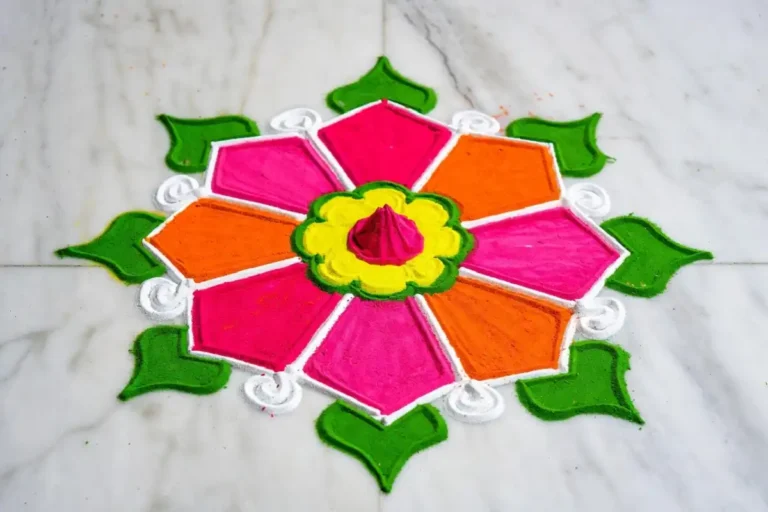
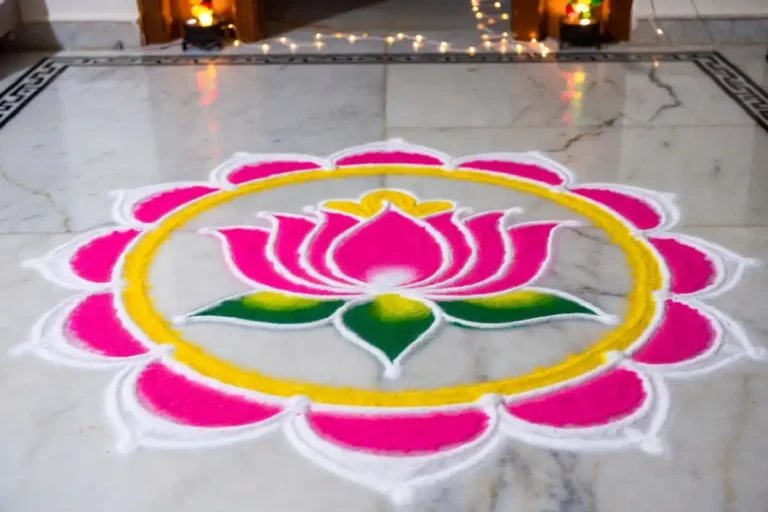
Step 3: Sketch the Rose Petals
Draw 5 to 6 curved petal shapes around the central circle. Each petal should curve slightly inward, like a real rose bloom seen from above. Keep the petal sizes even so the design stays balanced.
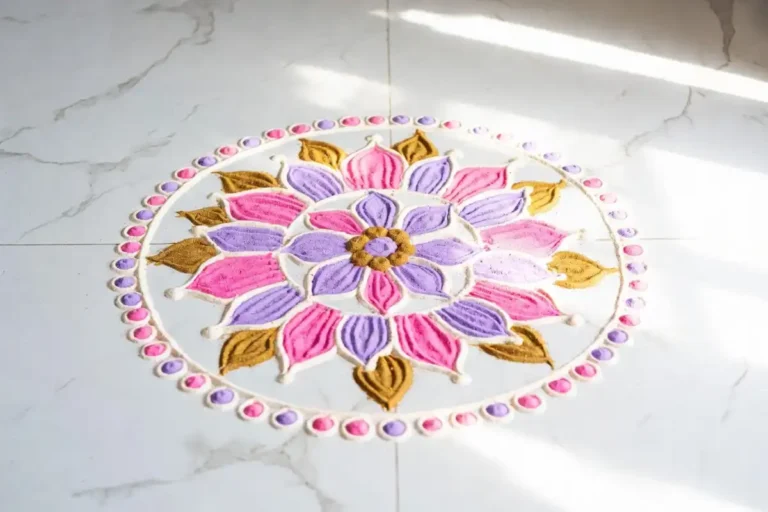
Step 4: Add Outer Layers
Add a second ring of petals slightly larger than the first. Offset them so they fill the gaps between the inner petals. This layering effect gives the rangoli a realistic, full rose appearance.
Step 5: Draw Leaves and Border
Add small leaf shapes around the outer edge of the petals. Leaves can be simple oval or pointed shapes with a center vein line. Then draw a thin border circle around the whole design to frame it neatly.
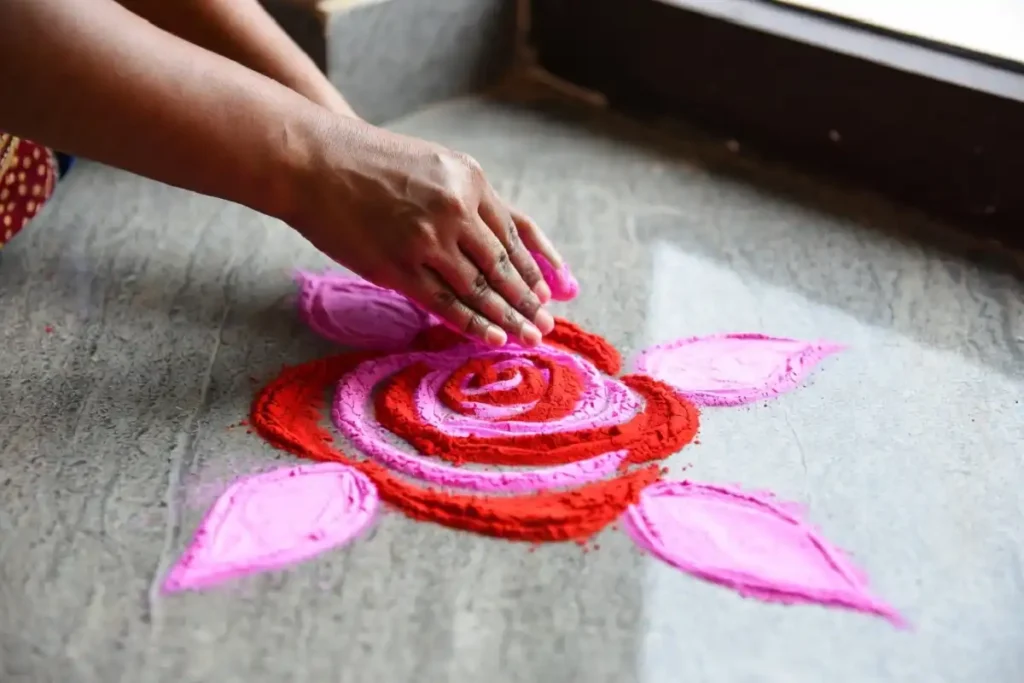
Step 6: Fill with Colors
Start filling from the center and move outward. Use deep red or dark pink for the innermost petals, then shift to lighter shades as you move to the outer layers. Fill leaves with green and the border with white or yellow.
Step 7: Add Final Details
Use a thin cone or bottle to trace fine lines along the petal edges. This adds definition and makes the rose rangoli easy design look polished and complete.
Color Combinations That Work Best
Color choice makes a huge difference in how your rose rangoli easy design turns out. The right combination can make a simple pattern look stunning.
Popular color pairings for rose rangoli:
- Deep red and white with green leaves for a classic look
- Hot pink and yellow for a festive, vibrant feel
- Soft peach and cream for a subtle, elegant appearance
- Magenta and orange for a bold Diwali or Navratri theme
Stick to three or four colors at most for a clean result. Too many shades in a small design can make it look busy and uneven.
Rose Rangoli Design Ideas for Different Occasions
A rose rangoli easy design can be adjusted to suit any event or setting. Here are a few ways to adapt the basic pattern.
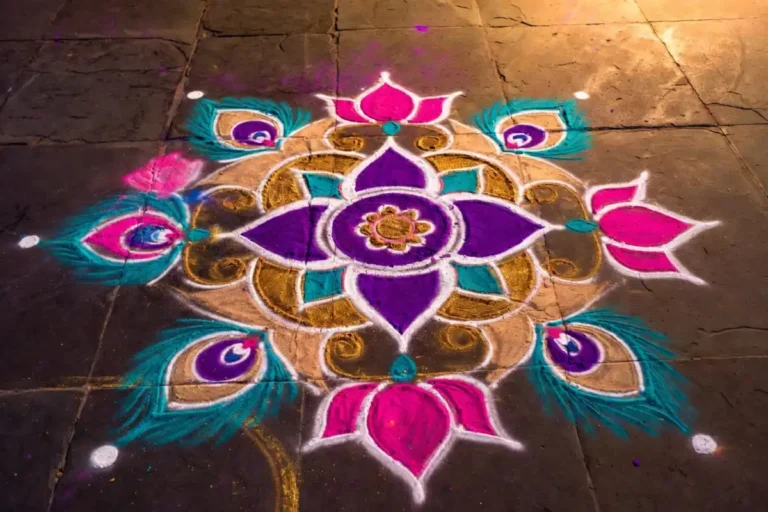
For Diwali
Use bright, warm colors like red, orange, and gold. Add small diyas or lamp shapes at the four corners of the design. The glow of actual diyas placed around the rangoli adds to the festive atmosphere.
For Weddings
A white and pink rose rangoli easy design works beautifully at the entrance of a wedding venue or mandap. You can scale it up by repeating the rose motif in a grid pattern across a larger floor space. For more ideas, see these easy wedding rangoli designs for beautiful spaces.
For Navratri
Bold, energetic colors like orange, pink, and red make your rose rangoli easy design stand out during Navratri celebrations. Add a ring of small footprint shapes around the design to represent Goddess Durga’s arrival.
For Daily Puja
Keep it small and simple. A single rose bloom with just two colors is enough for a daily ritual space. It takes only a few minutes to draw and still brings a sense of care and devotion.
Tips for Cleaner Lines and Better Results
Even simple rose rangoli easy designs can look very professional with a few good habits.
Practical tips to improve your rangoli:
- Always sketch with chalk first before adding color
- Fill the center before the outer areas to avoid smudging
- Keep a dry cotton cloth nearby to fix mistakes quickly
- Work from the inside out and from top to bottom
- Use a thin cone for borders and a spoon or card for large fills
Good lighting also matters. Natural daylight shows colors at their truest brightness. If you are working indoors, a bright white light helps you see the design clearly while you fill it.
Using Fresh Rose Petals in Your Design
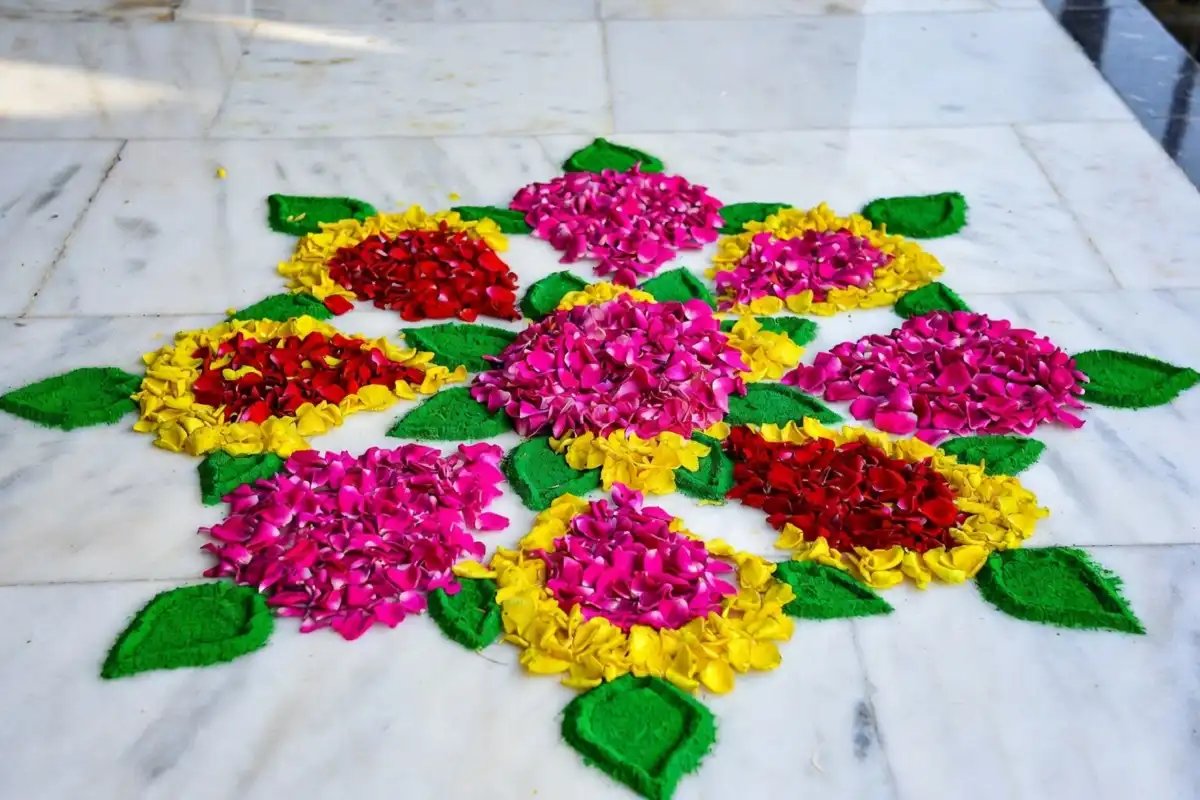
Fresh petals add a natural, fragrant touch to any rose rangoli easy design. You can use them alongside dry colors or make a full design using only petals.
How to use petals effectively:
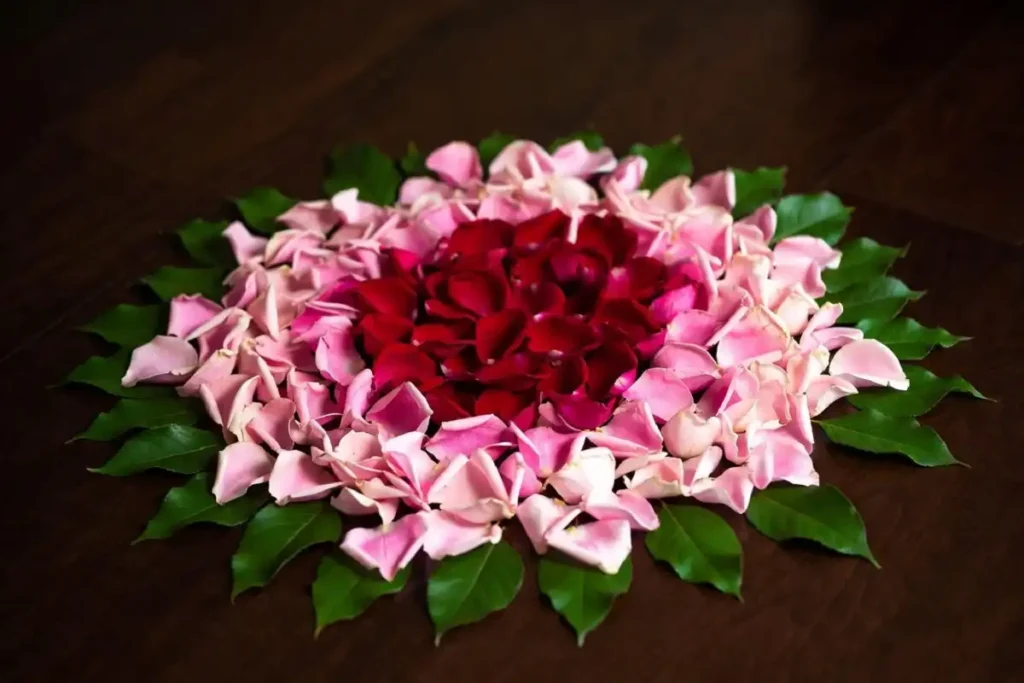
- Arrange whole petals in concentric rings for a rich texture
- Tear petals into smaller pieces to fill curved shapes
- Mix red and pink petals for a natural gradient effect
- Use green leaves as borders between petal sections
Petal rangoli does not last as long as dry color designs, but it is wonderful for special occasions like pujas and weddings where freshness matters. According to the Victoria and Albert Museum’s overview of Indian decorative arts, floral floor designs have been part of Indian ritual and welcome traditions for centuries.
Common Mistakes to Avoid
Even experienced artists sometimes run into small problems. Knowing what to watch for helps you get better results faster.
Mistakes to avoid when making a rose rangoli easy design:
- Skipping the chalk sketch and going straight to color
- Using too many colors, which creates a cluttered look
- Making petals uneven in size, which throws off the symmetry
- Not protecting finished sections while filling adjacent areas
- Using wet or damp surfaces, which cause colors to bleed
Take your time with the first few petals. Once the base shape is right, the rest of the design comes together much more easily.
Rose Rangoli with Indian Symbols
Combining a rose rangoli easy design with traditional Indian symbols adds cultural meaning to your decoration. A small Om or swastika in the center of the rose, surrounded by petals, is a common pattern for puja areas and auspicious occasions.
You can also explore how floral designs blend with simple Indian symbol rangoli patterns for home to create meaningful combinations that honor both art and tradition.
Scaling Up Your Rose Design
Once you are comfortable with a single rose motif, you can expand it into a larger, more detailed pattern.
Ways to scale a rose rangoli easy design:
- Repeat the rose bloom in a 3×3 grid pattern for a wide floor area
- Connect multiple rose motifs with vine and leaf borders
- Place a large central rose surrounded by smaller satellite blooms
- Use the same rose pattern in alternating colors for a quilt-like effect
Larger designs benefit from more careful chalk planning. Spend extra time on the sketch stage, and consider using a ruler or compass for perfectly even spacing. The BBC Good Food guide to edible flowers is a helpful visual reference for understanding how real rose blooms are layered, which you can translate into more realistic petal shapes in your rangoli.
Holi and Colorful Rose Rangoli
Holi is one of the best festivals for experimenting with bold rose rangoli easy design ideas. The festival’s spirit of color play gives you permission to go beyond traditional shades and try unexpected combinations.
For Holi decoration, you might enjoy these simple Holi rangoli designs for a colorful celebration alongside your rose patterns to create a full festive display.
FAQs
What is the easiest rose rangoli design for beginners?
Can I make a rose rangoli easy design with only two colors?
How long does a rose rangoli easy design last?
Do I need special rangoli powder for a rose design?
Is a rose rangoli easy design suitable for Navratri?
How do I keep the design symmetrical?
Conclusion
A rose rangoli easy design is one of the most rewarding ways to bring beauty and tradition into your home. It is accessible for beginners, adaptable for any occasion, and endlessly varied in its color and style possibilities. Whether you use dry powder, fresh petals, or a mix of both, the rose motif carries a sense of warmth and care that is hard to match. Start with a single bloom, practice your petal shapes, and build from there. With a little patience and the right color choices, your rose rangoli will become a highlight of any celebration or daily ritual.