How to Make Rangoli Design: Easy Step-by-Step Guide for Beginners
For me, rangoli has always been more than floor decoration, it is a childhood memory and a tradition I still carry with me. Based in Kolkata, I have spent the past eight years drawing, photographing, and documenting rangoli and alpana designs.
My love for this art began by watching my mother and grandmother create beautiful patterns at our doorway, dot by dot, before sunrise. Those quiet mornings taught me that even simple lines can carry meaning, beauty, and tradition.
In Bengal, this floor art is traditionally known as alpana, often created with rice-based paste on auspicious occasions. Today, I’m sharing what years of practice have taught me, so you can create your own beautiful design at home.
What Is Rangoli?
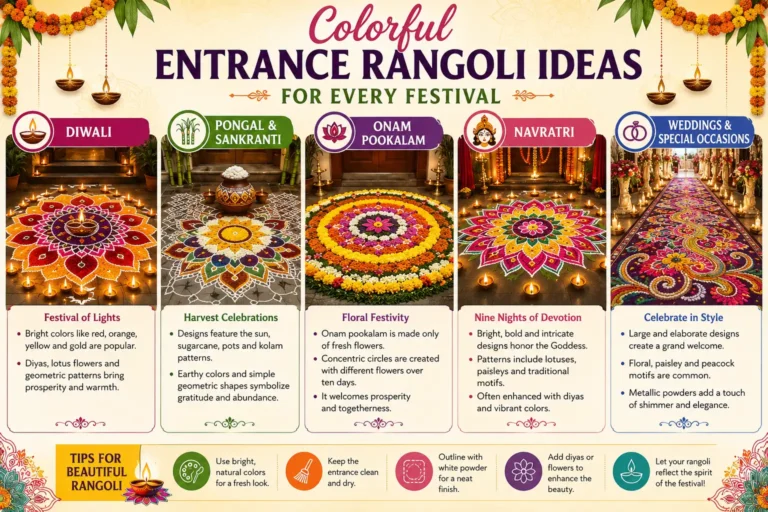
Rangoli is a way of decorating the floor using bright powders, rice, flower petals or other natural things. It is often made near doors in courtyards or in places during festivals and happy events.
Rangoli patterns can be very easy or very complicated. New people can begin with shapes, like circles, squares, flowers, small dots and gentle lines before moving on to more difficult pictures.
Materials You Need to Make a Rangoli
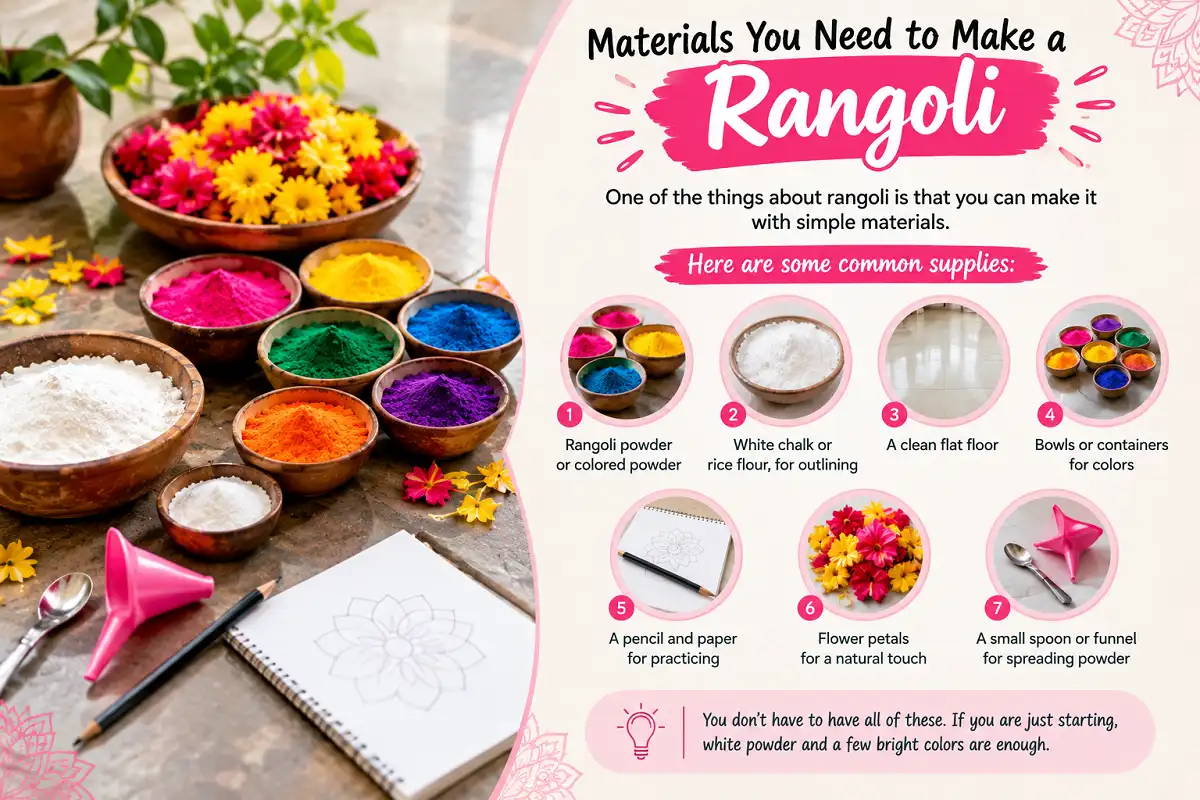
One of the things about rangoli is that you can make it with simple materials.
Here are some common supplies:
You don’t have to have all of these. If you are just starting, white powder and a few bright colors are enough.
How to Make Rangoli Design Step by Step
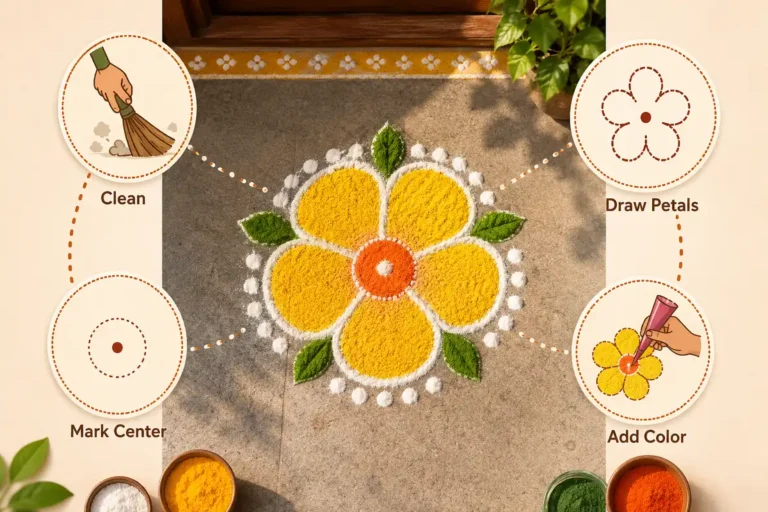
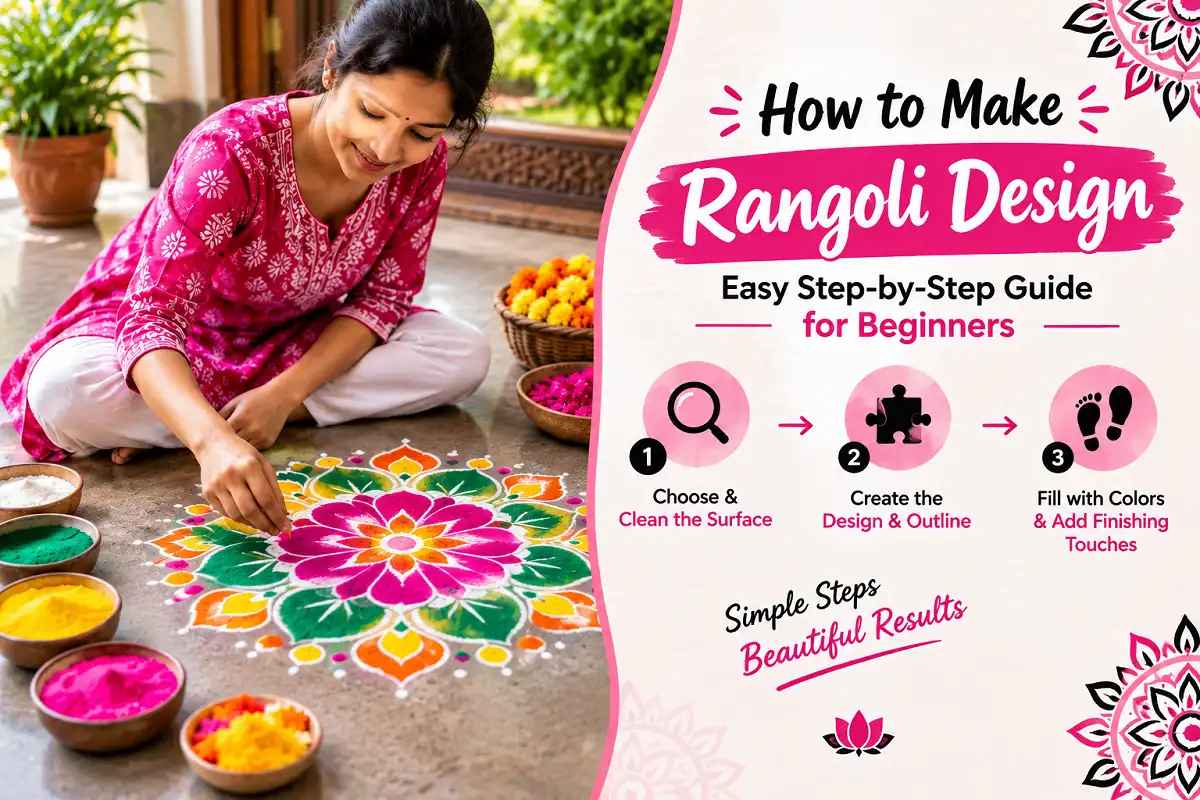
Making a rangoli becomes easier when you follow a simple sequence. Start with a clean, dry surface, mark an evenly spaced dot grid, and connect the dots to create a basic flower, geometric, or circular pattern.
Once the outline is ready, fill each section with rangoli powder, working from the center outward to avoid smudging. Finish with a neat border and a few small decorative details for a polished look.
Choose and Clean the Surface
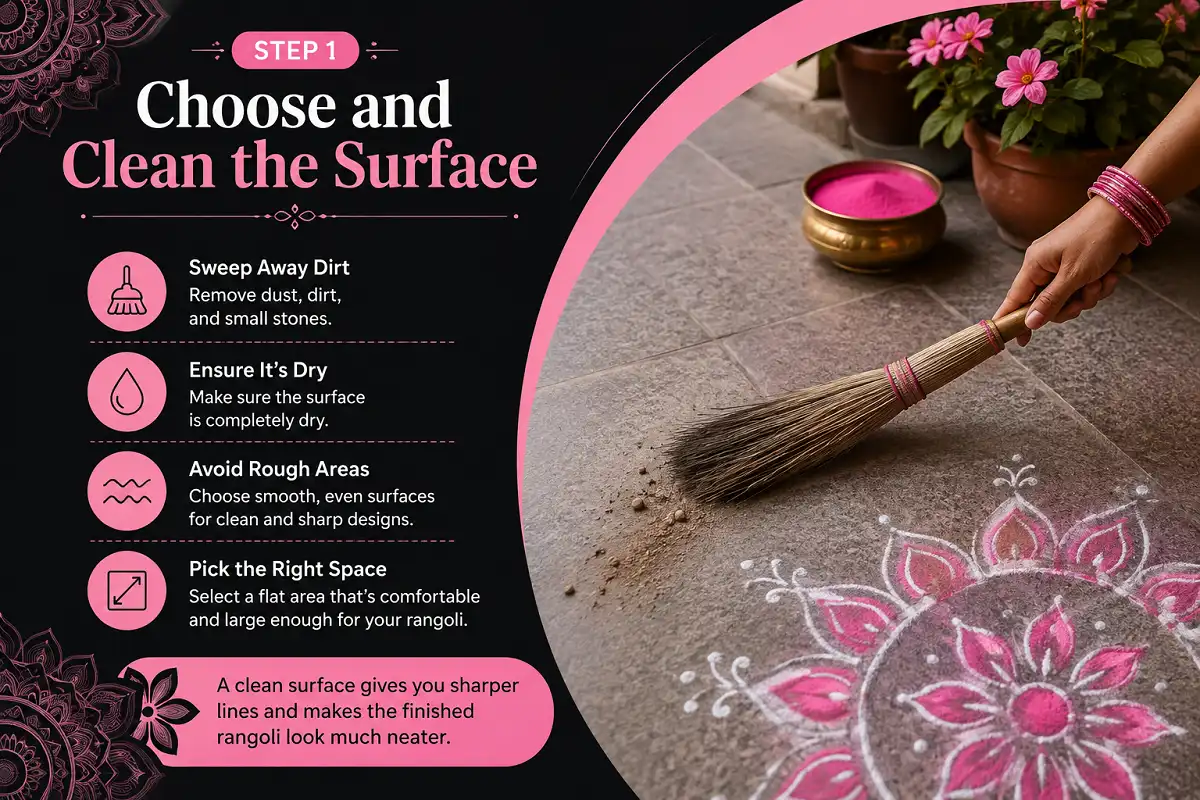
Start by selecting a flat and comfortable area for your rangoli. The entrance, courtyard, balcony, or a clean section of the floor can work well.
- Sweep away dust, dirt, and small stones.
- Make sure the surface is dry before drawing.
- Avoid rough or uneven areas because they can make the powder spread unevenly.
- Choose a space large enough for your selected design.
Gather Your Materials
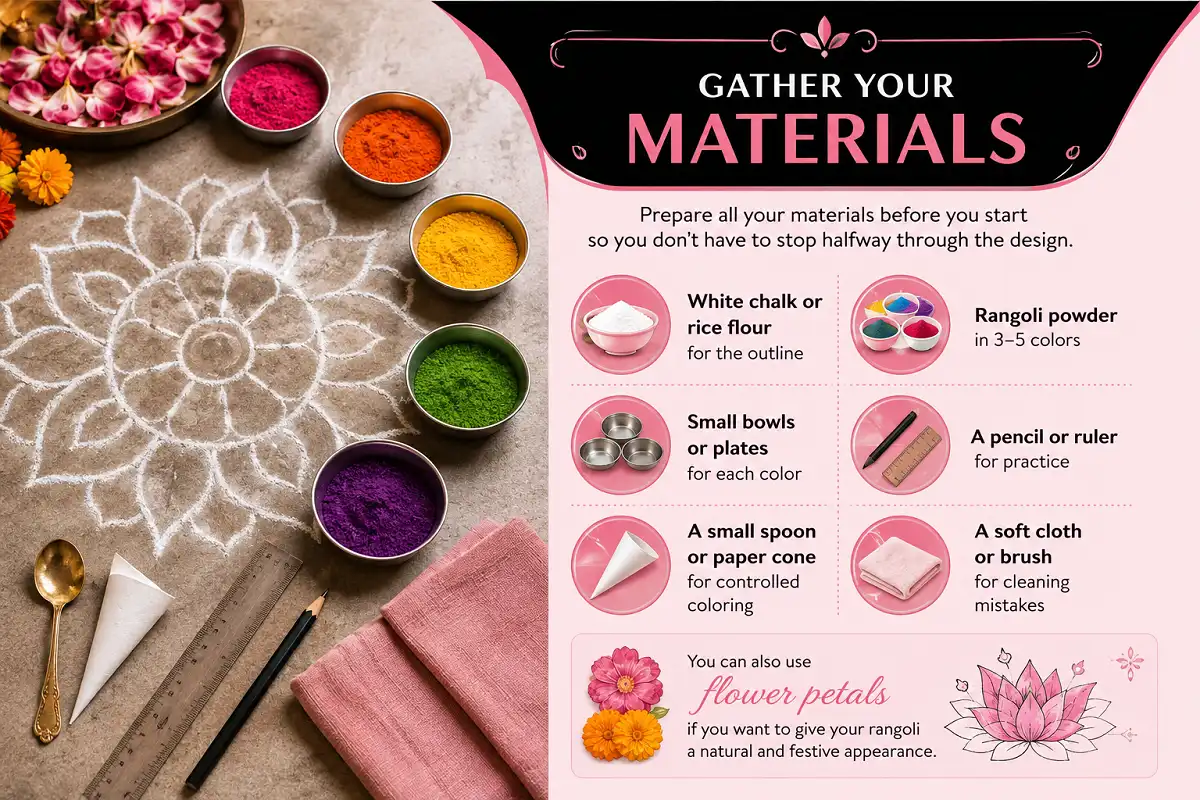
Prepare all your materials before you start so you don’t have to stop halfway through the design.
You can keep:
- White chalk or rice flour for the outline
- Rangoli powder in 3–5 colors
- Small bowls or plates for each color
- A pencil or ruler for practice
- A small spoon or paper cone for controlled coloring
- A soft cloth or brush for cleaning mistakes
You can also use flower petals if you want to give your rangoli a natural and festive appearance.
Select a Simple Design
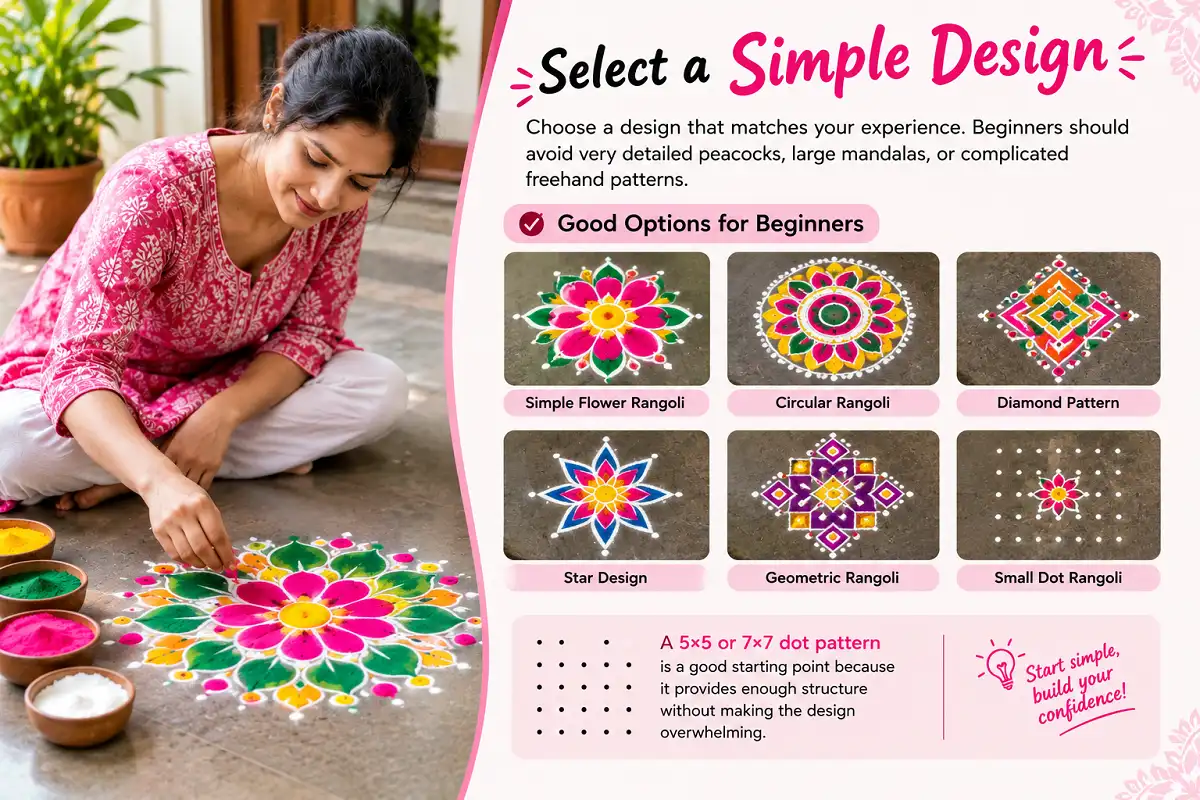
Choose a design that matches your experience. Beginners should avoid very detailed peacocks, large mandalas, or complicated freehand patterns.
A 5×5 or 7×7 dot pattern is a good starting point because it provides enough structure without making the design overwhelming.
Create the Dot Grid
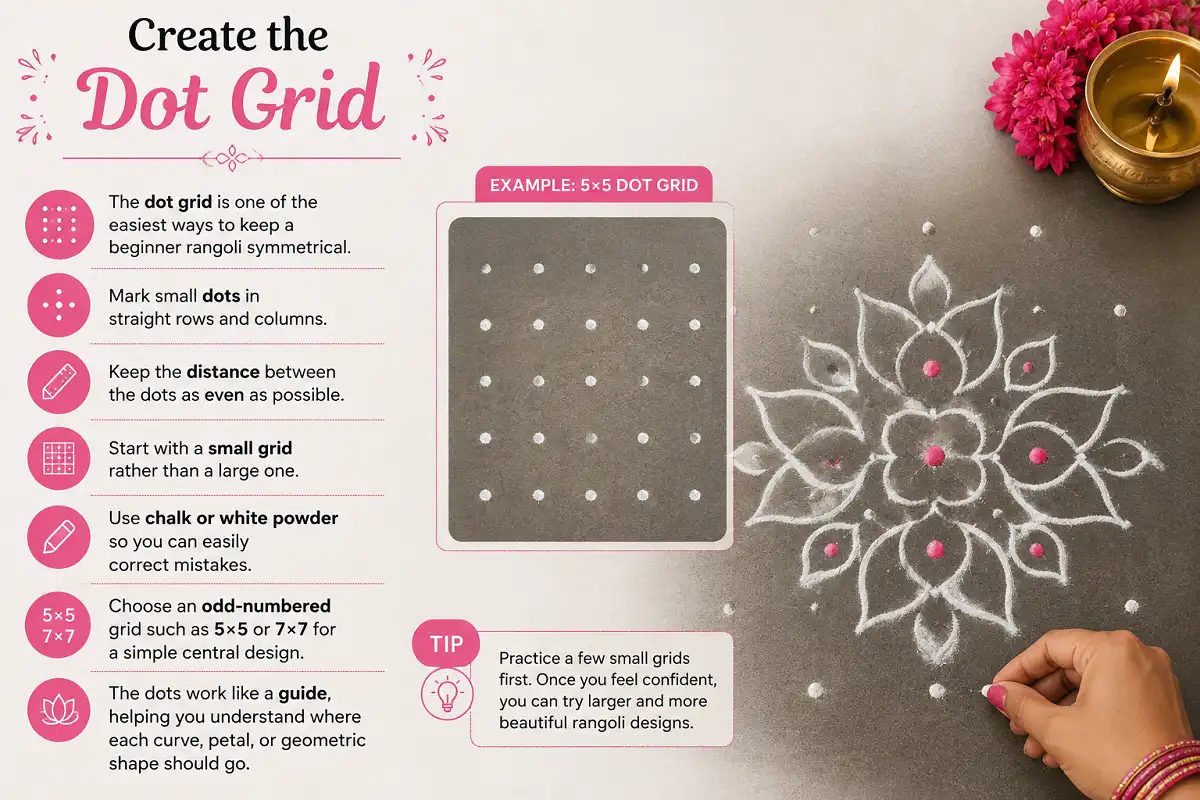
The dot grid is one of the easiest ways to keep a beginner rangoli symmetrical.
- Mark small dots in straight rows and columns.
- Keep the distance between the dots as even as possible.
- Start with a small grid rather than a large one.
- Use chalk or white powder so you can easily correct mistakes.
- Choose an odd-numbered grid such as 5×5 or 7×7 for a simple central design.
Connect the Dots and Draw the Outline
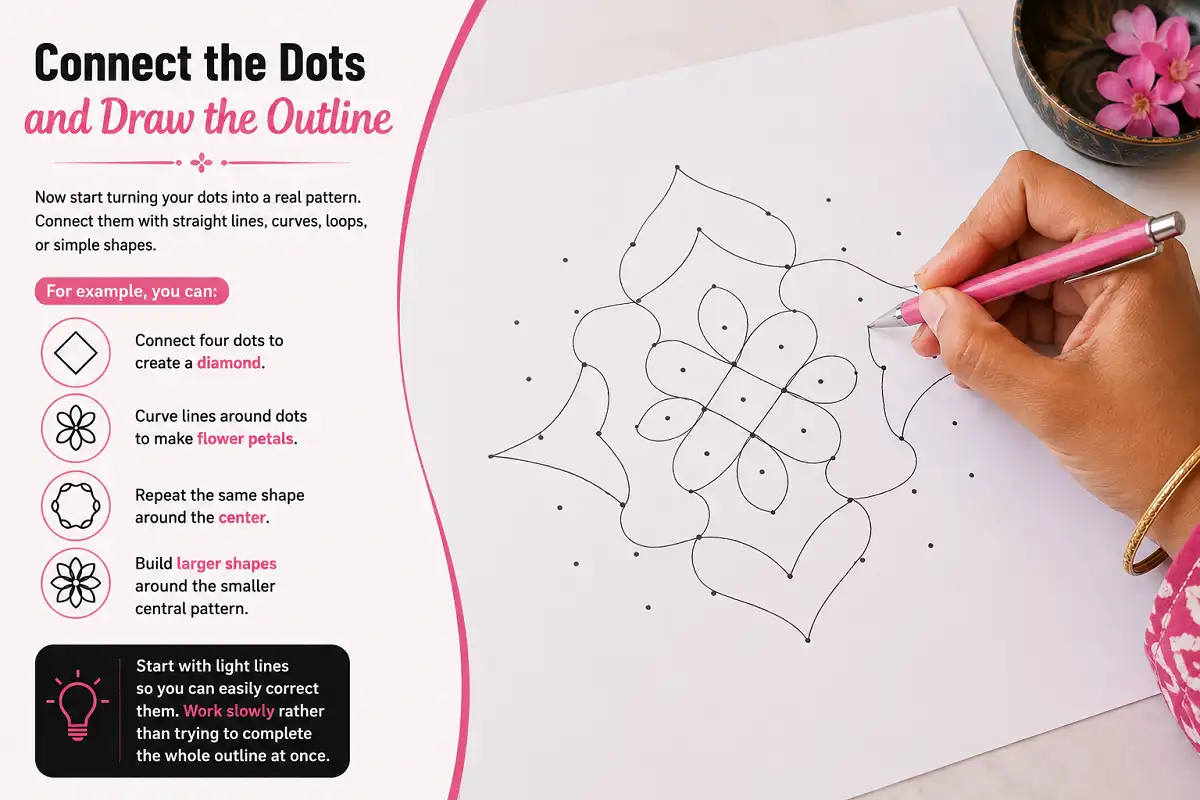
Now start turning your dots into a real pattern. Connect them with straight lines, curves, loops, or simple shapes.
For example, you can:
- Connect four dots to create a diamond.
- Curve lines around dots to make flower petals.
- Repeat the same shape around the center.
- Build larger shapes around the smaller central pattern.
Start with light lines so you can easily correct them. Work slowly rather than trying to complete the whole outline at once.
Check the Shape and Symmetry
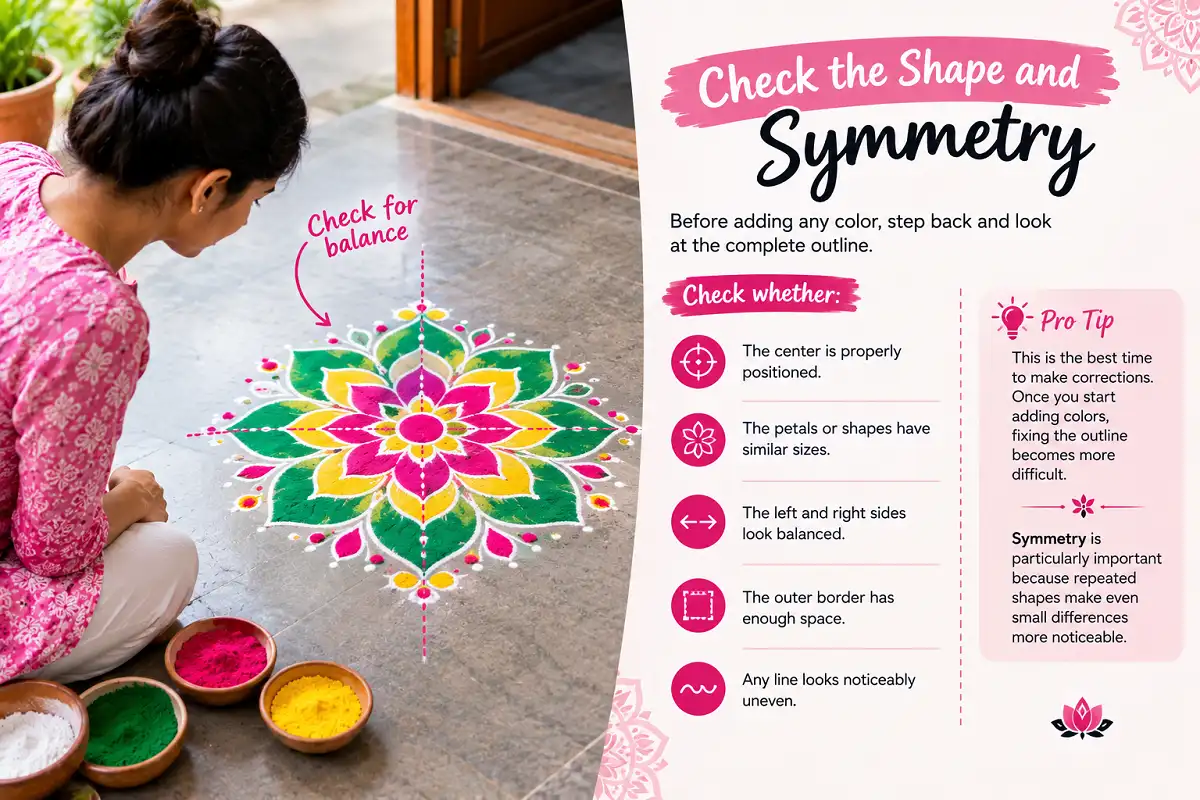
Before adding any color, step back and look at the complete outline.
This is the best time to make corrections. Once you start adding colors, fixing the outline becomes more difficult. Symmetry is particularly important because repeated shapes make even small differences more noticeable.
Start Filling the Design With Color
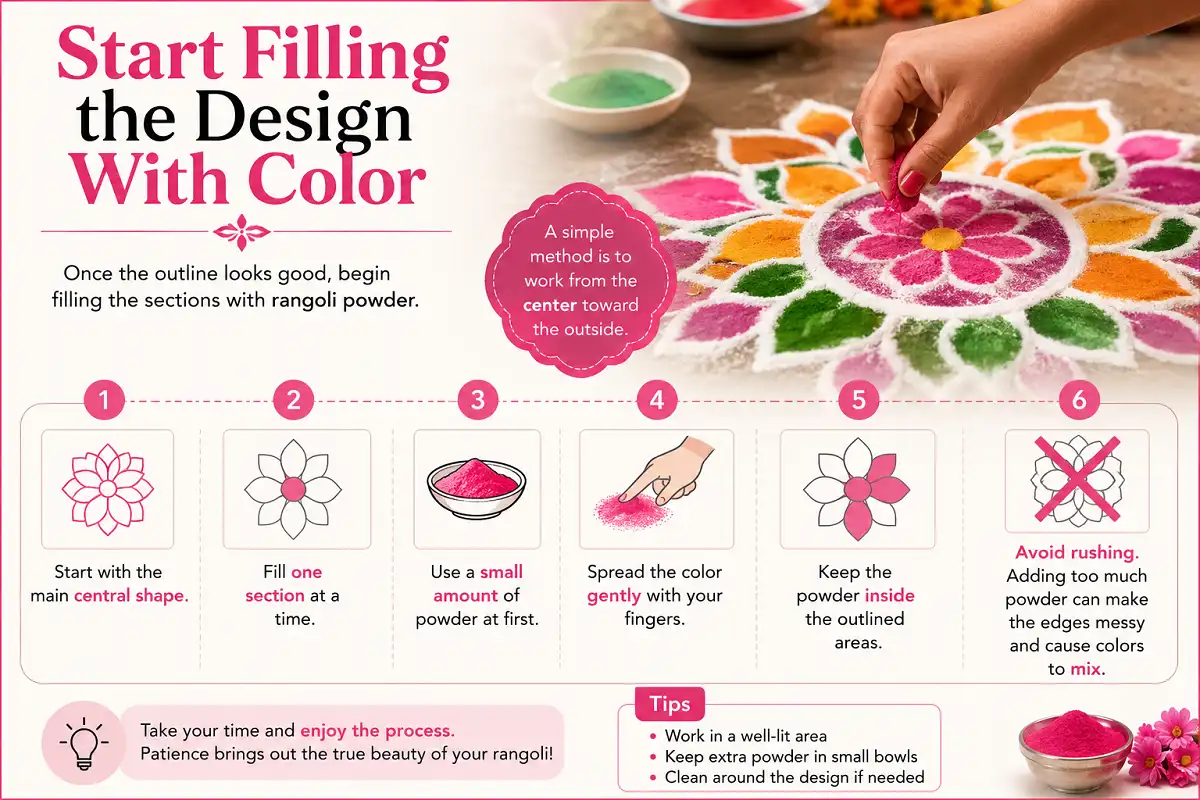
Once the outline looks good, begin filling the sections with rangoli powder.
A simple method is to work from the center toward the outside.
- Start with the main central shape.
- Fill one section at a time.
- Use a small amount of powder at first.
- Spread the color gently with your fingers.
- Keep the powder inside the outlined areas.
Choose Colors That Work Together
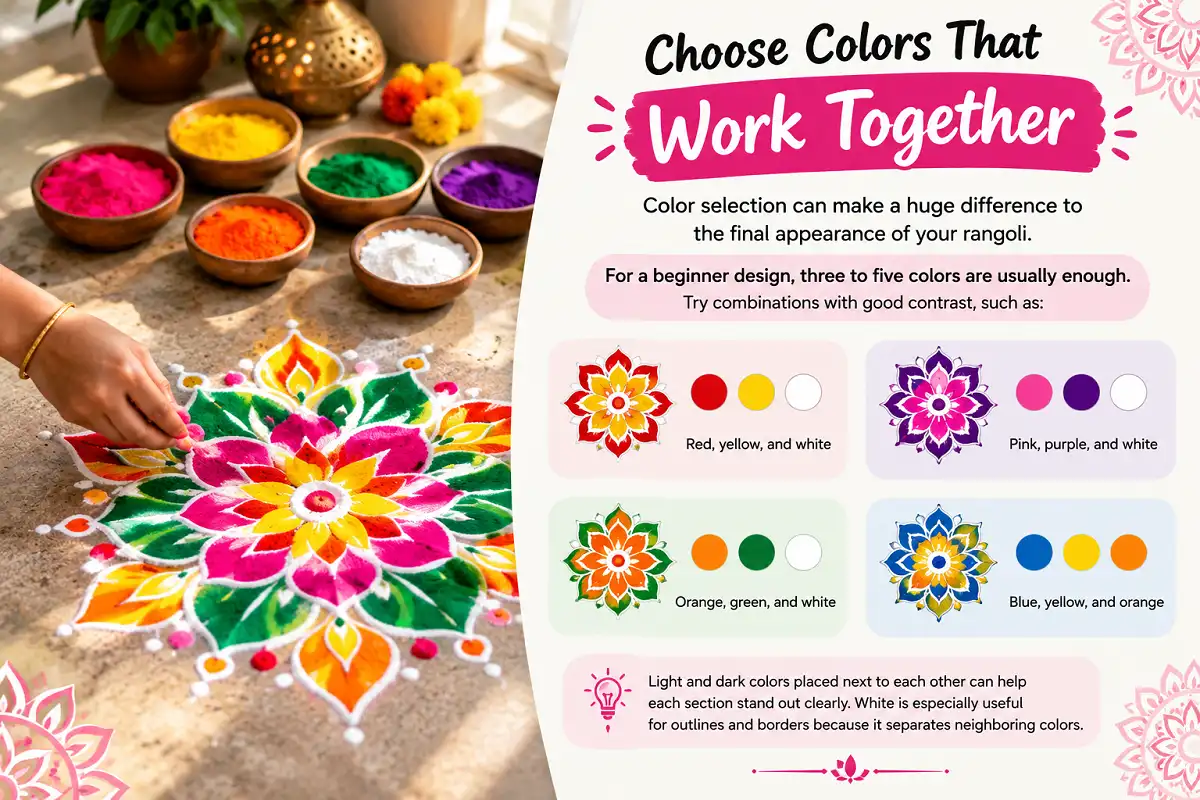
Color selection can make a huge difference to the final appearance of your rangoli.
For a beginner design, three to five colors are usually enough. Try combinations with good contrast, such as:
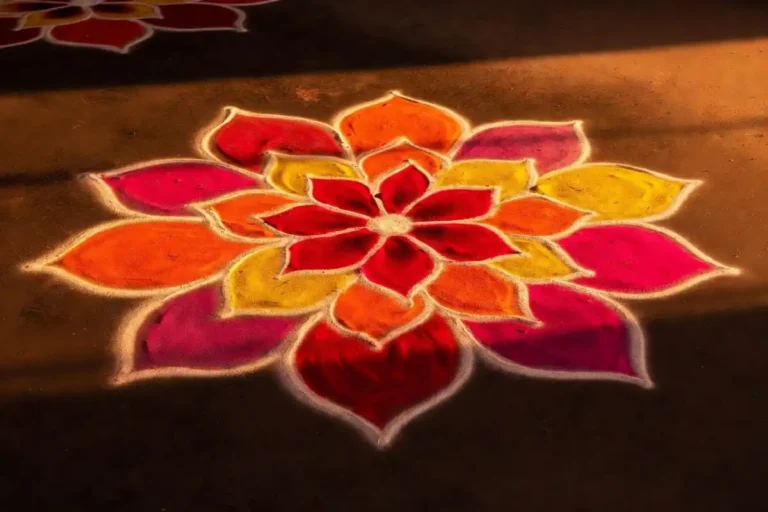
Light and dark colors placed next to each other can help each section stand out clearly. White is especially useful for outlines and borders because it separates neighboring colors.
Add Small Decorative Details
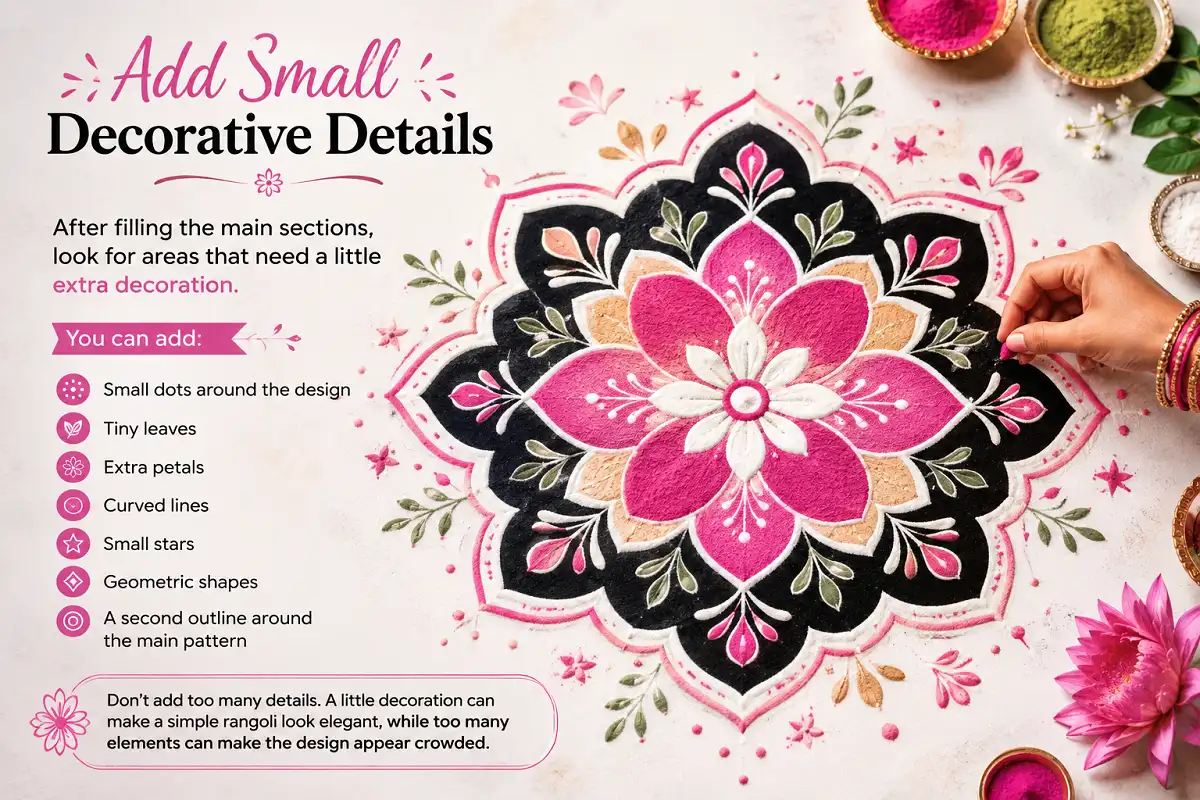
After filling the main sections, look for areas that need a little extra decoration.
Don’t add too many details. A little decoration can make a simple rangoli look elegant, while too many elements can make the design appear crowded.
Finish With a Clean Border
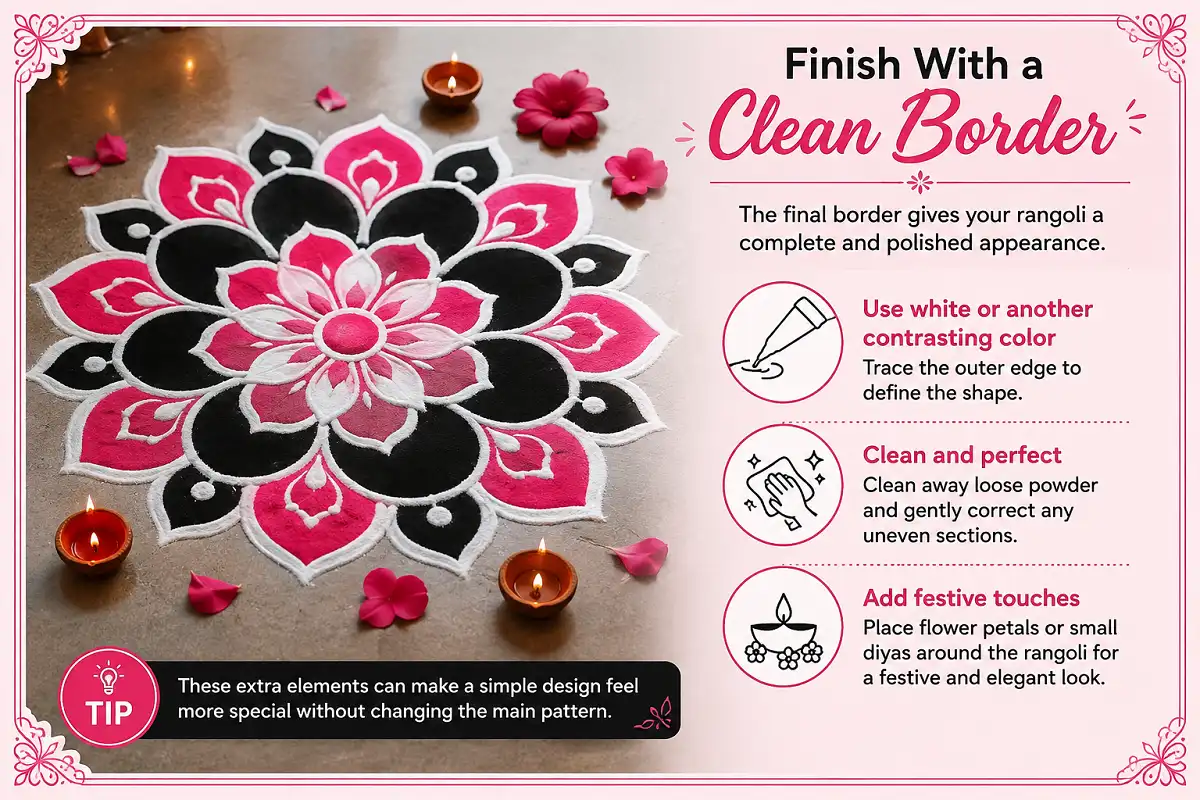
The final border gives your rangoli a complete and polished appearance.
Use white or another contrasting color to trace the outer edge. Clean away loose powder around the design and gently correct any uneven sections.
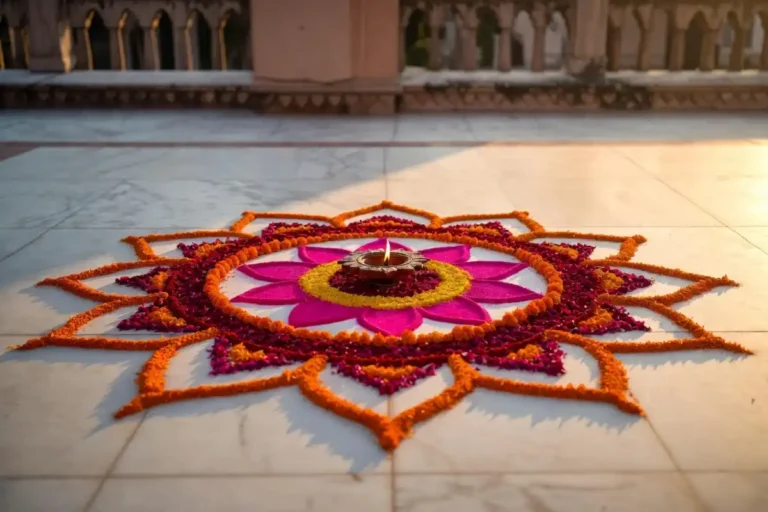
For a festive look, you can also place flower petals or small diyas around the rangoli. These extra elements can make a simple design feel more special without changing the main pattern.
Easy Rangoli Design Ideas for Beginners
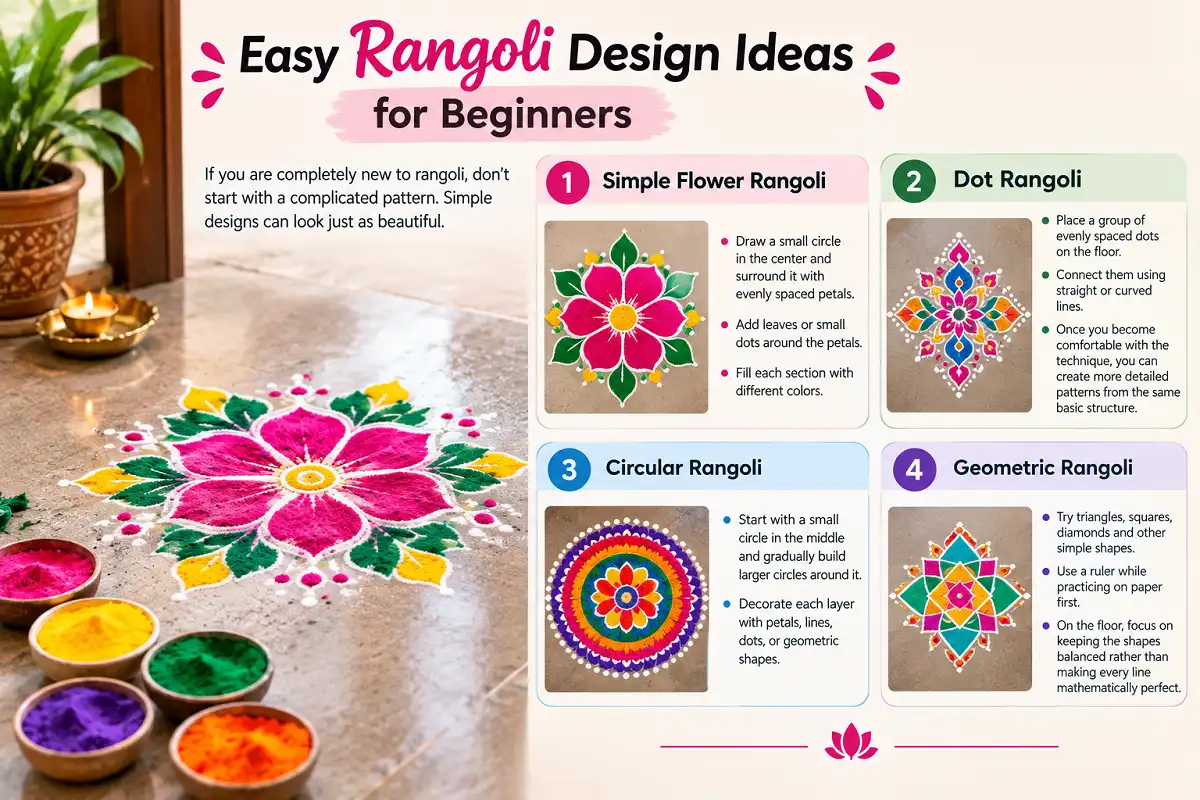
If you are completely new to rangoli, don’t start with a complicated pattern. Simple designs can look just as beautiful.
Simple Flower Rangoli
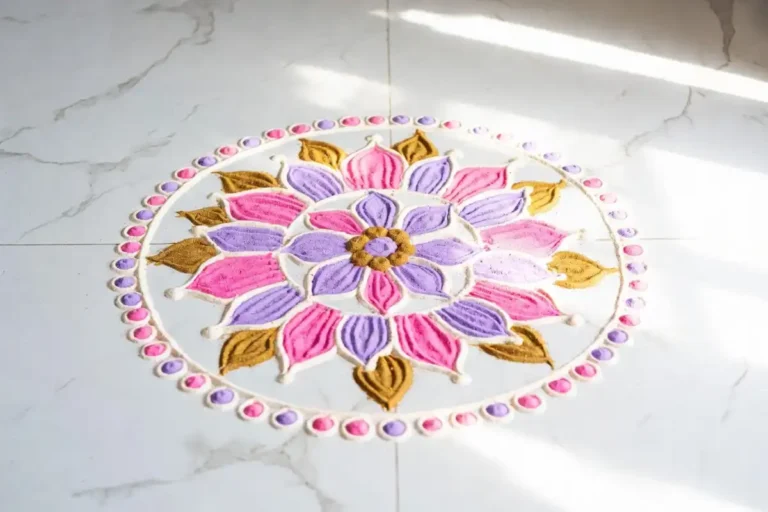
A flower is one of the easiest designs to practice. Draw a small circle in the center and surround it with evenly spaced petals. Add leaves or small dots around the petals and fill each section with different colors.
Dot Rangoli
Dot-based designs are excellent for beginners. Place a group of evenly spaced dots on the floor and connect them using straight or curved lines.
Once you become comfortable with the technique, you can create more detailed patterns from the same basic structure.
Circular Rangoli
A circular rangoli is another easy option. Start with a small circle in the middle and gradually build larger circles around it.
You can decorate each layer with petals, lines, dots, or geometric shapes.
Geometric Rangoli
If you prefer clean and organized designs, try triangles, squares, diamonds, and other simple shapes.
Use a ruler while practicing on paper first. On the floor, focus on keeping the shapes balanced rather than making every line mathematically perfect.
Tips to Make Your Rangoli Look Better
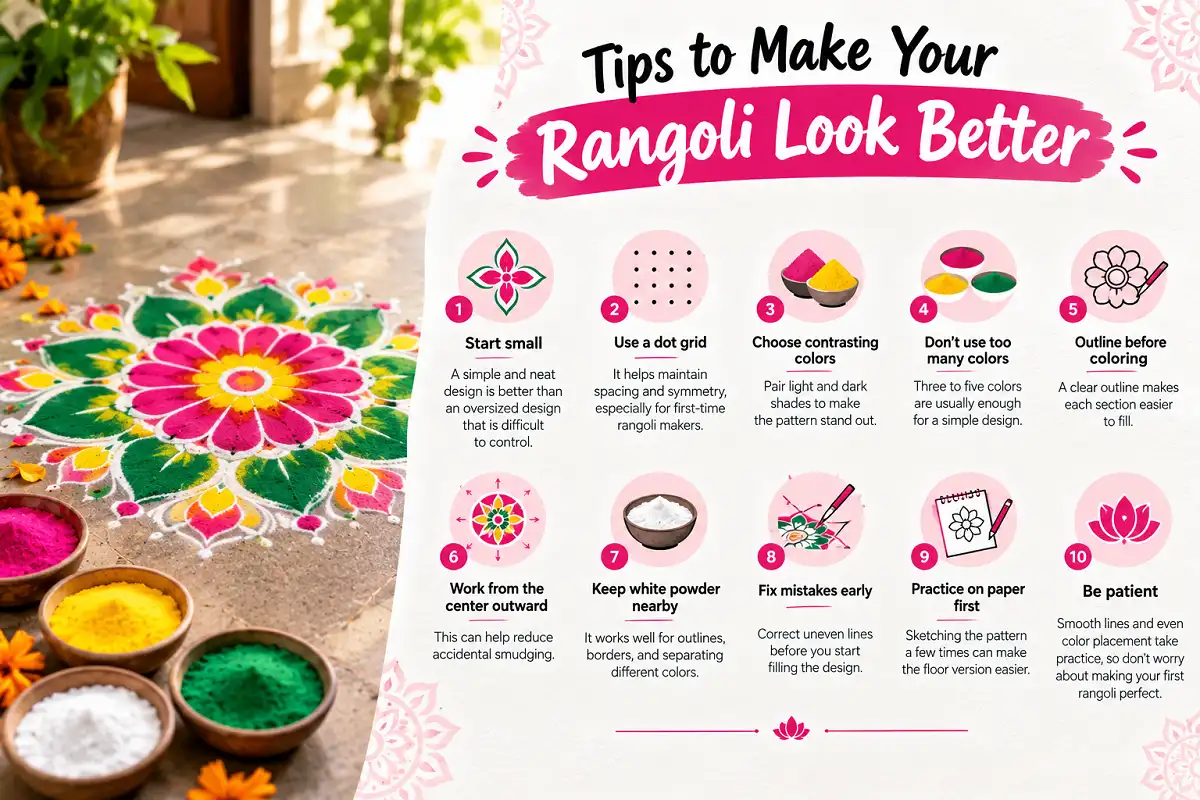
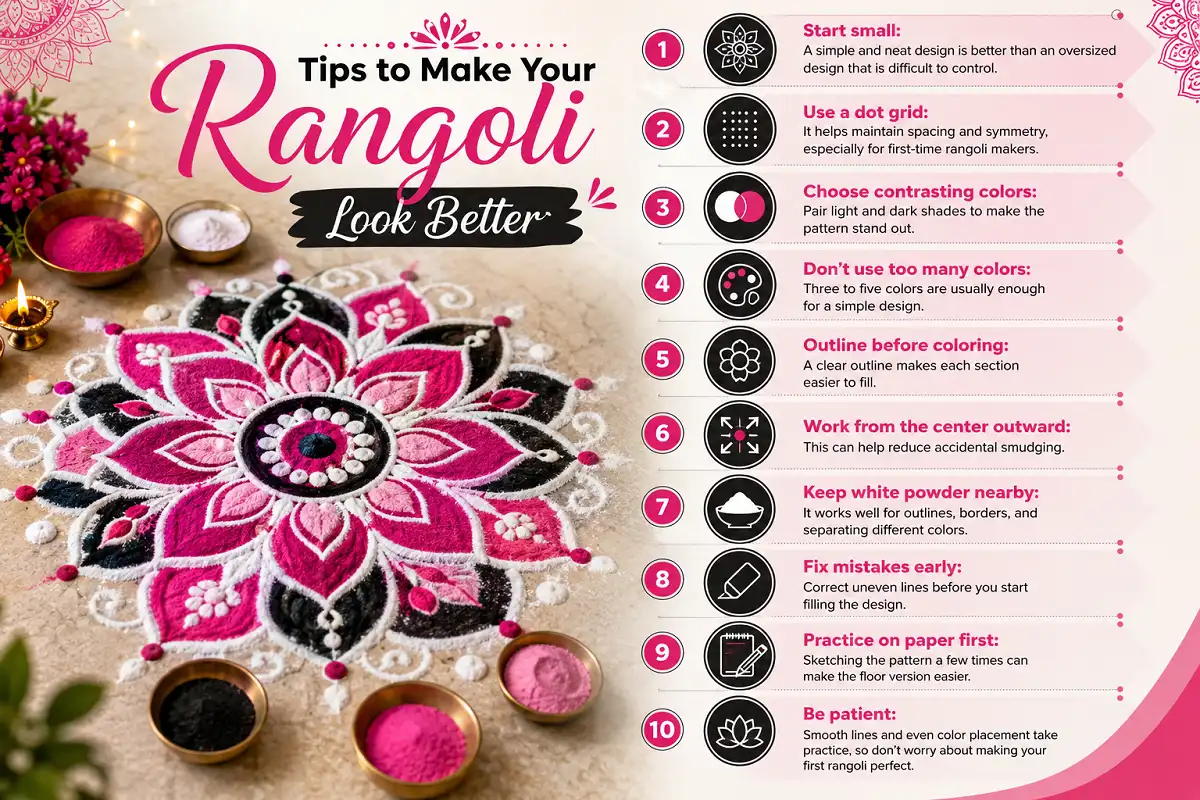
A simple and neat design is better than an oversized design that is difficult to control.
It helps maintain spacing and symmetry, especially for first-time rangoli makers.
Pair light and dark shades to make the pattern stand out.
Three to five colors are usually enough for a simple design.
A clear outline makes each section easier to fill.
This can help reduce accidental smudging.
It works well for outlines, borders, and separating different colors.
Correct uneven lines before you start filling the design.
Sketching the pattern a few times can make the floor version easier.
Smooth lines and even color placement take practice, so don’t worry about making your first rangoli perfect.
Common Mistakes Beginners Should Avoid
When learning how to make rangoli design, beginners often make a few simple mistakes.
One common mistake is choosing a design that is too complicated. A detailed pattern can be difficult to manage when you’re still learning how to control the powder.
Another mistake is using too many colors without a clear plan. Instead, choose a small color palette and use it consistently.
Uneven spacing is another issue. If your design has petals or dots, try to keep the distance between them reasonably similar.
Finally, don’t worry too much about perfection. Rangoli is a form of creative expression, and the handmade quality is part of its charm.
How to Make Rangoli Without Special Tools
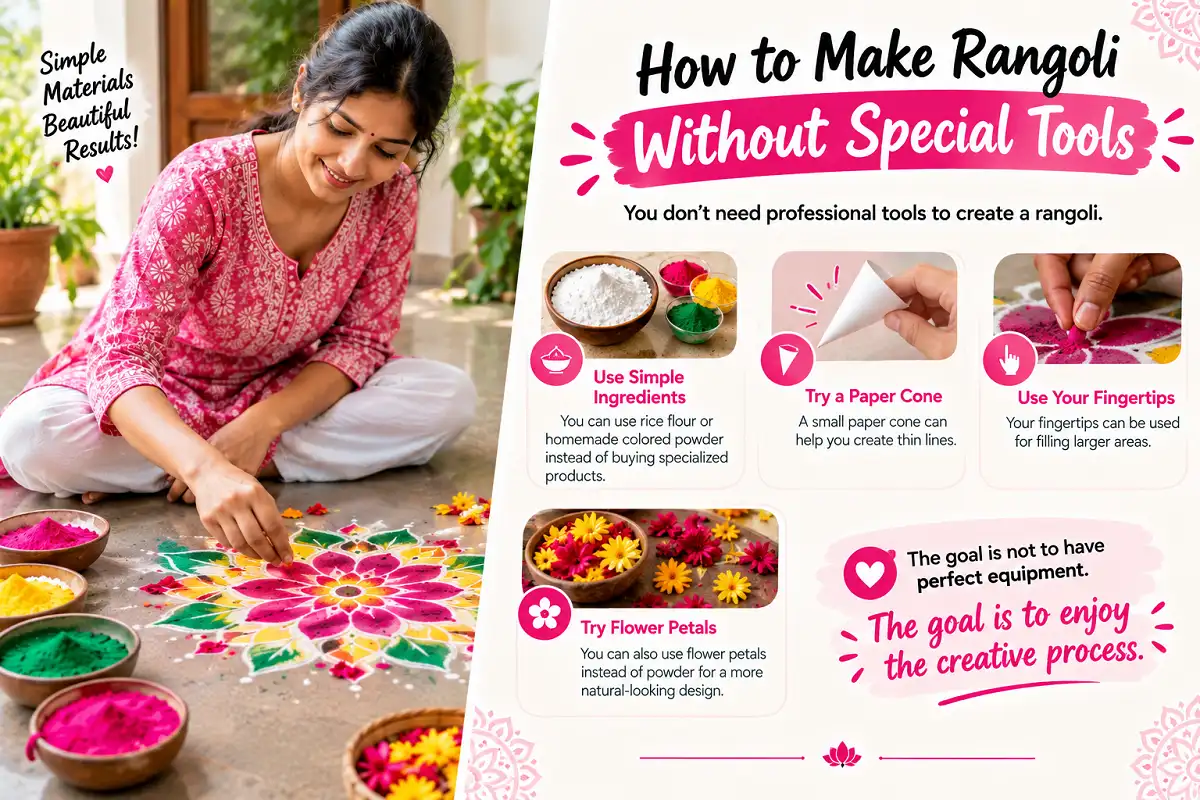
You don’t need professional tools to create a rangoli.
For example, you can use rice flour or homemade colored powder instead of buying specialized products. A small paper cone can help you create thin lines, while your fingertips can be used for filling larger areas.
You can also use flower petals instead of powder if you want to create a more natural-looking design.
The goal is not to have perfect equipment. The goal is to enjoy the creative process.
How to Preserve Your Rangoli for Longer
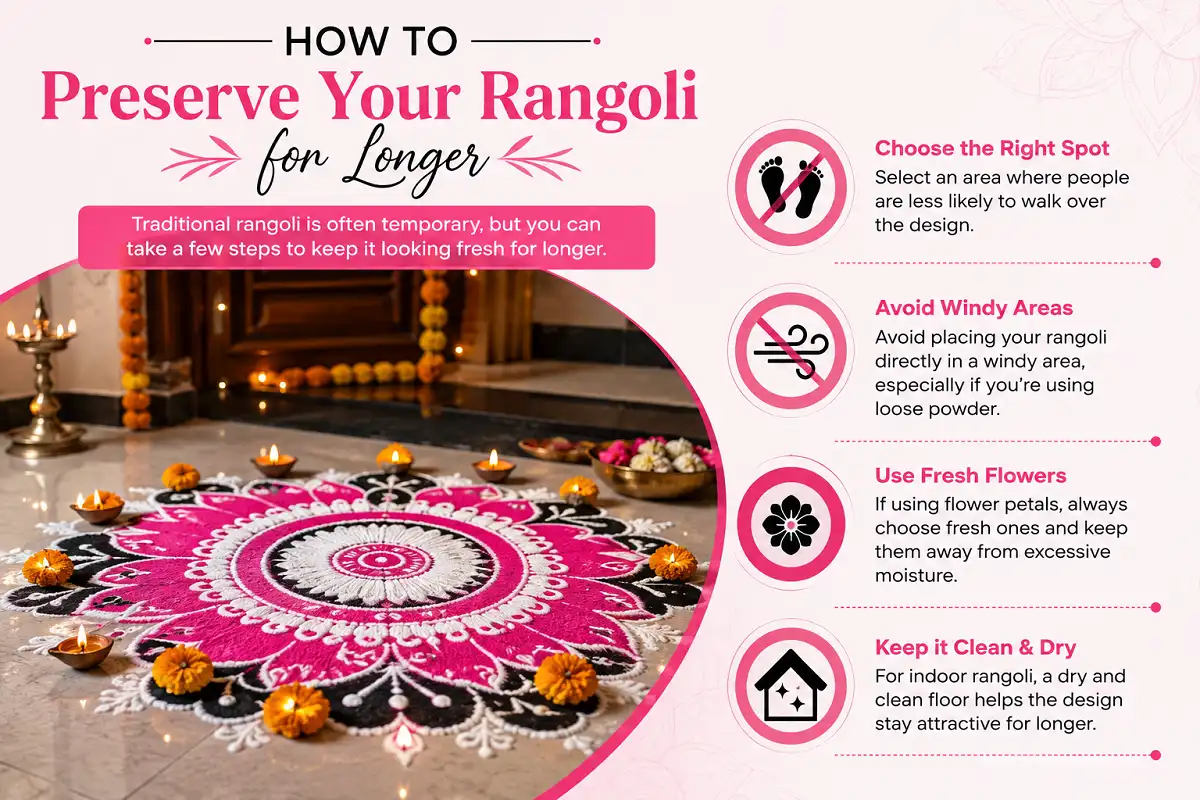
Traditional rangoli is often temporary, but you can take a few steps to keep it looking fresh for longer.
Choose an area where people are less likely to walk over the design. Avoid placing it directly in a windy area if you’re using loose powder.
If you are using flower petals, choose fresh petals and keep them away from excessive moisture. For an indoor rangoli, a dry and clean floor can help the design stay attractive for a longer period.
Bringing the Tradition of Rangoli Into Your Home
After eight years of drawing and documenting rangoli, I still feel excited whenever I begin a new design. Each pattern takes me back to those early mornings in Kolkata, watching my mother and grandmother create beautiful designs before sunrise. Over the years, I have also explored many simple patterns, from easy rangoli designs for beginners to simple rangoli patterns that anyone can try at home.
Rangoli does not have to be perfect to be beautiful. Simple dots, gentle curves, and thoughtful colors can create something meaningful. If you are just starting, this beginner-friendly rangoli guide can help you understand the basics and build confidence with each design. You can also explore more visual inspiration on Pinterest.
If you are learning how to make rangoli design, start with a small pattern and practice patiently. I hope this guide inspires you to bring a little tradition, creativity, and warmth into your home while keeping this beautiful art alive for future generations.
FAQs
What is the easiest rangoli design for beginners? +
A simple flower or dot-based rangoli is one of the easiest designs for beginners. It uses basic shapes and is easy to follow step by step.
What materials do I need to make rangoli? +
You mainly need rangoli powder or rice flour, a clean flat surface, and chalk for the outline. You can also use flower petals for decoration.
Can I make rangoli without a dot grid? +
Yes. You can create rangoli freehand using simple shapes such as circles, flowers, curves, and geometric patterns.
How many colors should I use in a rangoli? +
For a small beginner rangoli, three to five colors are usually enough. Using contrasting colors can make the design stand out.
How long does it take to make a simple rangoli? +
A small and simple rangoli can often be completed in around 15–30 minutes, depending on the design and your experience.