Diamond Pattern Rangoli Design: A Complete Guide with 25 Geometric Ideas
Diamond pattern rangoli design is one of the easiest ways I teach beginners to get clean, striking floor art fast. The shape is simple. The results look advanced. Here is everything you need to draw one well.
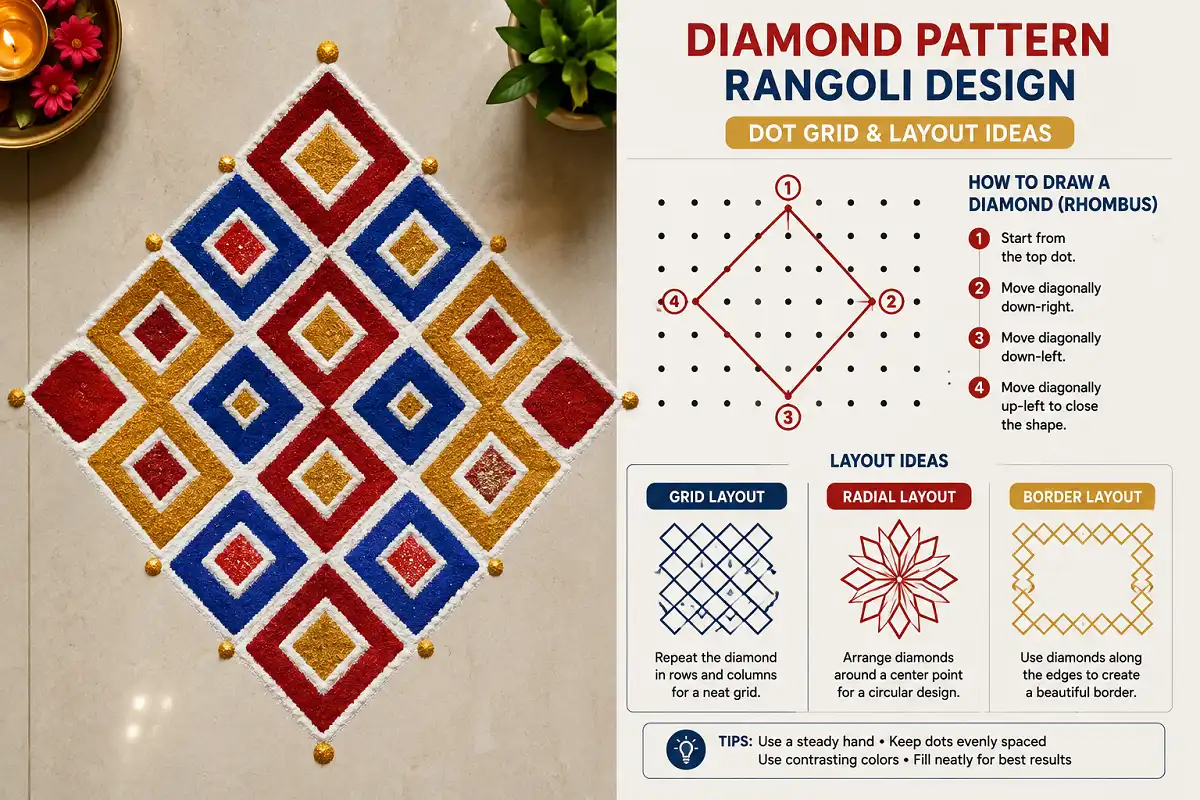
A diamond pattern rangoli design uses repeated rhombus shapes arranged in grids, borders, or radial layouts. You start with a dot grid, connect dots at angles to form diamonds, then fill each with color. It suits Diwali, weddings, and daily doorways alike.
What Is a Diamond Pattern Rangoli Design?
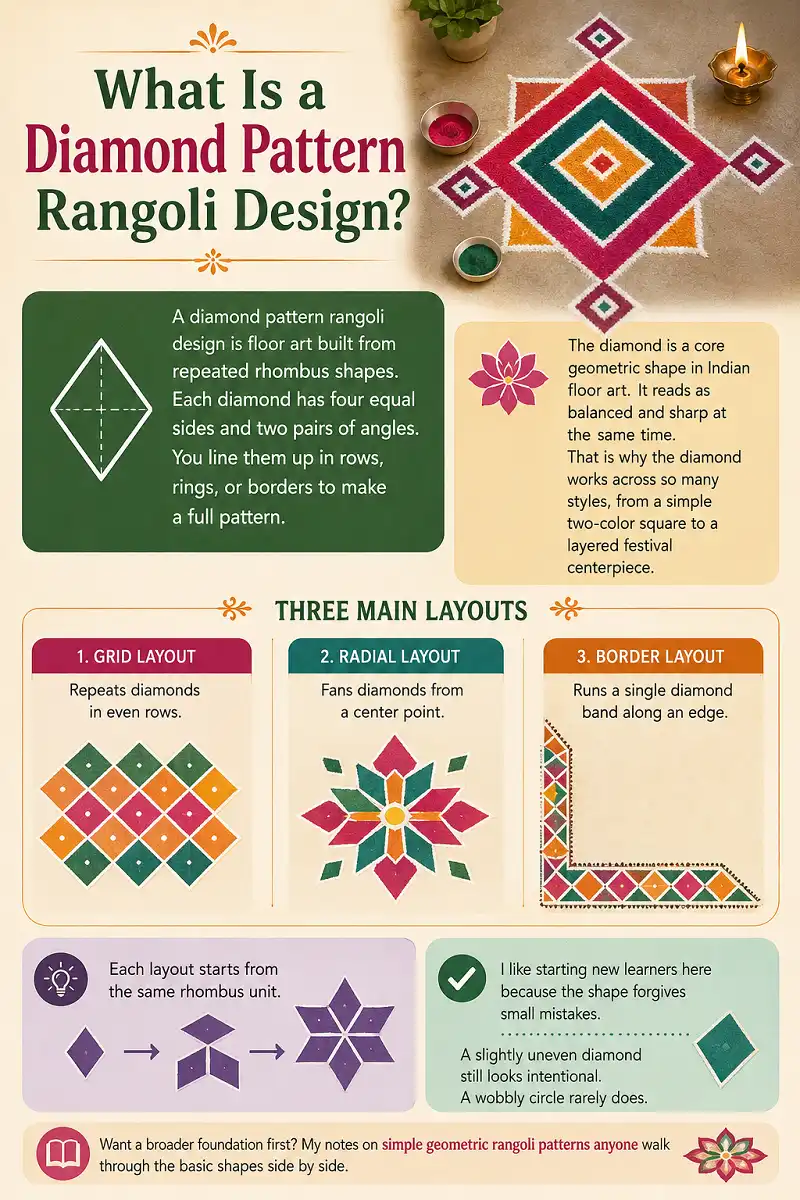
A diamond pattern rangoli design is floor art built from repeated rhombus shapes. Each diamond has four equal sides and two pairs of angles. You line them up in rows, rings, or borders to make a full pattern.
The diamond is a core geometric shape in Indian floor art. It reads as balanced and sharp at the same time. That is why the diamond works across so many styles, from a simple two-color square to a layered festival centerpiece.
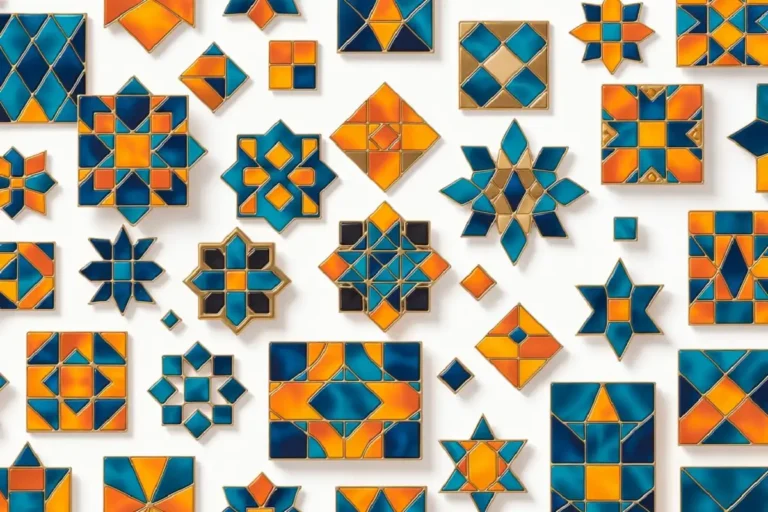
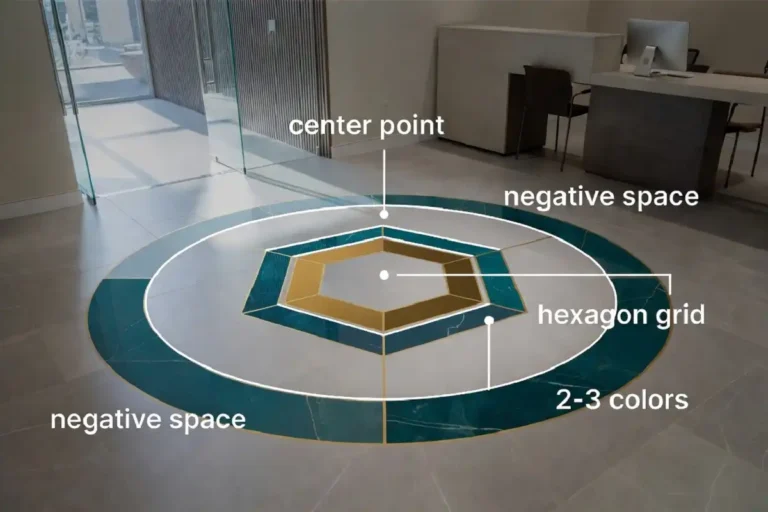
There are three main layouts. A grid layout repeats diamonds in even rows. A radial layout fans them from a center point. A border layout runs a single diamond band along an edge. Each layout starts from the same rhombus unit.
Grid Layout
Diamonds repeat in even rows across the floor.
Radial Layout
Diamonds fan outward from a center point.
Border Layout
A single diamond band runs along an edge.
I like starting new learners here because the shape forgives small mistakes. A slightly uneven diamond still looks intentional. A wobbly circle rarely does. Want a broader foundation first? My notes on simple geometric rangoli patterns anyone walk through the basic shapes side by side.
Why Choose a Diamond Motif for Floor Art?
Choose a diamond motif because it scales, repeats cleanly, and needs almost no freehand skill. The straight edges mean you can use a ruler or a chalk line. That control is rare in rangoli.
A diamond pattern rangoli design also fills space efficiently. Diamonds tessellate, so they lock together with no awkward gaps. You cover a large area with a small set of repeated units. This saves both time and color powder.
The motif carries meaning too. In many regional traditions, the diamond stands for prosperity and steady growth. So the pattern is decorative and symbolic at once, which matters during festivals like Diwali and Pongal.
A diamond pattern rangoli design also adapts to any floor size. Shrink the grid for a doorstep. Expand it for a courtyard. The same steps apply at both scales. That flexibility is why the diamond stays popular across Indian homes.
Materials You Need
Gather these before you begin. Good tools make the lines crisp.
- Rangoli powder or dry colors. Buy fine-grain powder for sharp edges. Coarse powder blurs the diamond corners.
- White chalk or rice flour. Use this to sketch the grid and the guide lines first.
- A ruler or straight strip. Diamonds live or die by straight sides. A ruler keeps angles honest.
- A small funnel cone or squeeze bottle. These give you thin, even lines of powder.
- A soft brush. Use it to clean stray grains and correct edges.
Want to compare bases first? My breakdown of white rangoli design ideas for home decor covers how each material behaves on different floors.
How to Make a Diamond Pattern Rangoli Design Step by Step
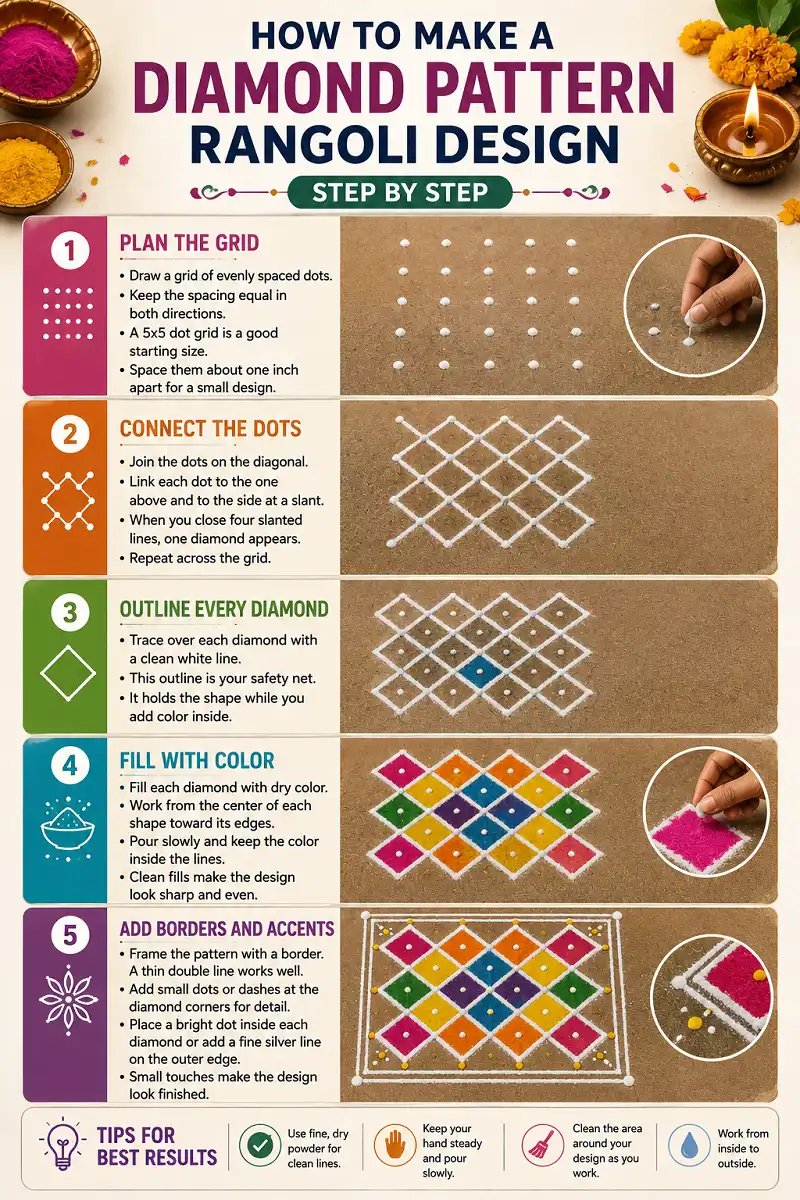
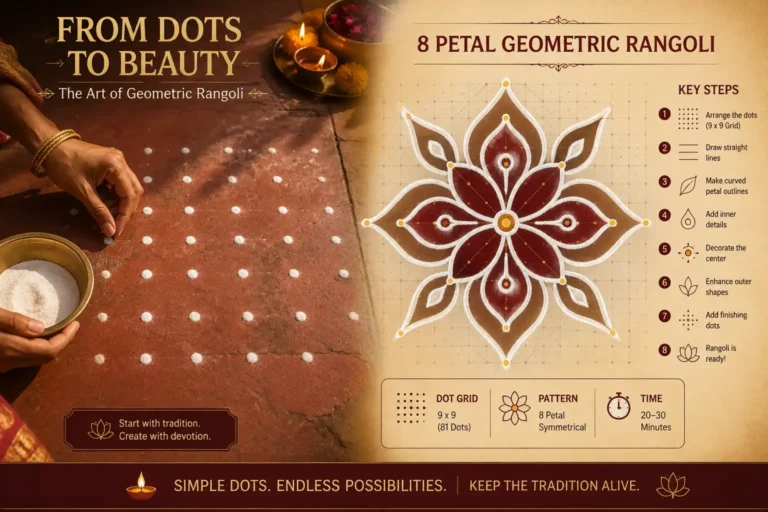
Start with a dot grid, connect the dots diagonally to form diamonds, then outline and fill. Here is the exact sequence I use for a diamond pattern rangoli design. Follow it in order and the shapes stay even.
Plan the Grid
Draw a grid of evenly spaced dots. Keep the spacing equal in both directions. A 5×5 dot grid is a good starting size. More dots mean more diamonds and a larger pattern. Mark the dots lightly first. Use rice flour or thin chalk. Space them about one inch apart for a small design. Wider spacing gives bigger diamonds but needs more color to fill.
Connect the Dots
Join the dots on the diagonal. Link each dot to the one above and to the side at a slant. When you close four slanted lines, one diamond appears. Repeat across the grid.
Outline Every Diamond
Trace over each diamond with a clean white line first. This outline is your safety net. It holds the shape while you add color inside.
Fill With Color
Fill each diamond with dry color. Work from the center of each shape toward its edges. Keep one hand steady and pour slowly. A diamond pattern rangoli design looks best when the fills stay inside the lines.
Add Borders and Accents
Frame the whole pattern with a border. A thin double line works well. Then add small dots or dashes at the diamond corners for extra detail. Accents lift the design fast. Place a bright dot inside each diamond. Or run a fine silver line along the outer edge. Small touches like these make a diamond pattern rangoli design look finished without extra effort.
25 Diamond Pattern Rangoli Design Ideas
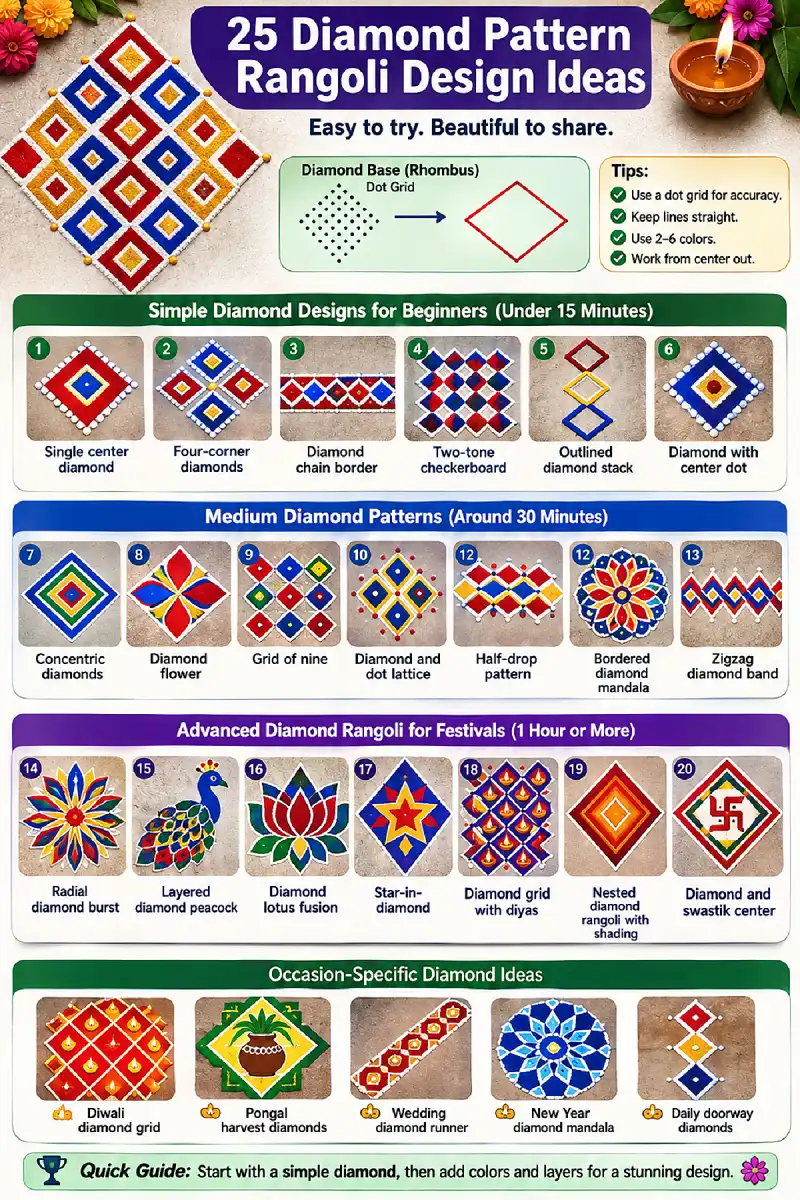
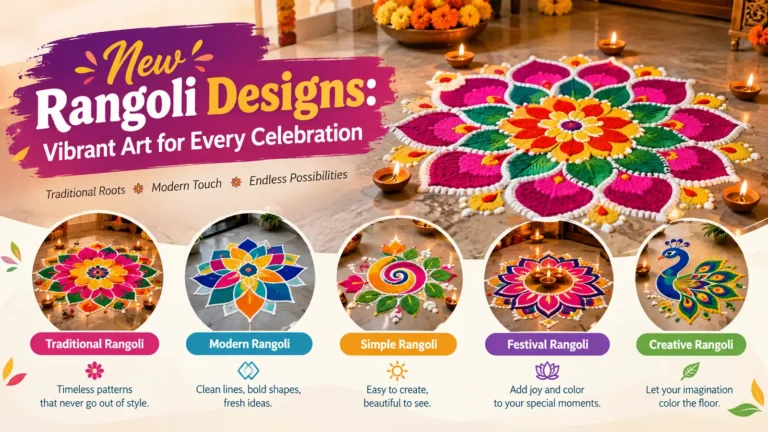
Below are 25 diamond pattern rangoli design ideas, sorted by skill level and occasion. Pick one that matches your space and time. Each idea uses the same rhombus base, so you can mix and match parts freely.
Simple Diamond Designs for Beginners
These take under fifteen minutes and need only two or three colors.
- Single center diamond. One large diamond, filled in two colors, with a dot border. The easiest start.
- Four-corner diamonds. One diamond in each corner of a square, linked by straight lines.
- Diamond chain border. A row of small connected diamonds along a doorway edge.
- Two-tone checkerboard. Alternating filled and empty diamonds in a grid.
- Outlined diamond stack. Three diamonds stacked vertically, outlines only, no fill.
- Diamond with center dot. Each diamond holds one contrasting dot at its middle.
A small, clean version like these fits tight spaces well. My guide to easy rangoli for small space shows more compact layouts that use the same logic.
Medium Diamond Patterns
These use four to six colors and take around half an hour.
- Concentric diamonds. Diamonds nested inside each other, each ring a new color.
- Diamond flower. Four diamonds meeting at a center point to form a petal shape.
- Grid of nine. A clean 3×3 block of equal diamonds in rotating colors.
- Diamond and dot lattice. Diamonds with small filler dots in every gap.
- Half-drop pattern. Rows of diamonds offset by half a step, like brickwork.
- Bordered diamond mandala. A round frame filled with radiating diamonds.
- Zigzag diamond band. A wide border of diamonds in a repeating up-down line.
Advanced Diamond Rangoli for Festivals
These are centerpiece designs. Set aside an hour or more. An advanced diamond pattern rangoli design layers shapes and shading for depth. Build the base grid first, then add motifs on top.
- Radial diamond burst. Diamonds fanning out from a center like rays.
- Layered diamond peacock. A peacock body built from stacked diamond scales.
- Diamond lotus fusion. A lotus center ringed by diamond petals.
- Star-in-diamond. An eight-point star formed where four large diamonds overlap.
- Diamond grid with diyas. A full diamond field with a diya motif at each junction.
- Nested diamond rangoli with shading. Ombre fills that fade color across each ring.
- Diamond and swastik center. A central auspicious symbol framed by a diamond border.
The peacock and lotus versions build on my peacock rangoli design easy guide. The same layering method appears there.
Occasion-Specific Diamond Ideas
These match the color and mood of specific festivals.
- Diwali diamond grid. Warm reds, golds, and orange in a large square field.
- Pongal harvest diamonds. Yellow and green diamonds around a pot motif.
- Wedding diamond runner. A long, narrow diamond band for an entrance path.
- New Year diamond mandala. A round diamond pattern in fresh blues and whites.
- Daily doorway diamonds. A tiny three-diamond line for everyday use.
Color Combinations That Work
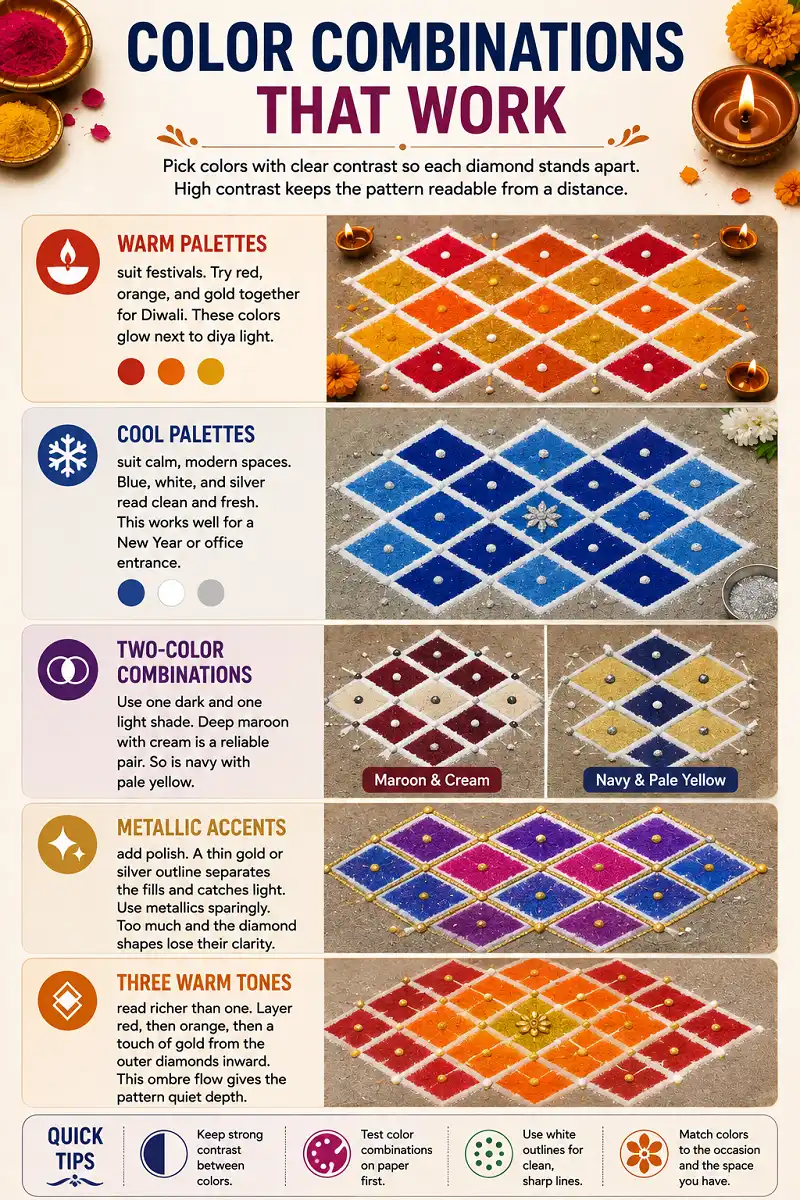
Pick colors with clear contrast so each diamond stands apart. High contrast keeps the pattern readable from a distance.
Warm Palette
Try red, orange, and gold together for Diwali. These colors glow next to diya light.
Cool Palette
Blue, white, and silver read clean and fresh. This works well for a New Year or office entrance.
Two-Color Pairing
Use one dark and one light shade. Deep maroon with cream is a reliable pair. So is navy with pale yellow.
Metallic Accents
A thin gold or silver outline separates the fills and catches light. Use metallics sparingly, though.
For festive floors, three warm tones read richer than one. Layer red, then orange, then a touch of gold from the outer diamonds inward. This ombre flow gives the pattern quiet depth.
Where to Place a Diamond Pattern Rangoli Design
Place a diamond pattern rangoli design where it frames an entry or fills an open floor. The main door threshold is the classic spot. A square or courtyard center works for larger grids.
Prep the floor first. Sweep it clean and wipe away dust. A smooth, dry surface holds powder better and keeps edges sharp. On rough floors, a light water mist helps the color settle.
Match the size to the space. A narrow doorway suits a single diamond band. A wide hall takes a full radial pattern. Leave a clear margin around the design so it reads as a deliberate frame.
Common Mistakes to Avoid
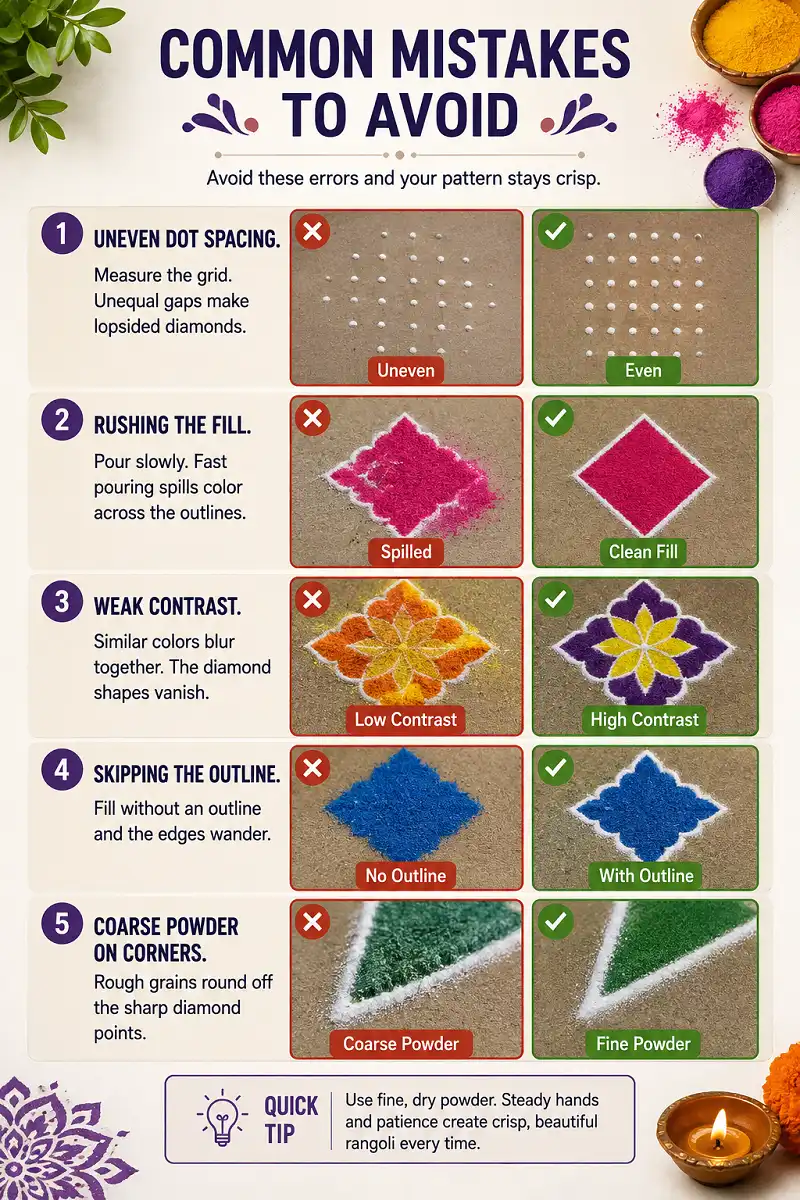
Avoid these errors and your pattern stays crisp.
- Uneven dot spacing. Measure the grid. Unequal gaps make lopsided diamonds.
- Rushing the fill. Pour slowly. Fast pouring spills color across the outlines.
- Weak contrast. Similar colors blur together. The diamond shapes vanish.
- Skipping the outline. Fill without an outline and the edges wander.
- Coarse powder on corners. Rough grains round off the sharp diamond points.
Tips to Make Your Diamond Rangoli Stand Out
Use these to lift a basic pattern into something memorable.
First, add a layer of depth. Outline each diamond in white after filling. The white edge separates the colors and sharpens the whole design.
Second, mix diamond sizes. Pair large diamonds with tiny ones in the gaps. The scale contrast adds interest without more colors.
Third, finish with a defined border. A clean frame makes even a simple diamond pattern rangoli design look complete and intentional.
Fourth, work under good light. Side lighting shows the texture of the powder and makes colors pop.
Fifth, seal the design if it needs to last. A light spray of clear fixative holds the powder in place outdoors. For indoor floors, a calm corner keeps the pattern intact for days. Wind and foot traffic are the main enemies of any powder rangoli.
FAQs
Is a diamond pattern rangoli design good for beginners?
Yes. The straight edges are easier to control than curves. Start with a single large diamond, then add more as your confidence grows.
How long does a diamond rangoli take?
A simple design takes ten to fifteen minutes. A medium pattern takes around thirty minutes. Large festival centerpieces can take an hour or more.
What is the best base for sharp diamond edges?
Fine-grain rangoli powder gives the sharpest corners. Rice flour works for outlines. Avoid coarse sand for the diamond points, as it rounds them off.
Can I make a diamond rangoli without dots?
Yes. Use a ruler to draw the diamond outlines freehand instead of a dot grid. Dots simply make spacing easier for first-timers.
Last Words
A diamond pattern rangoli design gives you clean geometry with very little freehand effort. Start with a dot grid, keep your spacing equal, and fill slowly for crisp edges. Pick a palette that fits the occasion, add a border, and you have a finished piece. The diamond is a small shape, but repeated well, it carries a whole floor. The rhombus shape itself is a classic form in geometry, which is why it feels so balanced underfoot.