Advanced 3D Rangoli Techniques for a Lifelike Floor Finish
Advanced 3D rangoli techniques can turn a simple floor design into something that looks almost like it is rising from the ground. If your rangoli already looks neat but still feels a little flat, adding realistic depth, soft shadows, and well-placed highlights can make a big difference. These small details can give your design a more eye-catching and lifelike appearance.
The secret behind advanced 3D rangoli techniques is knowing how to work with shading, layers, and light. Start with darker shades in the deeper areas and gradually blend them into lighter tones. Adding a little extra powder around certain edges can make them appear raised, while subtle highlights can show where the light naturally falls. Put all of these details together, and your rangoli can have a much stronger 3D effect without looking overdone.
What Makes a Rangoli Look 3D?
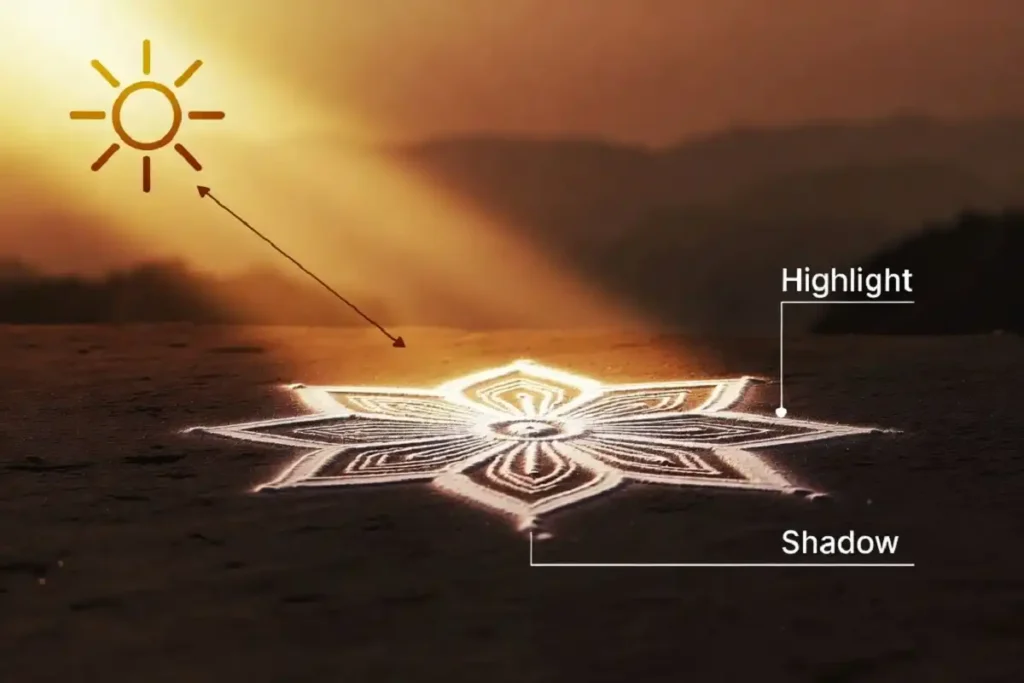
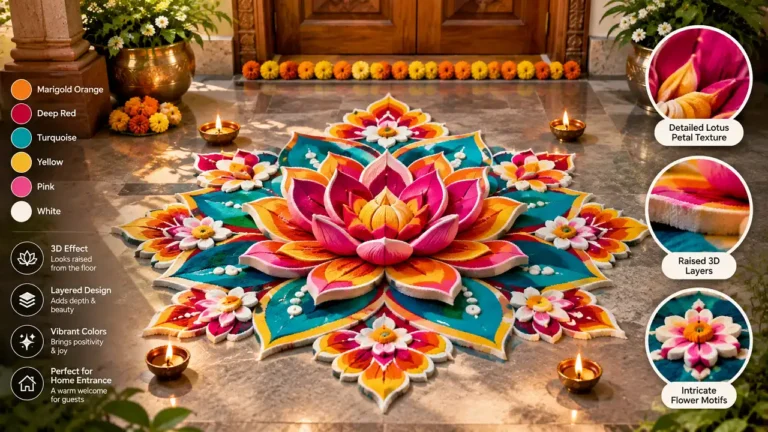
A advanced 3D rangoli techniques when light and shadow trick the eye into seeing height on a flat surface. Your brain reads a dark edge as a shadow and a bright center as a raised surface. Everything in 3D work serves that one goal.
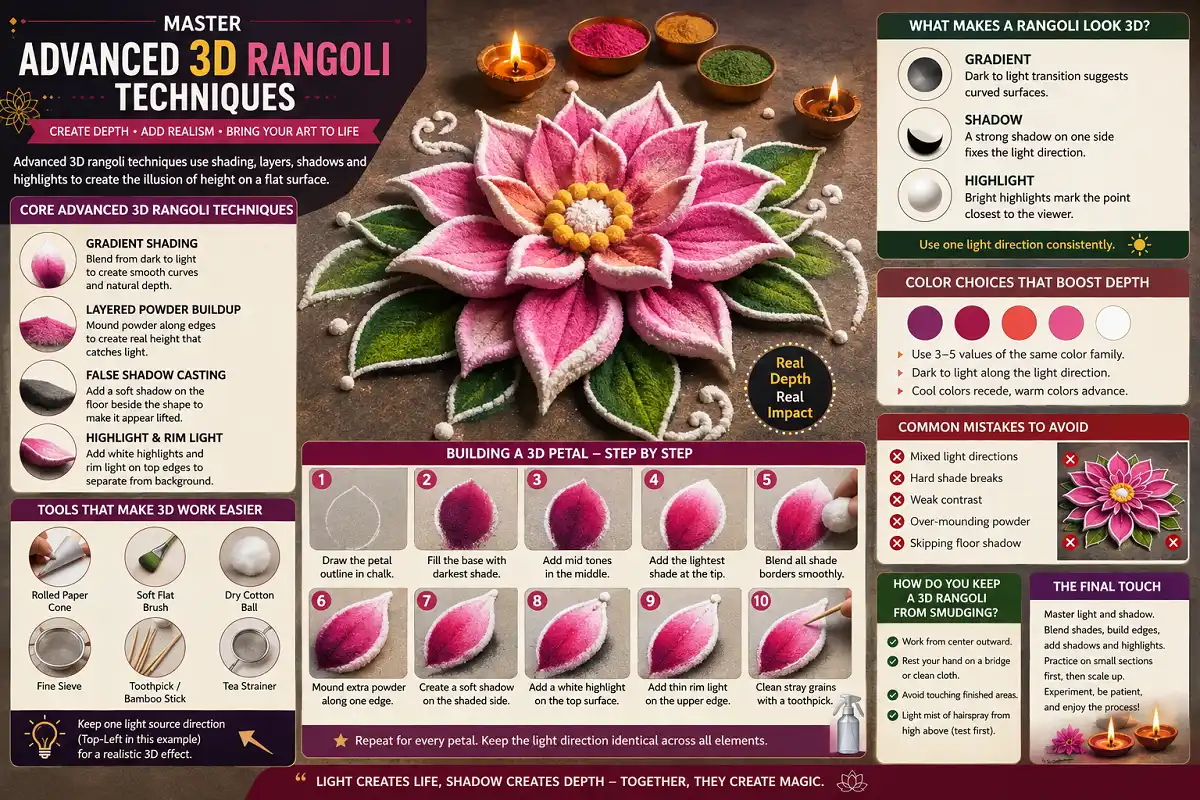
Three visual cues do the heavy lifting. First, a gradient from dark to light across a single shape suggests a curved surface. Second, a hard shadow on one side fixes the light direction. Third, a sharp white highlight marks the point closest to the viewer.
Keep your light source in one place. Pick one corner, top-left works well, and shade every element as if light comes from there. Mixed light directions flatten the whole design instantly.
Core Advanced 3D Rangoli Techniques
The strongest advanced 3D rangoli techniques fall into four groups: shading, layering, shadow casting, and highlight placement. You rarely use one alone. A single petal often needs all four.
Gradient Shading With Dry Powder
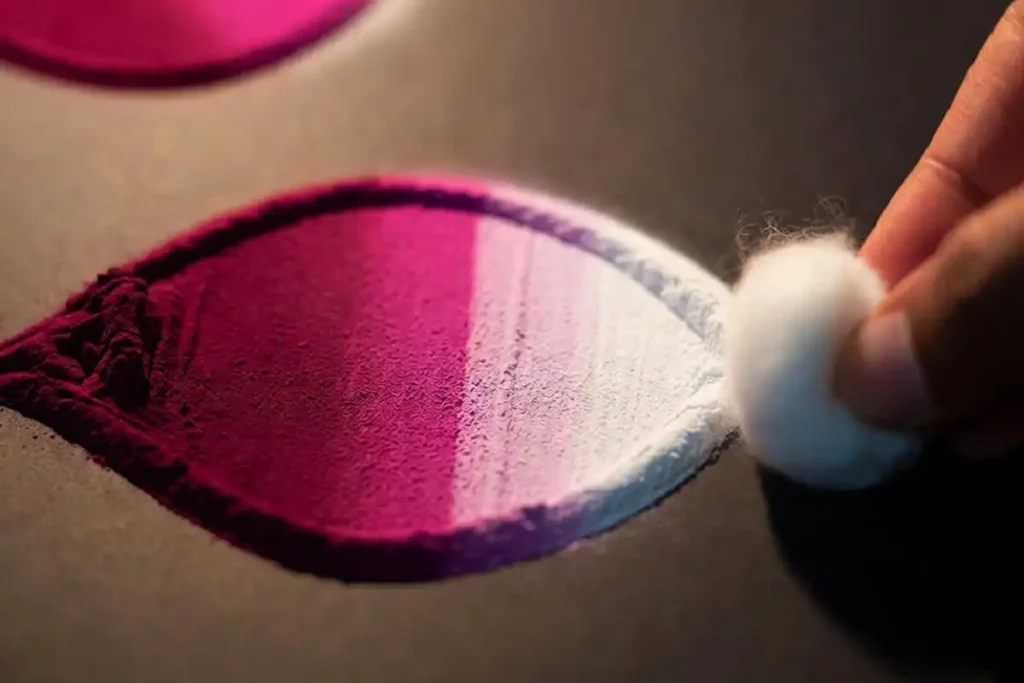
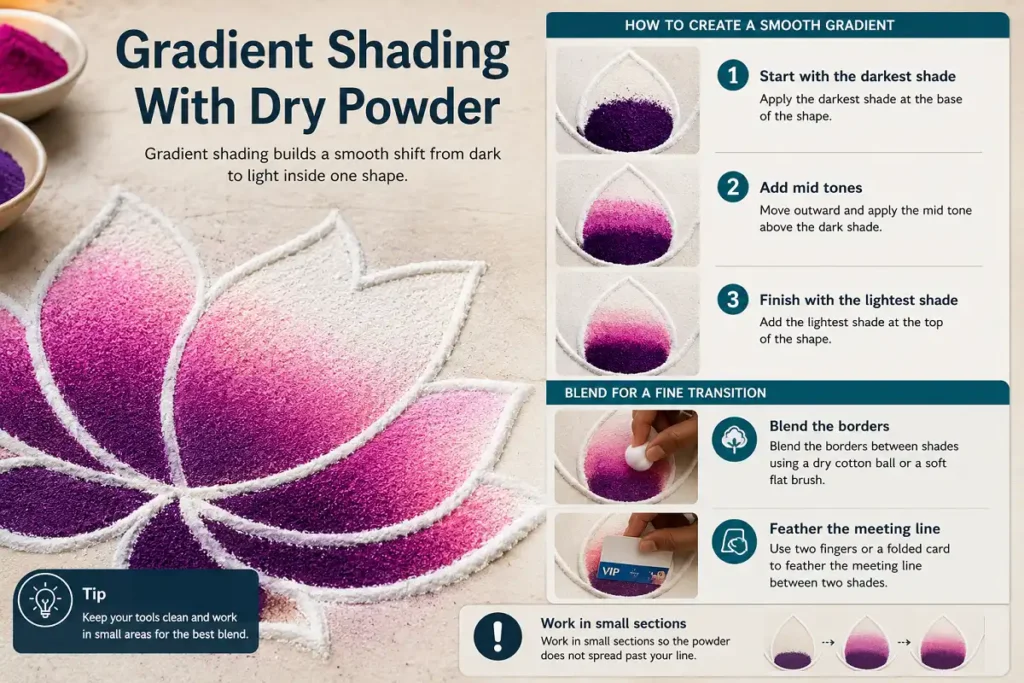
Gradient shading builds a smooth shift from dark to light inside one shape. Start with your darkest shade at the base of a form. Move outward and swap to mid tones, then the lightest shade at the top. Blend the borders between shades with a dry cotton ball or a soft flat brush.
The trick is a fine transition. Hard color breaks look flat. Use two fingers or a folded card to feather the meeting line between two shades. Work in small sections so the powder does not spread past your line.
Layered Powder Buildup for Real Height
Layered buildup adds actual physical height, not just visual depth. Pour powder along the edge of a shape and let it mound slightly. The raised ridge catches real light and casts a real micro-shadow. This works best for petal rims, flower centers, and diya flames.
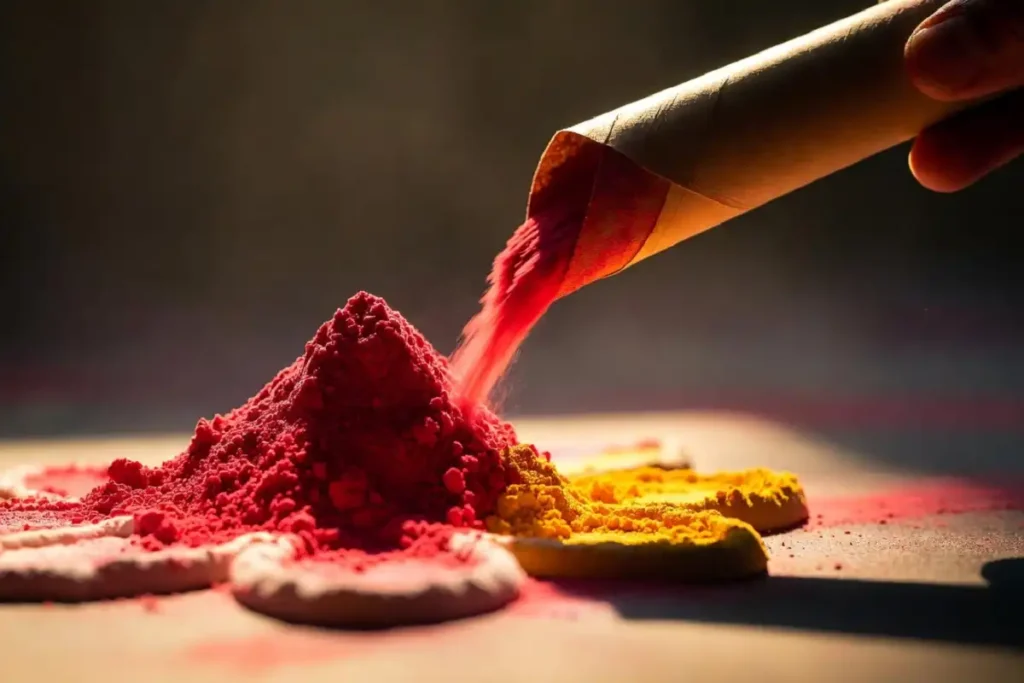
Control the mound with a rolled paper cone. A cone gives you a thin, steady stream and a clean ridge. Keep the base wide and the top narrow so the mound holds its shape and does not collapse.
False Shadow Casting
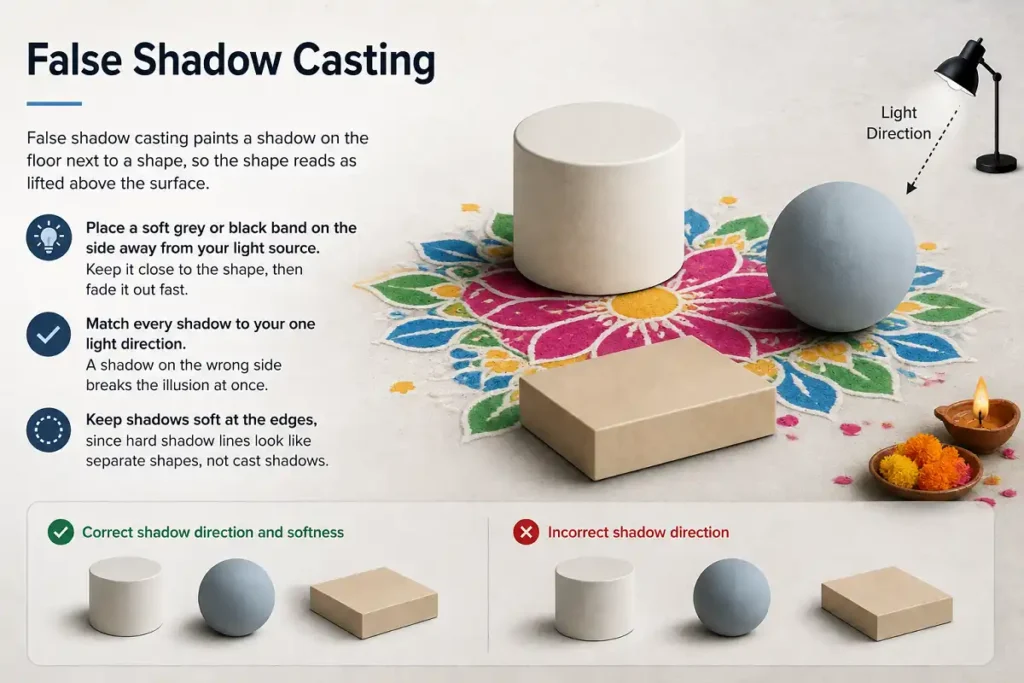
False shadow casting paints a shadow on the floor next to a shape, so the shape reads as lifted above the surface. Place a soft grey or black band on the side away from your light source. Keep it close to the shape, then fade it out fast.
Match every shadow to your one light direction. A shadow on the wrong side breaks the illusion at once. Keep shadows soft at the edges, since hard shadow lines look like separate shapes, not cast shadows.
Highlight and Rim Light
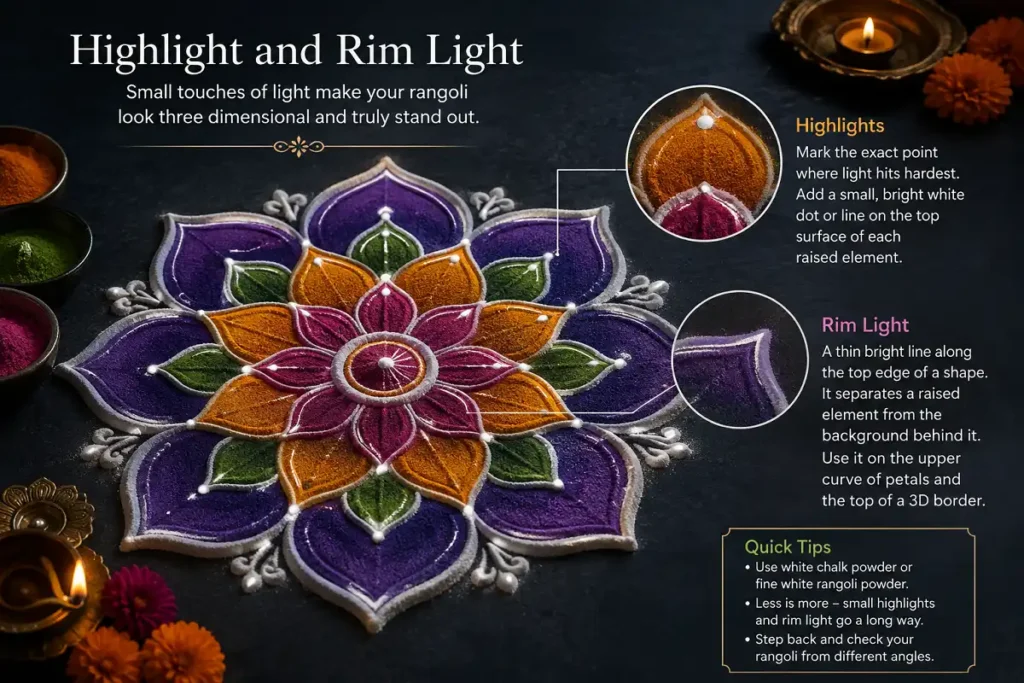
Highlights mark the exact point where light hits hardest, and they sell the roundness of a form. Add a small, bright white dot or line on the top surface of each raised element. White chalk powder or fine white rangoli powder works well.
Rim light is a thin bright line along the top edge of a shape. It separates a raised element from the background behind it. Use it on the upper curve of petals and the top of a 3D border.
Tools That Make 3D Work Easier
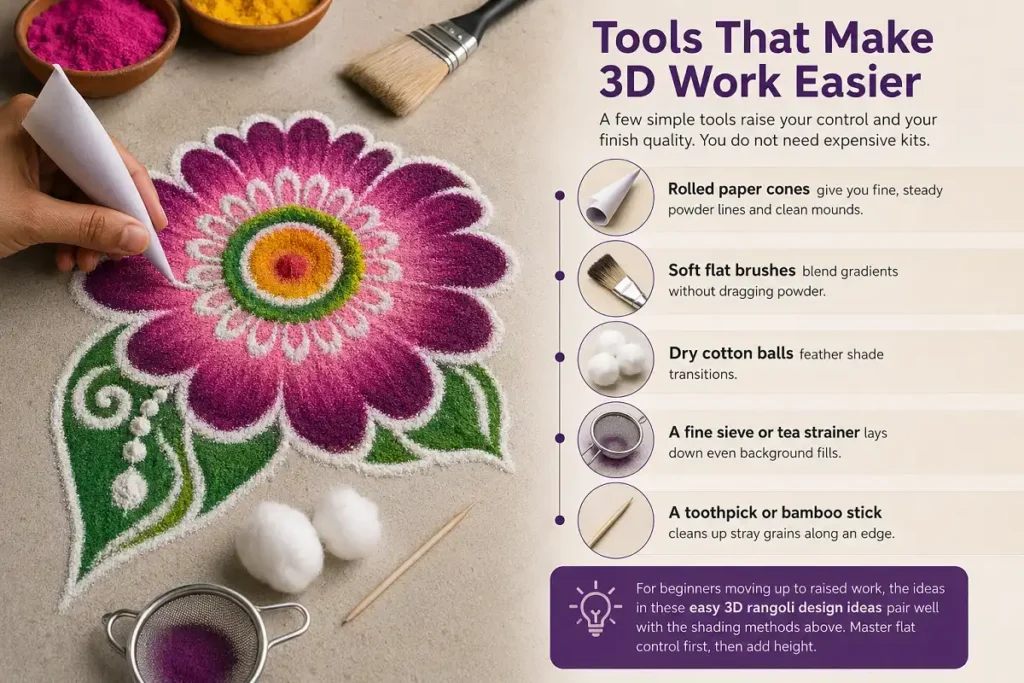
A few simple tools raise your control and your finish quality. You do not need expensive kits.
Rolled paper cones give you fine, steady powder lines and clean mounds. Soft flat brushes blend gradients without dragging powder. Dry cotton balls feather shade transitions. A fine sieve or tea strainer lays down even background fills. A toothpick or bamboo stick cleans up stray grains along an edge.
For beginners moving up to raised work, the ideas in these easy 3D rangoli design ideas pair well with the shading methods above. Master flat control first, then add height.
Building a 3D Element Step by Step
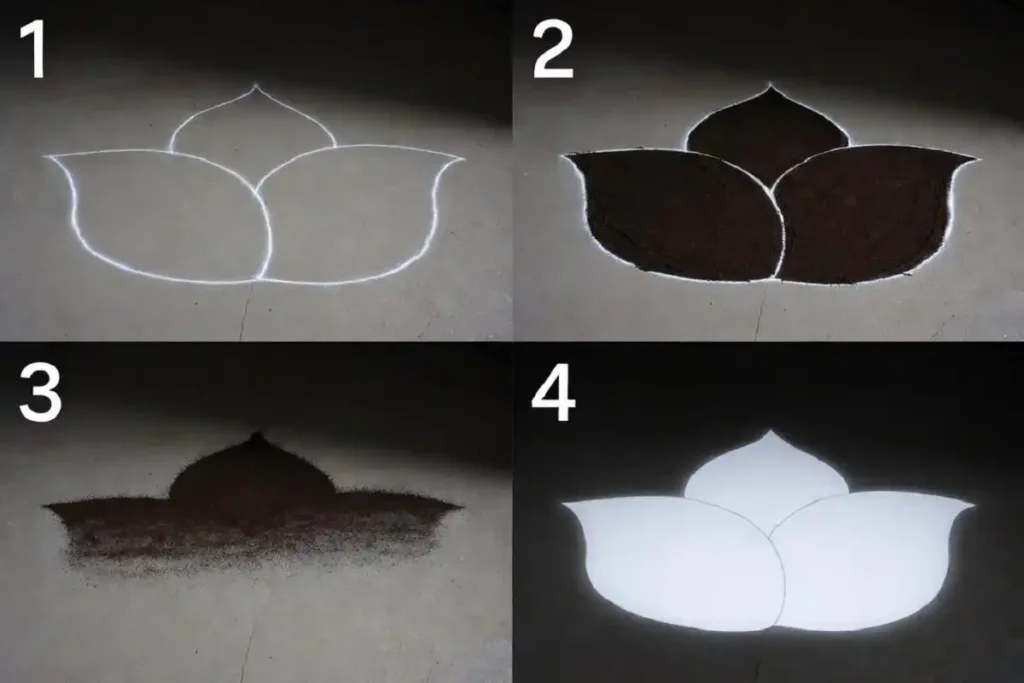
Here is the full sequence for one raised petal, from flat outline to finished 3D form.
- Draw the petal outline in chalk. Keep the line light.
- Fill the base with your darkest shade near the petal root.
- Add mid tones through the middle of the petal.
- Lay the lightest shade at the petal tip.
- Blend all shade borders with a dry cotton ball.
- Mound extra powder along one edge for real height.
- Paint a soft grey shadow on the floor beside the shaded side.
- Add a white highlight on the raised top surface.
- Run a thin rim light along the upper edge.
- Clean stray grains with a toothpick.
Repeat this for every petal, and keep the light direction identical across all of them. When you scale this up to a full floor piece, the process behind these 3D rangoli designs for competition follows the same logic on a larger canvas.
Color Choices That Boost Depth
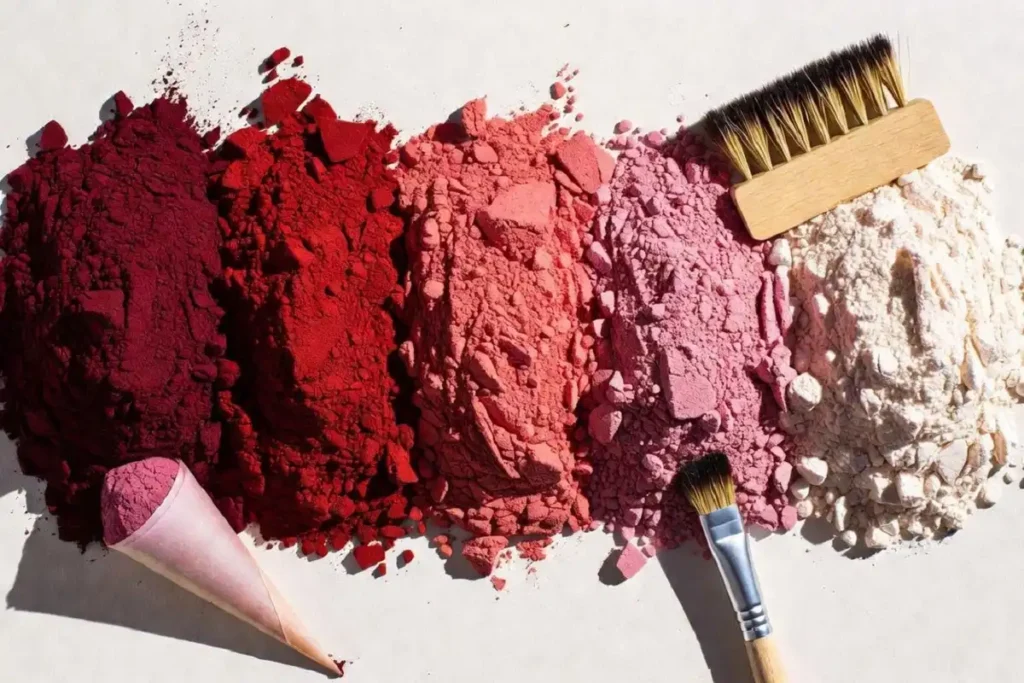
Color contrast decides how strong your 3D effect reads. Depth needs a real range from dark to light inside each shape. Weak contrast gives weak depth.
Pick three to five values of the same color family for each element. For a red rose, that means deep maroon, red, bright red, pink, and near-white. Place them dark to light along the light direction. Pure black and pure white are your shadow and highlight tools, so keep small amounts of both on hand.
Cool colors read as receding, and warm colors read as advancing. Push blues and purples to the back of a design. Pull reds, oranges, and yellows to the front. This adds a second layer of depth on top of your shading.
Common Mistakes in Advanced 3D Rangoli Techniques
Most failed 3D work comes from a few repeat errors, and each one is easy to fix. The biggest is mixed light direction. Shade every element from one source, always.
Hard shade breaks are the second problem. Unblended color jumps look flat, so feather every transition. Weak contrast is the third: timid shading gives no depth, so commit to real darks and real lights.
Over-mounding is the fourth error. Too much powder collapses and loses its shape, so build ridges slowly. Skipping the floor shadow is the last common miss. The cast shadow is what lifts a shape off the ground, so never leave it out.
How Do You Keep a 3D Rangoli From Smudging?
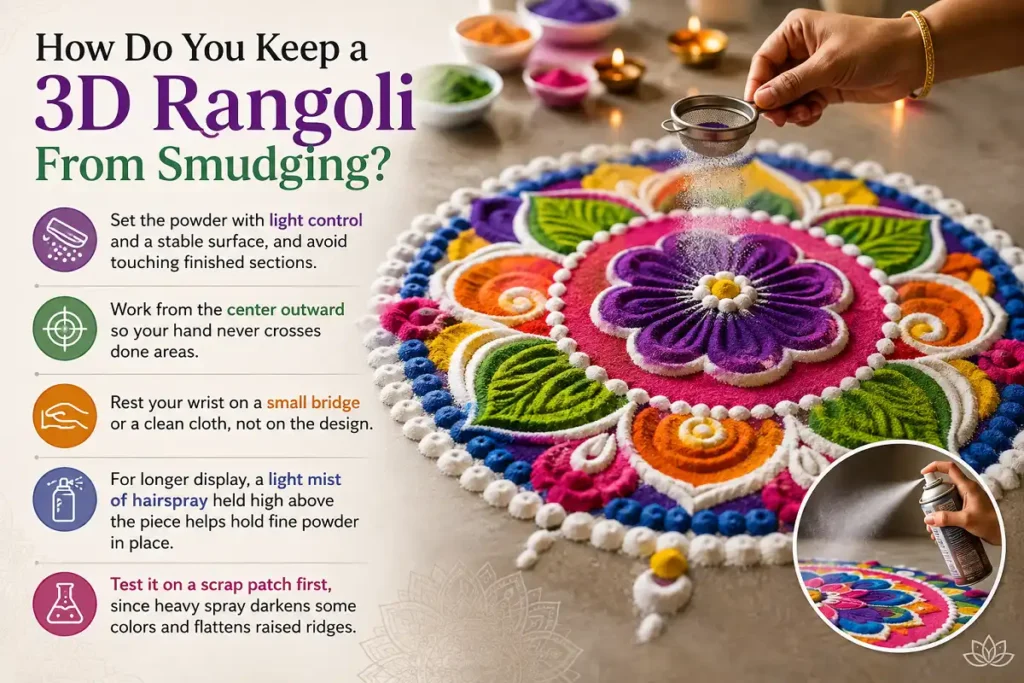
Set the powder with light control and a stable surface, and avoid touching finished sections. Work from the center outward so your hand never crosses done areas. Rest your wrist on a small bridge or a clean cloth, not on the design.
For longer display, a light mist of hairspray held high above the piece helps hold fine powder in place. Test it on a scrap patch first, since heavy spray darkens some colors and flattens raised ridges.
Bring the Whole Illusion Together
Creating a convincing 3D rangoli is really all about one simple thing learning how to use light and shadow. Choose one direction for your light, gradually blend your shades from dark to light, give the edges a little extra depth, and add a soft shadow underneath. A small highlight on the raised areas can then bring the whole design to life.
Before trying a complete floor rangoli, practice these techniques on just one petal or a small section of the design. Once you get comfortable with how the light and shadows work together, creating a realistic 3D effect becomes much easier.
Take your time, experiment with different shades, and don’t worry about getting it perfect on the first try. With a little practice, the depth and dimension you can create will make your rangoli look truly eye-catching.
FAQs
How long do advanced 3D rangoli techniques take to learn?
Basic shading takes a few sessions. Convincing shadow and highlight work takes weeks of practice. Start with one raised petal and build from there.
Can I make 3D rangoli without special powder?
Yes. Regular rangoli powder, chalk, and flower petals all work. Depth comes from your shading and shadow control, not from costly materials.
What is the best design to practice 3D on first?
A single flower with five to six petals. It gives you repeated practice at gradient shading, mounding, and highlights on a shape you can finish quickly.