How to Make 3D Rangoli Designs for Competition
3D rangoli designs for competition need one thing above all: a convincing illusion of depth that makes the design look like it is rising from the floor. I have seen enough rangoli competitions to know that a design does not have to be the most complicated one to get attention. What matters is how well you use shading, color, layers, and perspective to make the finished rangoli feel three-dimensional rather than simply colorful and decorative.
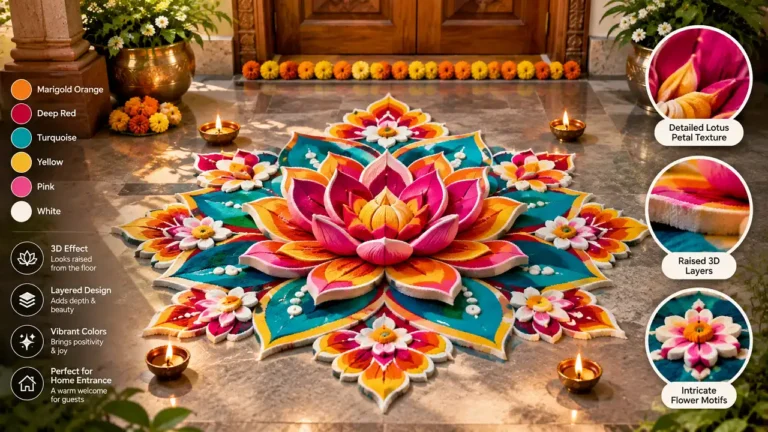
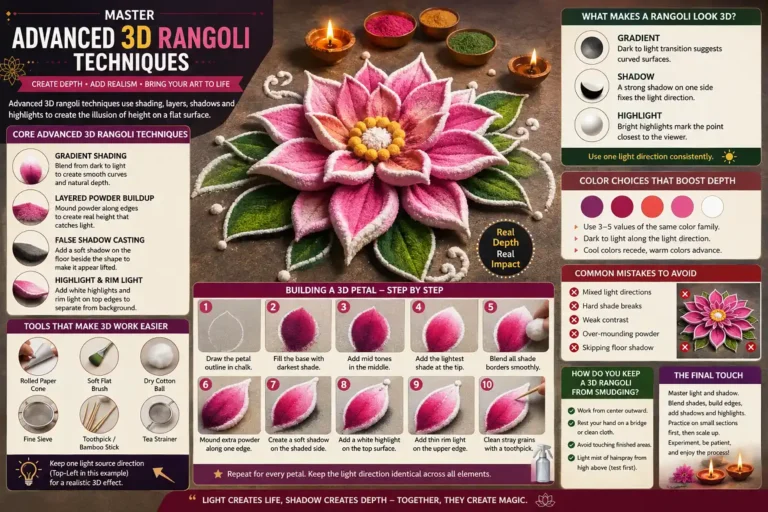
3D rangoli designs for competition usually create this effect by carefully layering colors from dark to light and adding raised elements such as thermocol, clay, cardboard, or other lightweight materials. Darker shades can make certain areas appear deeper, while lighter colors and highlights can bring other sections forward. When these techniques are combined properly, they trick the eye into seeing height and dimension even though the rangoli is created on a flat surface.
The best results also come from good planning and plenty of practice. Before the competition, test your color combinations, practice smooth shading, and try building the raised sections so you know how they will look from different angles. Keep the main design clear and avoid adding too many tiny details that could make the rangoli look crowded. A strong theme, clean finishing, balanced colors, and a convincing 3D effect can make your design stand out and leave a much stronger impression on the judges.
What Makes 3D Rangoli Designs for Competition Stand Out?
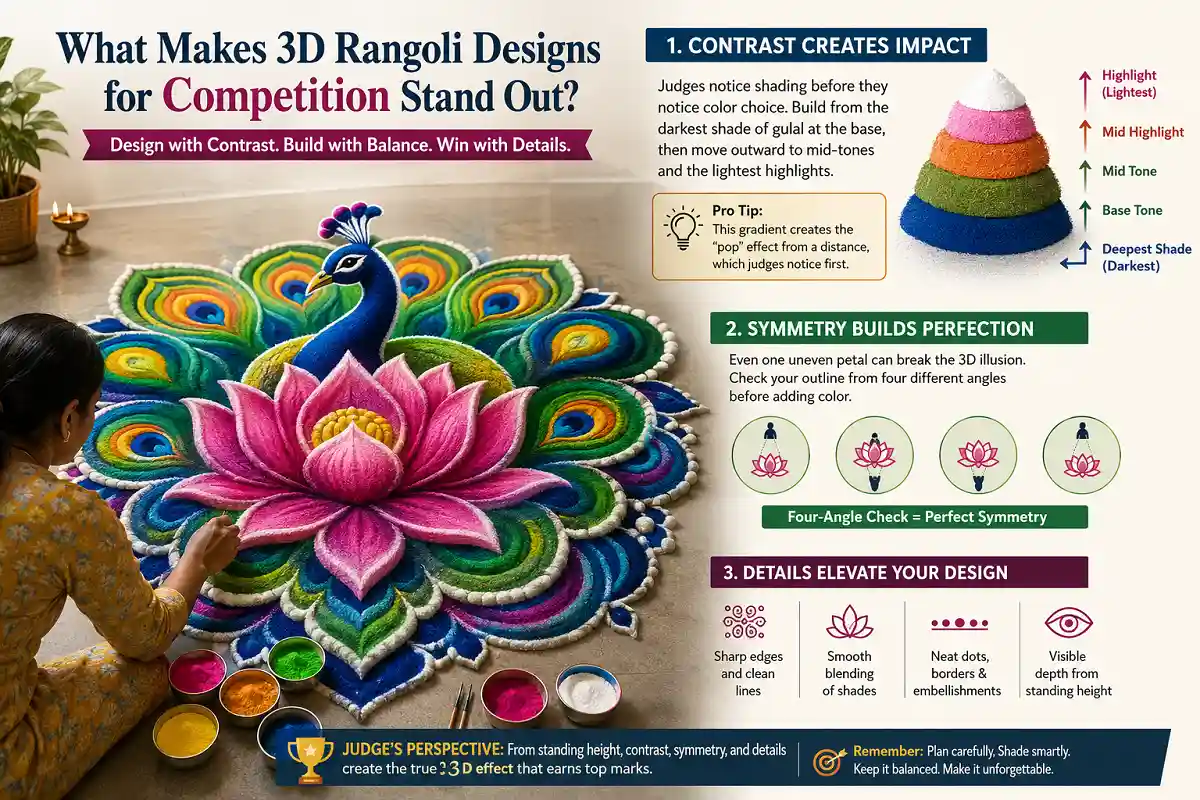
A winning design answers this question with one word: contrast. Judges notice shading before they notice color choice. I always build my base with the darkest shade of gulal first, then move outward through mid-tones to the lightest highlight. That gradient is what creates the “pop” effect from a distance, which matters a lot since most judges view entries from standing height, not up close.
Symmetry also plays a bigger role in 3D rangoli designs for competition than people expect. A peacock or lotus motif with even one uneven petal breaks the illusion instantly. So before adding a single layer of color, I check my outline from four different angles.
Materials You Need for 3D Rangoli Designs for Competition
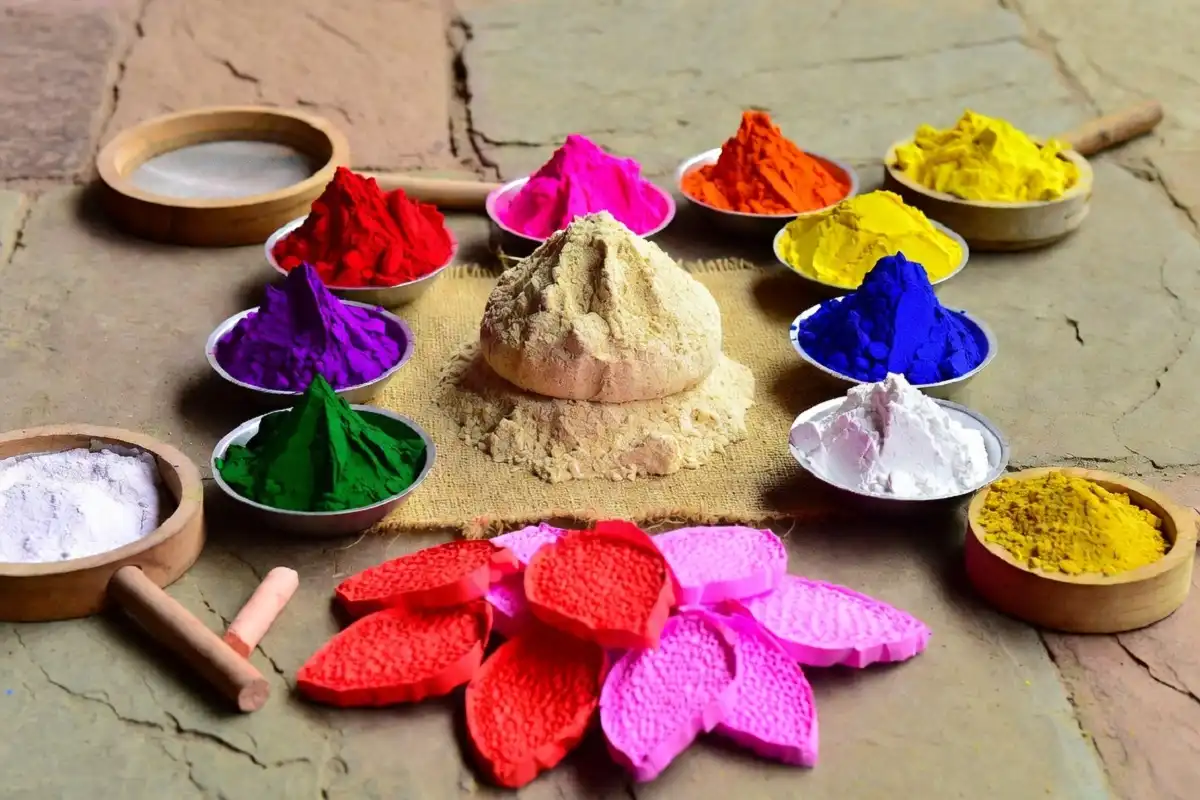
Here is what I keep in my kit for every contest:
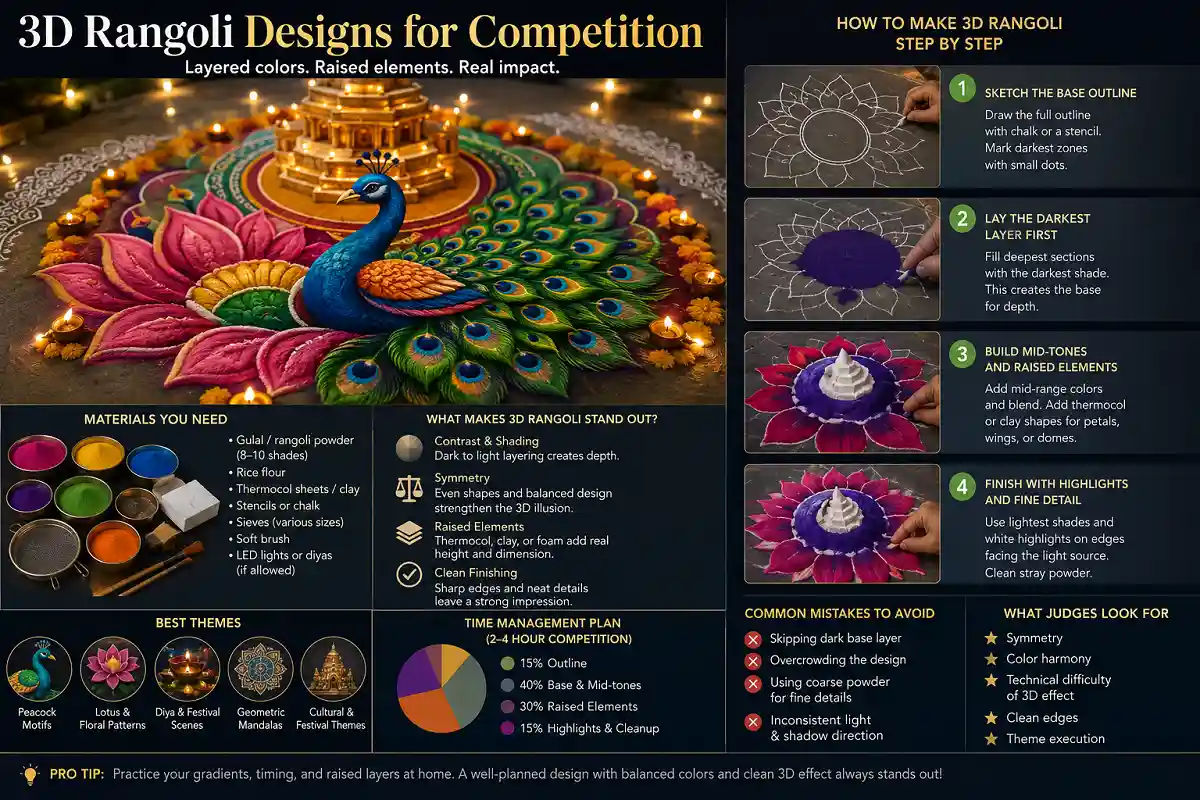
- Gulal or rangoli powder in at least 8 to 10 shades, including two shades each of a base color for gradient work
- Rice flour for the outline and for any white highlights
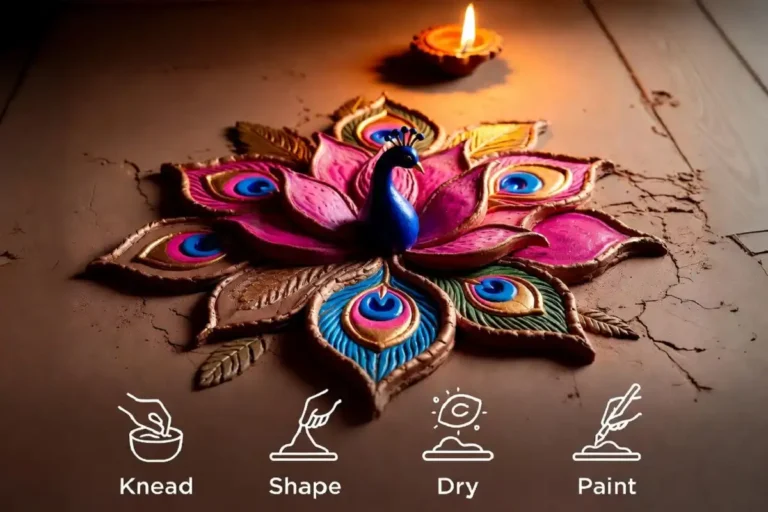
- Thermocol sheets or clay to build raised sections such as petals, domes, or peacock crowns
- A rangoli stencil or freehand sketching chalk for the outline
- Sieves in different mesh sizes so fine powder falls evenly on detailed areas
- A soft brush to clean stray powder without smudging edges
- LED string lights or diyas if the competition allows lighting elements
Rice flour and gulal remain the two materials I never skip, since they hold shape better than synthetic alternatives in humid weather. If you want a broader materials list for simpler floor art first, my guide on simple 3D rangoli patterns covers the basics before you scale up to a competition-level piece.
How to Make 3D Rangoli Designs for Competition Step by Step
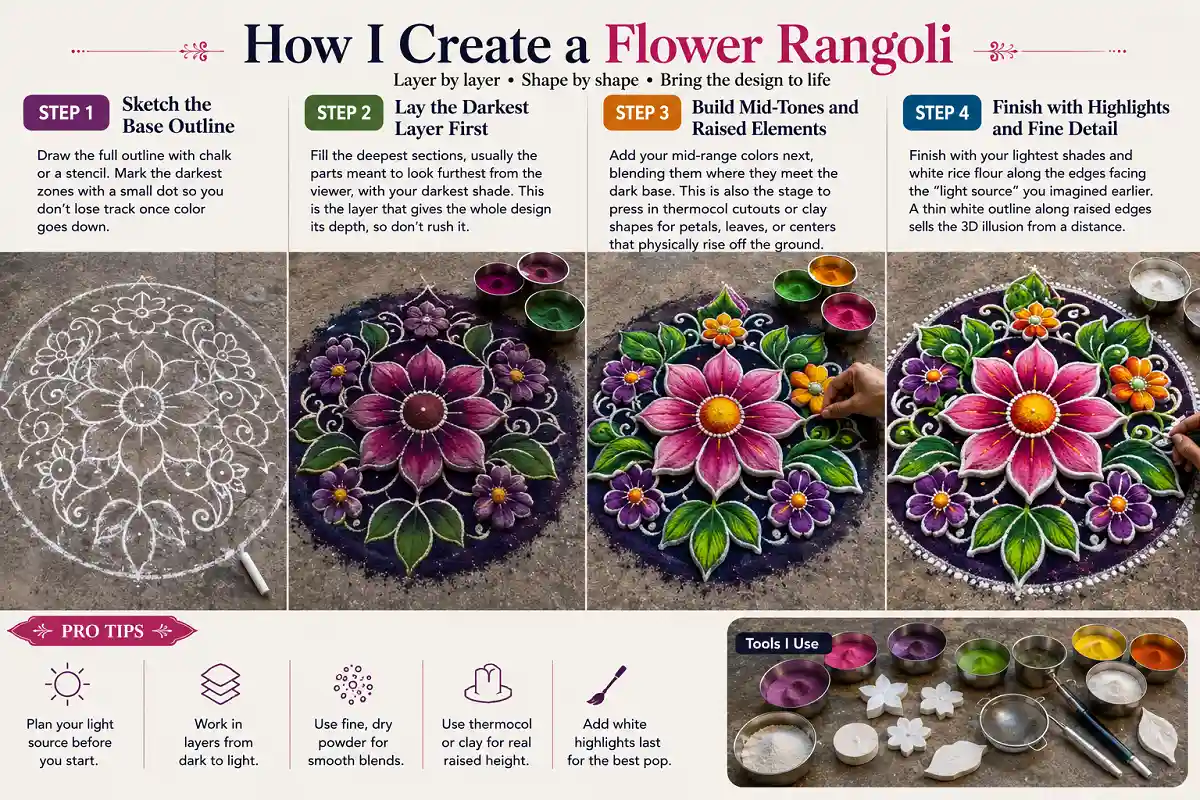
Building 3D rangoli designs for competition follows the same four stages every time, whether the theme is a peacock, a temple, or a festival scene.
Step 1: Sketch the Base Outline
Draw the full outline with chalk or a stencil before touching any powder. I mark the darkest zones with a small dot so I don’t lose track once color goes down.
Step 2: Lay the Darkest Layer First
Fill the deepest sections, usually the parts meant to look furthest from the viewer, with your darkest shade. This is the layer that gives the whole design its depth, so don’t rush it.
Step 3: Build Mid-Tones and Raised Elements
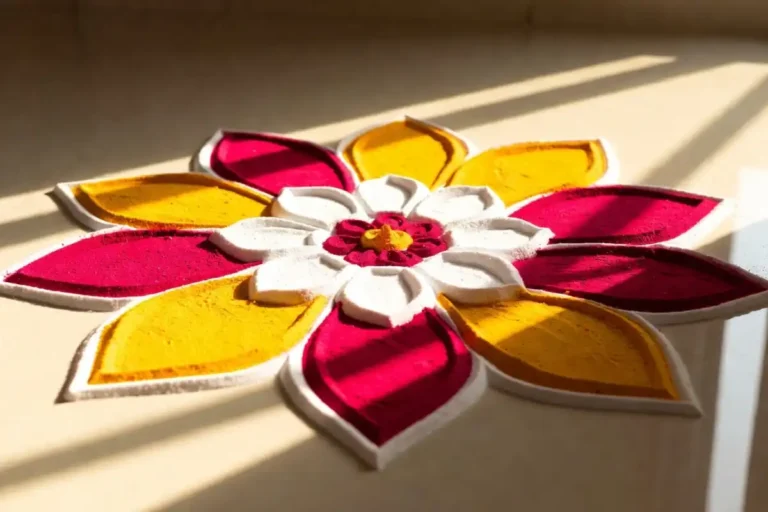
Add your mid-range colors next, blending them where they meet the dark base. This is also the stage to press in thermocol cutouts or clay shapes for petals, wings, or domes that physically rise off the ground.
Step 4: Finish with Highlights and Fine Detail
Finish with your lightest shades and white rice flour along the edges facing the “light source” you imagined earlier. A thin white outline along raised edges is what sells the 3D illusion to a judge standing several feet away.
Best Themes for 3D Rangoli Designs for Competition
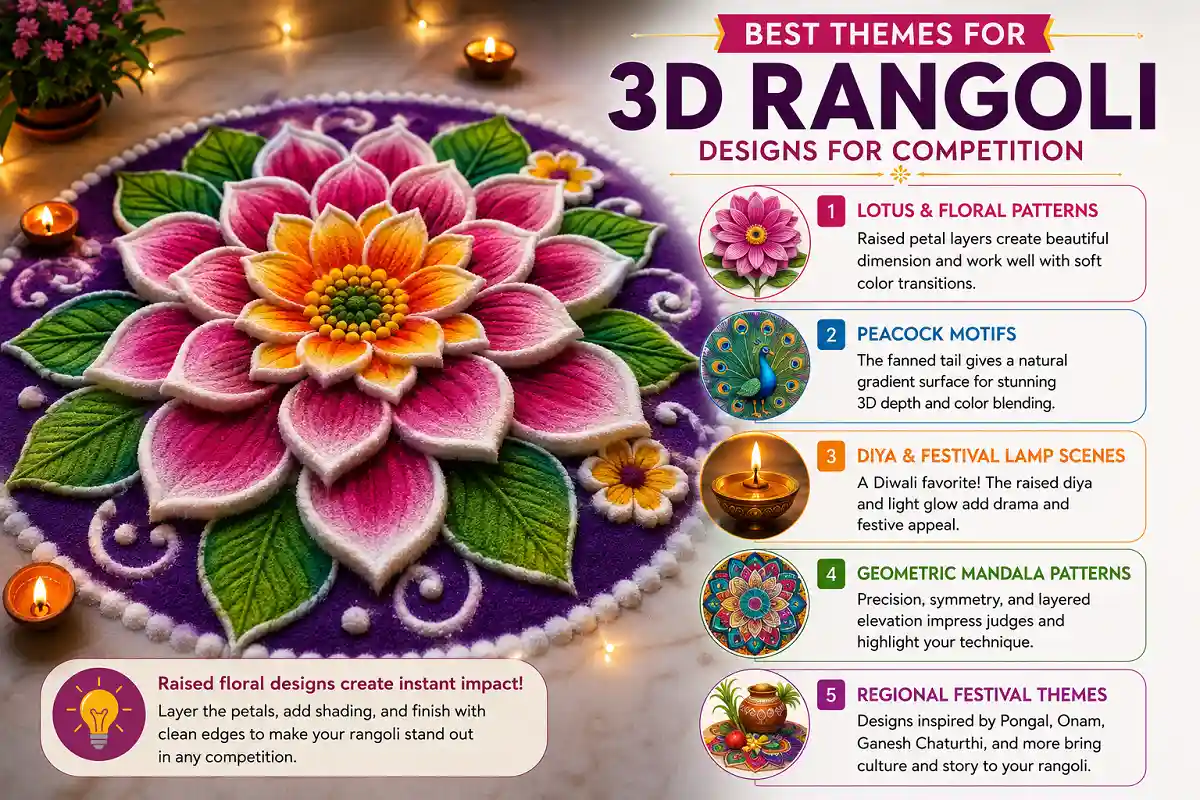
Some themes score consistently well because they naturally suit layered shading:
- Peacock motifs, since the fanned tail gives a natural gradient surface
- Lotus and floral patterns, which work well with raised petal layers
- Diya and festival lamp scenes, popular for Diwali-season contests
- Geometric mandala patterns, which reward precise symmetry over painterly detail
- Regional festival themes tied to Pongal, Onam, or Ganesh Chaturthi, which give judges a cultural story alongside the visual
If your competition allows a mythological or nature scene, judges often respond well to a raised peacock centerpiece. I cover specific layouts in my peacock rangoli motifs guide if you want a ready reference before contest day.
Color and Shading Techniques for a Realistic 3D Effect
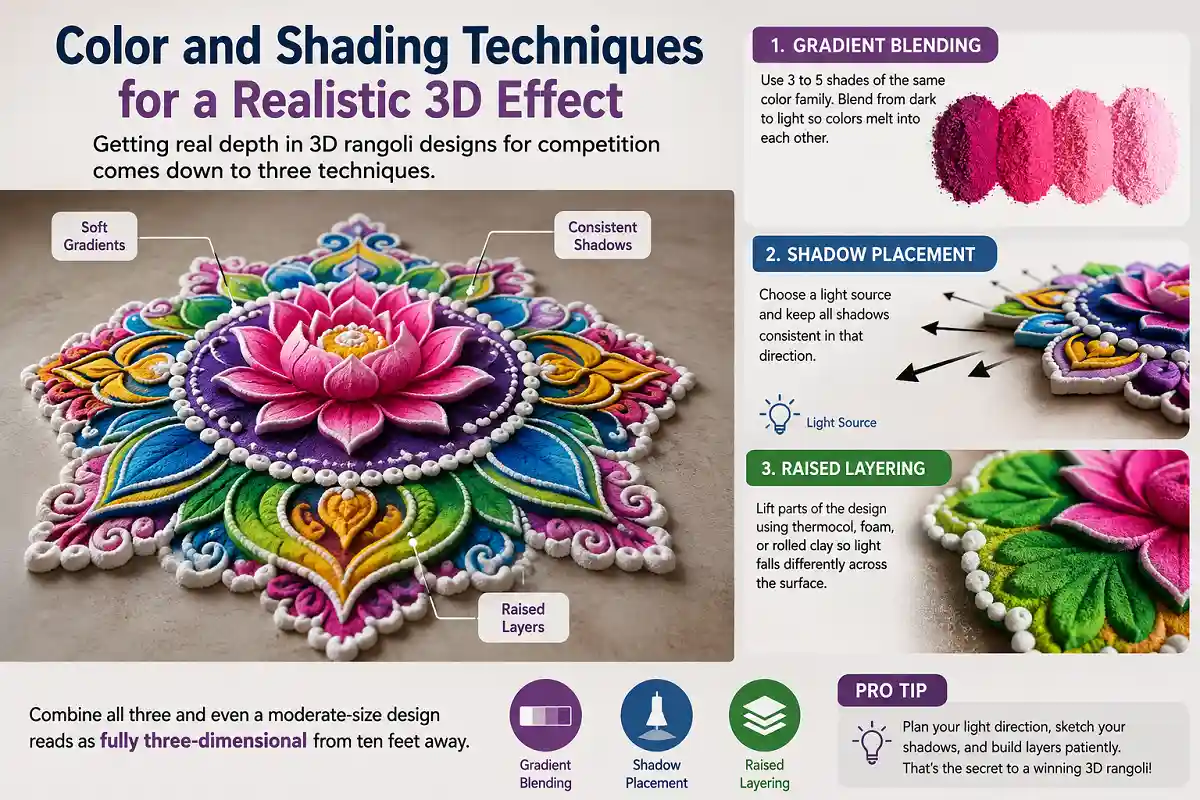
Getting real depth in 3D rangoli designs for competition comes down to three techniques.
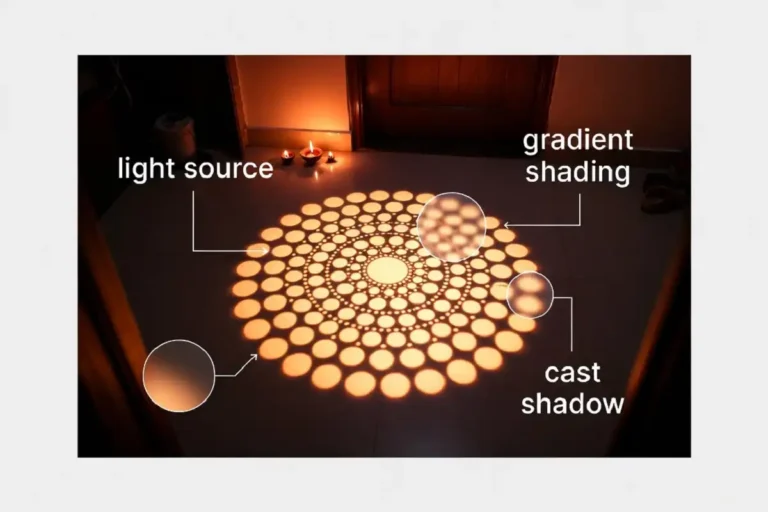
Gradient blending means placing three to five shades of one color family side by side so they melt into each other rather than showing hard lines. Shadow placement means deciding early where your imaginary light source sits, then keeping every shadow consistent with that direction. Raised layering means physically lifting parts of the design with thermocol, foam, or rolled clay so light actually falls differently across the surface, not just through painted shading.
Combine all three and even a moderate-size design reads as fully three-dimensional from ten feet away.
Gradient Blending
Blend multiple shades from dark to light for smooth visual depth.
Shadow Placement
Keep every shadow consistent with one imagined light source.
Raised Layering
Use lightweight materials to create real height and changing light.
Time Management Tips for Rangoli Competitions
Most contests give two to four hours, so plan your time before you start:
- 15%Spend the first 15% of your time on the outline only.
- 40%Spend 40% on base and mid-tone color layers.
- 30%Spend 30% on raised elements and thermocol work.
- 15%Save the final 15% for highlights, cleanup, and stray powder removal.
I keep a small timer running during practice sessions at home so contest-day pacing feels familiar rather than rushed.
Practice with a timer before contest day so you know exactly how much time to reserve for cleanup and final highlights.
Common Mistakes to Avoid in 3D Rangoli Designs for Competition
Skipping the gradient and jumping straight to bright colors is the most common mistake I see. Without a dark base layer, there is no depth to build on, no matter how many raised elements you add later.
Overcrowding the design is another issue. A rangoli packed with too many elements loses its focal point, and judges tend to reward one strong centerpiece over five scattered ones. Using powder that is too coarse for detail work also ruins fine edges, so keep a finer sieve ready for eyes, feathers, or petal tips.
What Judges Look For in Competition Rangoli
Judges generally score on five factors: symmetry, color harmony, technical difficulty of the 3D effect, cleanliness of edges, and how well the theme is executed. Technical difficulty carries real weight, so a well-shaded raised peacock will usually outscore a flat design with more colors but no depth. Clean edges matter more than people expect, since smudged borders make even a strong design look unfinished from a distance.
Make Your 3D Rangoli Stand Out in Competition
A 3D rangoli competition is not just about having a creative idea; it is also about preparation, patience, and clean execution. Spend some time practicing your gradient blending, shading, raised layers, and color combinations at home so you feel more comfortable when the competition begins. It also helps to time yourself at least twice before the actual contest. This gives you a better idea of how long each part of your design takes and helps you avoid rushing during the final stages.
Most importantly, choose one strong theme and develop it properly instead of trying to fit too many small ideas into one design. A well-planned rangoli with balanced colors, smooth shading, clear details, and carefully built raised layers will usually make a stronger impression than an overcrowded design. With enough practice and a little patience, you can create a 3D rangoli that looks polished, creative, and confident and has a real chance of standing out among the other entries.
FAQs
How long does it take to finish 3D rangoli designs for competition?
Most competition-ready 3D designs take two to four hours, depending on size and how many raised elements are included.
What size works best for 3D rangoli designs for competition?
A 3 to 5 foot diameter design usually gives enough room for shading and raised layers without running out of contest time.
Can beginners attempt 3D rangoli designs for competition?
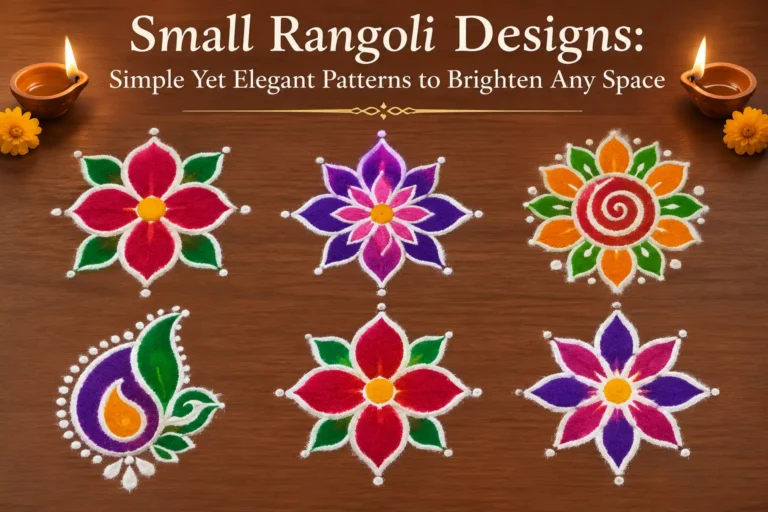
Yes, starting with a simple geometric or floral pattern with just two shading layers is a realistic entry point before attempting a full peacock or mandala scene. My guide on geometric rangoli shapes and colors is a good next step for that kind of practice.