Small Traditional Rangoli: Easy Designs, Cultural Roots & Step-by-Step Ideas
There is something deeply comforting about kneeling at your doorstep each morning and drawing a small traditional rangoli with just a handful of colored powder. This ancient practice passed down through generations across India is not just about decoration. It is a daily ritual of love, positivity, and cultural pride.
Whether you live in a cozy apartment or a spacious home, small traditional rangoli fits beautifully at thresholds, prayer corners, and balconies. These compact designs carry the full weight of India’s rich artistic heritage without demanding hours of work or specialist tools.
If you are just starting out, you might also enjoy these beginner-friendly rangoli designs that walk you through the basics with simple, manageable patterns.
In this guide, you will discover the history and cultural meaning behind small traditional rangoli, explore popular design styles, learn how to create your own step by step, and pick up expert tips that will make your artwork stand out every single day.
What Is Small Traditional Rangoli?
Rangoli is one of India’s oldest and most beloved folk art forms. The word itself comes from the Sanskrit term rangavalli, meaning “row of colours.” Traditionally, women created these floor designs using natural materials such as rice flour, chalk, turmeric, and flower petals.
A small traditional rangoli refers to compact versions of these heritage patterns typically fitting within a 12-inch to 24-inch radius. Despite their modest size, these designs preserve all the elegance and symbolism of larger festival pieces. They are ideal for:
- Daily doorstep decoration
- Pooja (prayer) room floors
- Festival greetings like Diwali, Pongal, and Onam
- Wedding entrance walkways
- Small apartment balconies
According to Britannica’s overview of Indian folk art, rangoli and kolam traditions have been practiced across the Indian subcontinent for thousands of years, holding deep ritual and social significance in both rural and urban communities.
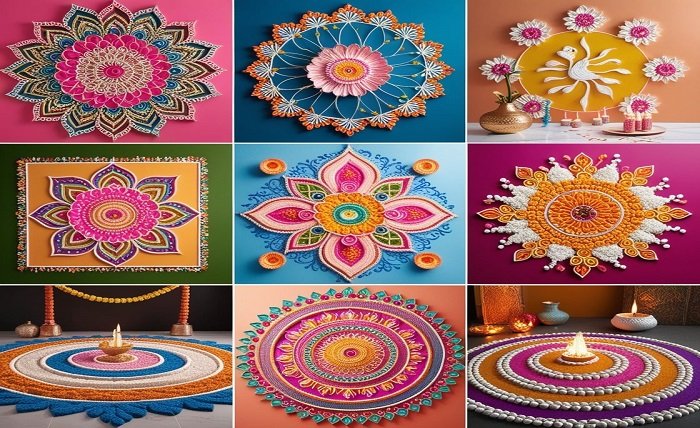
Types of Small Traditional Rangoli Designs
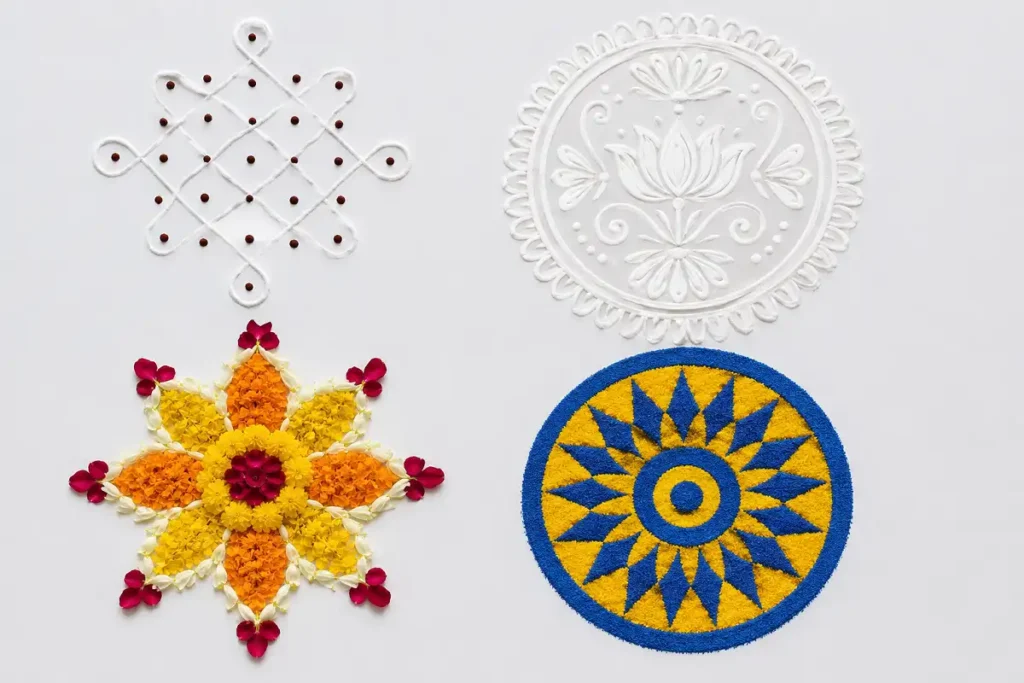
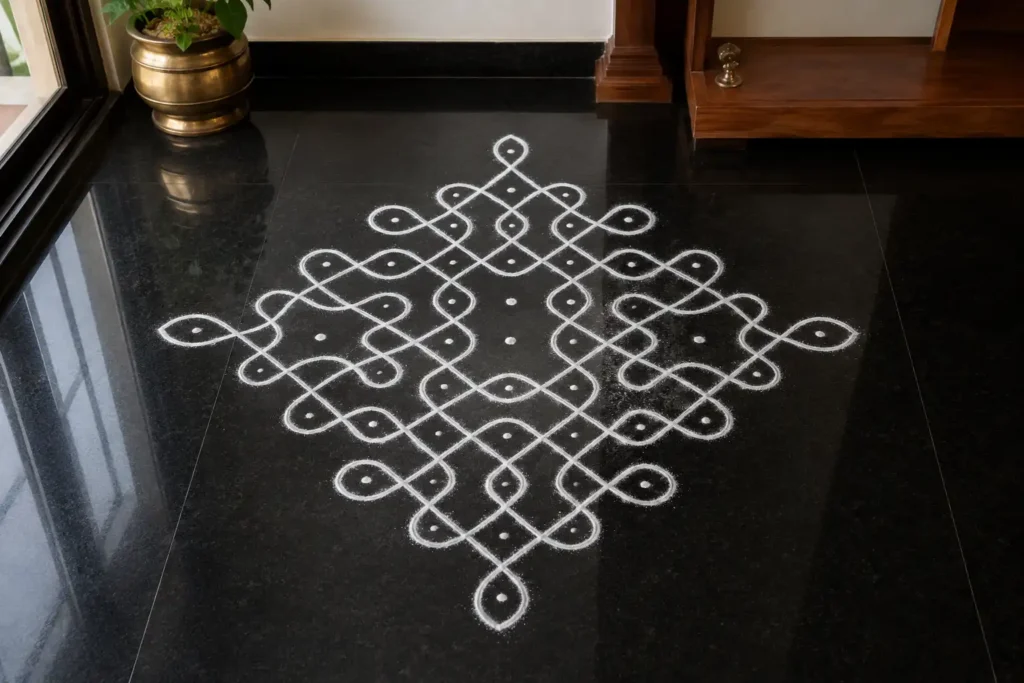
1. Kolam (South Indian Dot Patterns)
Kolam is one of the most well-known traditional rangoli forms, practiced extensively in Tamil Nadu, Karnataka, and Andhra Pradesh. These designs use a grid of dots as a framework, with flowing lines looping and connecting through them. Even small kolam patterns can look intricate and refined because of their mathematical precision.
2. Alpana (Bengali Style)
Alpana designs from Bengal use white rice paste and feature motifs such as lotus flowers, fish, feet of the goddess Lakshmi, and leafy vines. They are traditionally drawn on auspicious occasions and temple floors. In a small format, an alpana design with a simple lotus at the centre looks both elegant and deeply symbolic.
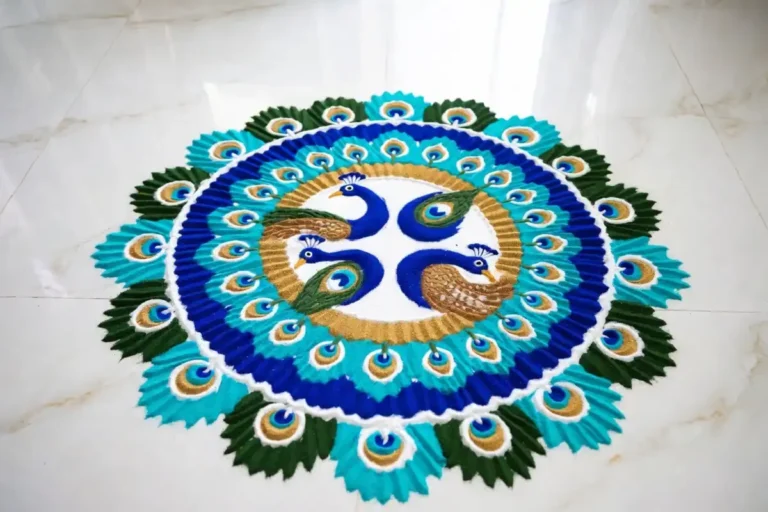
3. Chowk Purana (North Indian Style)
Popular in Uttar Pradesh and Rajasthan, chowk purana designs often feature geometric borders, peacock motifs, and lamp shapes. These are commonly used to prepare the sacred space beneath a diya (oil lamp) during festivals. Small versions with three to four concentric borders are perfect for home use.
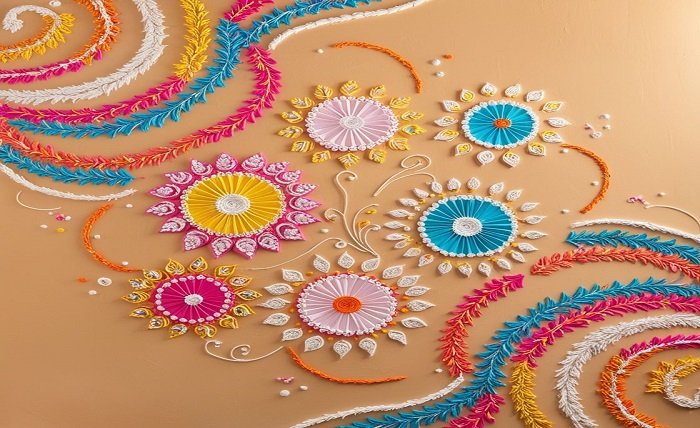
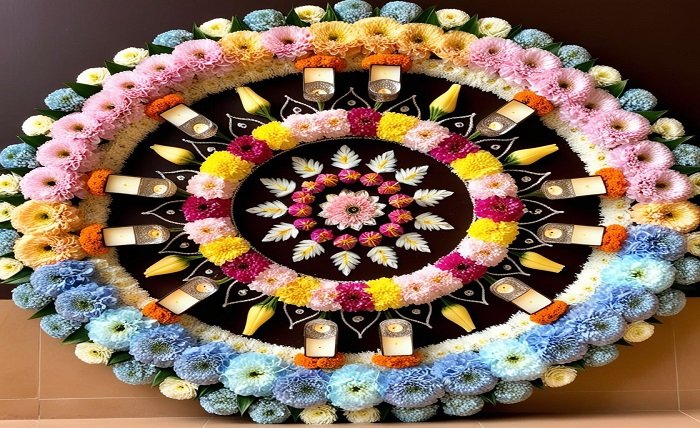
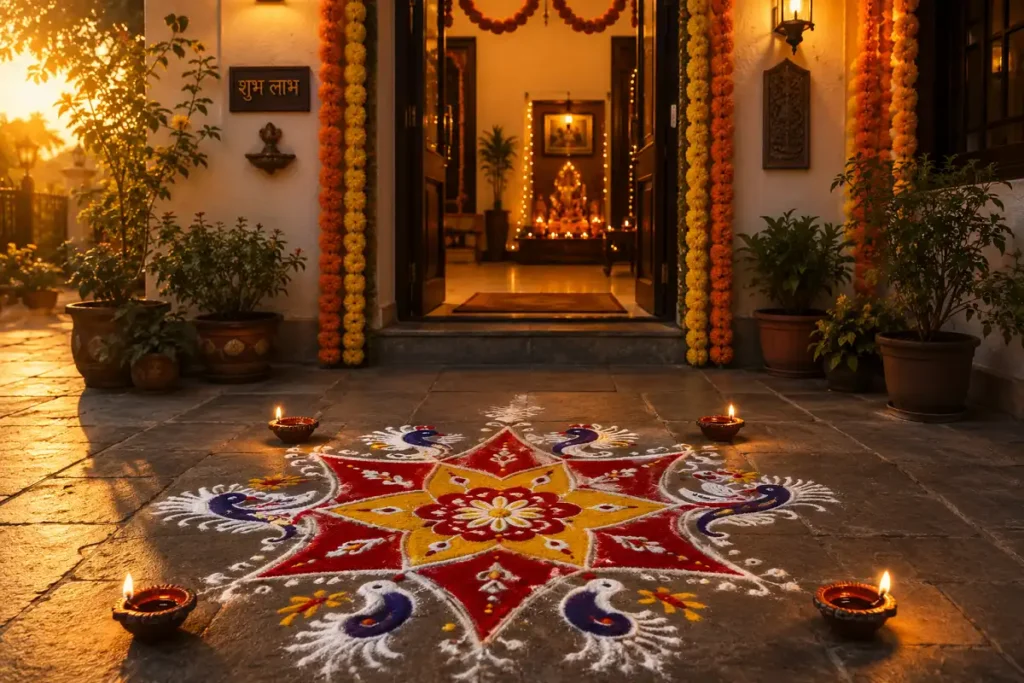
4. Petal-Based Floral Rangoli
Floral rangoli using real marigold, rose, or jasmine petals is one of the most loved small traditional styles. A simple circular arrangement of orange and yellow petals with a diya at the centre creates an instant festive mood. You can explore variations of this style in these simple petal rangoli ideas.
5. Geometric Symmetry Designs
Circles, triangles, and star-shaped patterns drawn with a compass or freehand are another classic approach. These small geometric rangoli designs are common in Maharashtra and Gujarat and work beautifully as daily floor art.
Step-by-Step Guide: How to Make a Small Traditional Rangoli
Follow these steps to create a neat, attractive small traditional rangoli in under 20 minutes.
What You Will Need
- Rangoli powder in 3–5 colours (white, red, yellow, green, blue)
- A chalk or white rangoli powder (for outline)
- A small spoon or cone filler
- Compass or circular lid (for drawing guide circles)
Step 1: Clean and Prepare the Surface
Sweep your floor clean and lightly dampen it. A slightly moist surface holds rangoli powder better and prevents it from spreading. Mark a small cross at the centre point of where you want your design.
Step 2: Draw the Base Circle
Using a compass, a cup, or a circular lid, draw two concentric circles — one at roughly 6 inches and one at 10 inches from the centre. These will serve as your design boundary.
Step 3: Create the Inner Pattern
Inside the inner circle, draw a simple eight-petal lotus. You can do this freehand by dividing the circle into four equal parts, then adding diagonal petals between each. Outline each petal lightly with chalk or white powder before filling.
Step 4: Fill With Colour
Fill alternate petals with contrasting colours for example, pink and white, or yellow and red. Fill the centre circle with a bright colour like saffron orange or deep red.
Step 5: Add the Border Design
Along the outer circle, create a simple repeating pattern tiny triangles, scalloped loops, or small dots. Border patterns make even the simplest central design look polished and complete.
Step 6: Add Finishing Dots
Use a finger dipped in white powder to dot along key intersection points. Dots are a traditional finishing element that give rangoli its signature hand-crafted texture.
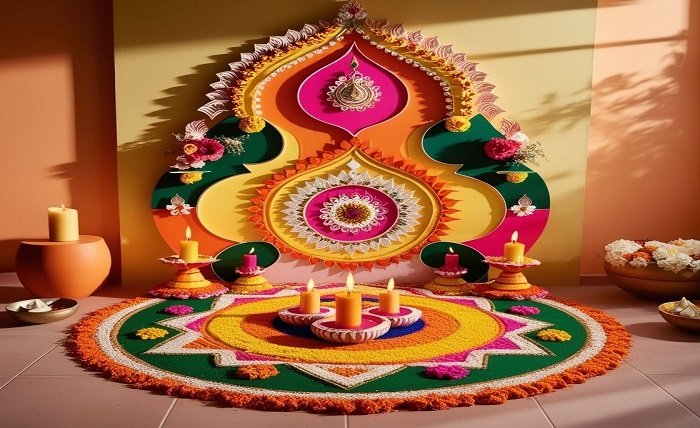
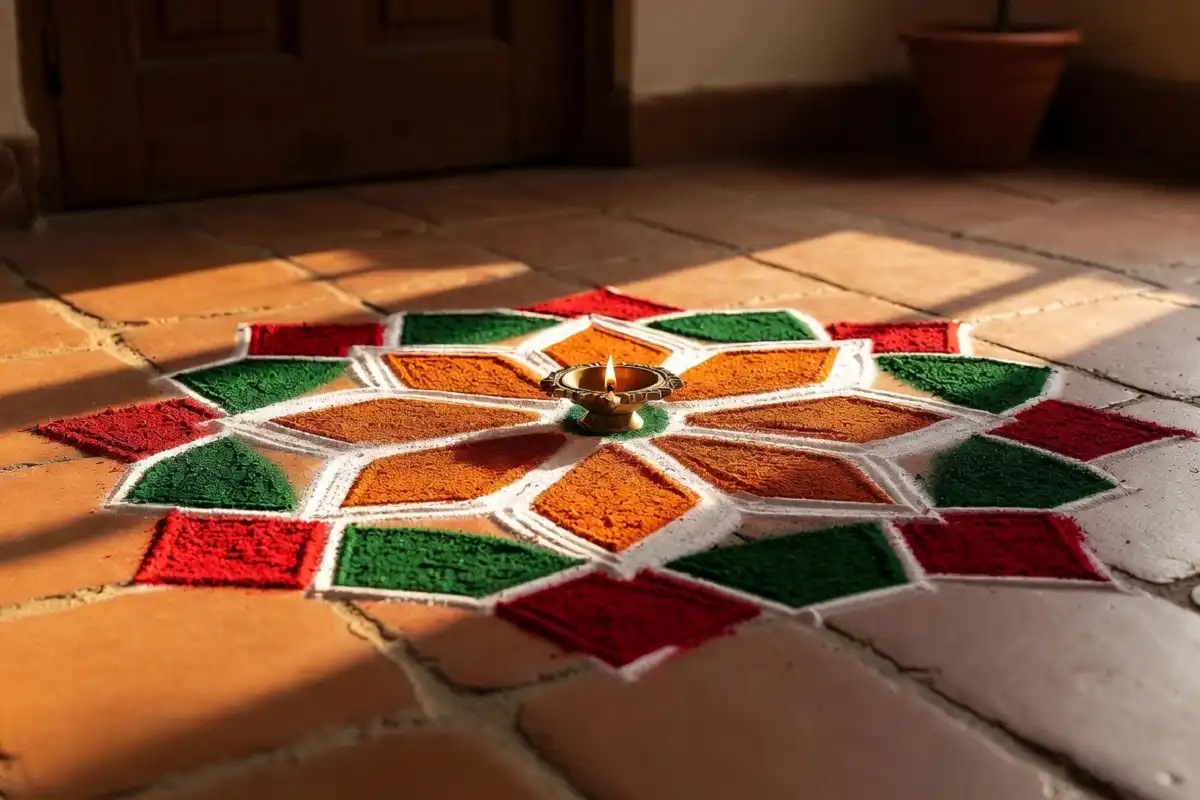
Step 7: Place a Diya at the Centre
If the design is for your doorstep or pooja space, place a small lit diya at the centre to complete the sacred effect.
Design Tips and Best Practices
Start small, aim for symmetry. The most beautiful small traditional rangoli pieces are perfectly symmetrical. Take your time with the initial framework before adding colour.
Use a cone for fine details. Fill a paper cone with powder for precise line work. This is the traditional method used by expert rangoli artists for adding delicate borders and lettering.
Stick to three to four colours. Using too many colours at once can make a small design look cluttered. Three complementary shades always look more refined than six competing ones.
Work from the centre outward. Always draw and fill from the inside first, then move outward. This prevents smudging the areas you have already completed.
Use natural materials when possible. Rice flour, turmeric, vermillion, and dried flower petals are eco-friendly options that honour the original spirit of traditional rangoli.
For more ideas on keeping designs clean and proportional, check out these small symmetry rangoli patterns that demonstrate how to achieve perfect balance even in compact spaces.
Festival and Cultural Importance of Small Traditional Rangoli
Rangoli is not merely decorative. It carries centuries of spiritual and cultural meaning across different regions of India.
At Diwali, rangoli is believed to welcome Goddess Lakshmi into the home. Bright, colourful designs at the entrance symbolise prosperity and the triumph of light over darkness.
During Pongal and Onam, kolam and pookalam designs are made as offerings of gratitude for the harvest. These are among the most elaborate traditional rangoli traditions in South India.
At weddings, rangoli marks sacred spaces, guides the bride and groom’s path, and decorates the mandap (wedding canopy) floor as a symbol of fertility and good fortune.
On Navratri, rangoli patterns represent the nine forms of Goddess Durga. Colours used during each of the nine nights often correspond to the deity worshipped that day.
Even a small traditional rangoli placed daily at the threshold of a home is considered an act of shubh (auspiciousness) — an invitation for positive energy to enter. As National Geographic explores in its coverage of Indian traditions, these folk art practices serve as living cultural memory, connecting modern Indian households to centuries of heritage.
Common Mistakes to Avoid
Skipping the base outline. Drawing directly with coloured powder without an outline first often leads to uneven shapes. Always sketch your design in chalk or white powder before filling.
Using too much powder at once. Pouring powder in large amounts leads to blotchy fills. Use a light, controlled pour and build up colour in thin layers.
Ignoring proportion. A common beginner mistake is making one part of the design larger than others, which breaks symmetry. Use measured guides even folded paper or a ruler helps.
Choosing clashing colours. Red and orange next to each other, or blue and green without a neutral separator, can look jarring. Use white or yellow to separate strong colours.
Working on a wet floor. A floor that is too wet will cause the powder to bleed and lose sharpness. Lightly damp is ideal not soaked.
Latest Trends in Small Traditional Rangoli
Traditional rangoli is experiencing a beautiful modern revival. While the roots stay the same, contemporary artists are adding fresh twists:
Minimalist mono-colour kolam. Single-colour white rangoli on terracotta or dark tile floors is trending on home décor platforms for its clean, sculptural look.
Eco-friendly petal rangoli. Marigold and rose petal designs are growing in popularity as sustainable alternatives to synthetic powders, especially for weddings and festivals.
Fusion geometric-floral hybrids. Artists are combining traditional kolam dot-patterns with floral mandala centres, creating designs that blend heritage and contemporary aesthetics perfectly.
Digital-to-floor rangoli. Many designers now plan their rangoli digitally using grid apps before drawing on the floor, resulting in highly precise traditional patterns.
Micro rangoli for urban spaces. For small apartments and balconies, micro rangoli designs within a 6-inch diameter are gaining popularity proof that traditional art can thrive even in compact urban settings.
FAQs
What materials are used in small traditional rangoli?
How long does a small traditional rangoli last?
Is small rangoli suitable for beginners?
Can I make traditional rangoli with chalk?
What is the difference between rangoli and kolam?
Conclusion
Small traditional rangoli is one of the most accessible, meaningful, and visually rewarding art forms you can practice at home. Whether you are drawing a simple lotus for your morning pooja, preparing a petal design for Diwali, or recreating a delicate kolam pattern on a quiet Sunday, each design carries with it a thread that connects you to centuries of Indian cultural tradition.
You do not need a large space, expensive tools, or years of practice to make something beautiful. A clean floor, a handful of colours, and a calm hand are all it takes.
As you grow more confident, you can explore more complex styles and if you are looking for your next creative challenge, these village rangoli easy designs offer a wonderful blend of rustic charm and traditional technique that are perfect for your next project.
Start small, stay consistent, and let your creativity deepen with every design you draw. That is the true spirit of traditional rangoli.