Beginner Mandala Rangoli: Easy Steps & Ideas
Start With a Simple Mandala Rangoli
A mandala rangoli is one of the easiest ways to begin learning floor art. The design grows from a central point into repeated circles, petals, lines, and geometric shapes. Because the same motif is repeated around the center, beginners can focus on one small section at a time.
You can create a small mandala for a doorway, pooja corner, apartment, balcony, or festival space without needing advanced drawing skills. Start with a simple structure, keep your spacing consistent, and allow each layer to build naturally from the center.
What Is a Beginner Mandala Rangoli?
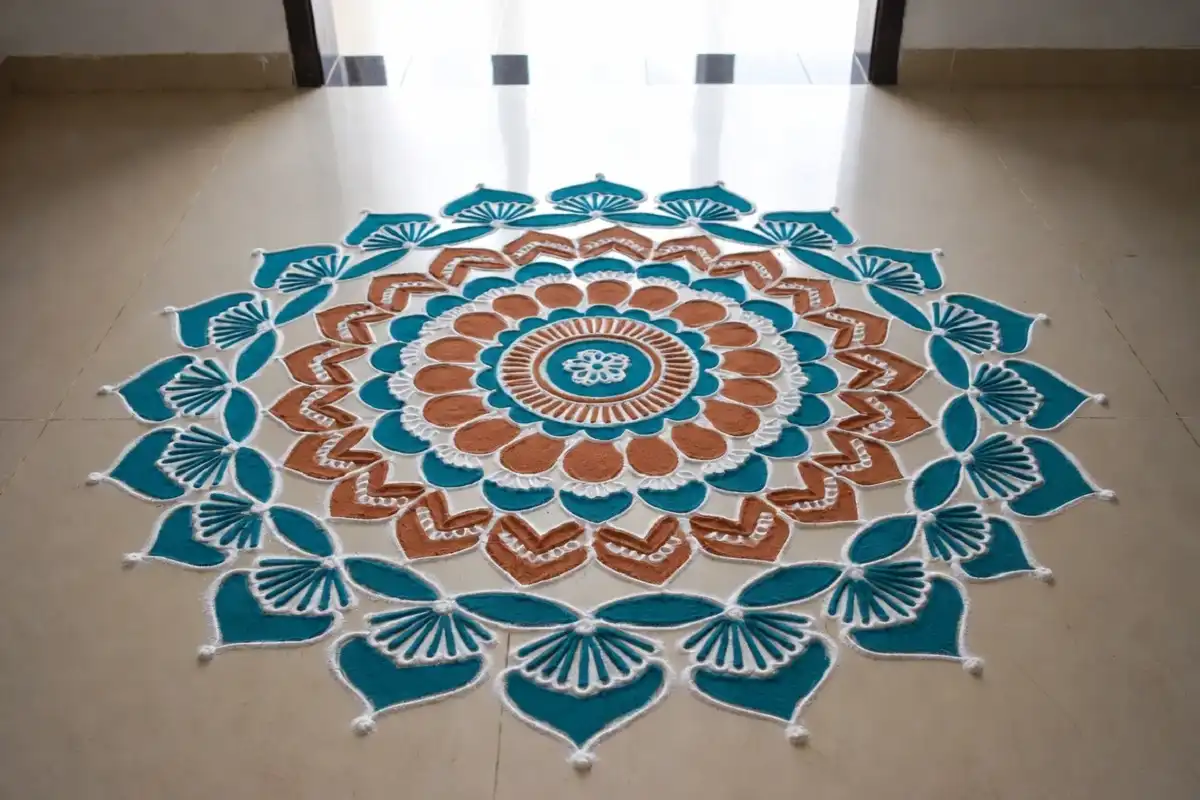
A beginner mandala rangoli is a circular floor design that begins with a center point and expands through repeated layers. Instead of creating every part from scratch, you draw one simple motif and repeat it around the circle.
The circular structure naturally creates balance. Petals, dots, curves, triangles, and other shapes can be arranged evenly around the center, making the finished design look more detailed than the individual steps actually are.
Central Point
One small dot gives the design a clear starting point and keeps the surrounding layers centered.
Repeating Motifs
Repeated petals, loops, dots, or geometric shapes create the mandala’s balanced appearance.
Layered Rings
Adding one ring at a time makes it easier to control spacing and avoid overwhelming the design.
Simple Mandala Rangoli Patterns to Try
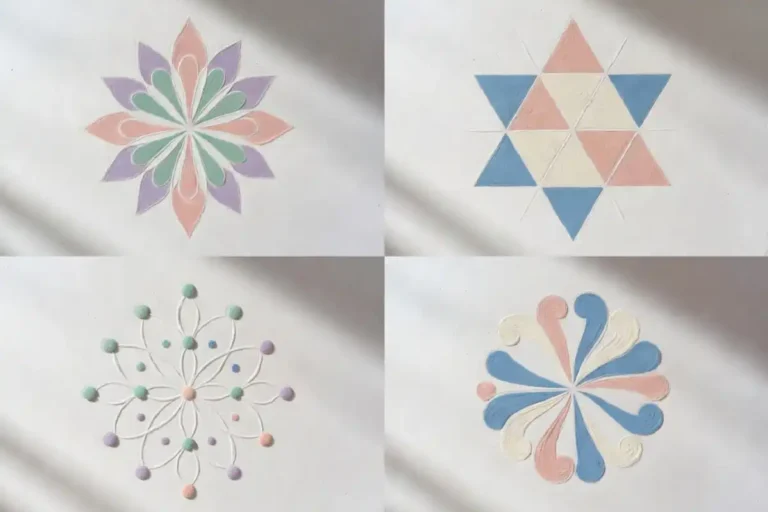
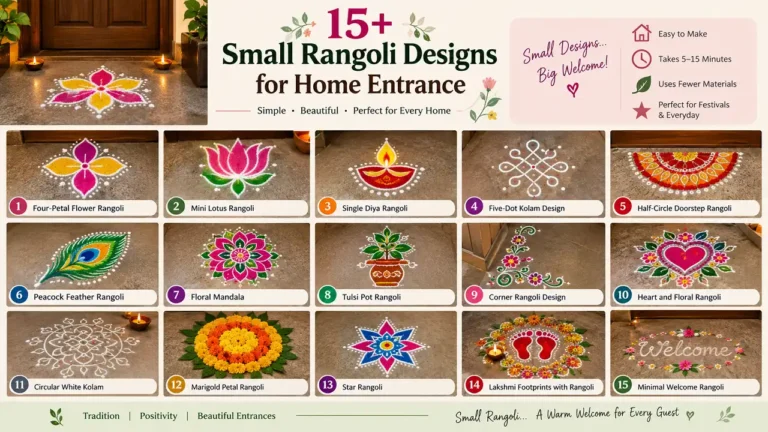
You do not need a complicated pattern for your first attempt. These beginner-friendly structures are easy to draw, repeat, and customize.
Dot Grid Mandala
Arrange evenly spaced dots and connect them with curves, loops, or small petals. The dots act as a visual guide and make spacing much easier to control.
Petal Ring Mandala
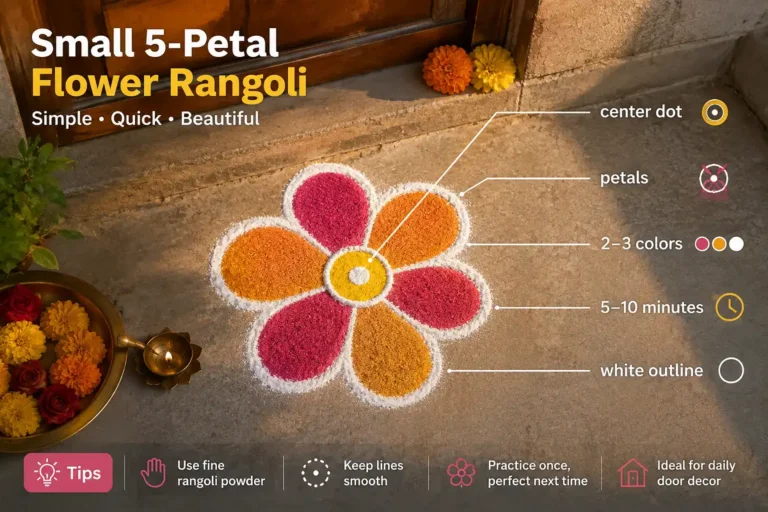
Begin with a small center circle and surround it with eight or more petals. Add another petal ring outside it when you feel comfortable.
Triangle Mandala
Repeat small triangles around the center for a sharper geometric style. This is a useful option if straight lines feel easier than curved ones.
Free-Form Loop Mandala
Once your hand becomes more confident, try drawing flowing loops without a dot guide. Small variations can give the design a more personal character.
How to Make Your First Mandala Rangoli
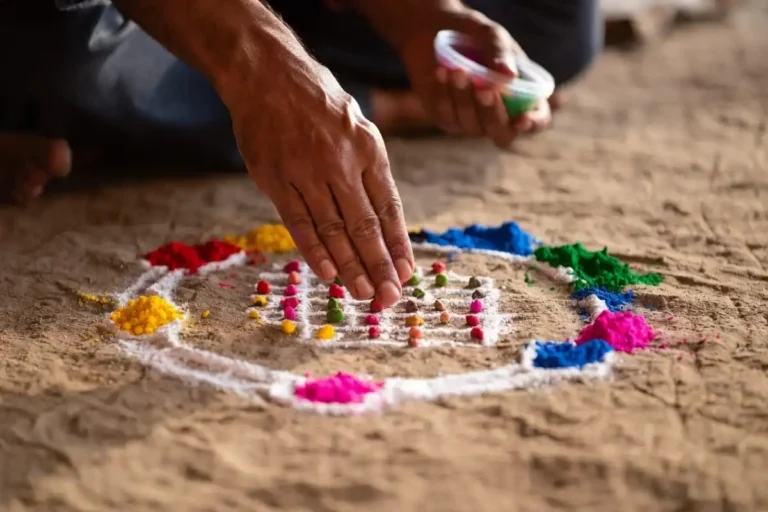
Prepare the surface
Sweep the floor and make sure it is dry and reasonably smooth. A clean surface helps powder stay where you place it.
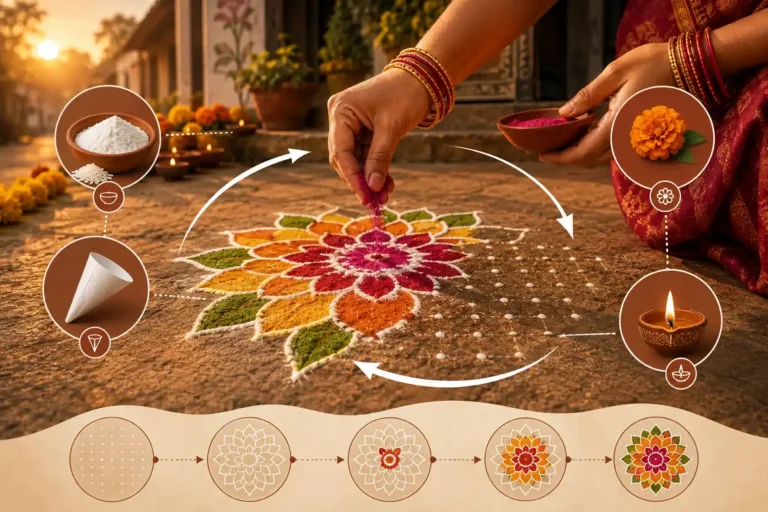
Mark the center
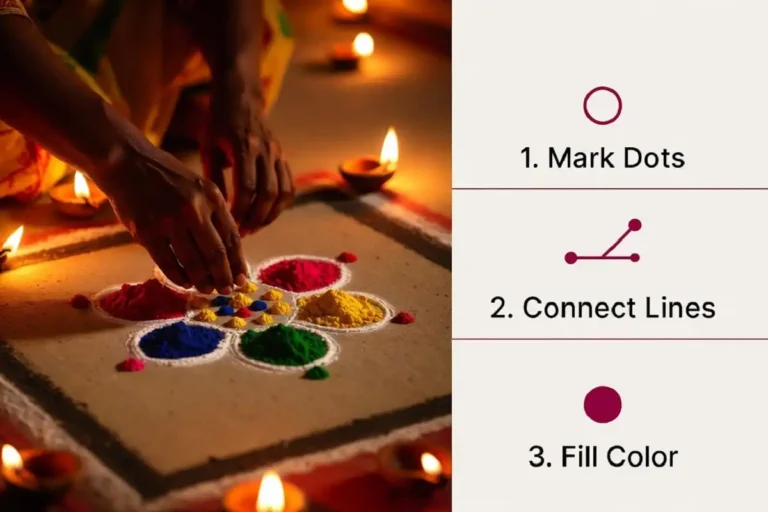
Place a single dot where you want the middle of the mandala to sit. Treat this as the anchor for every layer that follows.
Create a guide ring
Add evenly spaced dots around the center. A small dot arrangement or a light chalk circle can help you keep the design symmetrical.
Draw the first motif
Connect the guide points using petals, curves, loops, or straight lines. Keep the first layer simple.
Repeat the pattern outward
Build the next ring using the same basic shape. Check the spacing before moving on to another layer.
Add your colors
Fill the design from the center toward the outside. This helps reduce accidental smudging over areas you have already completed.
Finish with clean outlines
Add white powder or another contrasting shade around important edges to sharpen the final appearance.
Design Tips and Best Practices
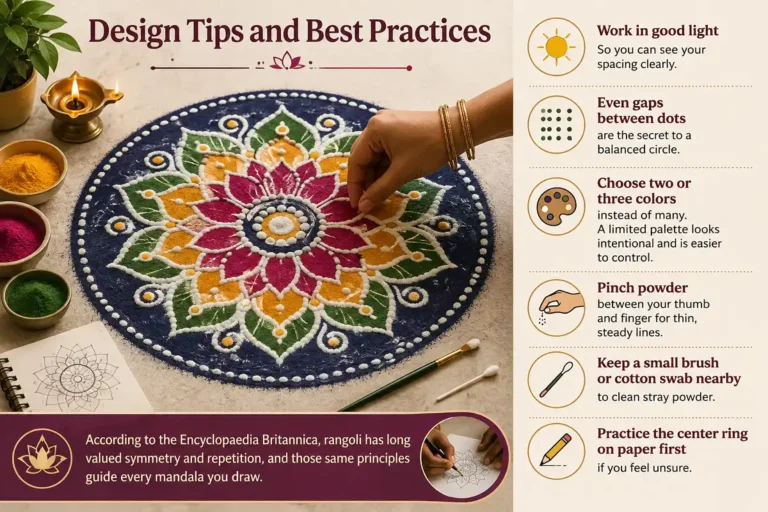
Work in good light
Clear lighting makes it easier to notice uneven dots, powder edges, and small gaps between repeating elements.
Limit your palette
Two or three main colors are usually enough for a beginner mandala. A smaller palette keeps the design calm and coordinated.
Control the powder
Hold a small amount of powder between your fingers and release it gradually to create thinner, more controlled lines.
Keep a cleanup tool nearby
A cotton swab or small soft brush can remove stray powder without disturbing the rest of your design.
Practice the center first
If you are unsure about your pattern, sketch the center ring on paper before transferring it to the floor.
Check spacing often
Step back occasionally and look at the whole design. Small spacing corrections are easier before several new layers are added.
Rangoli is a long-standing Indian floor-art tradition built around decorative patterns, repetition, and visual balance. Learn more about rangoli at Britannica →
Festival and Cultural Importance
Mandala-style rangoli works beautifully for both everyday decoration and festive occasions. The circular format can be adapted to a small doorway, pooja area, courtyard, or entrance without changing the basic drawing method.
Pair a circular mandala with diyas and warm festive colors.
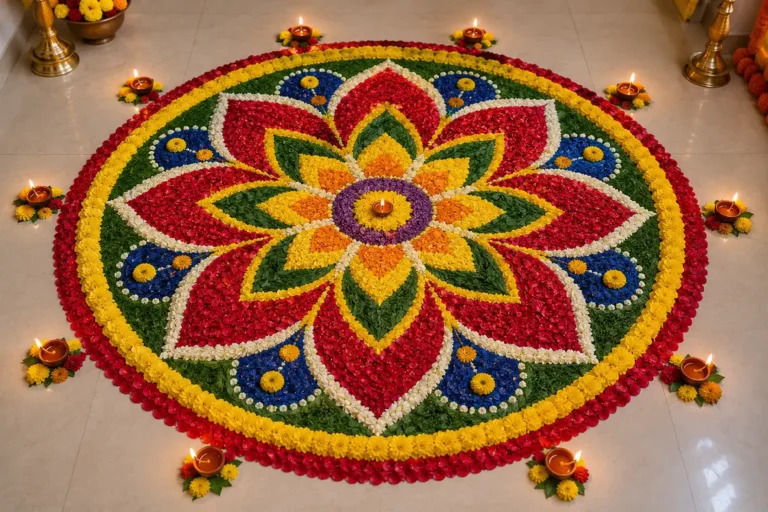
Use floral rings and soft colors for an elegant ceremonial look.
Combine traditional patterns with natural colors and floral details.
Keep the design small and simple for a welcoming everyday entrance.
If you are preparing a quick design for a festival, you can also explore quick Navratri rangoli ideas for compact patterns that can be completed in less time.
Common Beginner Mistakes to Avoid
Starting too large
A large mandala requires more precise spacing. Start with a compact design and increase the size as your confidence improves.
Uneven dot placement
When the guide dots are inconsistent, the outer rings can become difficult to balance. Take a moment to check their spacing first.
Using too many colors
Too many shades can make a small mandala feel busy. Begin with a restrained combination and add accents only where needed.
Rushing the center
The middle controls the direction of the entire design. Spend extra time making the first ring neat before expanding outward.
Coloring too early
Complete the important outlines and check symmetry before filling large areas with powder.
Latest Trends in Mandala Rangoli Design
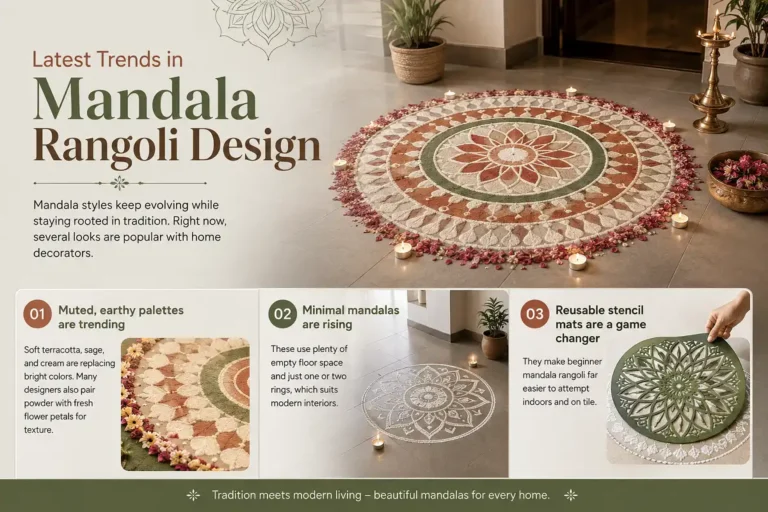
Modern mandala rangoli continues to keep the traditional circular structure while experimenting with color, materials, and scale. This makes the style especially suitable for contemporary homes and smaller decorating spaces.
Earthy Color Palettes
Terracotta, cream, muted green, beige, and other softer shades create a calm modern appearance.
Minimal Mandalas
One or two carefully designed rings with plenty of open floor space can look elegant without feeling crowded.
Flower and Powder Mixes
Fresh petals can be combined with colored powder to introduce natural texture and variation.
Reusable Stencils
Stencil-based approaches can make repeated mandala shapes easier for beginners, especially on smooth indoor floors.
Modern Geometric Layers
Triangles, diamonds, lines, and circles are increasingly combined within the same mandala for a contemporary finish.
Compact Designs
Small mandalas are especially practical for apartments, narrow entrances, balconies, and indoor decorative corners.
Save ideas before you start drawing
Browse more rangoli patterns, color combinations, and mandala references for your next design.
What You Need to Make a Simple Mandala
Rangoli Powder
Choose a few colors that are easy to see against your floor.
White Powder or Chalk
Useful for outlines, guide marks, and correcting your structure.
Flower Petals
Optional natural decoration for a softer and more festive result.
Cotton Swab
Helpful for cleaning edges and removing small amounts of excess powder.
Keep Your First Mandala Small and Simple
The easiest way to build confidence is to start with one center point, one repeating motif, and only a few colors. Once the first ring feels balanced, add another layer. Good spacing matters more than complicated decoration.
Beginner Mandala Rangoli FAQs
01 Is mandala rangoli suitable for absolute beginners?
02 What materials do I need?
03 How long does a simple mandala take?
04 Can I make a mandala without using dots?
05 How can I keep my rangoli neat?
Your First Mandala Does Not Need to Be Perfect
A beginner mandala rangoli is more about learning rhythm and spacing than creating a complicated masterpiece. Start with a manageable circle, repeat one shape carefully, and let the design grow one layer at a time.
With regular practice, your dots will become more even, your lines more controlled, and your color choices more confident. When you are ready for another floral challenge, try this easy rose rangoli design as your next project.