Rangoli Without Stencil Easy Designs to Try Now
Making rangoli without stencil easy at home is something anyone can learn, even with no art background. You do not need special tools or years of practice. All it takes is a clean floor, some colored powder, and a willingness to try. Freehand rangoli feels personal and alive because every line comes directly from your hand. This guide covers beginner-friendly patterns, dot grid methods, color pairing tips, and festival ideas so you can start drawing beautiful floor art today with real confidence.
Why Skipping the Stencil Is a Good Idea
A lot of beginners assume stencils are the only way to get clean, attractive results. That assumption stops many people from developing real freehand skills. The truth is, rangoli without stencil easy drawing is more flexible and often more satisfying than working around a printed shape.
When you skip the stencil, you gain:
- Full control over the size and direction of your design
- Faster setup with no positioning or removal steps
- A more organic, handmade look that carries your own style
- Gradual skill-building that improves with every session
Stencils have their place, but freehand practice builds the kind of confidence that stays with you.
What You Need Before You Start
The materials for rangoli without stencil easy work are simple and easy to find.
- Rangoli powder or chalk powder in three to five colors
- A small paper cone or cut plastic bottle to control powder flow
- White chalk for sketching a rough layout on the floor
- A clean, dry, flat surface such as tile, marble, or concrete
- A small spoon or squeeze bottle for filling larger sections
Optional materials include colored rice, dried flower petals, or fine sand. These add texture and are easy to source from your kitchen or garden.
How to Use Dots as Your Starting Point
The dot grid method is the most reliable foundation for rangoli without stencil easy drawing. Traditional artists across India have used dot grids for generations to maintain symmetry without any tools.
Here is how to use dots as your guide:
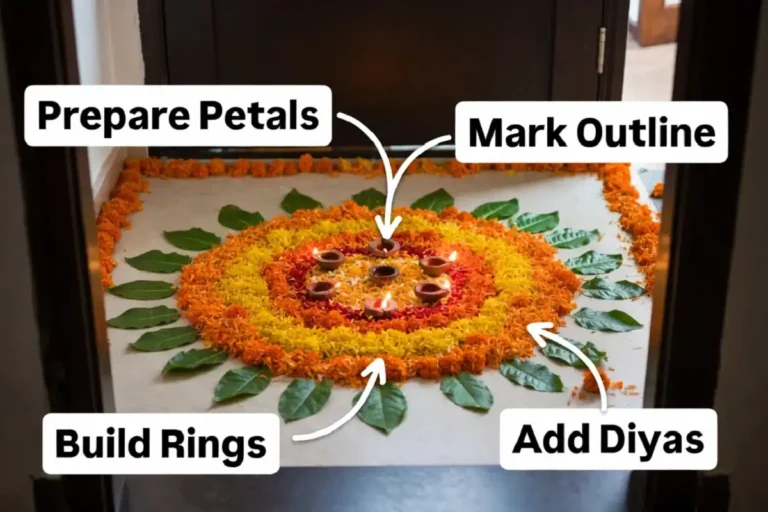
- Mark a grid of evenly spaced dots on the floor using chalk or a fingertip dipped lightly in powder.
- Connect the dots with curved or straight lines to form petals, diamonds, leaves, or triangles.
- Fill each shape with color once your outline is set.
- Add a thin border line around the full design to frame it cleanly.
Recommended dot grid sizes for beginners:
- 5×5 grid for small entry or doorstep designs
- 7×7 grid for medium patterns with more layers
- 9×9 or larger for festival centerpiece work
The dots give you structure while still letting you draw every line yourself. Symmetry becomes much easier to maintain once you trust this system.
Simple Freehand Patterns Anyone Can Draw
The best way to build skill with rangoli without stencil easy design is to start with shapes you already know how to draw. Simple geometry and natural forms are all you need for striking results.
Petal and Flower Patterns
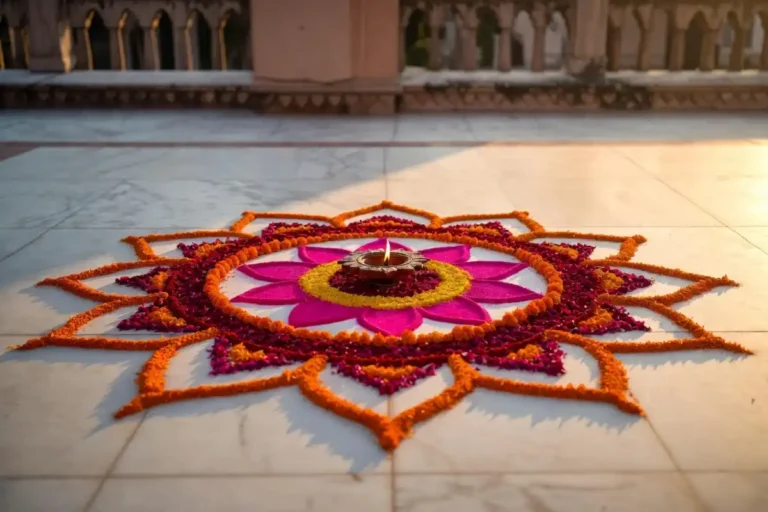
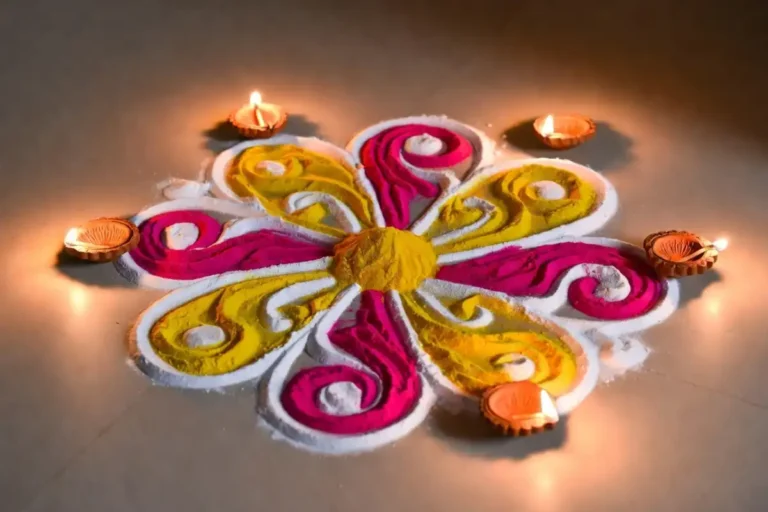
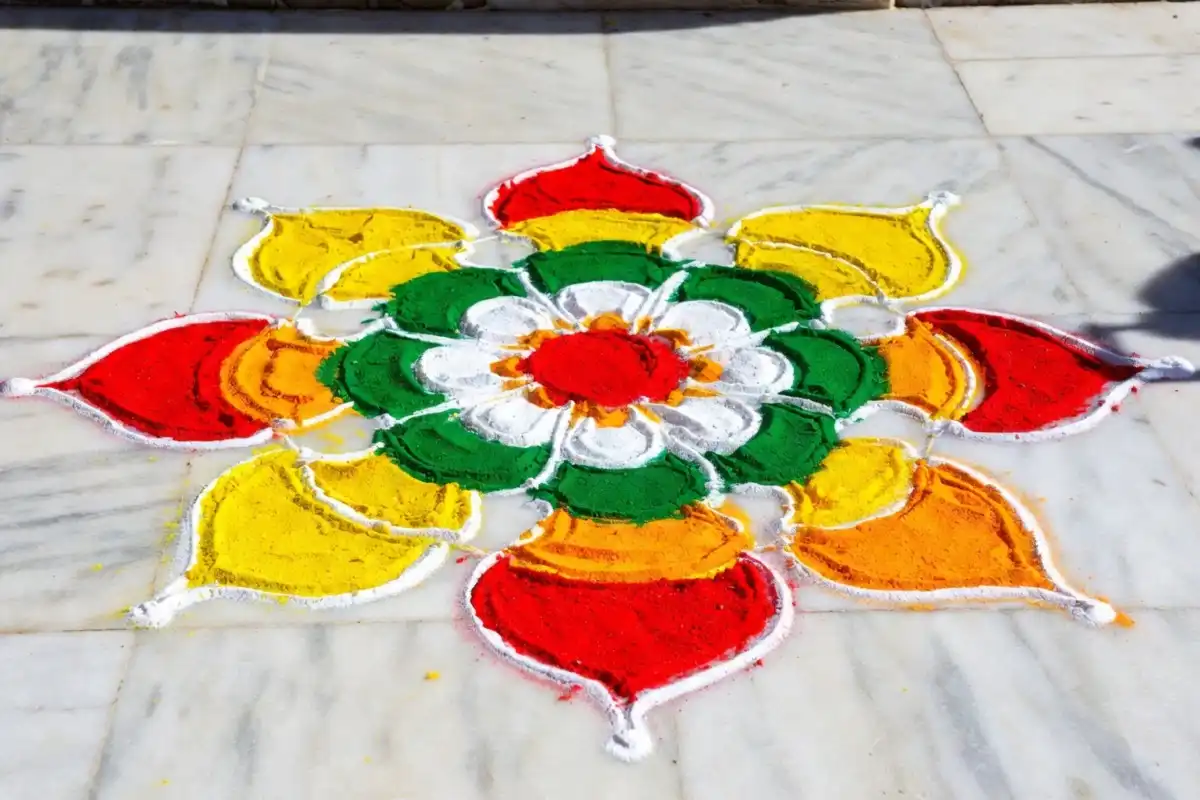
Place a single dot at the center of your space. Draw six to eight curved lines outward from that dot like spokes on a wheel. Then connect the tip of each spoke with a gentle curve to complete the petal shape. Fill alternate petals with contrasting colors for instant visual impact.
You can layer two or three flower shapes of different sizes on top of each other. Using a different color family for each layer builds depth without adding complexity. For guidance on how layered petals work in practice, explore simple petal rangoli ideas to see the structure before you draw it freehand.
Geometric Shapes
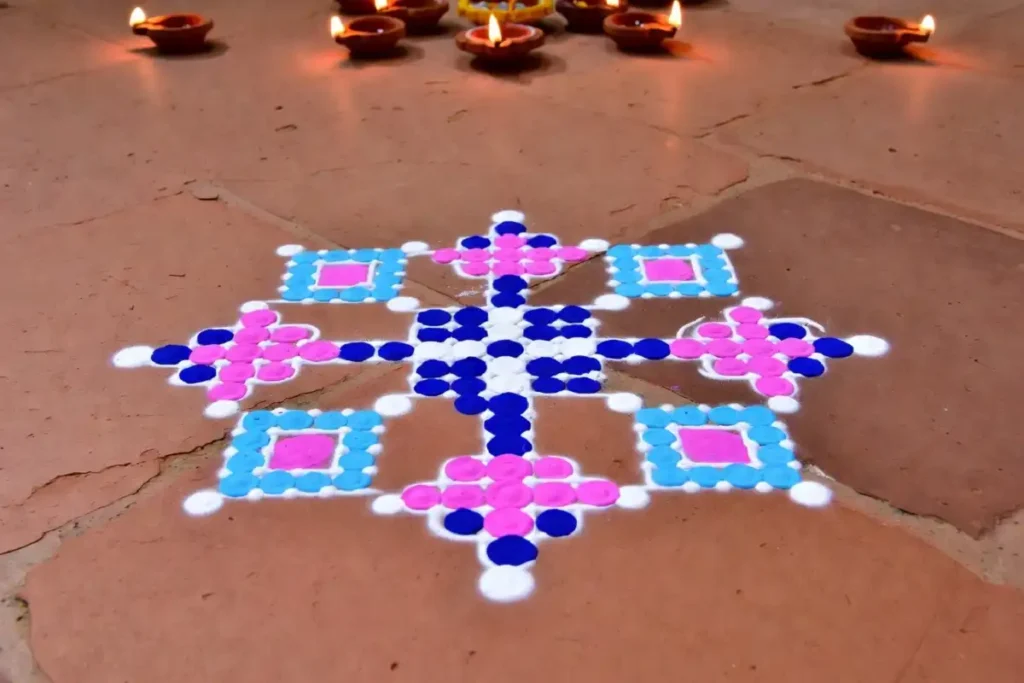
Squares, triangles, and diamonds are easy to draw freehand once you mark their corners with dots. Draw four dots in a square formation, connect them, then add diagonal crossing lines inside. Repeating this unit across the floor creates a tiled geometric pattern that looks far more complex than it is to make.
For more structured mandala-style ideas that work well as freehand references, beginner mandala rangoli designs show how circles and petal layers combine naturally.
Leaf and Vine Borders
Start at one edge of your design and draw a flowing curved line as a vine stem. At regular intervals, draw small oval leaves branching off on both sides. This border ties a larger centerpiece design together and adds movement around the outside edge. It is one of the most forgiving patterns to draw freehand because slight variation in leaf size actually improves the natural look.
Choosing Colors That Work Together
Color selection makes a significant difference in rangoli without stencil easy designs. Three to four well-chosen colors always look better than ten competing ones fighting for attention.
Reliable color combinations for beginners:
- Red, white, and yellow for a classic festive appearance
- Pink, purple, and green for a fresh, floral arrangement
- Orange, blue, and white for bold, high-contrast impact
- Yellow and green for a clean two-color design that is easy to manage
Always lay your lightest color down first as a base. Add darker shades afterward for outlines and detail work. This approach prevents muddy blending between sections and keeps each color zone crisp.
According to Smithsonian Magazine’s coverage of South Asian folk art traditions, color in traditional Indian floor patterns has long carried symbolic weight, with red linked to auspiciousness and white to purity. Keeping that meaning in mind can bring real intention to your color choices.
Festival Occasions for Freehand Rangoli
Rangoli without stencil easy drawing suits any occasion where you want to add warmth and color to your home. You do not need a major holiday to justify making one.
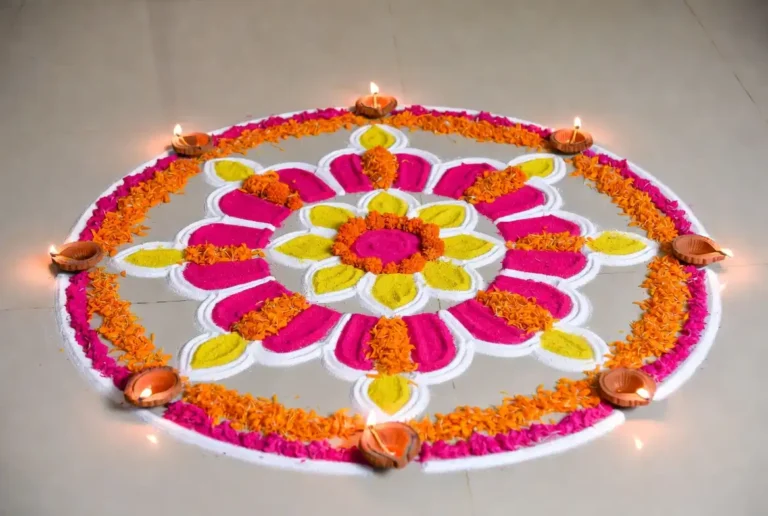
Diwali: Large, layered centerpiece designs with diyas placed along the outer edge. Peacock and floral motifs are popular choices for this festival.
Pongal and Makar Sankranti: White rice flour kolam patterns drawn in a dot-grid style are the traditional form. Simple interlocking curves on a 7×7 or 9×9 grid work well here.
Navratri: Bright, high-contrast geometric designs with bold borders. Red and gold are the dominant colors for this season.
Onam: Circular pookalam designs made with real flower petals. Draw the ring grid freehand first, then fill each section with sorted flowers by color.
Everyday use: A small kolam at the front door each morning is a South Indian tradition that takes under ten minutes once you know a few dot patterns. For compact ideas suited to tight entry spaces, small traditional rangoli patterns offer size and layout references worth bookmarking.
Practical Tips to Improve Your Freehand Skills
Rangoli without stencil easy progress comes faster when you practice with intention rather than just repeating the same pattern. Small habits make a noticeable difference over time.
- Sketch on paper first. Drawing your pattern on paper before moving to the floor removes pressure and helps you plan spacing.
- Use chalk to outline. A light chalk sketch on the floor gives you a removable guide you can refine before adding color.
- Always work from the center outward. This keeps the design balanced and makes it easier to manage the available space.
- Hold your cone close to the floor. A lower cone position gives you more control over line width and powder placement.
- Fill color section by section. Avoid moving over finished areas to prevent accidental smudging.
For designs where compact size and clean symmetry matter most, small symmetry rangoli ideas show how much impact a tight, well-balanced pattern can carry.
Common Mistakes and Simple Fixes
Even with good preparation, small things can go wrong with rangoli without stencil easy work. Knowing how to correct common errors keeps the process relaxed and enjoyable.
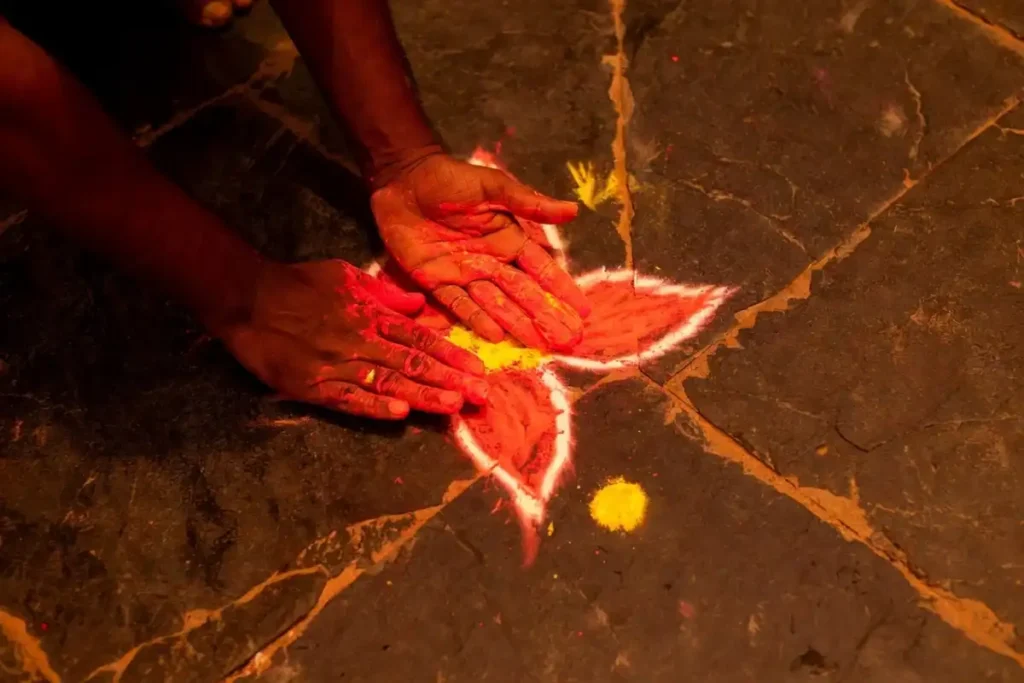
Uneven line weight: Use a dry fingertip or a small brush to gently push the edge of a thick line back into shape. This works better than trying to add more powder on top.
Color bleeding between sections: This almost always happens on a damp floor. Make sure the surface is fully dry before you begin any design.
Off-center patterns: Place a central dot before drawing anything else. Check that your first ring of shapes is evenly spaced before adding outer layers.
Running out of floor space: Mark your outermost border with chalk before filling in the center. This one step prevents the most common sizing mistake beginners make.
Colors looking flat and dull: Add a thin layer of a slightly darker shade along the inner edge of each colored section. This creates a subtle gradient that adds visible depth without extra complexity.
How to Make Your First Rangoli Without a Stencil
If you are ready to try rangoli without stencil easy drawing for the first time, this simple step-by-step gives you a clear starting point.
- Choose a clean, dry section of floor near your entrance or in a clear open space.
- Mark a center dot with chalk, then add a 5×5 grid of dots around it at even spacing.
- Draw six curved lines outward from your center dot to form a basic flower spoke shape.
- Connect the tips of each spoke with a gentle curve to complete your petals.
- Outline the full flower with a thin border of white powder to define the shape.
- Fill alternate petals with two contrasting colors, keeping the fill even and close to the outline.
- Add a simple dot or small petal at each outer corner of the grid to frame the full design.
This pattern takes about fifteen to twenty minutes for a first attempt and produces a complete, attractive result even without any prior experience.
Rangoli Without Stencil for Kids and Families
Rangoli without stencil easy drawing is an excellent activity for children and families to do together. It does not require sharp tools or toxic materials, and the mess is easy to clean up after.
Younger children can fill in color sections while older children or adults draw the outline. This division of tasks keeps everyone involved and makes the activity feel collaborative. Starting with a very simple petal flower on a small section of floor gives children an early success that builds their enthusiasm for the next attempt.
Using colored rice instead of powder is a child-friendly option that is safer to handle and easier to sweep up after the design is finished.
Seasonal Ideas for Rangoli Without a Stencil
Rangoli without stencil easy designs can reflect the season as much as the specific festival. Adjusting your motifs and color palette to match the time of year keeps the practice feeling fresh.
In spring, light floral patterns with pink, yellow, and soft green work well. In monsoon months, leaf and vine motifs feel appropriate and are simple to draw freehand. In autumn festival season, bold warm colors like orange, red, and gold suit the celebratory mood. In winter, white and blue geometric patterns create a clean, cool visual that contrasts nicely with indoor lighting.
Seasonal adaptation is one of the joys of rangoli without stencil easy work. There is no fixed rulebook, and your design can evolve with what feels right for the day.
The Cultural Meaning Behind Freehand Rangoli
Understanding a little background enriches the experience of rangoli without stencil easy practice. Rangoli is one of the oldest living folk art traditions in India, with roots across different regions under different names including kolam, alpana, muggu, and aripana.
Each regional style has its own visual vocabulary. South Indian kolam relies heavily on the dot grid method. Bengali alpana uses curved white line work on red floors. Rajasthani rangoli favors bright colors and peacock imagery. All of these traditions share one thing: they were drawn freehand, passed down from one generation to the next through direct practice rather than printed templates.
According to National Geographic’s documentation of living art traditions, floor art practices like rangoli represent one of the most direct connections between daily home life and cultural heritage in South Asia. Practicing rangoli without stencil easy methods at home connects you to that long tradition in a real and personal way.
FAQs
Is rangoli without stencil easy enough for a first-time beginner?
What is the best material to use for rangoli without a stencil at home?
How do I keep my freehand rangoli from smudging or spreading?
What is the simplest pattern for rangoli without stencil easy drawing?
How many times should I practice before my rangoli looks clean and even?
Can I use rangoli without stencil easy methods on outdoor surfaces?
Conclusion
Drawing rangoli without stencil easy freehand methods is a skill that grows naturally with practice. You start with a few dots, connect them into petals, and build from there. The materials are affordable, the patterns are adaptable, and every attempt teaches you something useful. Whether you are marking a festival, decorating your doorstep for the morning, or exploring a new creative outlet, freehand rangoli gives you a direct and personal connection to one of the oldest living art traditions in South Asia. Start small, be patient with yourself, and watch your confidence grow with every design you complete.