How to Make Easy Rangoli Design: A Beginner-Friendly Step-by-Step Guide
Rangoli has been part of my life for as long as I can remember. Growing up in Kolkata, I watched my mother and grandmother draw Rangoli at our doorway every morning before sunrise. I would sit quietly on the steps and watch the patterns take shape dot by dot, curve by curve, and color by color. I didn’t know it then, but those peaceful mornings were where my love for Rangoli began.
For the past eight years, I have been drawing, trying, photographing, and documenting Rangoli designs. Some have been simple patterns that took only a few minutes, while others required much more patience and practice. Through all those years, I’ve learned that you don’t need to be an expert artist to make a beautiful Rangoli. In fact, some of my favorite designs are the simplest ones.
If you’re wondering how to make easy Rangoli design, you’re in the right place. In this guide, I’ll show you how to create a simple Rangoli step by step, from preparing the floor and drawing the first dots to adding colors and finishing touches. I’ll also share some of the beginner tips I’ve learned from years of making and documenting Rangoli.
What Is Rangoli?
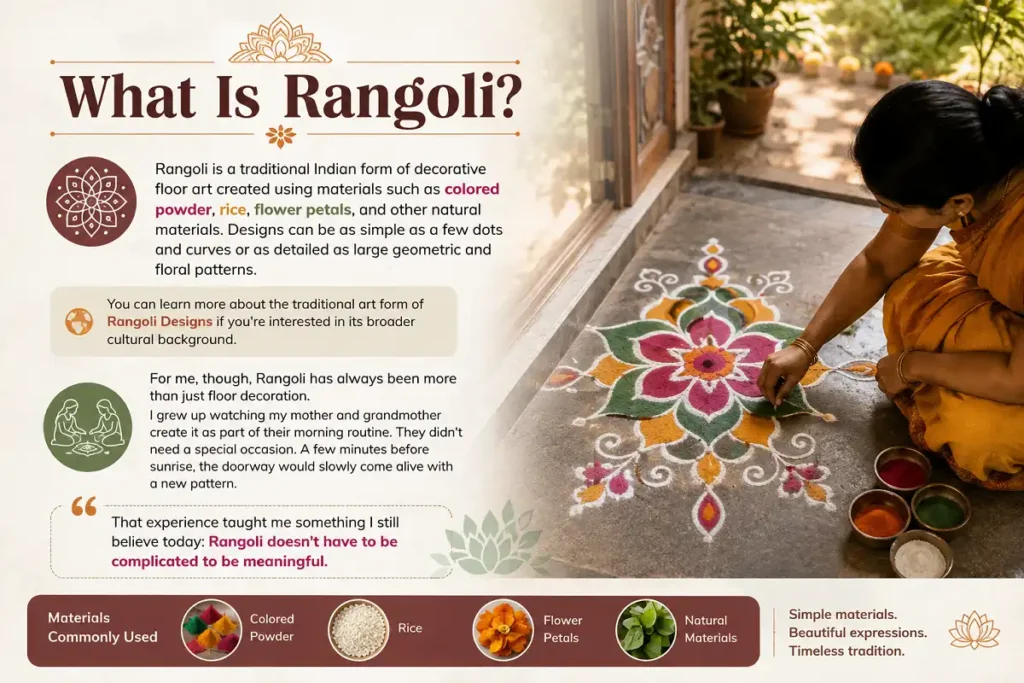
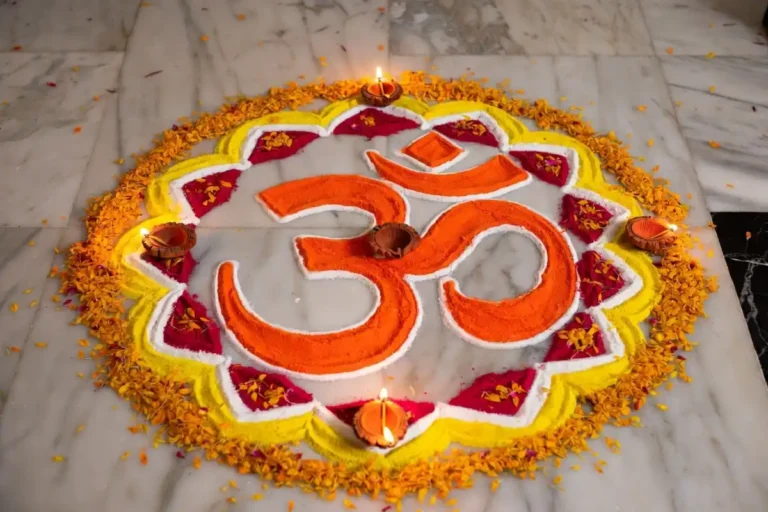
Rangoli is a traditional Indian form of decorative floor art created using materials such as colored powder, rice, flower petals, and other natural materials. Designs can be as simple as a few dots and curves or as detailed as large geometric and floral patterns.
You can learn more about the traditional art form of Rangoli Designs if you’re interested in its broader cultural background.
For me, though, Rangoli has always been more than just floor decoration. I grew up watching my mother and grandmother create it as part of their morning routine. They didn’t need a special occasion. A few minutes before sunrise, the doorway would slowly come alive with a new pattern.
That experience taught me something I still believe today: Rangoli doesn’t have to be complicated to be meaningful.
What You Need to Make an Easy Rangoli
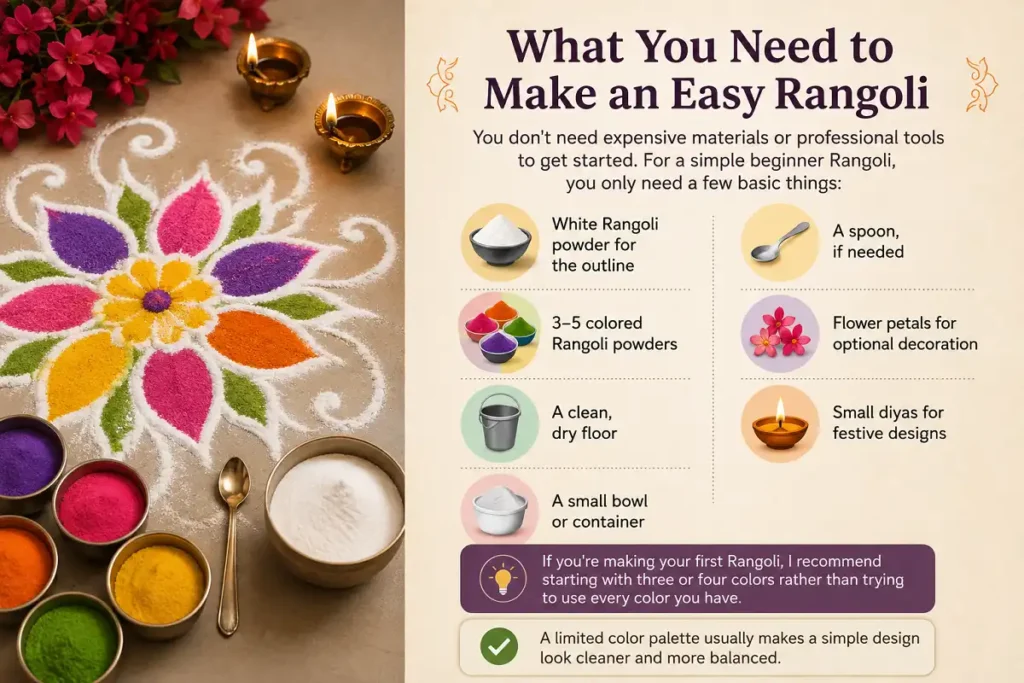
You don’t need expensive materials or professional tools to get started. For a simple beginner Rangoli, you only need a few basic things:
- White Rangoli powder for the outline
- 3–5 colored Rangoli powders
- A clean, dry floor
- A small bowl or container
- A spoon, if needed
- Flower petals for optional decoration
- Small diyas for festive designs
If you’re making your first Rangoli, I recommend starting with three or four colors rather than trying to use every color you have.
A limited color palette usually makes a simple design look cleaner and more balanced.
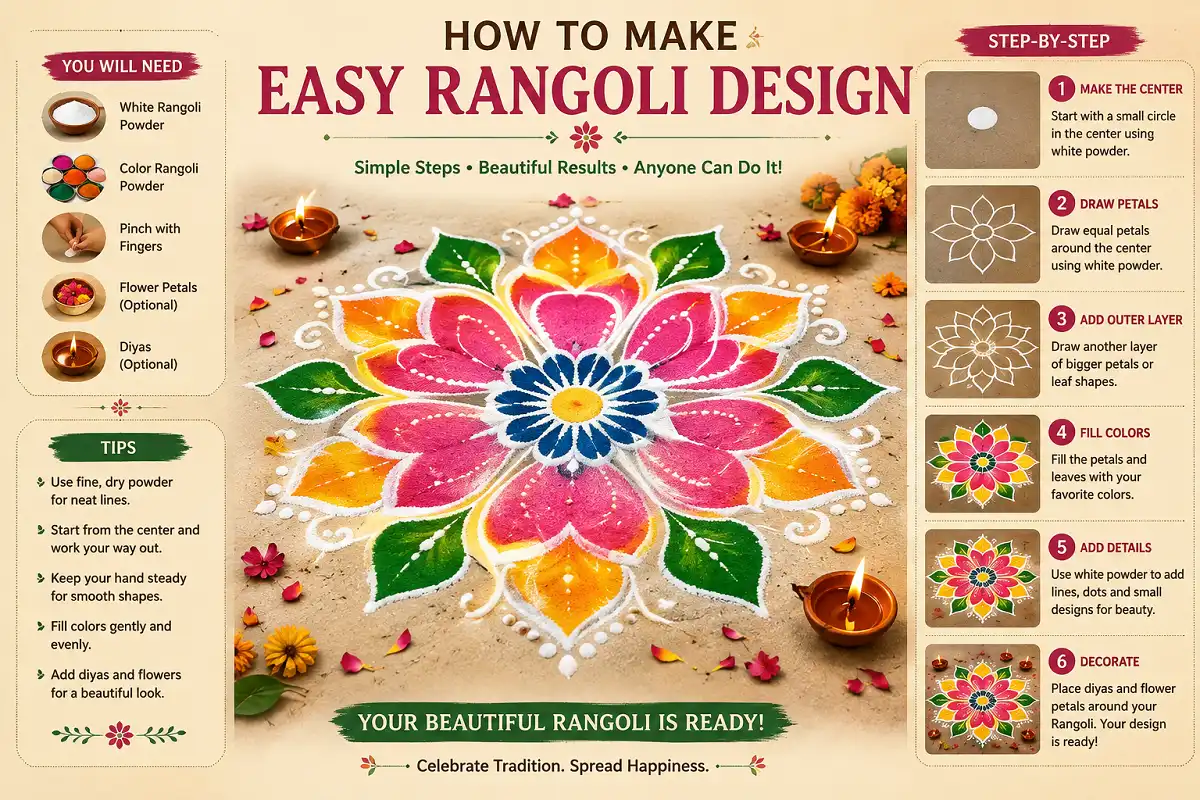
How to Make Easy Rangoli Design Step by Step
When I started paying more attention to Rangoli patterns, I realized that many complicated-looking designs are actually built from a few simple shapes.
Circles, dots, curves, petals, and leaves can be combined in countless ways.
That’s exactly the approach we’ll use here.
Choose and Clean Your Space
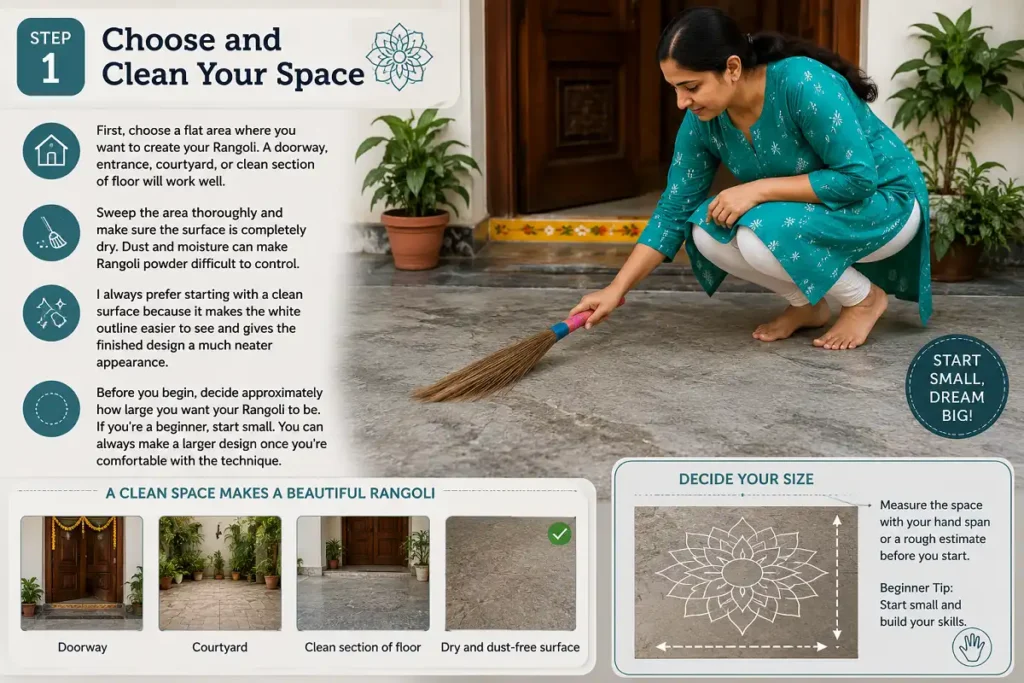
First, choose a flat area where you want to create your Rangoli. A doorway, entrance, courtyard, or clean section of floor will work well.
Sweep the area thoroughly and make sure the surface is completely dry. Dust and moisture can make Rangoli powder difficult to control.
I always prefer starting with a clean surface because it makes the white outline easier to see and gives the finished design a much neater appearance.
Before you begin, decide approximately how large you want your Rangoli to be. If you’re a beginner, start small. You can always make a larger design once you’re comfortable with the technique.
Mark the Center
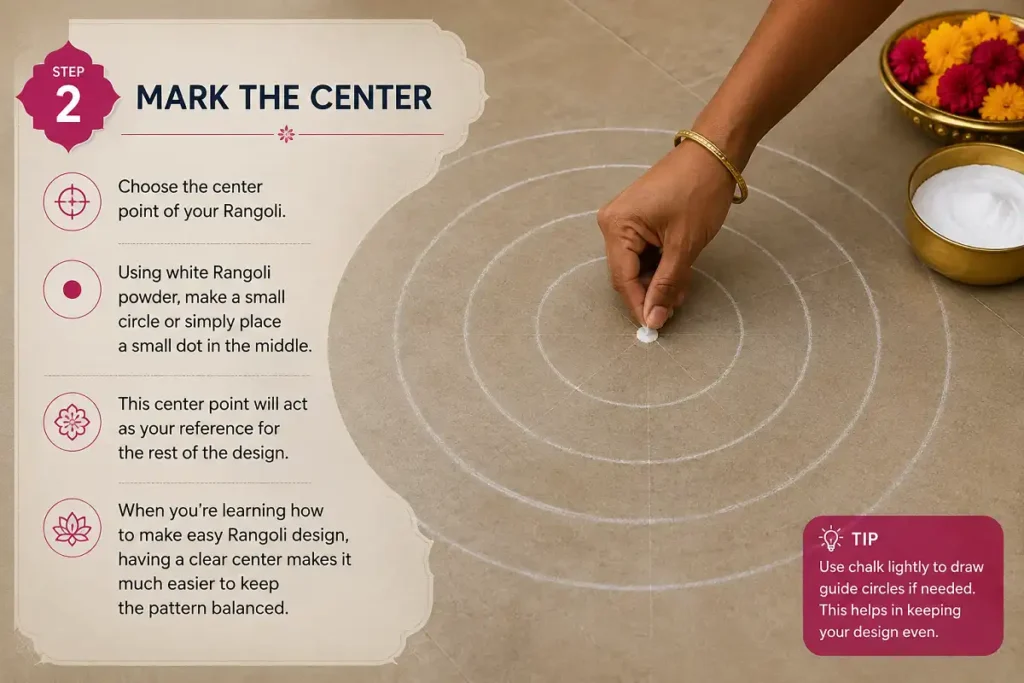
Choose the center point of your Rangoli.
Using white Rangoli powder, make a small circle or simply place a small dot in the middle.
This center point will act as your reference for the rest of the design.
When you’re learning how to make easy Rangoli design, having a clear center makes it much easier to keep the pattern balanced.
Add Guide Dots
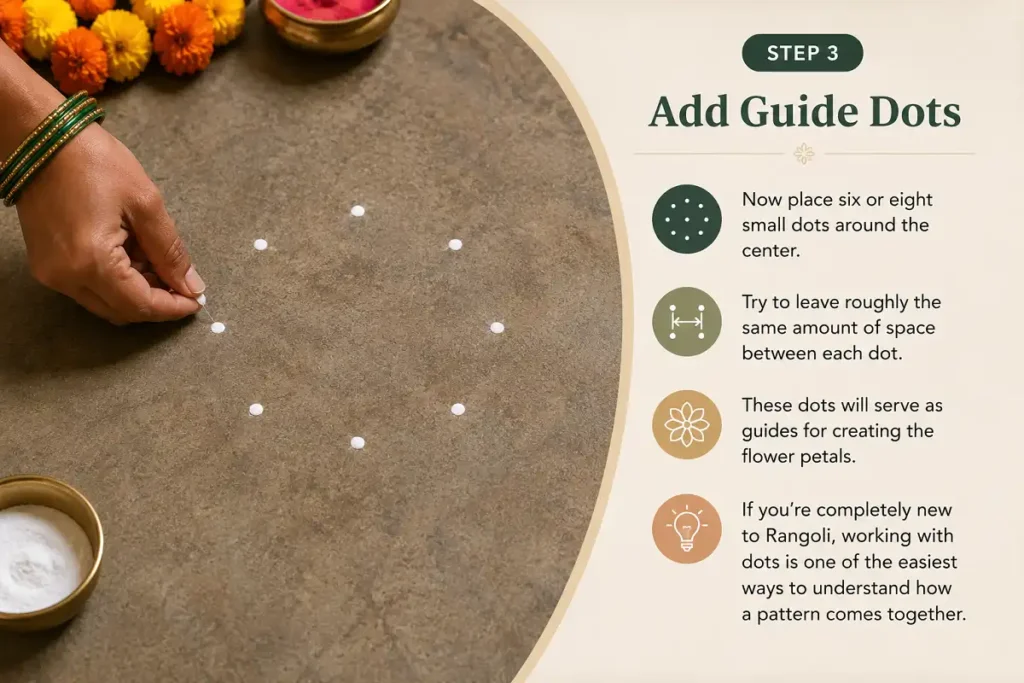
Now place six or eight small dots around the center.
Try to leave roughly the same amount of space between each dot. Don’t worry about making the measurements perfect. With practice, you’ll naturally become better at judging the spacing.
These dots will serve as guides for creating the flower petals.
If you’re completely new to Rangoli, working with dots is one of the easiest ways to understand how a pattern comes together.
Draw the Main Flower Pattern
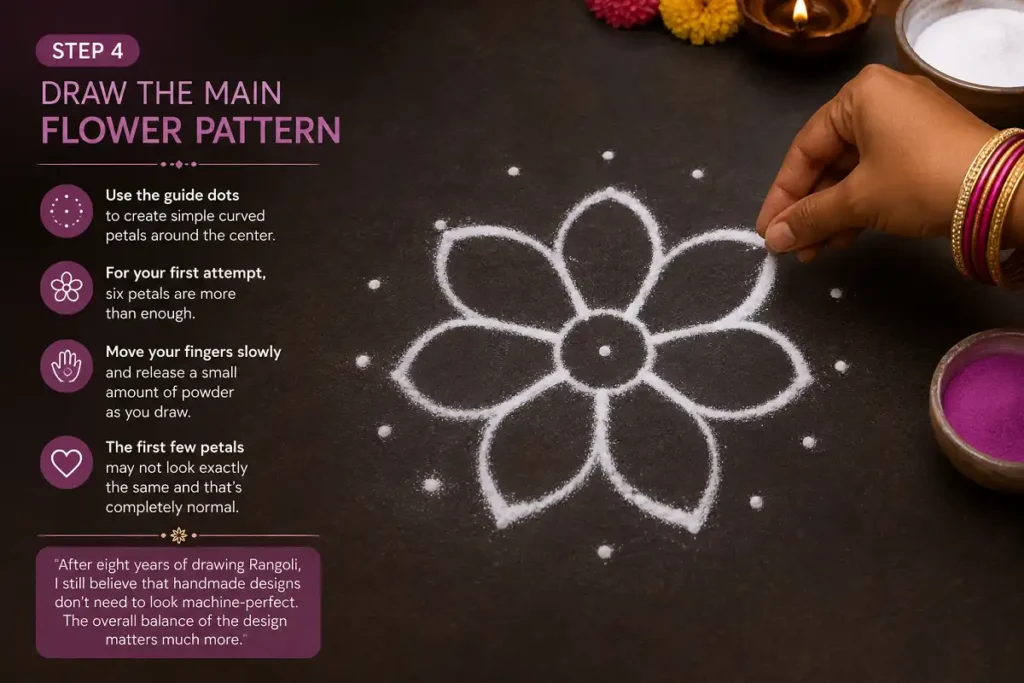
Use the guide dots to create simple curved petals around the center.
For your first attempt, six petals are more than enough. Once you’re comfortable, you can try eight or even ten.
Move your fingers slowly and release a small amount of powder as you draw.
The first few petals may not look exactly the same and that’s completely normal. After eight years of drawing Rangoli, I still believe that handmade designs don’t need to look machine-perfect.
The overall balance of the design matters much more.
Add Simple Details
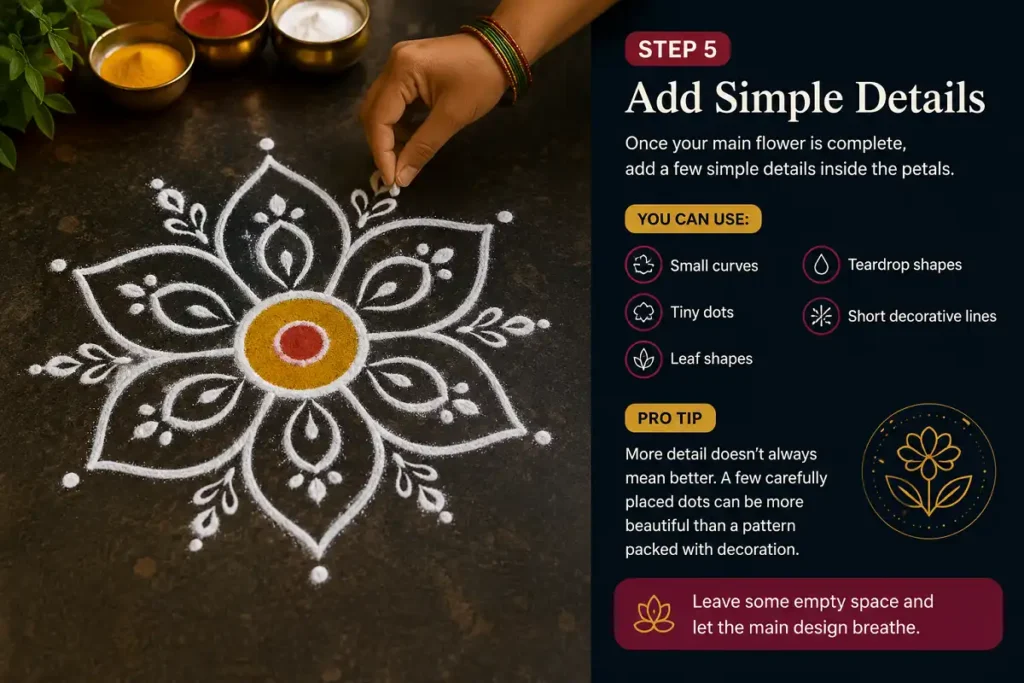
Once your main flower is complete, add a few simple details inside the petals.
- Small curves
- Tiny dots
- Leaf shapes
- Teardrop shapes
- Short decorative lines
This is where you can begin adding your own style.
One thing I’ve learned from years of creating and photographing Rangoli is that more detail doesn’t necessarily make a design better. Sometimes a few carefully placed dots can look more beautiful than a pattern packed with decoration.
So leave some empty space and let the main design breathe.
Fill the Rangoli With Color
Bring your Rangoli to life with a balanced palette and carefully placed colors.
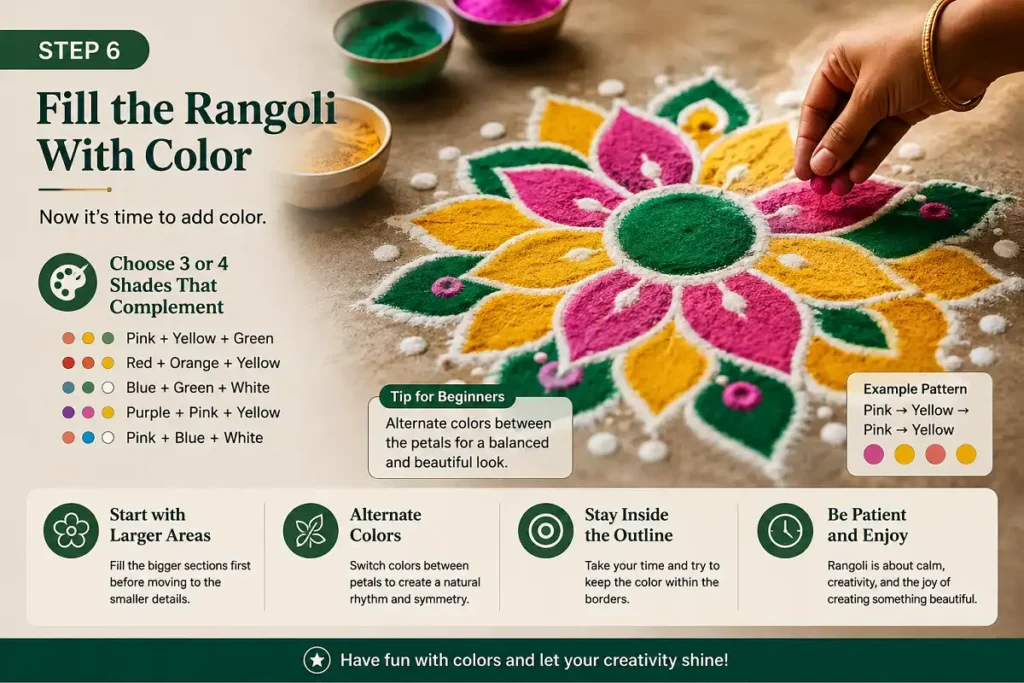
Now it’s time to add color.
Choose three or four shades that complement one another. Some easy combinations include:
Start by filling the larger areas and then work on the smaller details.
One simple technique I often recommend to beginners is alternating colors between the petals.
This creates a balanced rhythm without requiring a complicated pattern.
Take your time while filling the colors and try to stay inside the outline as much as possible.
Create an Outer Border
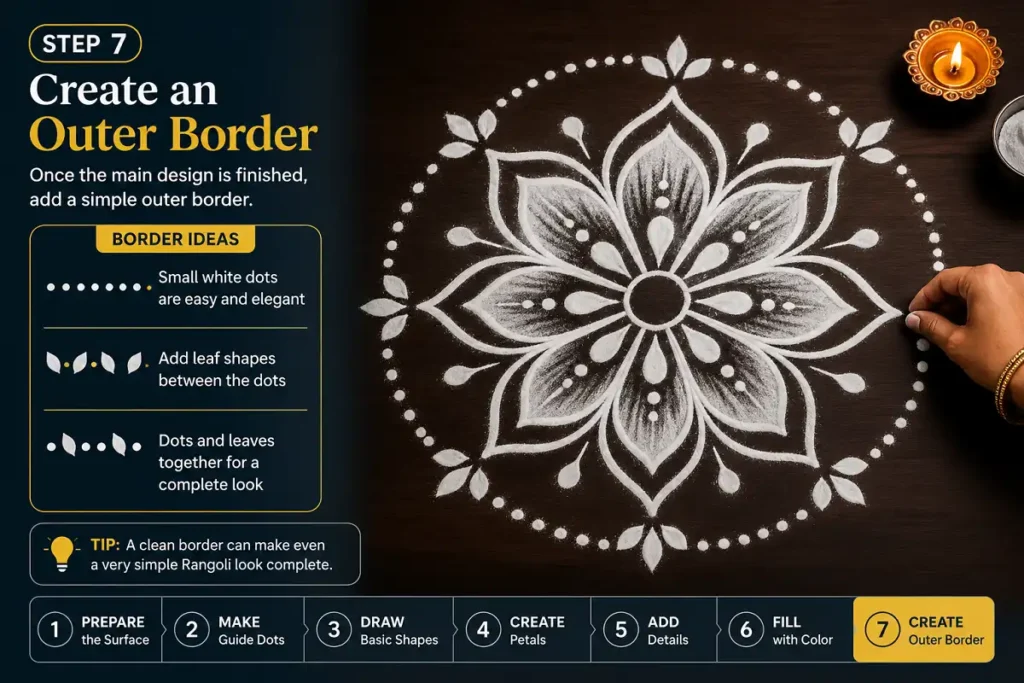
Once the main design is finished, add a simple outer border.
You can draw a larger circle around the flower or use repeated curves, leaves, or dots.
Small white dots are one of the easiest ways to decorate the border:
You can also place small leaf shapes between the dots.
A clean border can make even a very simple Rangoli look complete.
Add Diyas or Flower Petals
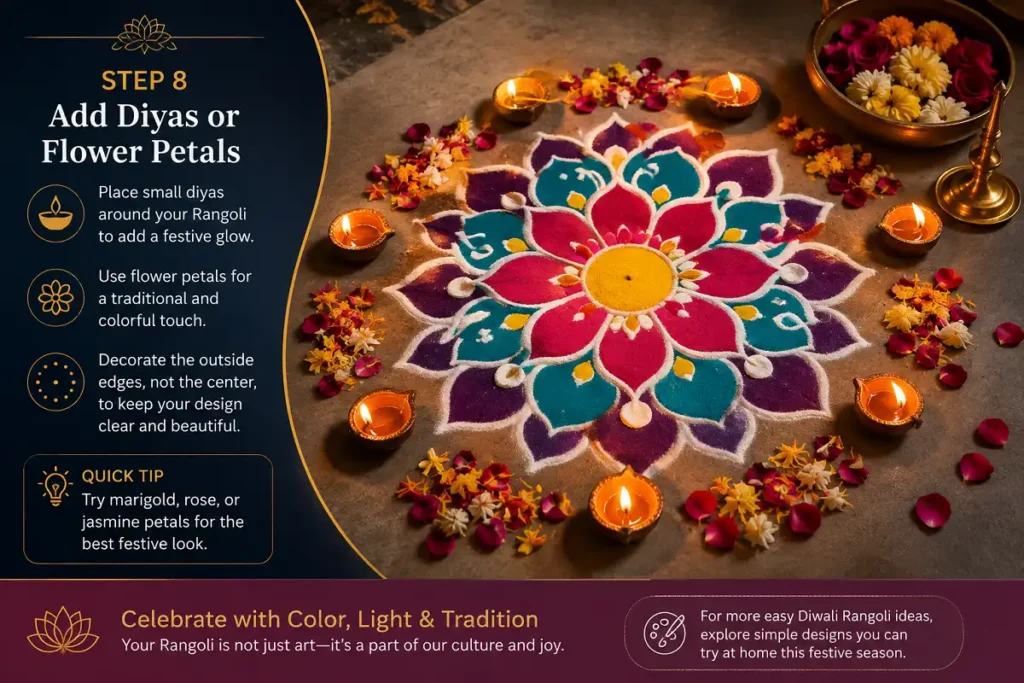
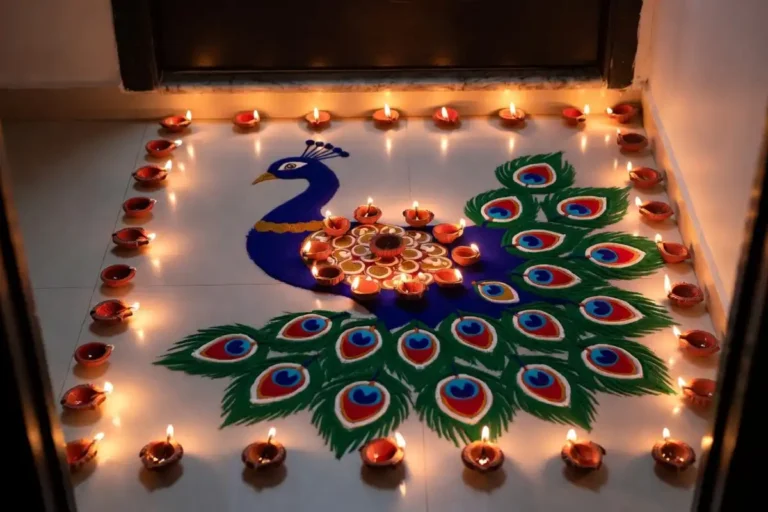
If you’re creating your Rangoli for Diwali or another celebration, you can place a few small diyas around the design.
Flower petals can also add a beautiful traditional touch.
I prefer keeping these decorations around the outside rather than covering the main Rangoli. This keeps the pattern and colors visible.
For Diwali inspiration, you can also explore these easy Diwali Rangoli designs .
Easy Rangoli Designs You Can Try Next
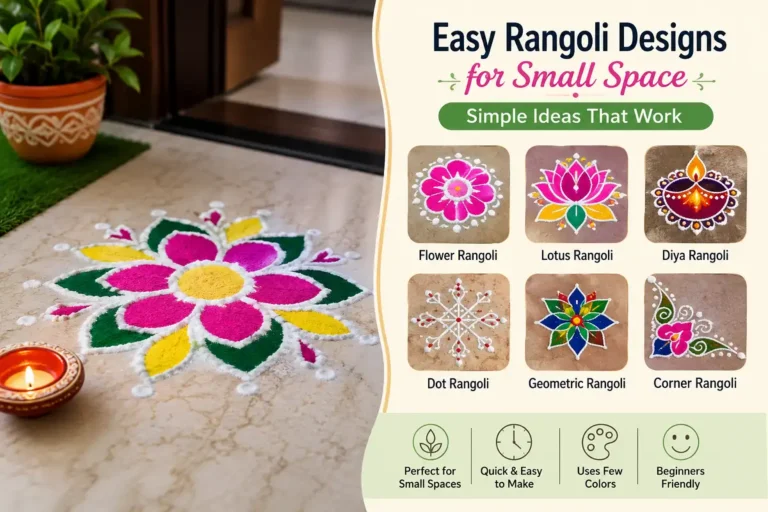
Once you’ve completed your first flower Rangoli, you can experiment with other beginner-friendly patterns.
If you want more ideas, take a look at these simple Rangoli designs for beginners .
Simple Flower Rangoli
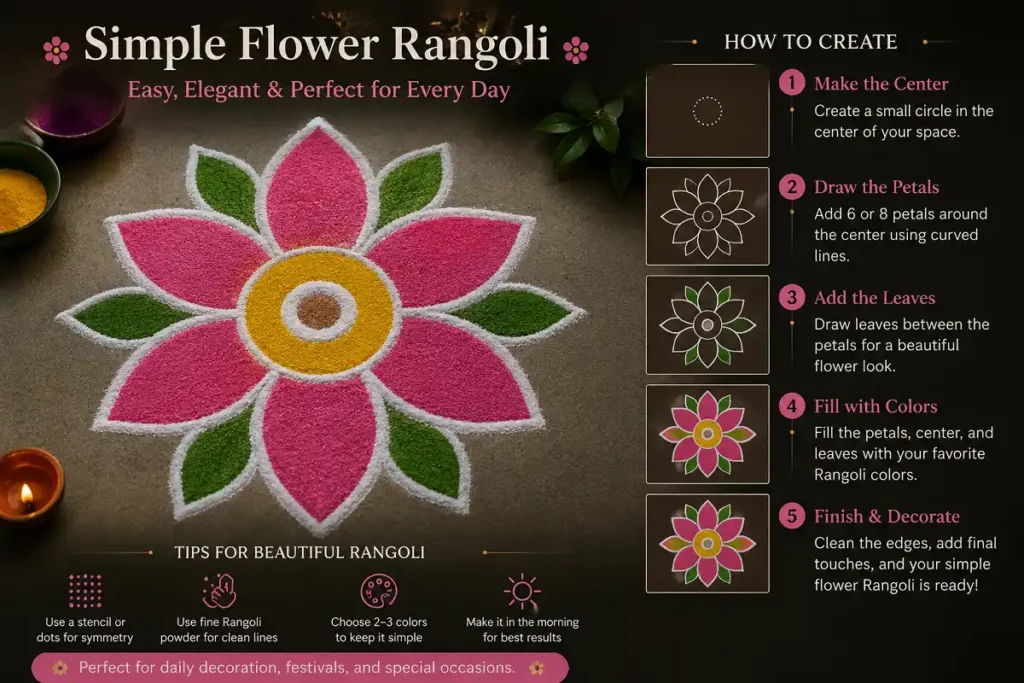
A flower pattern is one of the easiest designs to start with. Create a center circle, add six or eight petals, and fill them with two or three colors.
You can also explore more simple daily flower Rangoli designs once you’re comfortable with the basic pattern.
Dot Rangoli
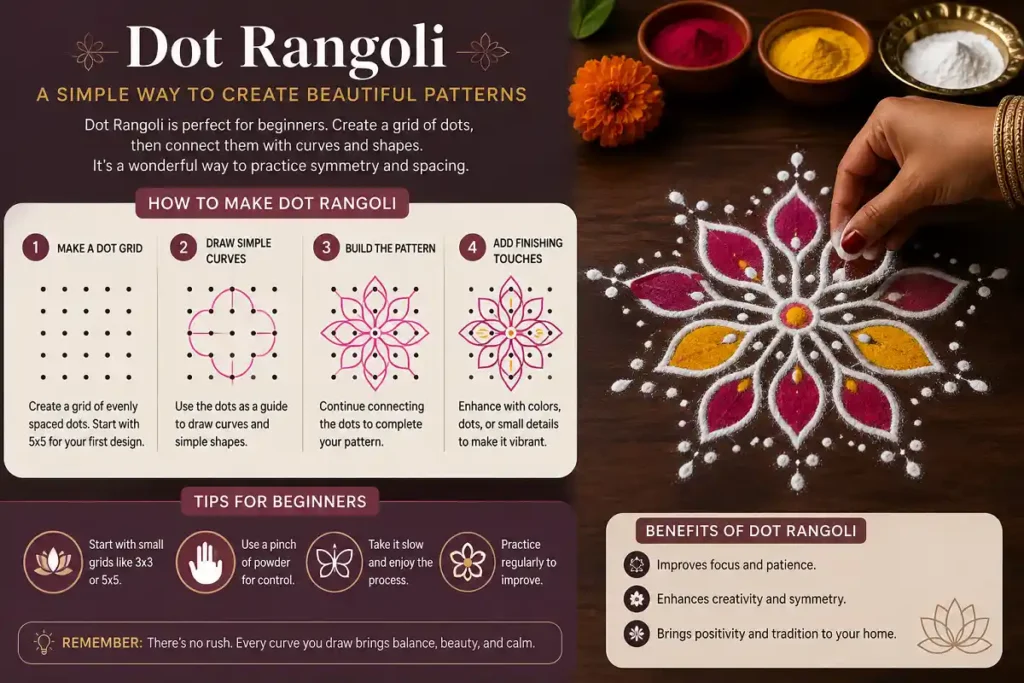
Dot Rangoli is another excellent choice for beginners.
Create a grid of evenly spaced dots and connect them using curves and simple shapes. This type of Rangoli is particularly useful for practicing symmetry and spacing.
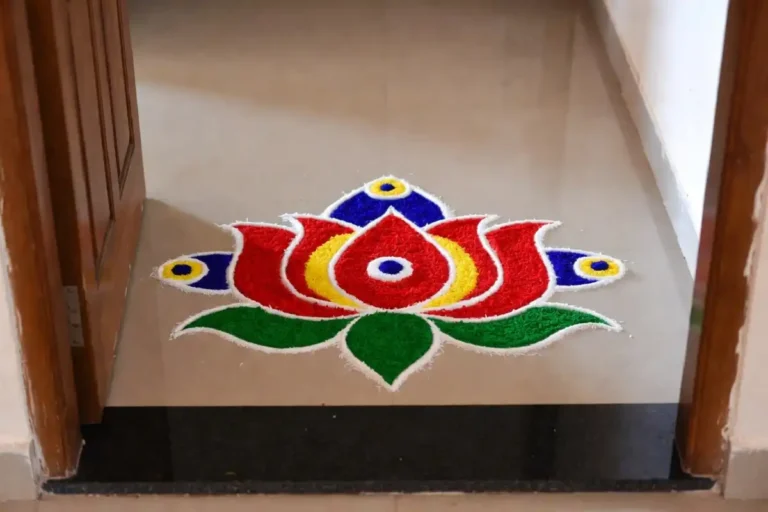
Lotus Rangoli
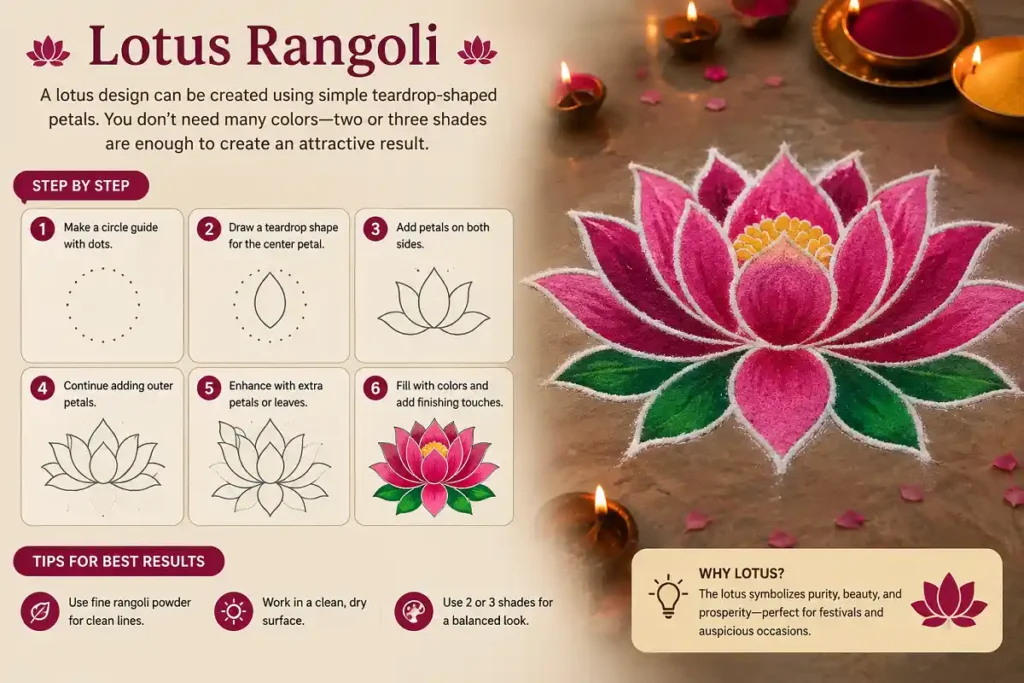
A lotus design can be created using simple teardrop-shaped petals. You don’t need many colors—two or three shades are enough to create an attractive result.
Diya Rangoli
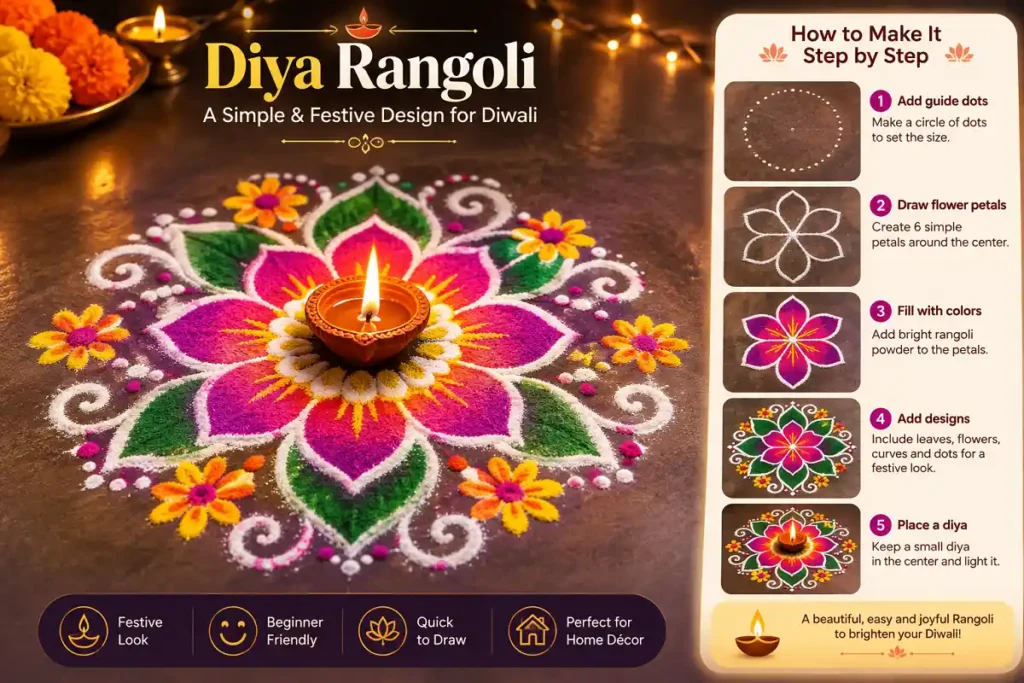
For Diwali, try creating a small diya in the center and surrounding it with flowers, dots, or curved patterns.
It’s festive without being difficult to draw.
Geometric Rangoli
If you prefer clean and modern patterns, experiment with circles, triangles, squares, and straight lines.
Once you understand the basic shapes, you can combine them to create your own geometric design.
Easy Rangoli Color Combinations
Color can completely change the appearance of a Rangoli, even when you use the same pattern.
Here are a few combinations you can try:
| Color Combination | Best For |
|---|---|
| Pink + Yellow + Green | Flower Rangoli |
| Red + Orange + Yellow | Diwali designs |
| Blue + White + Green | Simple modern designs |
| Purple + Pink + Yellow | Decorative patterns |
| Red + White + Green | Traditional designs |
You don’t have to follow these combinations exactly. Some of the nicest combinations can come from simply experimenting with the colors you already have.
My Tips for Beginners
After eight years of drawing, photographing, and documenting Rangoli, I’ve learned that beginners often make the process more difficult than it needs to be.
Here are a few things I’d recommend.
Start With a Small Design
Your first Rangoli doesn’t need to cover the entire entrance.
Start with a design around one or two feet wide. Once you become comfortable with the powder and basic patterns, gradually increase the size.
You can also explore more beginner-friendly Rangoli designs to practice different styles.
Learn Basic Shapes First
Before attempting complicated patterns, practice these simple elements:
- Circles
- Dots
- Curves
- Leaves
- Petals
- Straight lines
These shapes appear in countless Rangoli designs.
Use Less Powder
One of the most common mistakes beginners make is using too much powder.
Take a small amount between your fingers and release it slowly as you move your hand.
With practice, you’ll have much better control over the thickness of your lines.
Focus on Symmetry
You don’t need mathematical precision, but try to keep the major elements evenly spaced.
A balanced design generally looks more attractive than a complicated design with uneven spacing.
Don’t Be Afraid of Imperfections
This is something I’ve learned over the years.
When you’re drawing Rangoli by hand, small differences between petals and lines are completely natural.
If one curve isn’t perfect, don’t immediately erase the entire design. Sometimes those little imperfections are part of what makes handmade Rangoli special.
Practice Before Making the Final Design
If you’re nervous about drawing directly on the floor, practice your pattern on paper first.
You can also lightly mark guide points before creating the final outline.
How to Make Rangoli Look Beautiful Without Making It Complicated
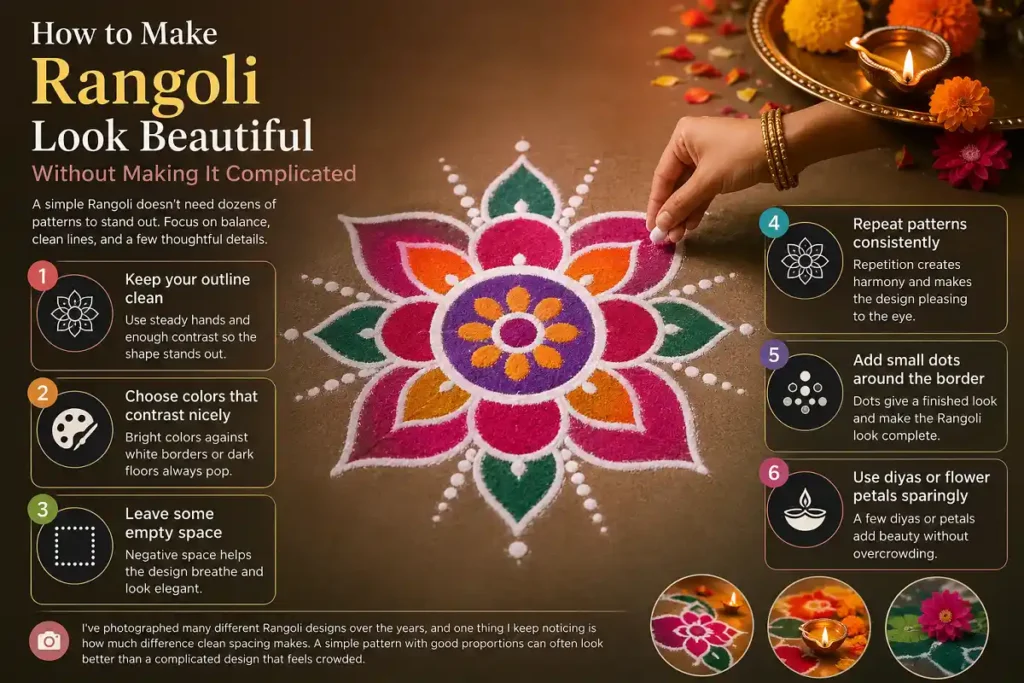
A simple Rangoli doesn’t need dozens of patterns to stand out.
Instead, focus on a few important things:
- Keep your outline clean
- Choose colors that contrast nicely
- Leave some empty space
- Repeat patterns consistently
- Add small dots around the border
- Use diyas or flower petals sparingly
I’ve photographed many different Rangoli designs over the years, and one thing I keep noticing is how much difference clean spacing makes.
A simple pattern with good proportions can often look better than a complicated design that feels crowded.
Common Mistakes to Avoid
If you’re learning how to make easy Rangoli design, these are some common mistakes worth avoiding.
Large designs are harder to control when you’re still learning.
Too much powder can make your lines thick and messy.
A limited color palette usually creates a cleaner appearance.
Uneven spacing can make your design look unbalanced.
You don’t need to decorate every empty area.
Rangoli is a handmade art form, so small imperfections are completely normal.
A Simple Rangoli Formula for Beginners
If you want a straightforward pattern to practice, follow this structure:
Once you’ve mastered this basic structure, change the number of petals, shapes, colors, and decorations to create your own designs.
Practice Is the Best Way to Improve
When I look back at the Rangoli designs I’ve created over the past eight years, one thing is clear: improvement comes from repetition.
Your first design may not look exactly like the picture you had in your mind. Your circles might be uneven, your petals may be different sizes, or a little color might spill outside the outline.
That’s okay.
Keep practicing small patterns. Try drawing the same design several times. Take photographs of your work so you can compare your progress later.
Documenting my own Rangoli has been one of the most enjoyable parts of this journey. When I look back at older photographs, I can see how my patterns, color choices, and technique have changed over time.
That’s something I hope to encourage others to do as well don’t just create Rangoli; enjoy the process and keep a record of what you make.
FAQs
Quick answers to common questions about making easy Rangoli designs.
What is the easiest Rangoli design for beginners? +
A simple flower or dot-based Rangoli is one of the easiest choices for beginners. Start with a small center circle, add six to eight petals or a basic dot pattern, and use two or three colors.
What materials do I need to make an easy Rangoli? +
You mainly need Rangoli powder, a clean and dry floor, and a few colors. White powder is useful for outlines, while three or four colored powders are enough for a simple design. You can also use flower petals or diyas for decoration.
How long does it take to make an easy Rangoli? +
A small beginner Rangoli can usually take around 10–30 minutes, depending on its size and level of detail. Simple dot and flower patterns are generally quicker to make than large, detailed designs.
Can I make Rangoli without colored powder? +
Yes. Rangoli can also be created using flower petals, colored rice, rice flour, and other suitable materials. Flower-petal Rangoli can be especially beautiful for festivals and celebrations.
Which Rangoli design is best for Diwali? +
Flower, diya, lotus, and geometric patterns are all good choices for Diwali. If you’re a beginner, start with a simple floral or diya design instead of attempting a very detailed pattern.
How can I make my Rangoli symmetrical? +
Start from the center and work outward. Guide dots are one of the easiest ways to maintain symmetry. Try to keep similar distances between petals and repeated patterns.
How do I fix a mistake in Rangoli? +
Gently remove the unwanted powder using your finger, a dry brush, or a small piece of paper. Then redraw that section. Don’t worry about minor imperfections they’re a natural part of handmade Rangoli.
Can children make easy Rangoli designs? +
Yes. Simple dots, flowers, stars, leaves, and geometric patterns are suitable for children. For younger children, larger patterns can make the activity easier and more enjoyable.
What colors look best in a simple Rangoli? +
There isn’t one perfect combination. Pink and yellow, red and orange, blue and white, or green and yellow can all work beautifully. For a small design, three or four colors are usually enough.
A Simple Rangoli, A Beautiful Tradition
After eight years of drawing, photographing, and documenting Rangoli, I’ve come to appreciate simple designs just as much as elaborate ones. Sometimes, the most beautiful Rangoli is nothing more than a few well-placed dots, smooth curves, and carefully chosen colors.
My love for this art began by watching my mother and grandmother create Rangoli at our doorway before sunrise. I was simply a child sitting on the steps, watching the patterns appear one dot at a time. Years later, I still find the same quiet joy in creating them myself.
So, if you’ve been searching for how to make easy Rangoli design, don’t feel that you need years of experience before you begin. Pick a small space, draw a few guide dots, build your pattern with simple shapes, and add colors that you enjoy.
Your first Rangoli may not be perfect and that’s completely okay. Start small, practice whenever you can, and let your own style develop naturally.
Perhaps one day you’ll look back at your early Rangoli designs and realize that what started as a simple floor pattern became a tradition of your own.