Easy Om Rangoli Design: Simple Steps for Beginners
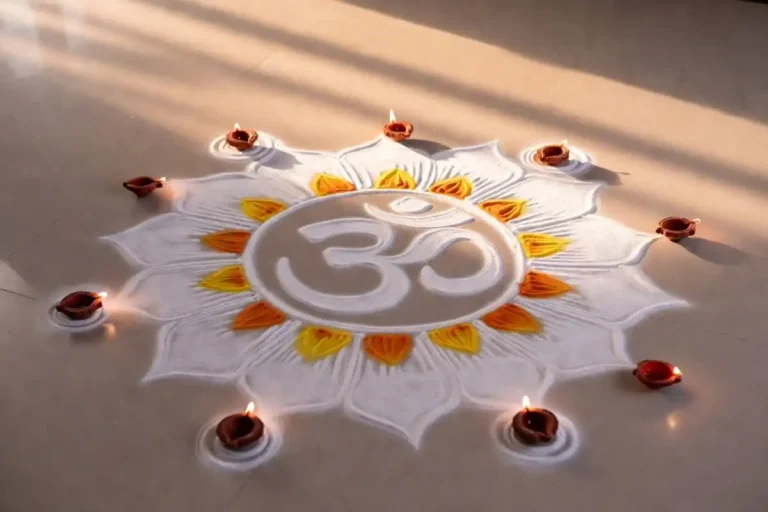
An easy om rangoli design is one of the most meaningful and beautiful ways to decorate your home entrance, pooja room, or festival space. The Om symbol holds deep spiritual significance in Hindu tradition, representing the universal sound and divine energy. Whether you are preparing for Diwali, Navratri, or a simple morning pooja, placing this sacred symbol at your threshold brings both beauty and a sense of blessing. This guide walks you through everything you need to create one with confidence, even if you are a complete beginner.
Why Choose an Om Symbol for Rangoli
The Om symbol, written as “ॐ” in Sanskrit, is one of the most recognized spiritual symbols across Hindu, Buddhist, and Jain traditions. Using it as the centerpiece of an easy om rangoli design adds layers of meaning to your decorative art. According to Britannica’s entry on Om, the syllable is considered the primordial sound of the universe and is used in prayer, meditation, and sacred rituals.
Its curved, flowing shape also makes it visually appealing as a rangoli motif. The natural arches and loops of the symbol lend themselves beautifully to powder, petal, or chalk-based rangoli styles.
Materials You Need to Get Started
Before you begin, gathering the right materials makes the process smoother and more enjoyable.
- Rangoli powder in your chosen colors (white, yellow, orange, red, and green are popular choices)
- White chalk or a rangoli pencil for sketching the outline
- A flat, clean surface such as a floor, doorstep, or wooden board
- Small funnels or cones made from paper for controlled powder application
- Flower petals, diyas, or colored sand for decorative borders (optional)
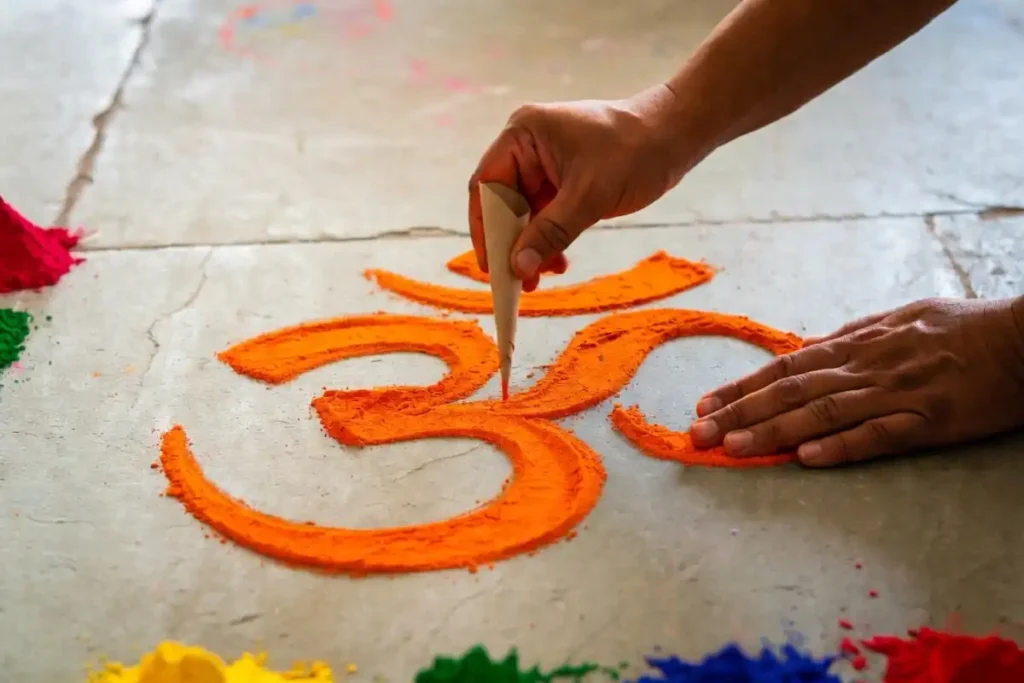
[Keyword 3] You do not need expensive tools to complete an easy om rangoli design. A paper cone filled with powder gives you enough control to trace clean lines and fill shapes neatly.
How to Draw an Easy Om Rangoli Design Step by Step
Breaking the process into clear stages makes any easy om rangoli design approachable, even for first-timers.
Step 1: Sketch the Base Outline
Start by lightly drawing the Om symbol on your surface using chalk. Do not worry about perfection at this stage. Focus on getting the proportions right. The symbol has three main curved sections, a curved tail, a small arc above, and a dot at the top. Take your time with this sketch before adding any color.
Step 2: Define the Borders
Once your sketch looks balanced, go over the outline with white rangoli powder to create a clean, visible boundary. This border acts as your guide for filling in colors and keeps sections distinct and neat.
Step 3: Fill in the Colors
Choose two or three colors that complement each other. Fill the inner curves of the symbol with one color, the background space with another, and use a contrasting shade for the dot and arc on top. Apply powder gently using your paper cone, working from the center outward to avoid smudging finished sections.
Step 4: Add a Decorative Border
Surround the Om symbol with a simple circular or petal border. Dot patterns, small flowers, or a ring of marigold petals all work beautifully. Adding a border elevates an easy om rangoli design from a simple sketch to a finished, polished piece.
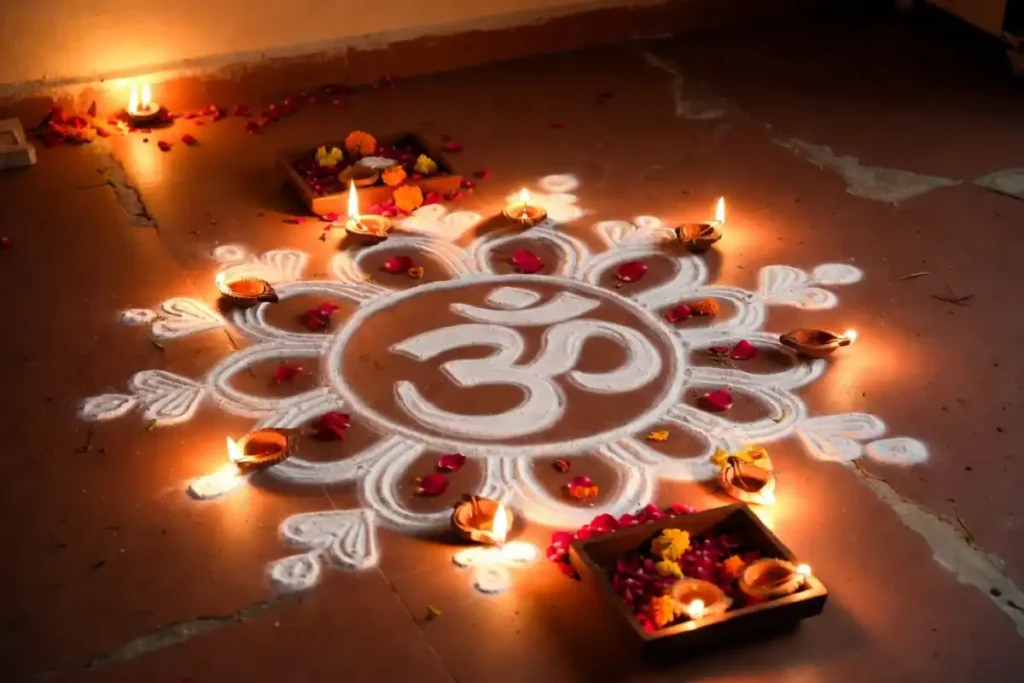
Step 5: Place Diyas or Flowers
Place small oil lamps or tea light candles around the outer border. Scatter rose or marigold petals between the lamps for a festive, complete look.
Best Color Combinations for Om Rangoli
Color choices shape the mood of your design. Here are a few combinations that work consistently well:
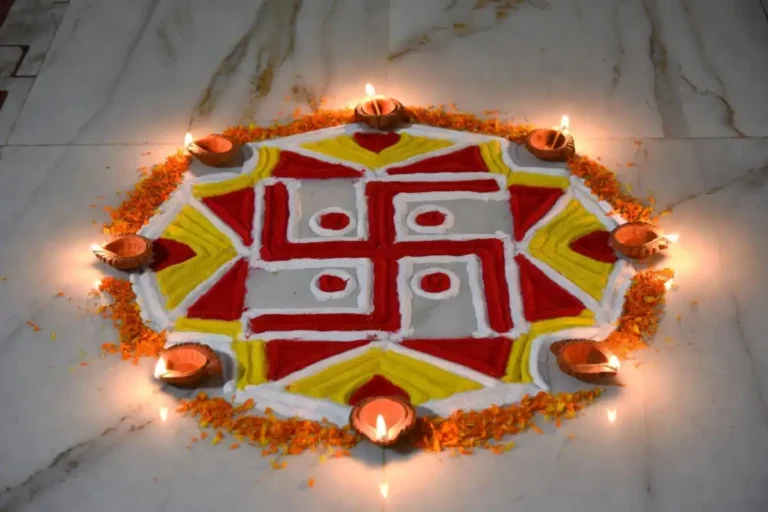
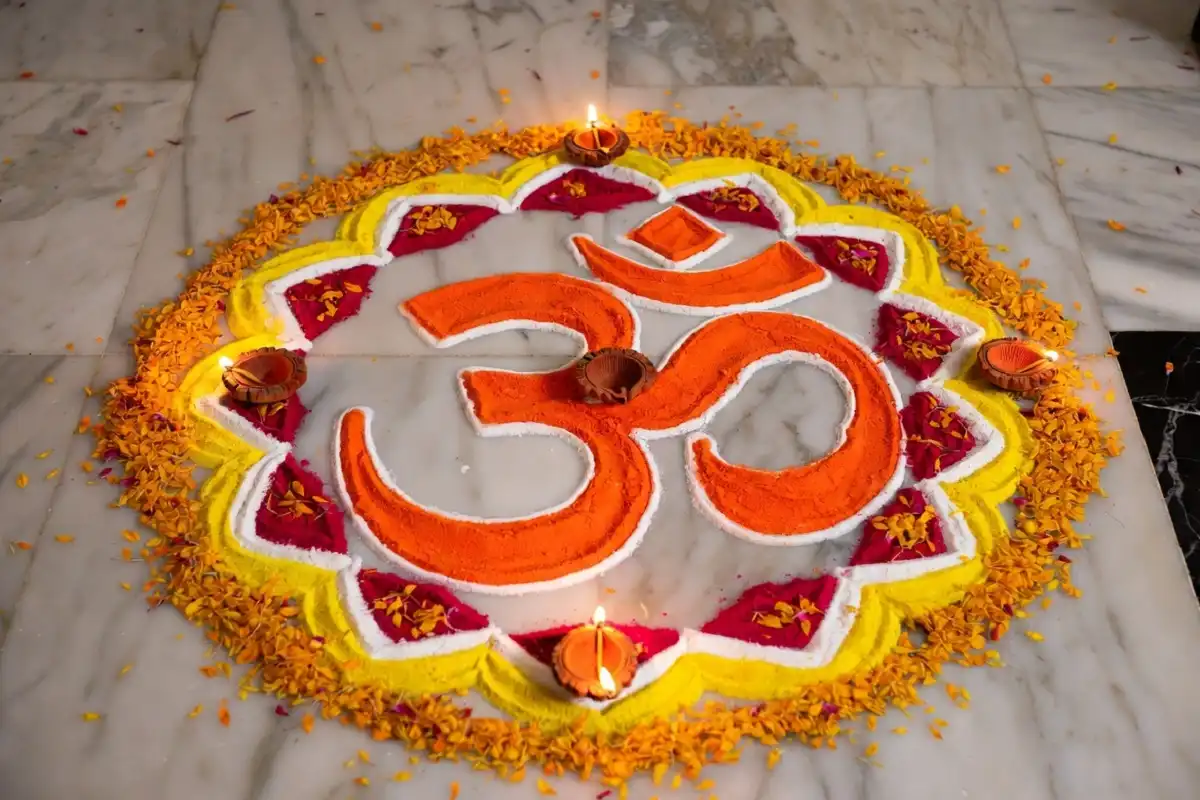
- Traditional: White Om symbol on a red background with a gold border
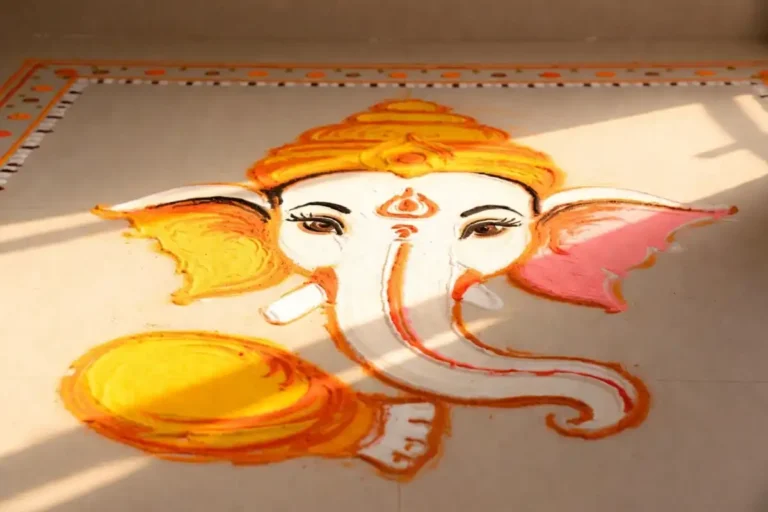
- Festival: Yellow and orange Om with green leaf accents and a white outer ring
- Minimal: White Om on a plain floor with a single ring of pink rose petals
- Vibrant: Multicolored fill with each curve in a different color, outlined in white
For a daily pooja space, a two-color easy om rangoli design in white and yellow keeps things clean and quick to recreate each morning.
Easy Om Rangoli Variations to Try
Once you are comfortable with the basic design, small variations keep the art fresh and creative.
Om With Floral Frame
Draw the Om symbol in the center and surround it with hand-drawn or stencil-based flowers. Lotus petals pointing outward from the symbol create a particularly elegant effect and tie the spiritual meaning together naturally.
Om Inside a Geometric Border
Place the Om symbol inside a square or octagonal geometric border made from dot-and-line patterns. This variation of an easy om rangoli design suits apartment entrances and smaller spaces well. For more ideas suited to compact spaces, the guide to easy rangoli designs for small space to try now has excellent inspiration.
Om With Diya Motifs
Draw small diya shapes radiating outward from the Om symbol like rays of light. Fill the diyas in orange and yellow to mimic a flame effect. This version is especially popular during Diwali and Karthigai Deepam.
Dot-Based Om Rangoli
Use the traditional dot-grid method (pulli kolam style) to construct the Om symbol. Place evenly spaced dots on your surface first and then connect them to form the symbol’s curves. This technique produces clean, consistent lines and is a great entry point for beginners.
Tips for Beginners
A few practical tips help beginners complete an easy om rangoli design with less frustration and better results:
- Practice drawing the Om symbol on paper before moving to the floor.
- Use a stencil for the first few attempts until you feel confident with the shape.
- Work in a well-lit space so you can see fine details clearly.
- Keep a dry cloth nearby to gently correct mistakes before the powder sets.
- Start with a smaller size design (around 30 to 40 cm) to keep it manageable.
For those who want to try other beginner-friendly styles alongside their Om designs, the collection at cute small rangoli designs for every occasion is worth exploring.
When to Make an Om Rangoli
An easy om rangoli design fits a wide range of occasions and does not need to be reserved for major festivals only.
- Diwali, Navratri, and Dussehra
- Janmashtami and Ram Navami
- Daily morning pooja at the entrance or altar
- Griha Pravesh (housewarming) ceremonies
- Ugadi, Gudi Padwa, and other regional New Year celebrations
The Om symbol’s universal spiritual significance means it is appropriate across all these occasions and for households of varying traditions.
Using Stencils for a Quicker Result
Stencils are a practical tool for anyone short on time or still building confidence with freehand drawing. Pre-cut Om rangoli stencils are widely available in craft stores and online. Place the stencil flat on the floor, apply powder over it, and lift carefully for a clean result in minutes.
Stencils are especially useful when you want to create an easy om rangoli design regularly, such as for a daily pooja space where you refresh the design each morning. According to Wikipedia’s article on rangoli, the art form has evolved over centuries to include both freehand and stencil-assisted techniques, both of which are considered valid expressions of the tradition.
For additional design inspiration beyond Om motifs, browsing aesthetic rangoli ideas for every home offers a broad collection of styles suited to different tastes and spaces.
FAQs
Is an om rangoli design difficult for beginners?
What colors work best for an om rangoli design?
How long does it take to make an om rangoli?
Can I use flower petals instead of rangoli powder?
How do I keep my rangoli from smudging?
Can I make an om rangoli on a wooden board for indoor use?
Conclusion
An easy om rangoli design is one of the most rewarding creative projects you can take up for home decoration and spiritual expression. The symbol itself carries centuries of meaning, and bringing it to life through color and pattern is a fulfilling experience for artists of all levels. With the right materials, a little practice, and the step-by-step guidance in this article, you can create a beautiful Om rangoli for any occasion. Start with a simple version of this easy om rangoli design, build your confidence, and explore the many variations that make this sacred art form endlessly expressive.