Rangoli Designs with Peacock Motif: Master These Beautiful Patterns
Peacock rangoli designs with peacock motif are among the most elegant and visually striking forms of Indian floor art. The graceful shape of the peacock, flowing curves, detailed feather patterns, and vibrant color combinations create endless creative possibilities for both beginners and experienced rangoli artists.
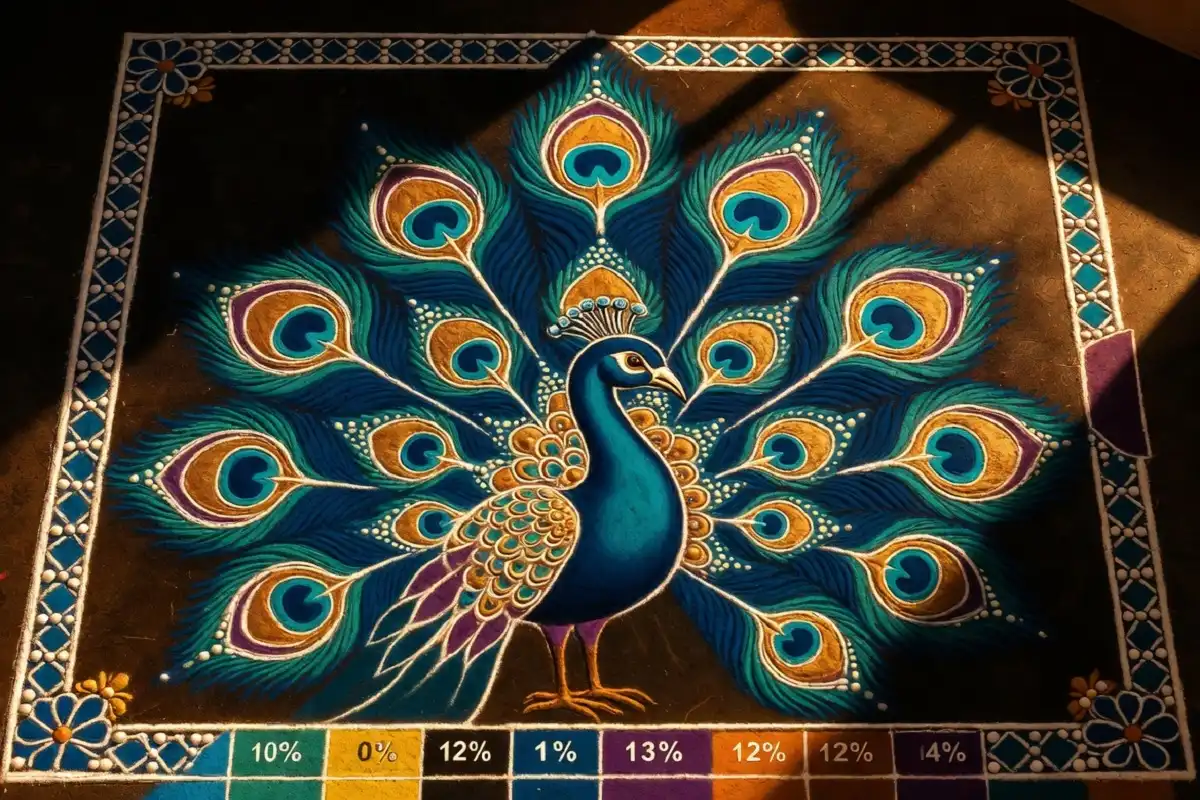
A typical peacock rangoli combines a central bird with radiating tail feathers, circular feather-eye patterns, dot work, decorative borders, and carefully layered colors. These designs can be adapted for festivals, weddings, prayer spaces, entrances, competitions, or daily artistic practice.
Why Peacocks Dominate Rangoli Art
Grace, Symmetry and Color
The peacock naturally fits the visual language of rangoli. Its graceful neck, balanced body, fan-shaped tail, and repeated feather-eye patterns provide a strong framework for symmetry, geometry, and decorative detail.
Peacock motifs are especially effective when you want a rangoli to feel elegant and ceremonial. A compact design can work beautifully near an entrance, while a larger composition can include multiple feather layers and supporting motifs.
Navratri, Diwali, weddings, and other celebrations provide excellent opportunities to use the peacock as the centerpiece of a colorful floor-art composition.
Key Elements of Peacock Rangoli Designs
A strong peacock rangoli composition becomes easier to create when the design is divided into several important visual elements. Each part should support the central bird and maintain a balanced overall appearance.
The Central Body and Head
Start with an oval or rounded body and extend the neck upward into a graceful curve. Keep the head relatively small and add a simple eye and beak. Balanced proportions help the finished composition look natural and intentional.
The Tail Feathers
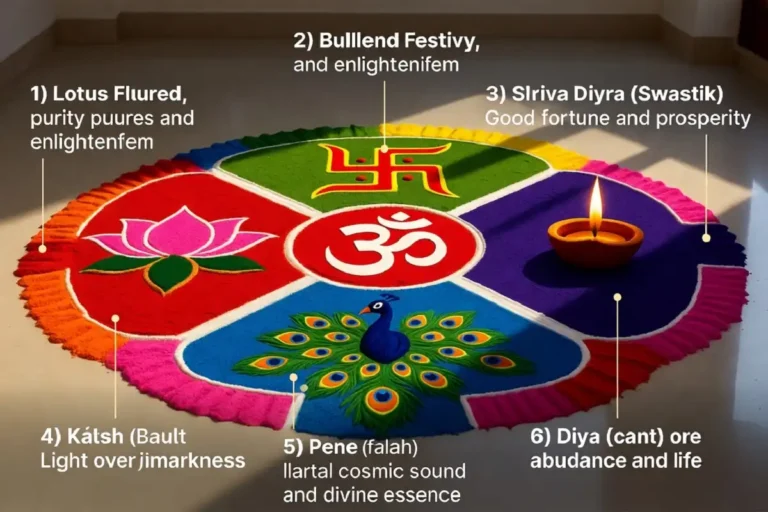
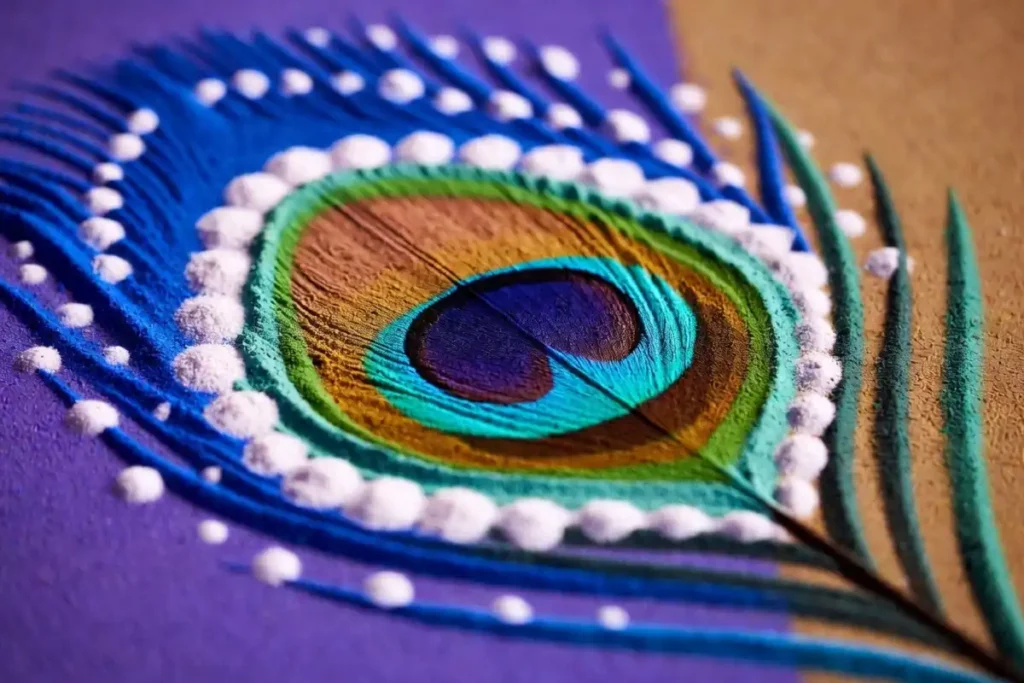
The tail is usually the strongest visual feature. Draw curved feather sections radiating outward from the body and use repeated circular eye patterns to create the characteristic peacock appearance.
For more structured circular compositions, explore big circle rangoli design ideas for festival arrangements.
Color Choices for Peacock Motifs
Blues and teals are natural choices for the body and feathers. Greens, golds, yellows, purples, reds, and white can then be introduced as accents and highlights.
Borders and Supporting Elements
Decorative borders give the composition a finished appearance. Leaves, flowers, geometric lines, repeated dots, and smaller motifs can frame the peacock without competing with it.
Dot Work and Texture
Dot work adds refinement to feather eyes, the neck, empty spaces, and borders. Uniform dots create a clean modern look, while varied sizes produce a more ornamental traditional effect.
Step-by-Step Process for Creating Peacock Rangoli Designs
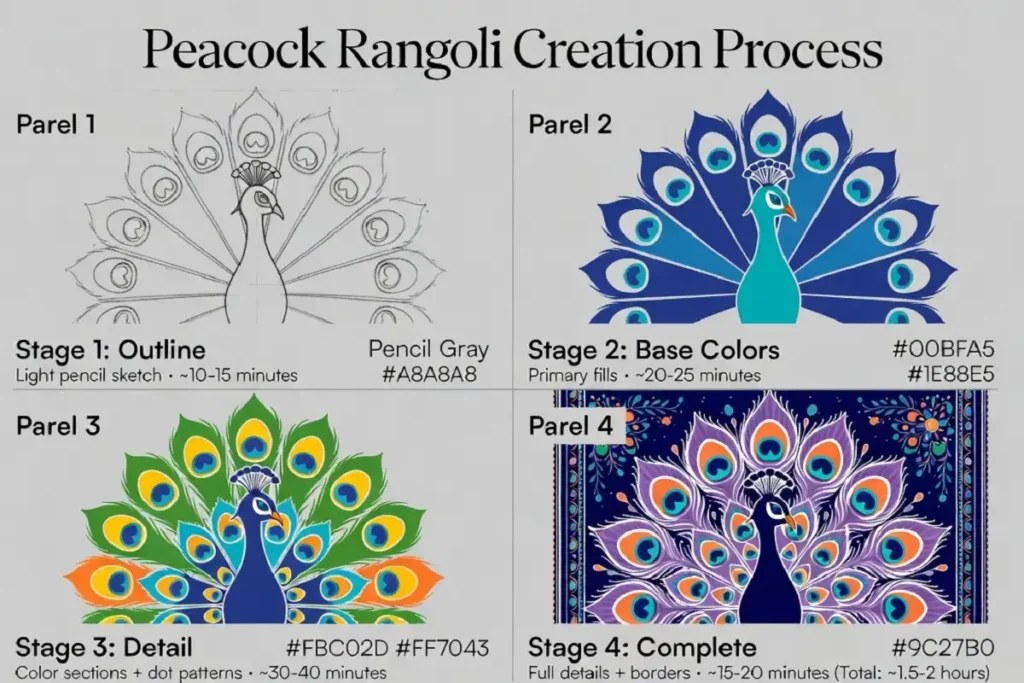
Plan Your Space and Sketch the Outline
Measure the available floor area and decide the final size. Lightly sketch the peacock body, neck, and tail fan before adding intricate details. Marking feather-eye circles early helps create a consistent framework.
Fill the Body and Head
Fill the body, neck, and head with your primary color. Blue and teal are classic choices. Leave small spaces for the eye, mouth, or other fine details if you want a crisp outlined appearance.
Create the Feather Pattern
Give each feather a dominant color and then build the central eye using contrasting circular layers. Alternating the dominant colors of neighboring feathers creates rhythm and keeps the tail visually interesting.
Add Fine Details and Dot Work
Add white, gold, or contrasting dots around feather eyes, the neck, body, and empty spaces. A small stick, toothpick, or dot-making tool can help maintain precision.
Complete Borders and Final Touches
Finish with a clean border, small flowers, repeated dots, or fine lines. Check the composition from a distance and correct uneven sections before considering the rangoli complete.
Size Variations: From Small to Grand
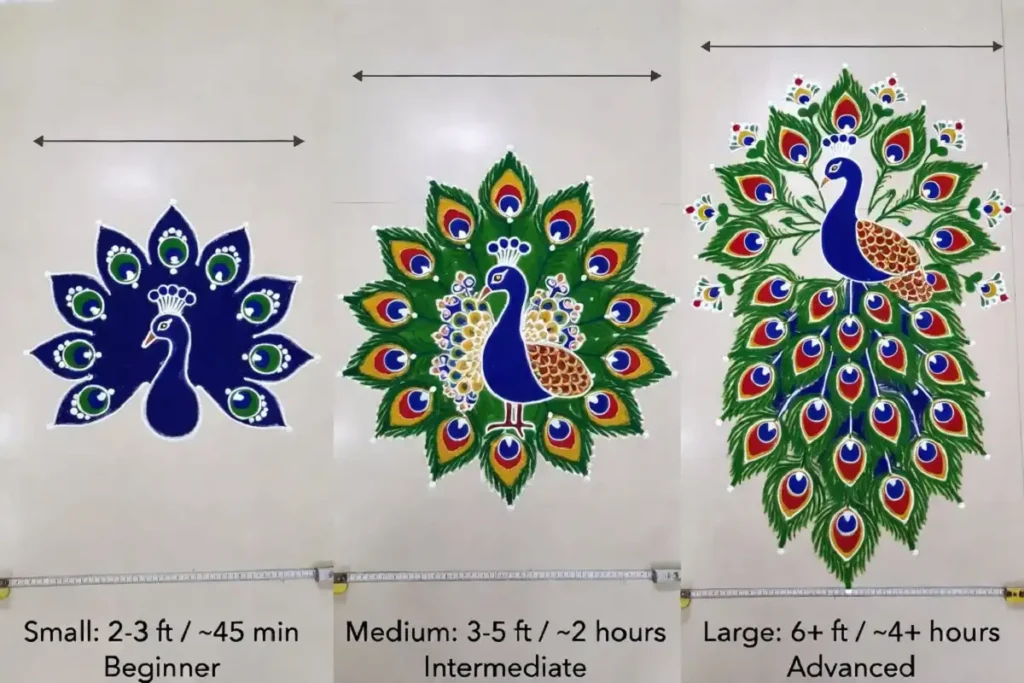
Practice and Entrances
Small designs are ideal for apartment entrances, compact spaces, and practice sessions. Simplified feather patterns allow you to focus on color transitions and dot work.
Home and Celebrations
Medium designs provide enough space for elaborate feather details, multiple color layers, decorative borders, and supporting floral or geometric elements.
Competition Rangoli
Large compositions allow advanced feather structures, multiple peacocks, landscape elements, dramatic color variation, and dimensional effects.
Beginners can first explore rangoli design easy ideas for beginners steps before moving toward larger and more detailed peacock compositions.
Best Colors and Materials for Peacock Rangoli Designs
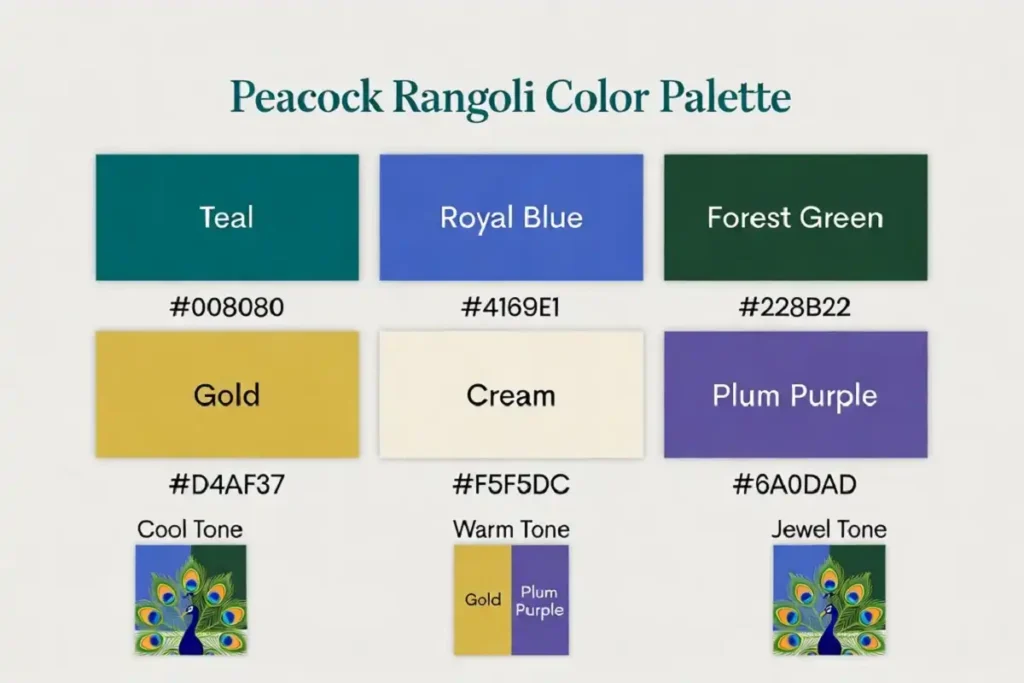
Traditional Colored Powders
Store-bought colored powders provide vibrant, consistent color and make it easier to control the palette of detailed peacock compositions.
Natural Color Alternatives
Rice flour, turmeric, indigo, vermillion, dried flower petals, and coffee powder can provide natural tones and interesting textures.
Hybrid Approach
Combining traditional powders with natural materials offers flexibility while preserving the handmade and traditional appearance of rangoli.
Seasonal and Occasion-Based Peacock Designs
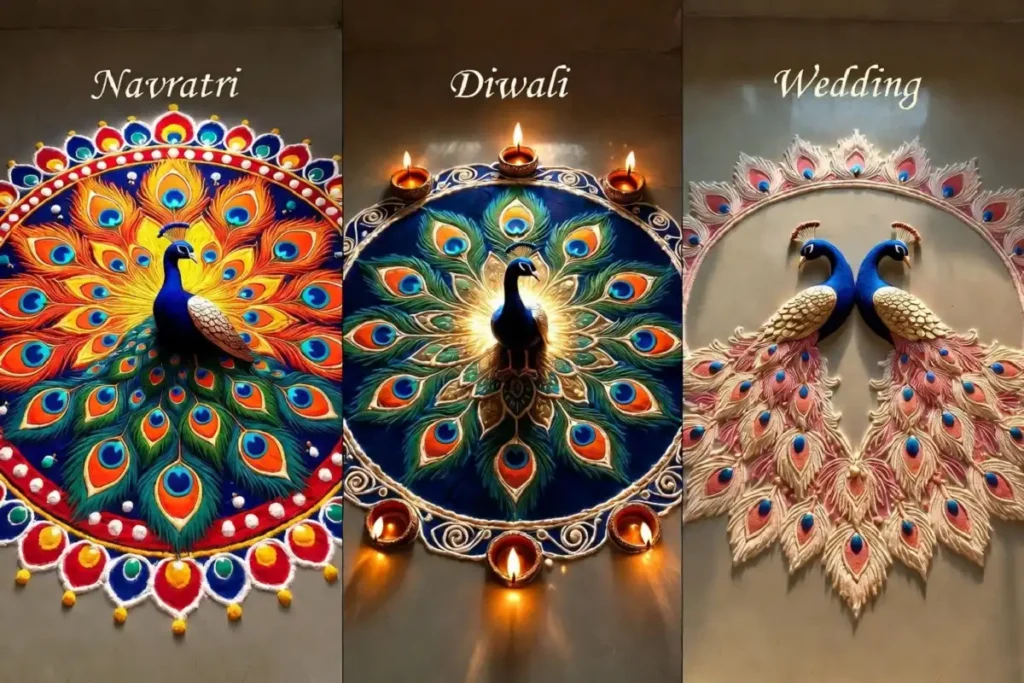
Navratri Peacock Rangoli
Use bright, energetic colors and combine the peacock with flowers, dots, and decorative elements that complement the festive atmosphere.
Diwali Peacock Designs
Gold accents, warm yellow tones, cool blues and greens, and diya motifs can give a peacock rangoli a beautiful Diwali appearance.
Wedding and Celebration Rangoli
Softer peach, rose, cream, and gold palettes create an elegant wedding look. Two facing peacocks can represent unity and togetherness.
Daily Practice Rangoli
A simple peacock with fewer feathers, basic dot work, and a clean border can become a manageable daily spiritual and artistic practice.
Common Challenges and Solutions
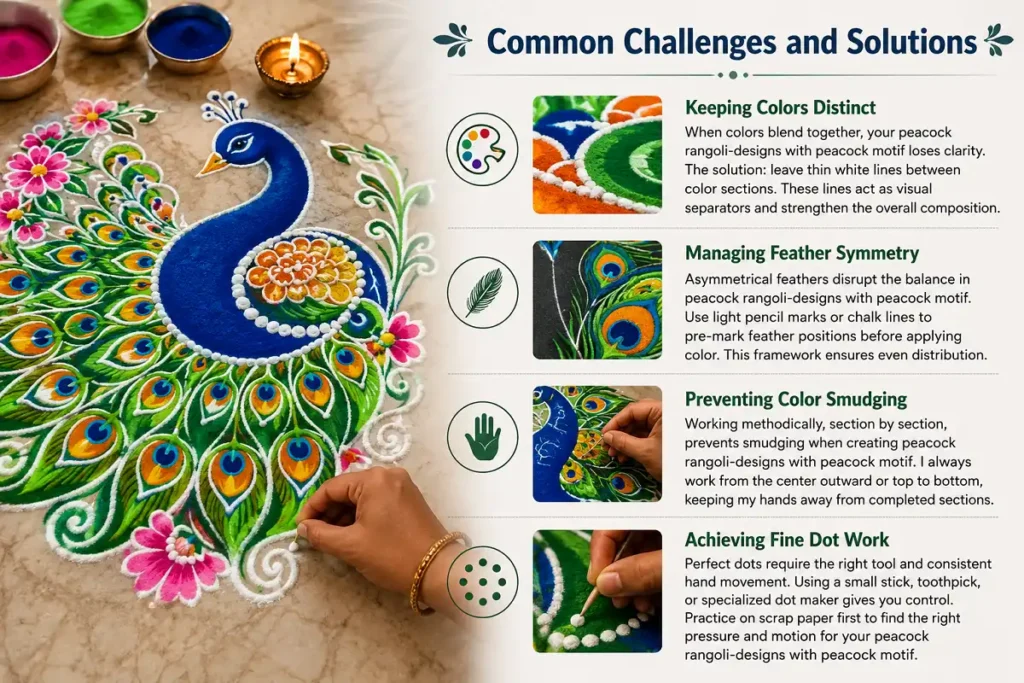
Keeping Colors Distinct
When neighboring colors begin to blend, leave thin white separator lines between sections. These lines improve clarity and strengthen the overall composition.
Managing Feather Symmetry
Light pencil or chalk marks can be used to position the feather sections before adding color. Use the center axis as your reference for balanced distribution.
Preventing Color Smudging
Work methodically from the center outward or from one completed section to the next. Avoid placing your hands over areas that have already been filled.
Achieving Fine Dot Work
A small stick, toothpick, or specialized dot tool provides better control. Practice your pressure and spacing on scrap paper before working on the final design.
Advanced Techniques for Experienced Artists
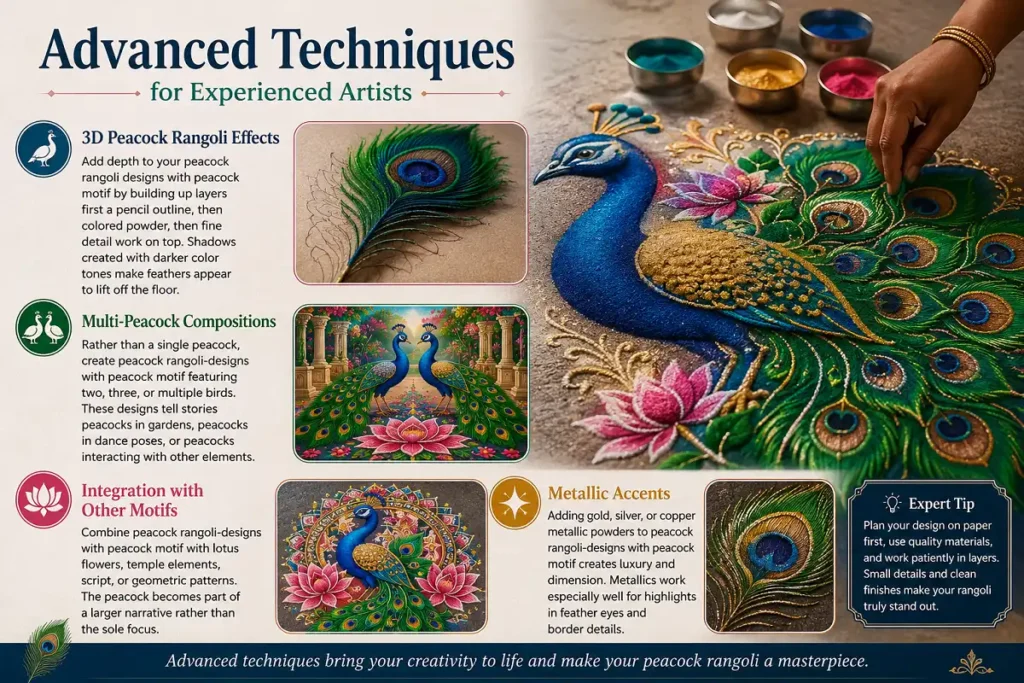
3D Peacock Rangoli Effects
Create depth by building layers: begin with the outline, add colored powder, and then place fine details above the main layers. Darker tones can be used as shadows so feather sections appear raised.
Explore beautiful peacock rangoli design ideas →Multi-Peacock Compositions
Instead of using one bird, create two, three, or multiple peacocks. Facing birds, garden scenes, and dancing poses can introduce storytelling into the rangoli.
Integration with Other Motifs
Combine peacocks with lotus flowers, temple-inspired forms, geometric patterns, leaves, or other traditional elements to create a larger visual narrative.
Metallic Accents
Gold, silver, and copper-toned powders can be used around feather eyes, highlights, and borders to add a luxurious finishing effect.
Preserving Your Peacock Rangoli Design
Make the Peacock the Story of Your Rangoli
Peacock rangoli designs offer a beautiful balance between cultural tradition and personal creativity. Start with a manageable size, establish the body and feather structure, choose a controlled palette, and gradually build your details.
Whether you are practicing a compact design or preparing a large festival centerpiece, patience and symmetry make a major difference. Once the basic structure becomes comfortable, experiment with flowers, diyas, metallic accents, multiple birds, and dimensional shading.
Explore More Rangoli Inspiration ↗FAQs About Peacock Rangoli Designs
Quick answers to common questions about creating, practicing, and improving peacock rangoli designs.
How long does it take to complete a medium peacock rangoli? +
Can I create peacock rangoli designs indoors? +
What is the easiest way to start practicing? +
Are there regional variations in peacock rangoli designs? +
What if my colors do not blend smoothly? +
Can I add 3D elements to peacock rangoli designs? +
Start small, practice the feather structure, experiment with color, and let your own artistic style become part of the traditional peacock motif.