How to Make 3D Rangoli With Flowers and Colors
Creating a 3D rangoli with flowers and colors is a beautiful way to turn a simple floor pattern into a design that appears raised, rounded, and full of depth. The effect comes from combining real height with smart shading, layered colors, and strong light-and-dark contrast.
Fresh marigold, rose, and chrysanthemum petals can add natural texture, while colored rangoli powder helps create smooth gradients and sharp details. In this guide, you’ll learn how to plan the design, choose flowers and color combinations, build raised sections, and use darker edges with lighter centers to create a realistic 3D effect.
Whether you are decorating your home for Diwali, a festival, or a special celebration, these simple techniques can help beginners create an eye-catching rangoli with depth and dimension.
What Makes a 3D Rangoli With Flowers and Colors Look Raised?
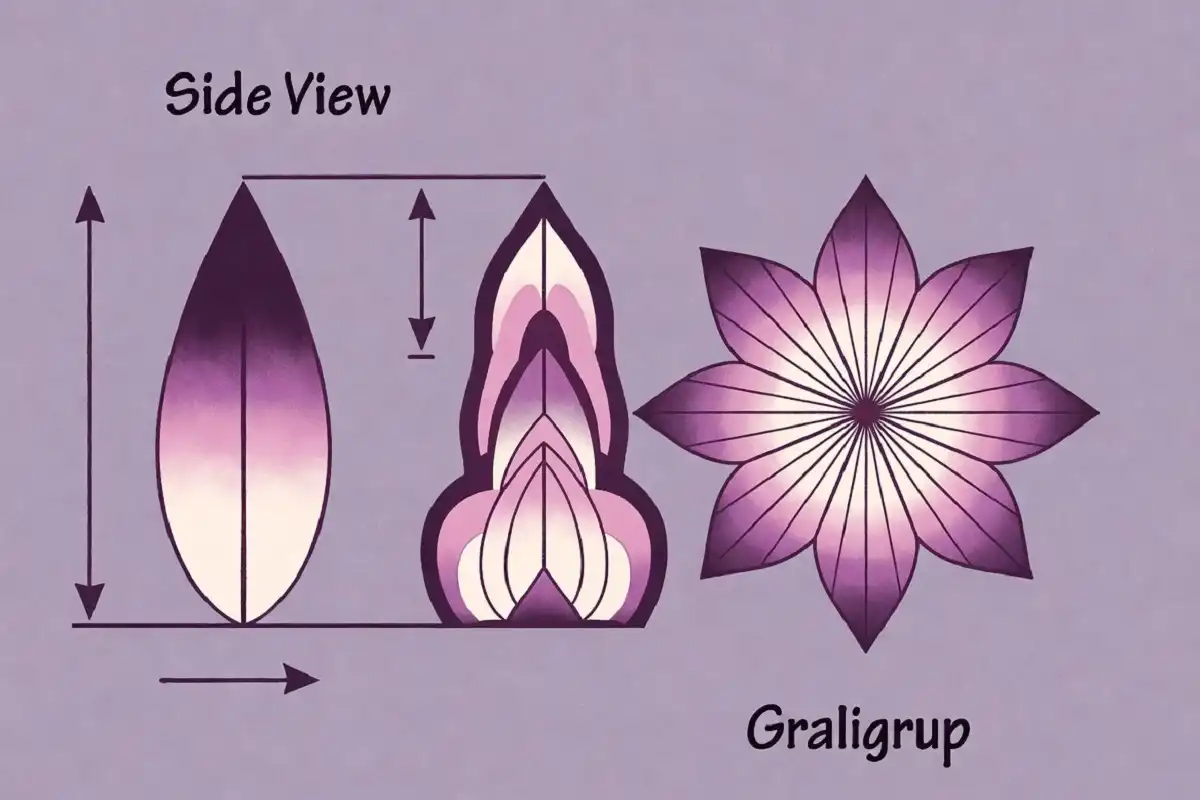
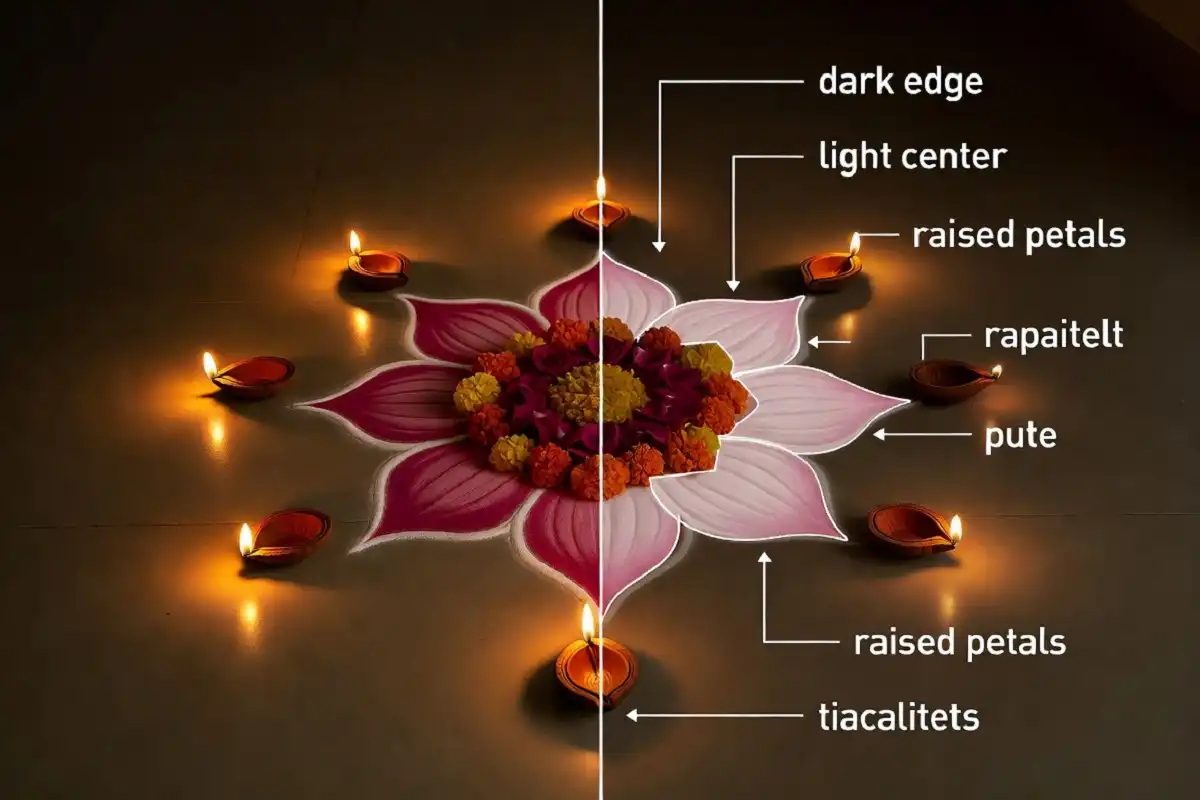
The raised look comes from two things: shading and real height. Your eye reads light and dark tones as depth. So a smooth shift from a dark edge to a light center makes a shape look rounded.
Petals add the actual height. When you mound rose petals in the middle and keep the border flat, the center pushes forward.
This is the core trick behind every 3D rangoli with flowers and colors that I make. Contrast does the rest. Bright colors sitting against a dark base feel closer to you.
What Flowers and Colors Work Best?
Fresh, firm flowers and high-pigment powders work best.
Flowers to Use
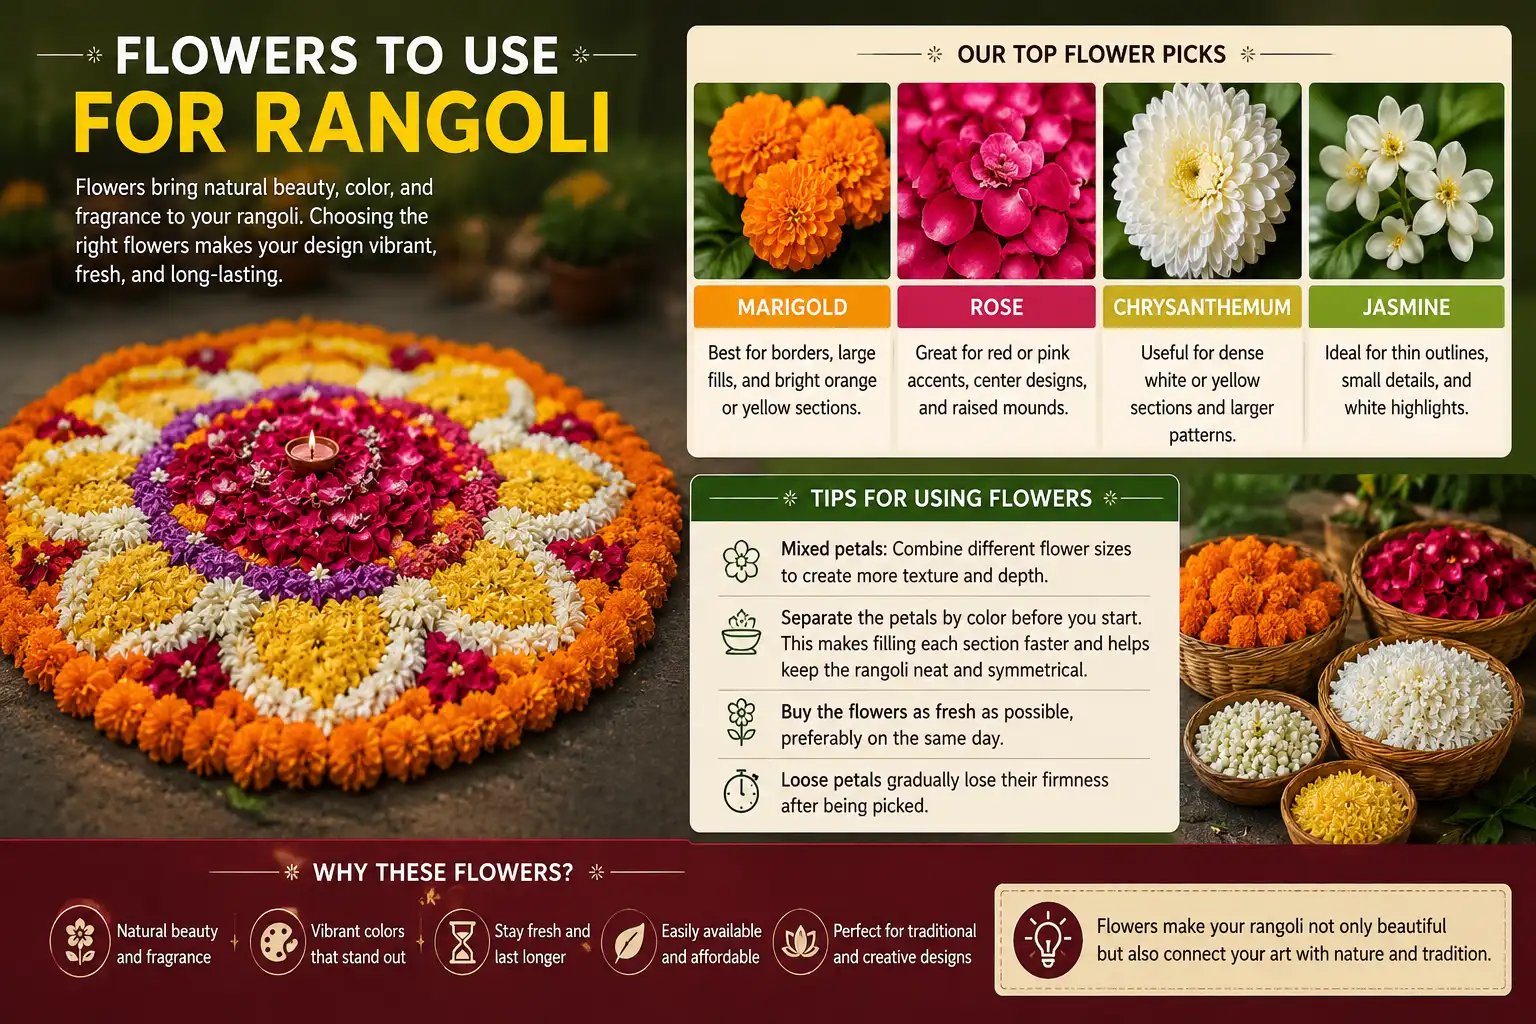
Marigold is my first pick. Its petals are small, bright, and hold their shape for hours, making them ideal for filling large areas and creating bold borders.
Rose petals give soft height and a rich red or pink color. They work especially well in the center, raised sections, and areas where you want a softer, layered look.
Chrysanthemum adds dense white and yellow color and is useful for filling wider sections quickly. Jasmine can also be added for small white details, fine outlines, or delicate accents.
- Marigold: Best for borders, large fills, and bright orange or yellow sections.
- Rose: Great for red or pink accents, center designs, and raised mounds.
- Chrysanthemum: Useful for dense white or yellow sections and larger patterns.
- Jasmine: Ideal for thin outlines, small details, and white highlights.
- Mixed petals: Combine different flower sizes to create more texture and depth.
For the best result, separate the petals by color before you start. This makes filling each section faster and helps keep the rangoli neat and symmetrical. Buy the flowers as fresh as possible, preferably on the same day, because loose petals gradually lose their firmness after being picked.
Colors to Use
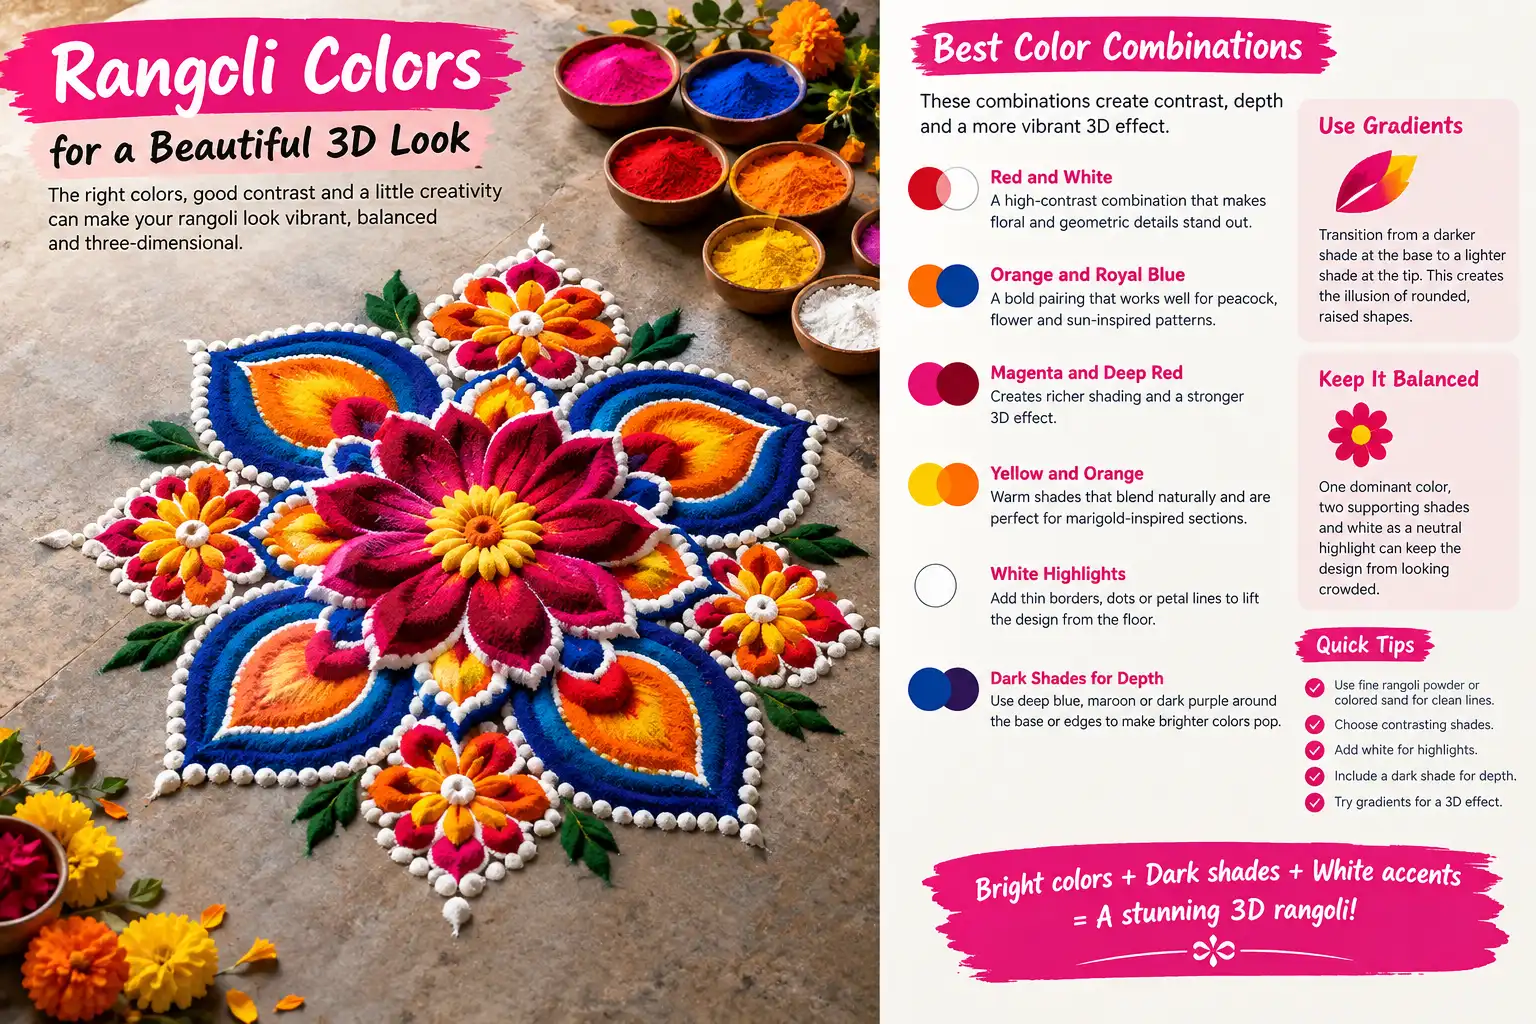
Use fine rangoli powder or colored sand for clean lines and even filling. Reds, deep oranges, magenta, and royal blue create strong contrast, while white works well for highlights and sharp outlines. Rangoli designs generally look more striking when bright shades are placed beside darker tones rather than using too many similar colors.
- Red and white: A high-contrast combination that makes floral and geometric details stand out.
- Orange and royal blue: A bold pairing that works especially well for peacock, flower, and sun-inspired patterns.
- Magenta and deep red: Use these together to create richer shading and a stronger 3D effect.
- Yellow and orange: These warm shades blend naturally and are ideal for marigold-inspired sections.
- White highlights: Add thin white borders, dots, or petal lines to visually lift the design from the floor.
- Dark shades for depth: Use deep blue, maroon, or dark purple around the base or edges of raised elements to make brighter colors appear closer.
- Use gradients: Transition from a darker shade at the base to a lighter shade toward the center or tip of a petal. This creates the illusion of rounded, raised shapes.
- Keep the palette controlled: One dominant color, two supporting shades, and white as a neutral highlight can keep the design balanced without making the pattern look crowded.
A good 3D rangoli with flowers and colors should have at least one dark shade beside a bright shade. This contrast, combined with raised flower petals and gradual color changes, helps create depth and makes the main motifs appear more three-dimensional.
Tools to Keep Ready
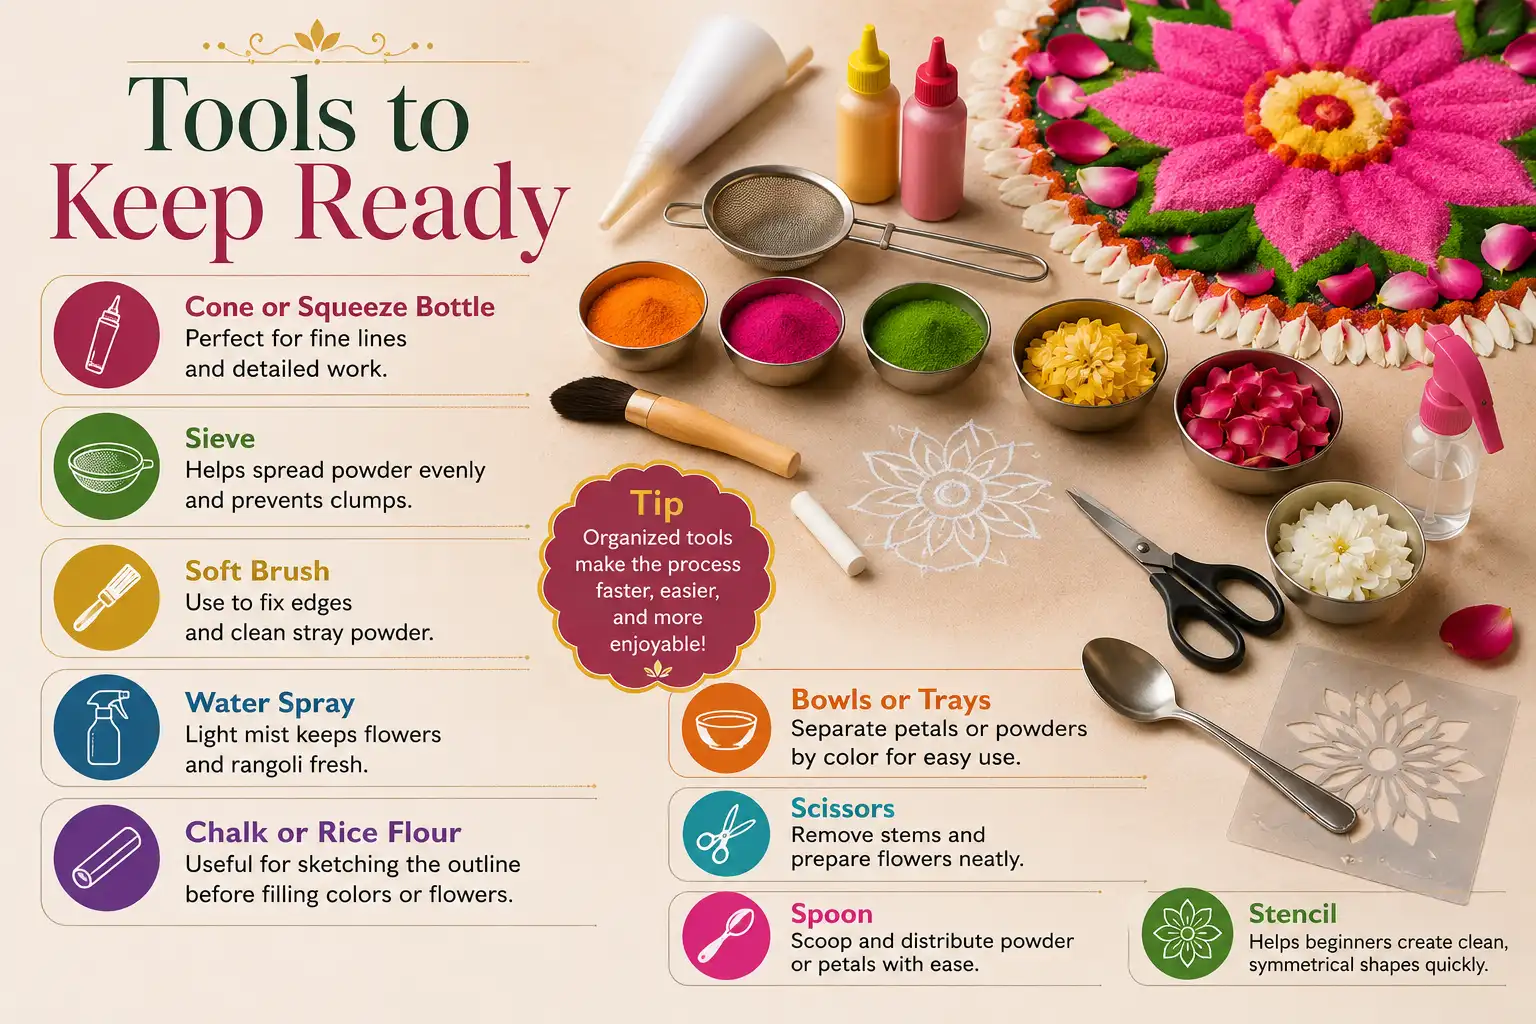
You need a cone or a squeeze bottle for fine lines. A small sieve helps spread powder evenly and prevents clumps. Keep a soft brush to fix edges and clean stray powder. Also keep a light water spray to hold the petals fresh.
A piece of chalk or rice flour is useful for sketching the basic outline before adding colors or flowers. Keep a small bowl or shallow tray nearby to separate petals by color, while scissors can help remove stems and prepare flowers neatly.
For larger designs, a spoon can make it easier to scoop and distribute powder or petals. A simple stencil can also help beginners create clean, symmetrical shapes without spending too much time on the outline.
How to Make 3D Rangoli With Flowers and Colors Step by Step
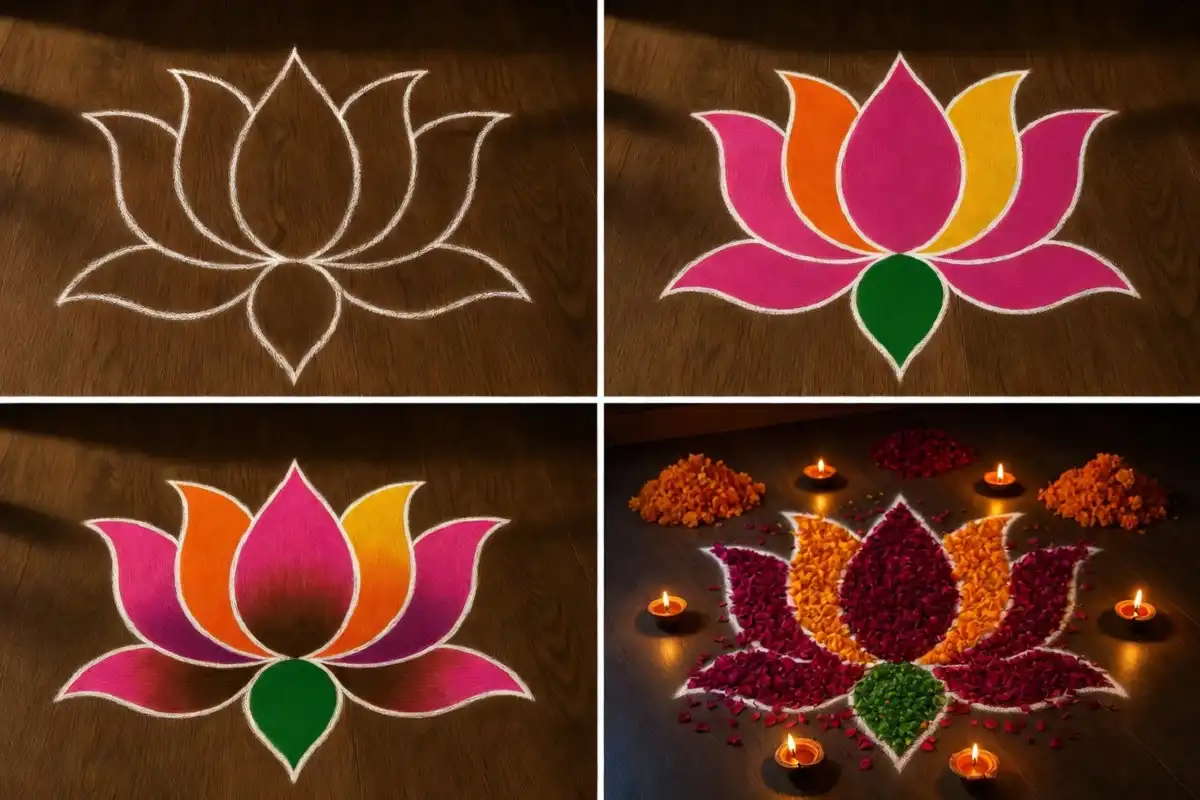
Work in this order: outline first, base color next, shading after, then flowers last.
- Plan and outline. Sketch your shape on paper first. Then mark the outline on the floor with chalk or a light powder line. Keep the design simple if you are new. For a starter base, you can follow an easy 3D rangoli with colors and build on it.
- Lay the base colors. Fill each section with a flat color. Press the powder down so it sits even and smooth.
- Build the shading. This step creates the 3D rangoli with flowers and colors effect. Add a dark shade at the outer edge of each petal or curve. Then blend it toward a lighter shade in the center. Use your finger or a brush to smudge the border between the two tones.
- Add raised petals. Mound marigold and rose petals along the center lines. Build them higher in the middle. This gives real, touchable height.
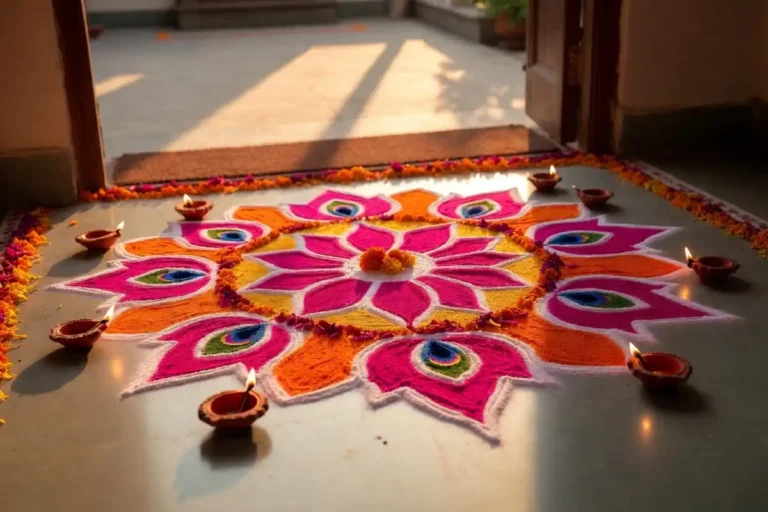
- Finish with diyas and highlights. Place diyas at key points. Add white dots or fine lines on top. If you want the full floor method, see how people make 3D rangoli at home for larger layouts.
Design Ideas to Try
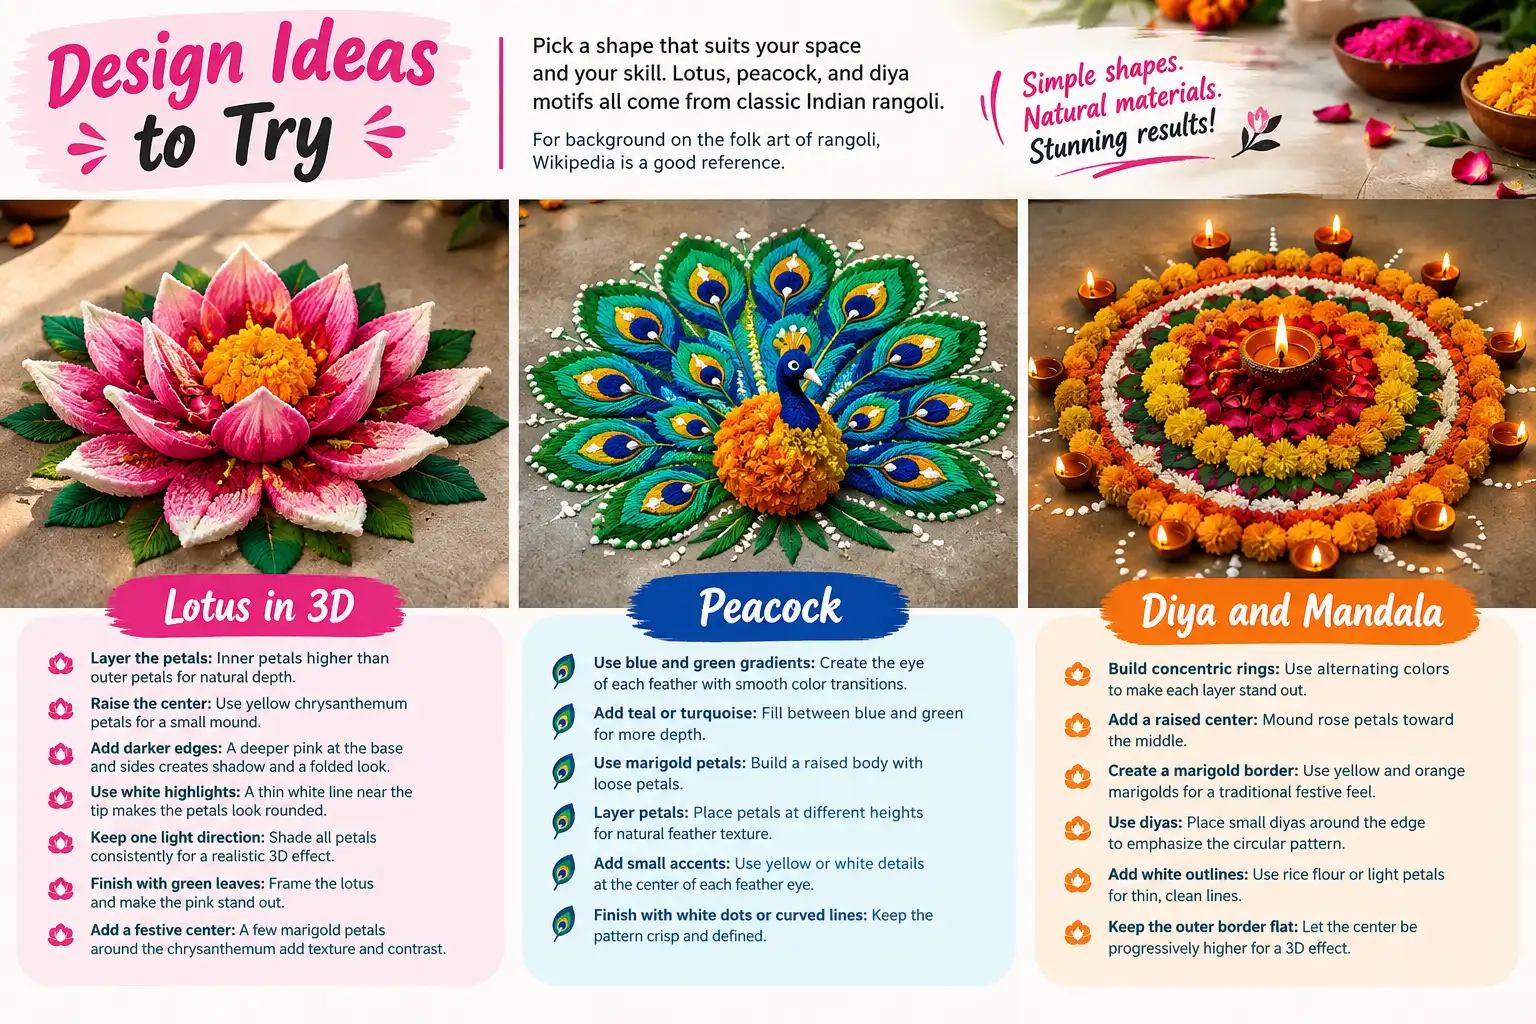
Pick a shape that suits your space and your skill. Lotus, peacock, and diya motifs all come from classic Indian rangoli. For background on the folk art of rangoli, Wikipedia is a good reference.
Lotus in 3D
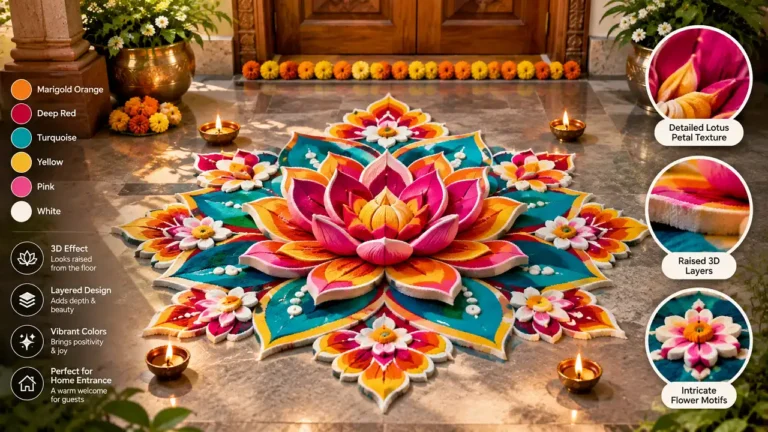
A lotus is one of the easiest and most attractive 3D flower shapes to create. Start with a simple symmetrical outline and build the flower with two or three layers of curved petals. Shade each petal from dark pink at the base to lighter pink and finally white at the tip. This smooth gradient makes the petals look rounded instead of flat.
- Layer the petals: Place the inner petals slightly higher or more prominently than the outer petals to create natural depth.
- Raise the center: Use yellow chrysanthemum petals to build a small mound in the middle. This gives the lotus real height as well as a visual 3D effect.
- Add darker edges: A little deeper pink along the petal base and side edges creates a shadow that makes each petal appear folded and raised.
- Use white highlights: Add a thin white highlight near the upper part of each petal to make the surface look closer to the light.
- Keep one light direction: Shade all petals consistently so the highlights and shadows appear to come from the same direction. This makes the 3D illusion more realistic.
- Finish with green leaves: Add small green leaves beneath the outer petals to frame the lotus and make the pink flower stand out.
- Add a festive center: A few yellow or orange marigold petals around the chrysanthemum center can create extra texture and contrast.
Peacock
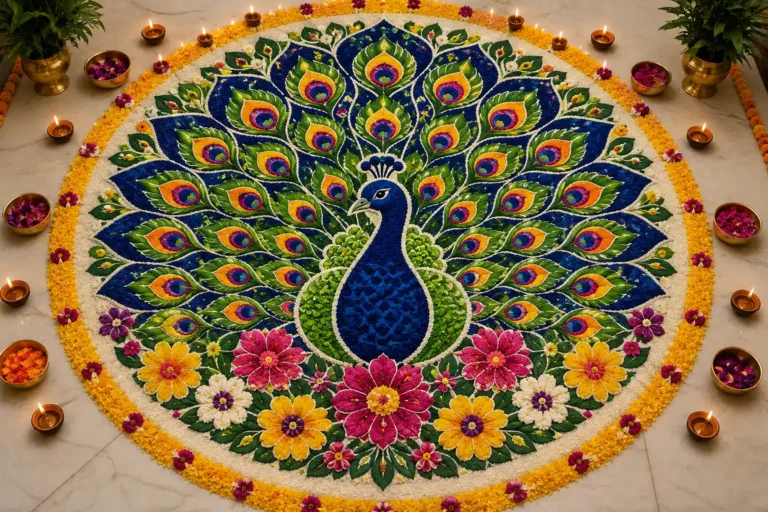
A peacock feather fan looks striking in 3D. Use blue and green gradients on the eye of each feather. Loose marigold petals form a raised body.
Layer the petals at slightly different heights to create a natural feather texture, and add teal or turquoise between the blue and green sections for smoother depth. Use small yellow or white accents at the center of each feather eye to make the details stand out.
Darker shades near the base and lighter shades toward the tips can strengthen the 3D illusion. Finish with a few white dots or fine curved lines around the feathers to keep the pattern crisp and defined.
Diya and Mandala
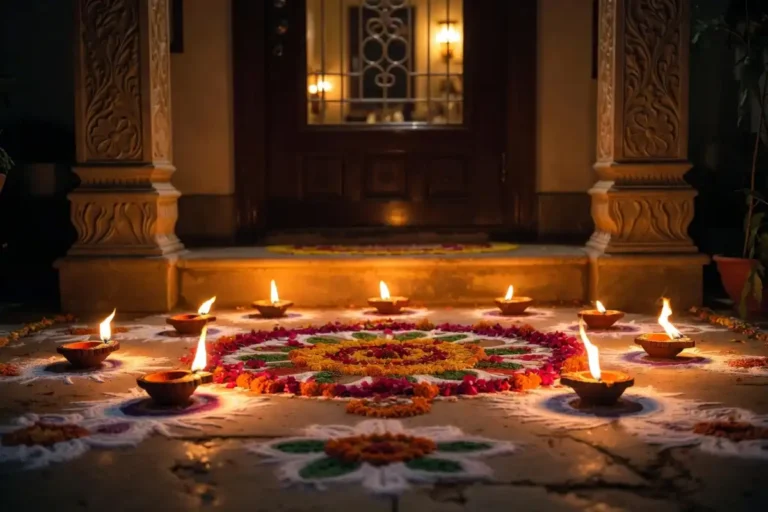
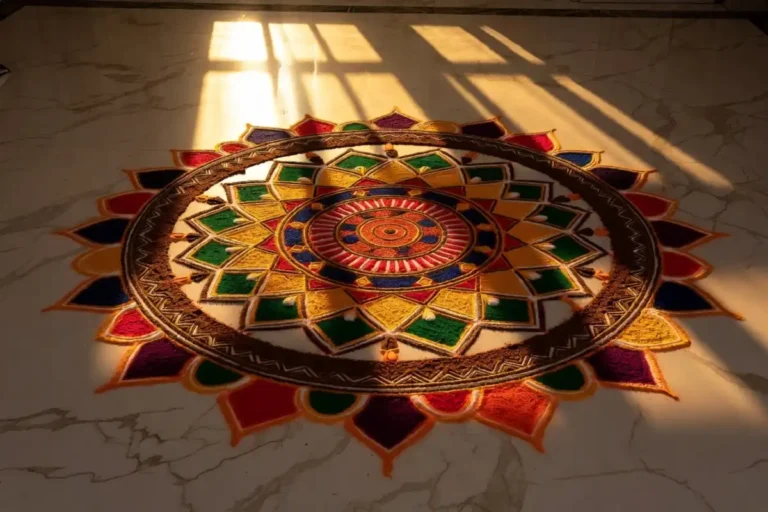
A round mandala with a raised diya at the center is a strong festival design. My favorite 3D rangoli with flowers and colors for Diwali uses a marigold border and a rose petal core. You can build the mandala with several concentric rings, using alternating colors to make each layer stand out. Add small diyas around the outer edge to create a warm glow and emphasize the circular pattern.
White rice flour or light-colored petals can be used for thin outlines, while yellow and orange marigolds add a traditional festive feel. For extra depth, slightly mound the rose petals toward the center so the design appears raised from the floor.
For more petal-based layouts, these flower 3D rangoli patterns give good starting shapes.
Best Color Combinations
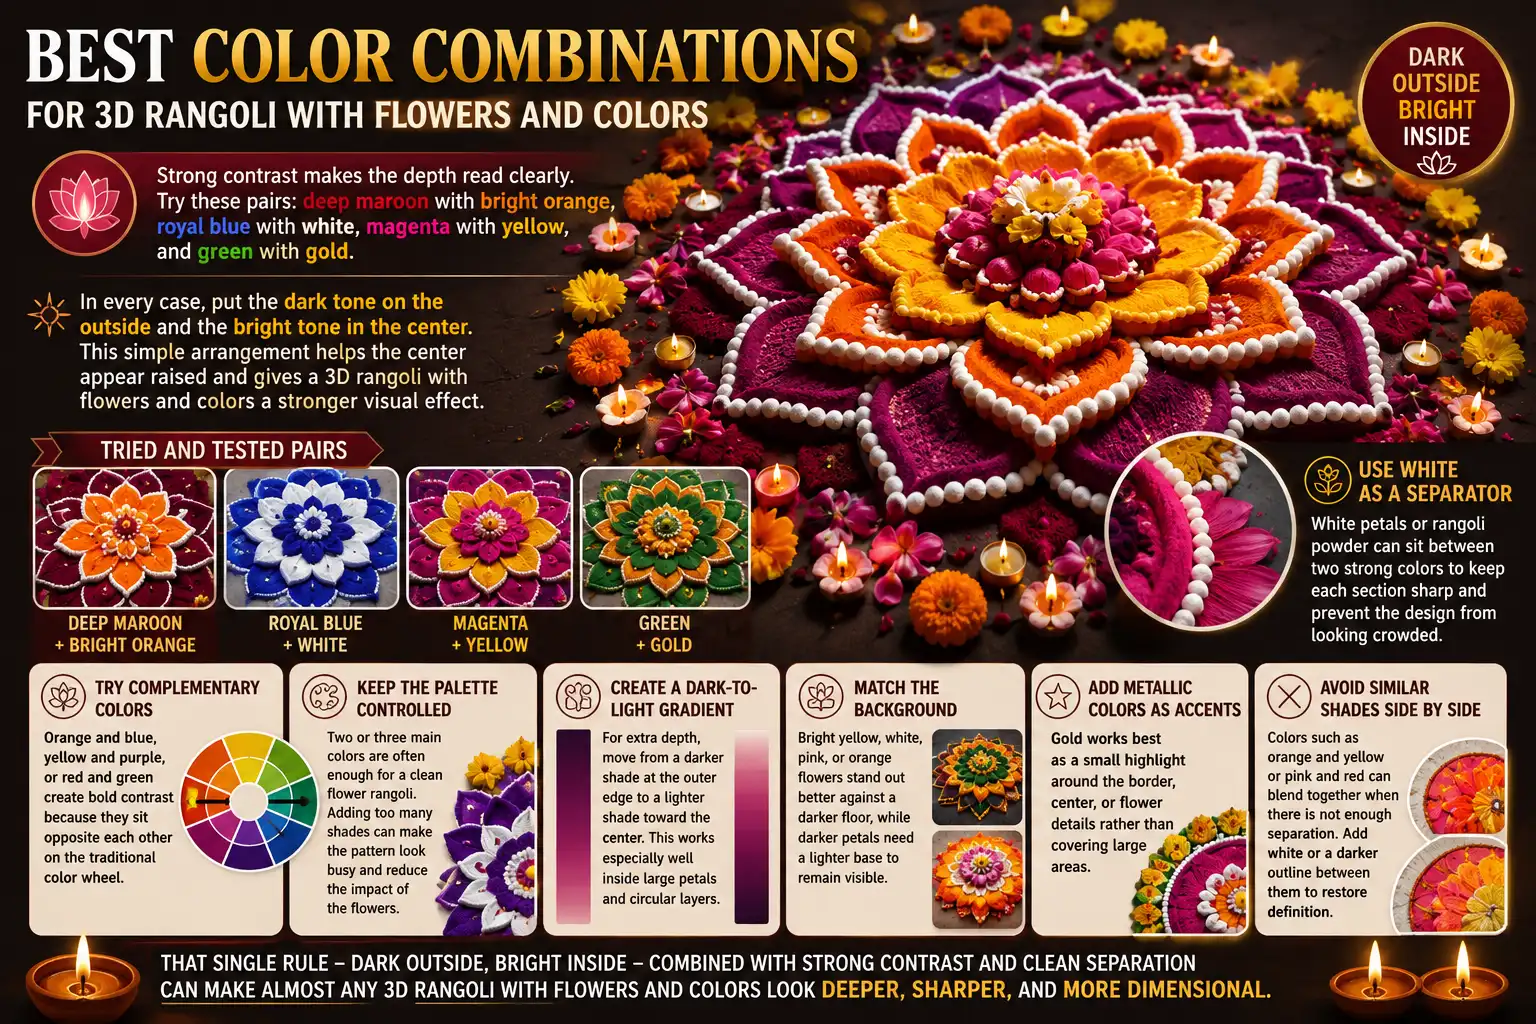
Strong contrast makes the depth read clearly. Try these pairs: deep maroon with bright orange, royal blue with white, magenta with yellow, and green with gold. In every case, put the dark tone on the outside and the bright tone in the center.
This simple arrangement helps the center appear raised and gives a 3D rangoli with flowers and colors a stronger visual effect.
- Use white as a separator: White petals or rangoli powder can sit between two strong colors to keep each section sharp and prevent the design from looking crowded.
- Try complementary colors: Orange and blue, yellow and purple, or red and green create bold contrast because they sit opposite each other on the traditional color wheel.
- Keep the palette controlled: Two or three main colors are often enough for a clean flower rangoli. Adding too many shades can make the pattern look busy and reduce the impact of the flowers.
- Create a dark-to-light gradient: For extra depth, move from a darker shade at the outer edge to a lighter shade toward the center. This works especially well inside large petals and circular layers.
- Match the background: Bright yellow, white, pink, or orange flowers stand out better against a darker floor, while darker petals need a lighter base to remain visible.
- Add metallic colors as accents: Gold works best as a small highlight around the border, center, or flower details rather than covering large areas.
- Avoid similar shades side by side: Colors such as orange and yellow or pink and red can blend together when there is not enough separation. Add white or a darker outline between them to restore definition.
That single rule — dark outside, bright inside — combined with strong contrast and clean separation can make almost any 3D rangoli with flowers and colors look deeper, sharper, and more dimensional.
Tips and Common Mistakes
Small errors flatten the whole design, so avoid these. Do not skip shading, because flat color kills the 3D effect. Do not soak your petals, since wet petals lose their shape.
Keep the border flat so the center stands out. Also work from the outside in, so you do not smudge finished areas.
The most common mistake I see in a 3D rangoli with flowers and colors is uneven pressure on the powder. Press each layer the same, or the surface looks patchy.
How to Create a 3D Rangoli With Flowers and Colors
A good 3D rangoli with flowers and colors is about depth, not size. Shade every shape, mound your petals in the center, and keep strong contrast. Start small, practice the shading, and your floor art will look raised and rich. Fresh flowers and bright colors do the rest.
FAQs
How long does a 3D flower rangoli last?
A fresh flower rangoli stays bright for about one day. Marigold and rose hold up longest. Mist it lightly with water to extend it. Powder-only sections last much longer.
Can beginners try this design?
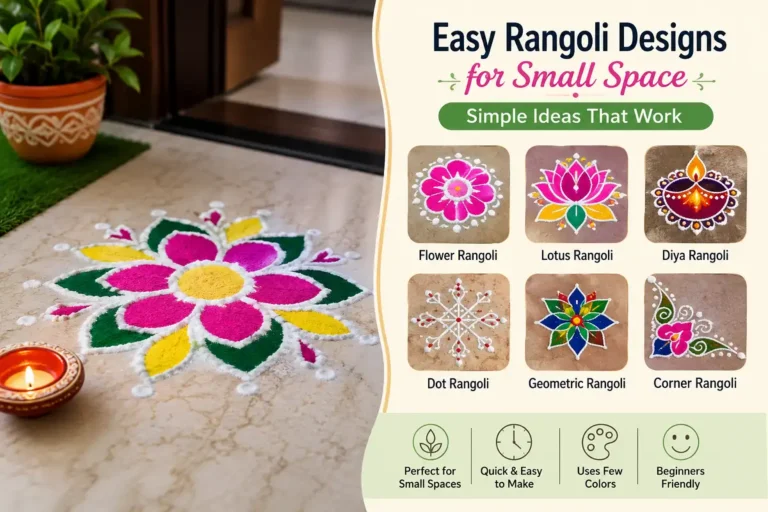
Yes. Beginners can make a 3D rangoli with flowers and colors with a small lotus or a single diya. Start with one shape and two colors. Then add petals only in the center.
Do I need dots or a grid?
No. You can work freehand or with a light outline. Dots help with symmetry, but shading matters more for the raised look.
What is the best base surface?
A clean, dry, flat floor works best. A dark mat or dark base powder makes bright colors pop more.