How to Make Rangoli Flower Design: A Simple Step by Step Guide
I grew up watching my mother and grandmother draw rangoli at our doorway every morning before sunrise. I would sit on the steps and watch them create beautiful patterns, one dot and one petal at a time. What looked simple to me as a child slowly became something I truly loved.
Those quiet mornings were where my love for rangoli began. Over the years, I started learning the designs they taught me, trying new patterns, and photographing the ones I enjoyed most. Some were simple enough for everyday mornings, while others took more time and patience to complete.
That experience taught me that rangoli does not have to be complicated to be beautiful. A few simple petals, dots, curves, and colors can turn an ordinary doorway into something warm and welcoming.
If you are wondering how to make rangoli flower design, you can start with the same simple approach I learned over the years. In this guide, I’ll share easy flower rangoli ideas, step-by-step instructions, color tips, and beginner-friendly techniques to help you create a beautiful design at home.
Why I Love Flower Rangoli
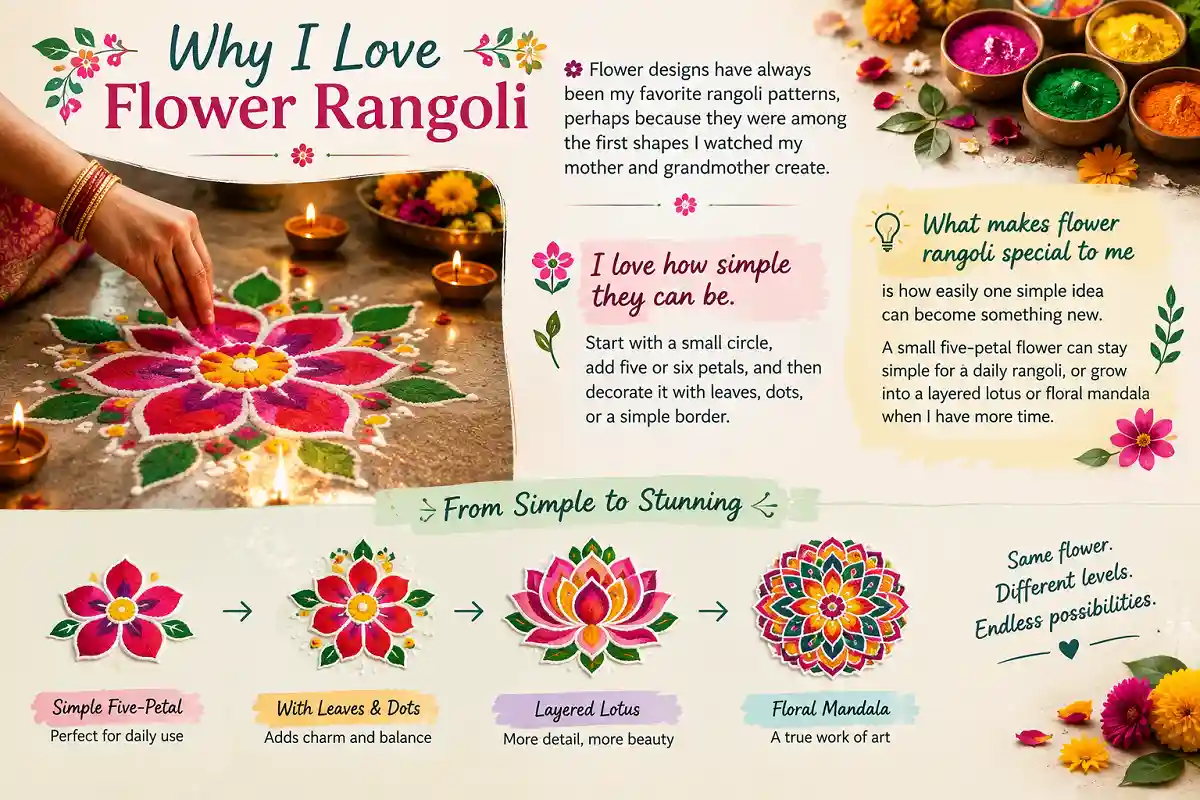
Flower designs have always been my favorite rangoli patterns, perhaps because they were among the first shapes I watched my mother and grandmother create.
I love how simple they can be. Start with a small circle, add five or six petals, and then decorate it with leaves, dots, or a simple border.
What makes flower rangoli special to me is how easily one simple idea can become something new. A small five-petal flower can stay simple for a daily rangoli, or grow into a layered lotus or floral mandala when I have more time.
What You Need to Make a Flower Rangoli
When I learned to make rangoli, we did not need a lot of special tools. Most of the work was done with simple materials that were already available at home.
For a basic flower rangoli, you can use:
- Colored rangoli powder
- White rice flour or white rangoli powder
- Chalk for a light guide
- A small bowl or plate for making a circle
- Fresh flower petals, if you want a natural design
- Small diyas for decoration
- A clean cotton cloth for correcting small mistakes
Colored powder works well when you want bright petals and clear outlines. Rice flour is useful for traditional white patterns, while fresh petals can give the rangoli a soft and natural appearance. These are also commonly used approaches in flower rangoli designs.
How to Make Rangoli Flower Design Step by Step
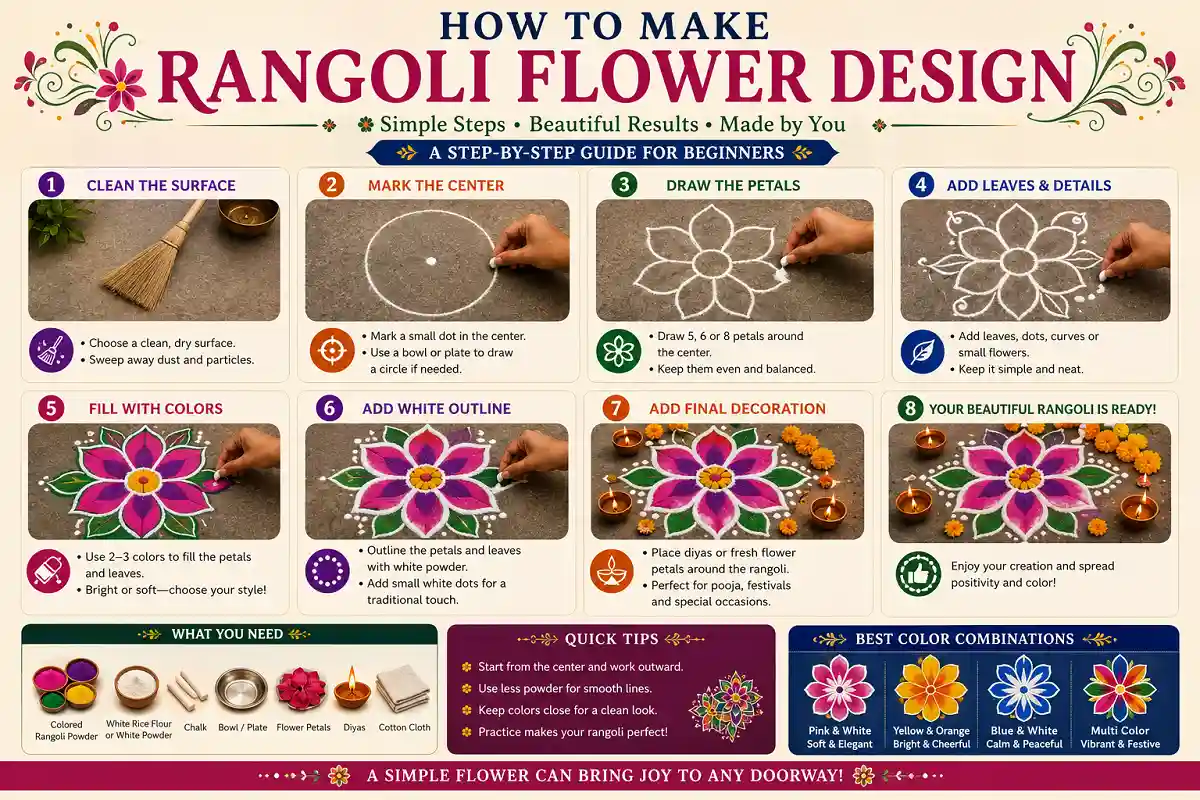
The easiest way I have found to make a flower rangoli is to start from the center and slowly work outward. This simple method makes it easier to keep the design balanced while giving you plenty of room to add your own creative touches.
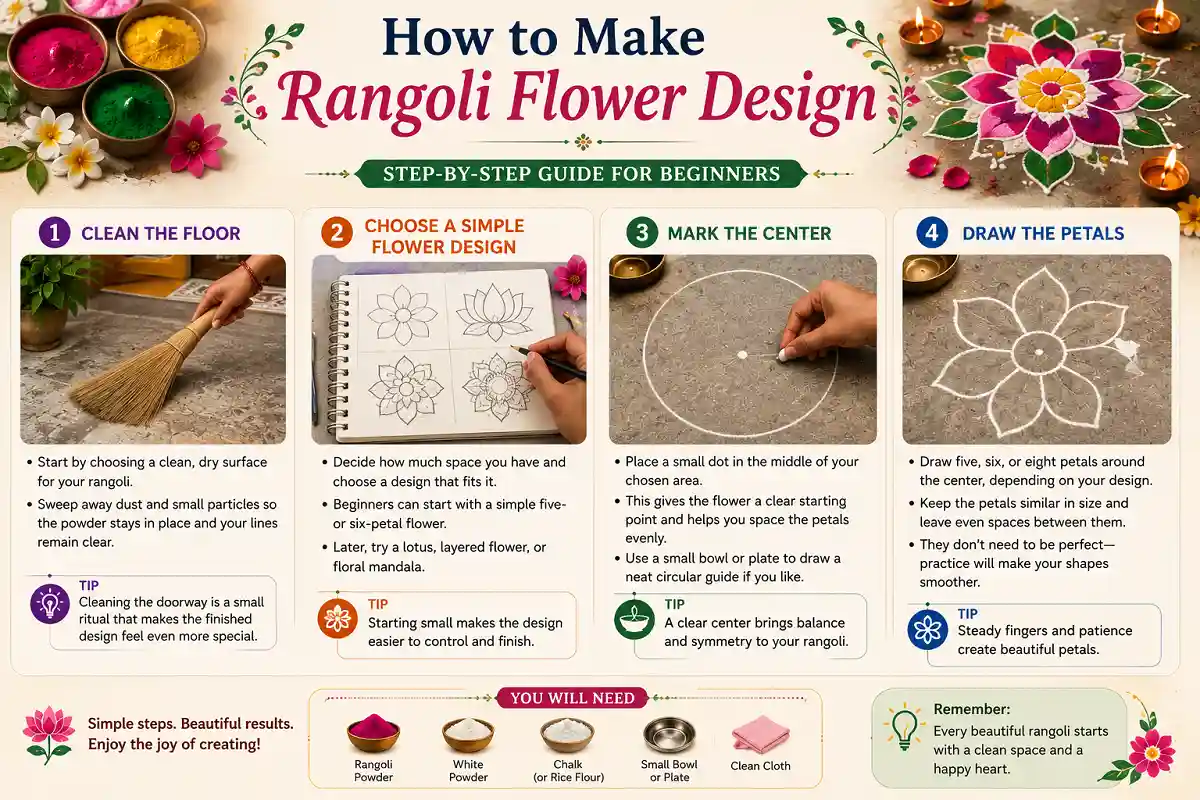
Clean the Floor
Start by choosing a clean, dry surface for your rangoli. Sweep away dust and small particles so the powder stays in place and your lines remain clear.
For me, cleaning the doorway always reminds me of watching my mother and grandmother prepare the space before starting their morning rangoli. It was a small part of the ritual, but it made the finished design feel even more special.
Choose a Simple Flower Design
Before you begin, decide how much space you have and choose a design that fits it. If you are a beginner, start with a simple five- or six-petal flower. Once you feel comfortable, you can try a lotus, layered flower, or floral mandala. Starting small makes the design easier to control and finish.
Mark the Center
Place a small dot in the middle of your chosen area. This gives the flower a clear starting point and helps you space the petals evenly. If you want a neat circular center, you can also use a small bowl or plate as a simple guide.
Draw the Petals
Now draw five, six, or eight petals around the center, depending on your chosen design. Try to keep the petals similar in size and leave even spaces between them. They do not need to be perfectly identical. With practice, your hand will naturally become more comfortable with the shapes.
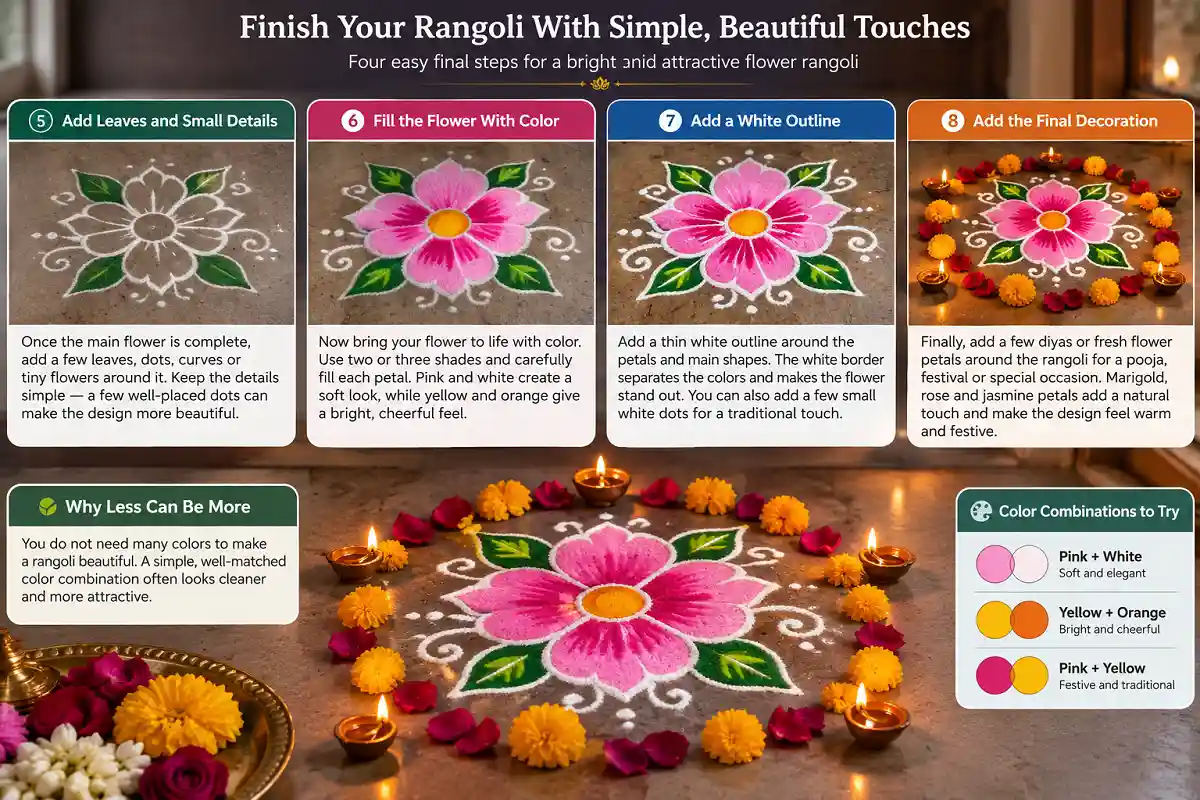
Add Leaves and Small Details
Once the main flower is complete, add a few leaves, dots, curves, or tiny flowers around it. For a simple daily rangoli, I prefer keeping these details minimal. A few well-placed dots can sometimes make the design look more beautiful than a complicated border.
Fill the Flower With Color
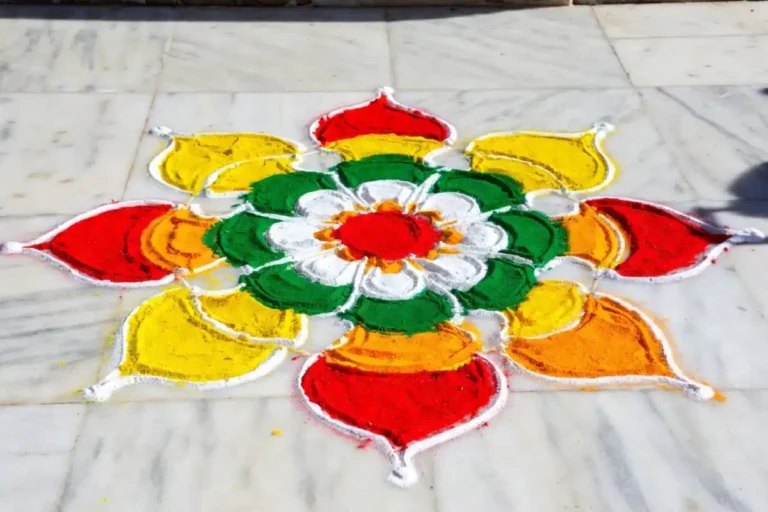
Now bring your flower to life with color. Choose two or three shades and carefully fill each petal. Pink and white create a soft look, while yellow and orange give the design a bright, cheerful feel.
I have learned that you do not need a lot of colors to make a rangoli beautiful. A simple, well-matched color combination can often make the design look cleaner and more attractive.
Add a White Outline
Once the colors are filled, add a thin white outline around the petals and other main shapes. The white border helps separate the colors and makes the flower stand out. You can also add a few small white dots around the design for a traditional finishing touch.
Add the Final Decoration
Finally, add a few diyas or fresh flower petals around the rangoli if you are decorating for a pooja, festival, or special occasion.
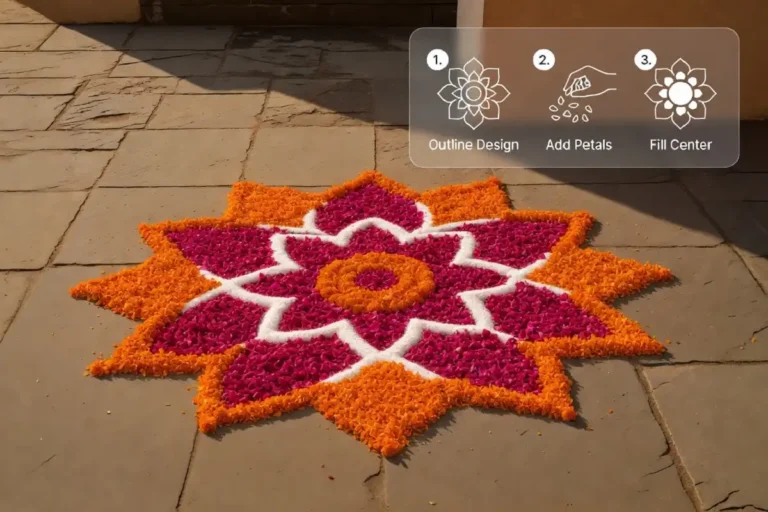
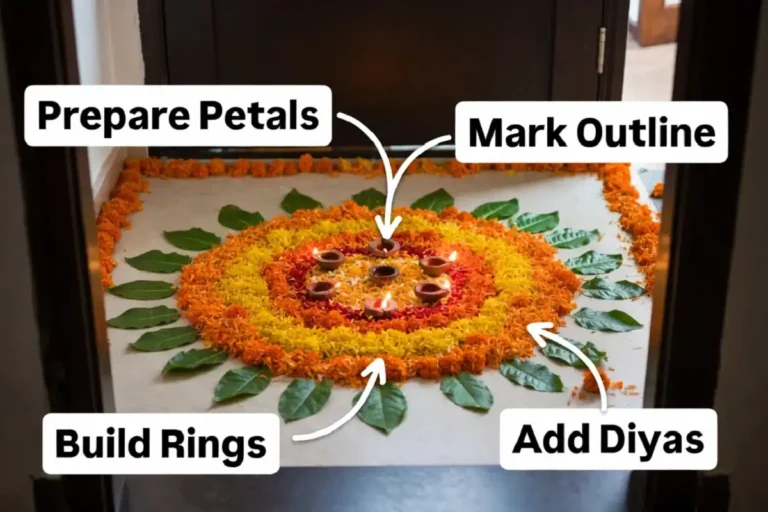
I especially enjoy combining colored powder with real flowers. Marigold, rose, and jasmine petals add a natural touch and make the finished rangoli feel warm and festive. Fresh petals can also be used on their own to create simple floral patterns.
Easy Flower Rangoli Designs for Beginners
If you are new to rangoli, floral patterns are a wonderful place to start. Most flower designs use simple circles, repeated petals, dots, and leaves, so you can learn the basic shapes without feeling overwhelmed. Here are 15 easy flower rangoli designs that you can try at home, starting with simple patterns and gradually moving toward slightly more detailed designs.
Simple Five-Petal Flower Rangoli
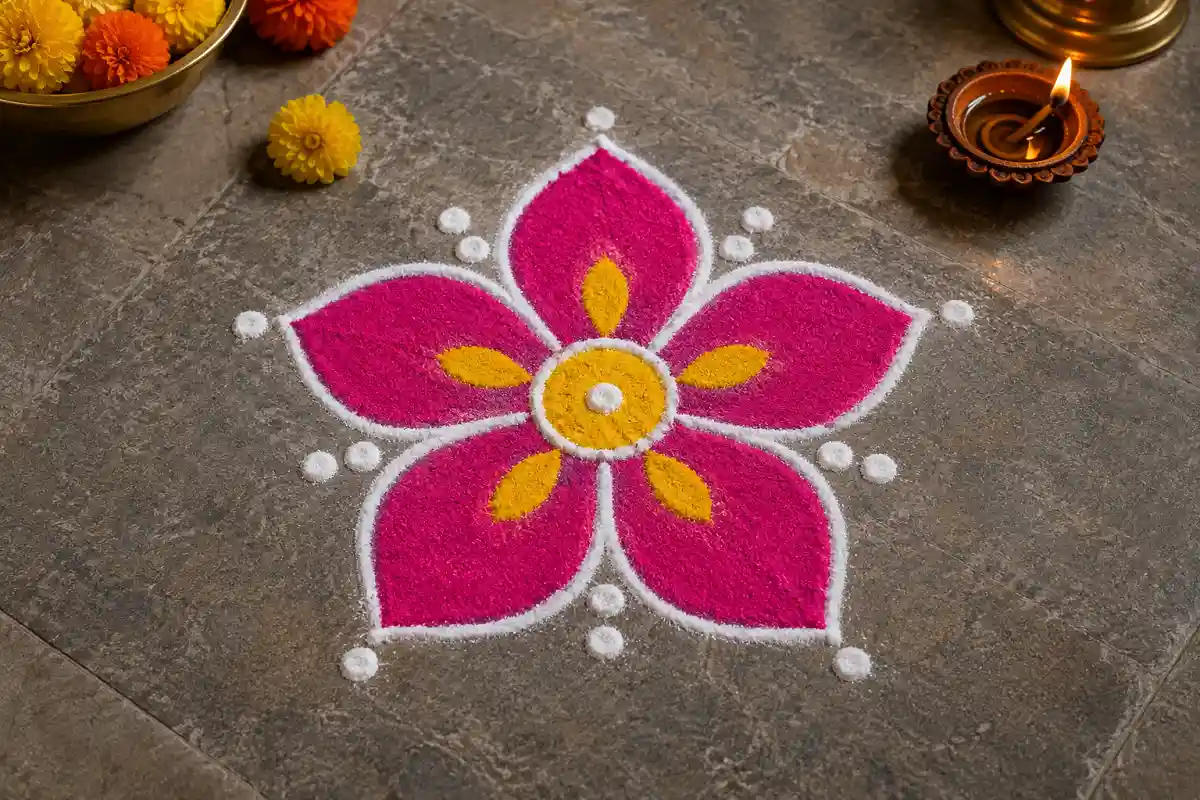
A simple five-petal flower is one of the easiest designs to try as a beginner. Start by placing a small dot or circle in the center, then draw five rounded petals around it. Keep the petals similar in size and spacing to create a balanced look. Fill them with two colors such as pink and yellow, and add a few white dots around the outside. This small design works beautifully near a doorway or pooja room and can be completed in just a few minutes.
Six-Petal Flower Rangoli
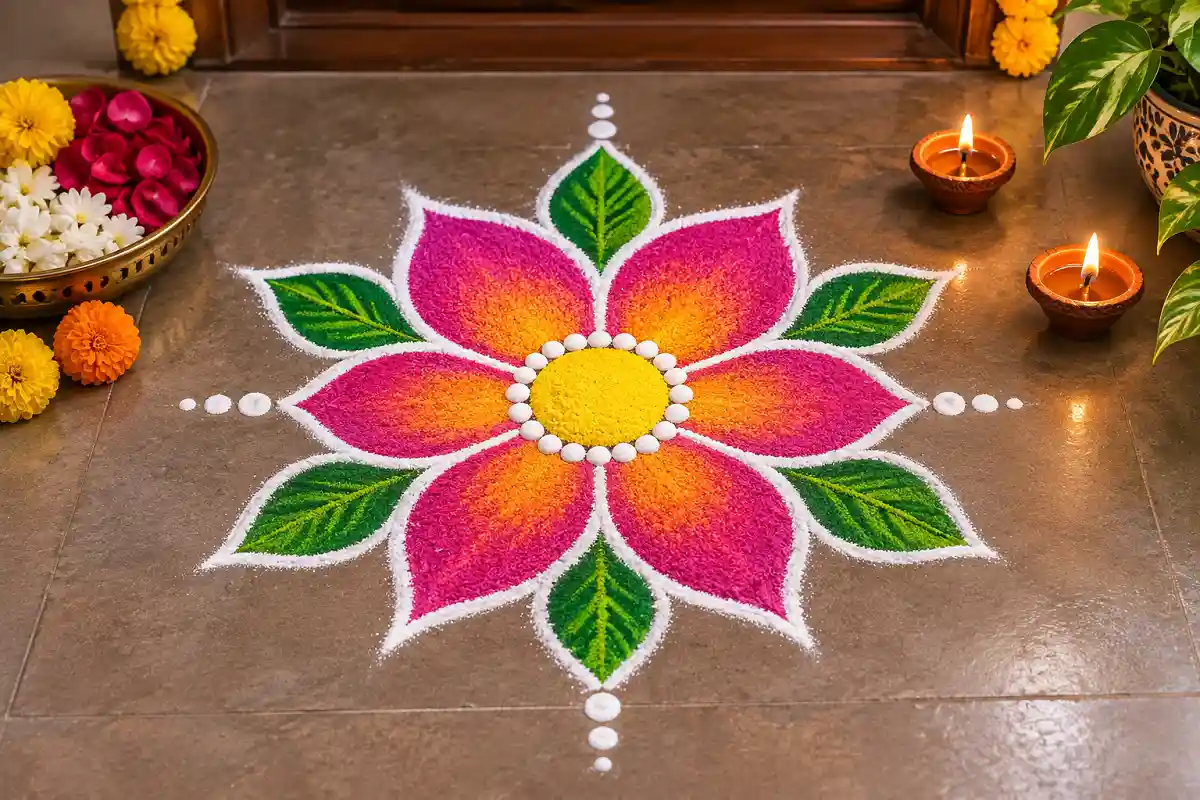
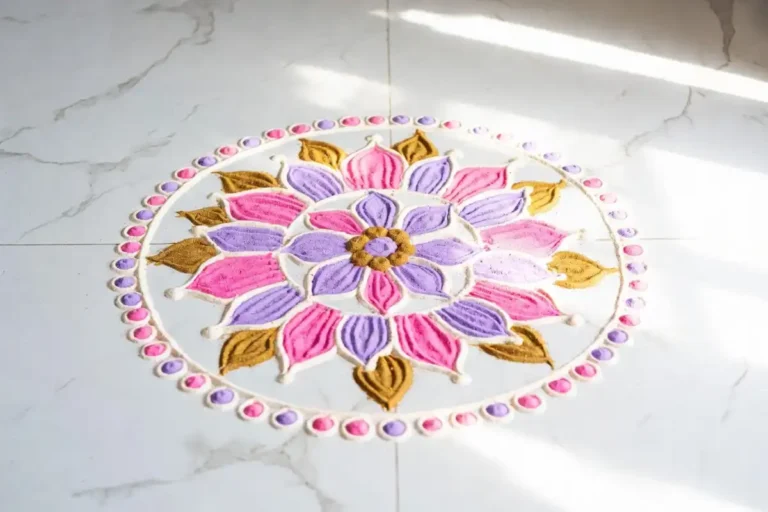
The six-petal flower is a simple step up from the basic five-petal design. Begin with a small center circle and carefully draw six curved petals around it. Try to leave equal space between each petal so the flower looks neat and symmetrical. You can use yellow in the center, pink or orange for the petals, and green for a few leaves. A thin white outline around the flower will make the colors stand out and give the design a clean finish.
Flower and Dot Rangoli
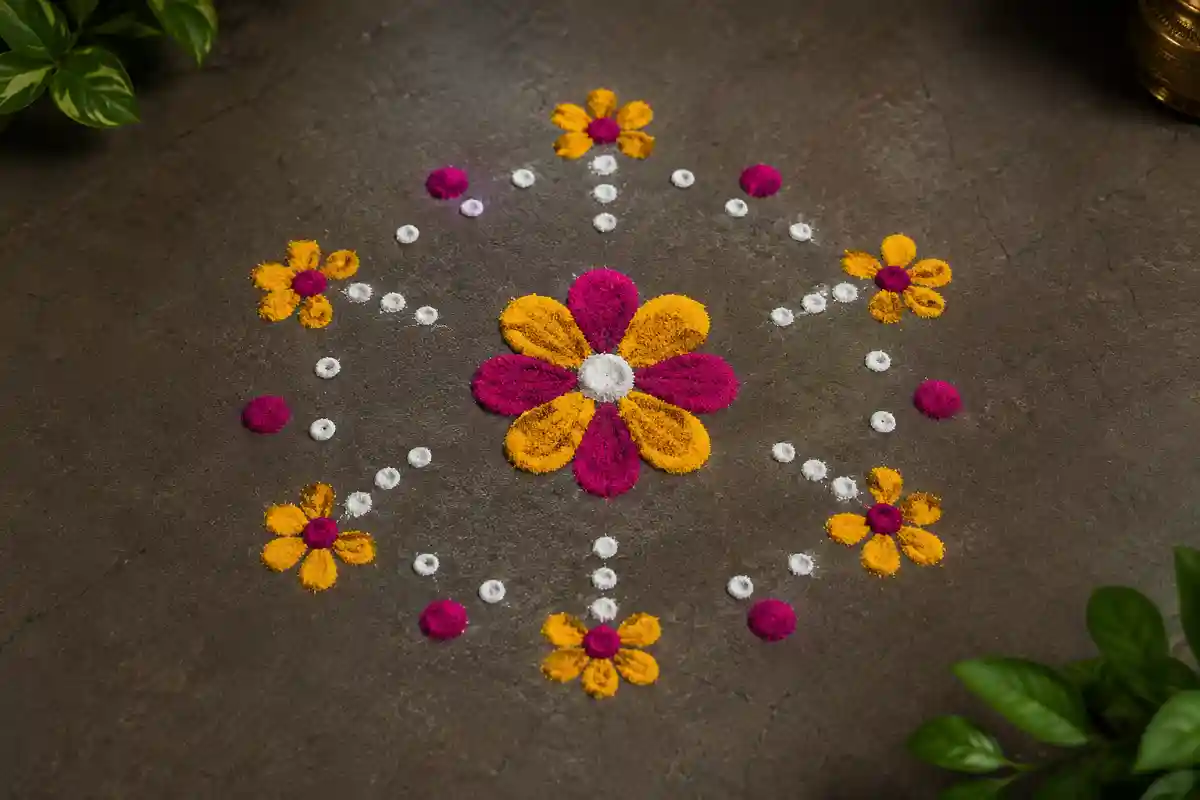
A flower and dot rangoli is perfect when you want something simple but decorative. Start with one small flower in the center and place evenly spaced dots around it. You can leave the dots as they are or connect some of them with small curves. Use two or three colors to keep the design clean. This pattern is especially suitable for daily decoration because it does not require much time or space. The dot arrangement can also help beginners maintain balance while drawing.
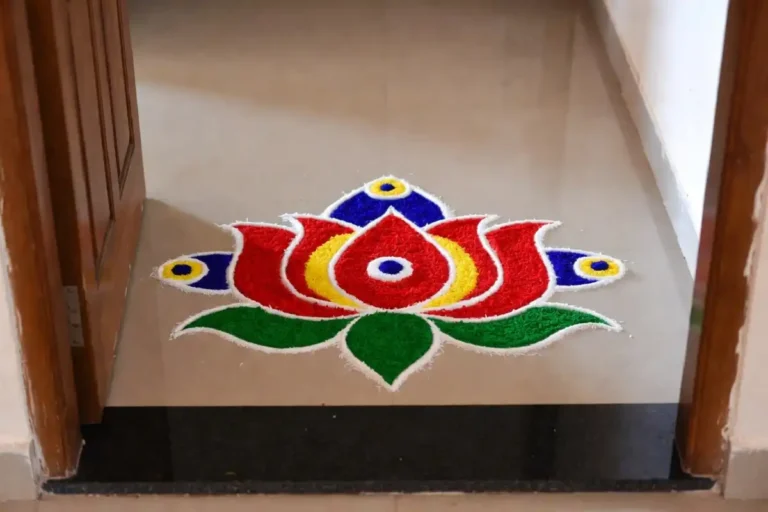
Simple Lotus Rangoli
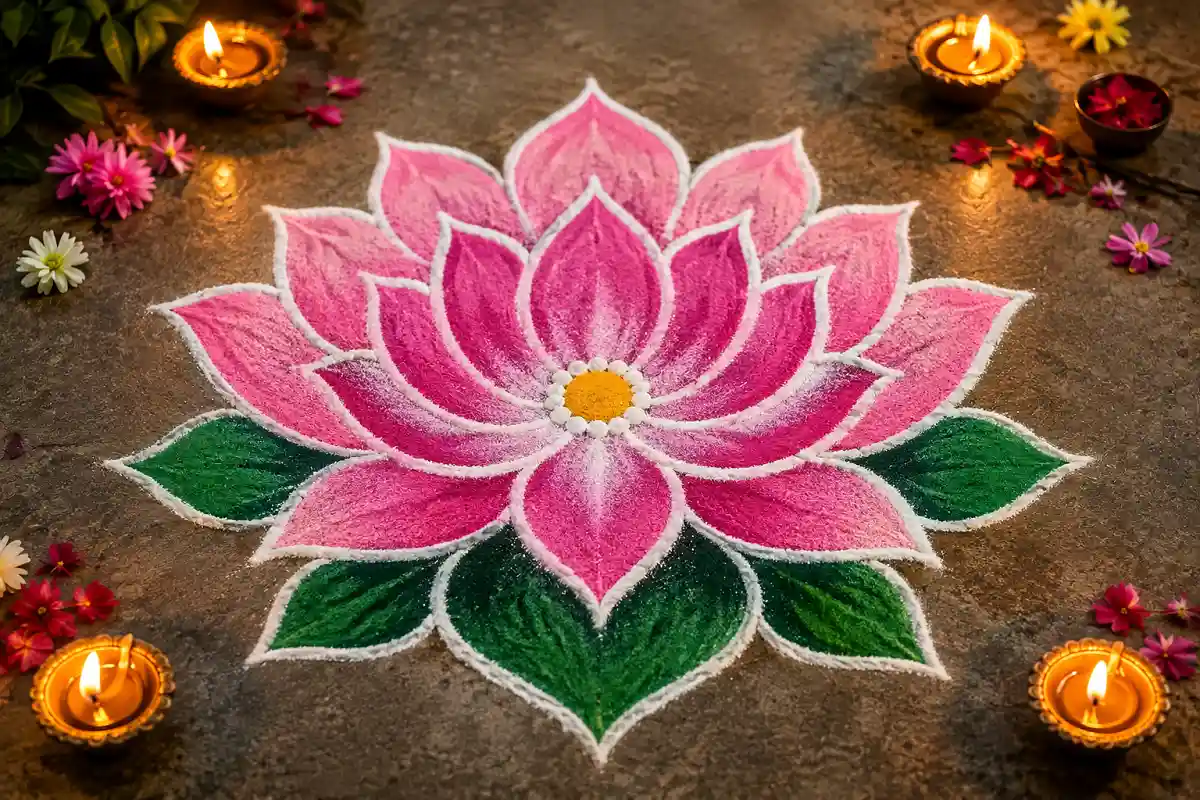
A simple lotus rangoli is a beautiful choice for beginners who want to try pointed petals. Begin with a small circle in the center and draw five to eight petals around it. Once the first layer is complete, you can add a few larger petals behind it for a fuller look. Pink and white are classic choices, while green leaves can complete the design. Start with one layer if you are new to lotus rangoli and add more layers as your confidence improves.
Five-Dot Flower Rangoli
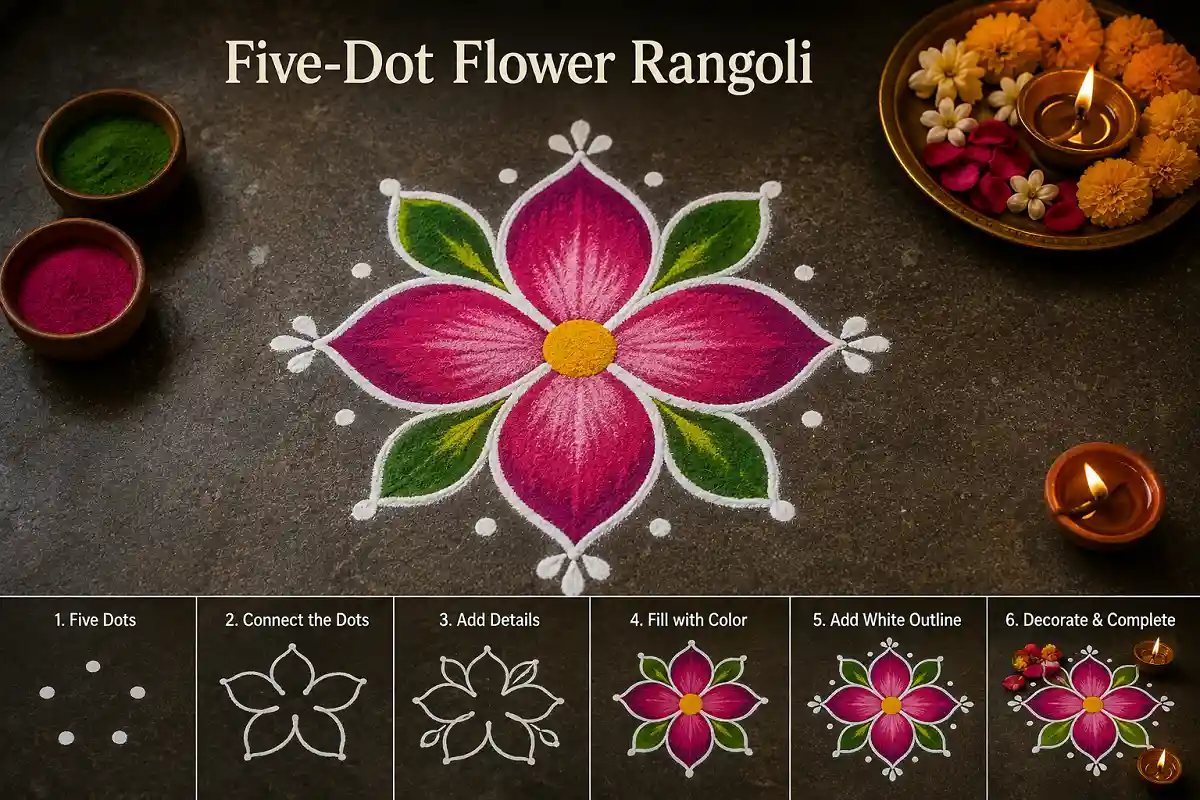
A five dot flower rangoli uses dots as a simple guide for creating evenly spaced petals. Place a small group of dots on the floor and connect them with smooth curved lines to form the flower. This method can be especially helpful if you find freehand drawing difficult. Once the outline is complete, fill the petals with one or two bright colors and add a white border. Dot-based patterns are a great way for beginners to practice symmetry while still creating a beautiful floral design.
Simple Marigold Flower Rangoli
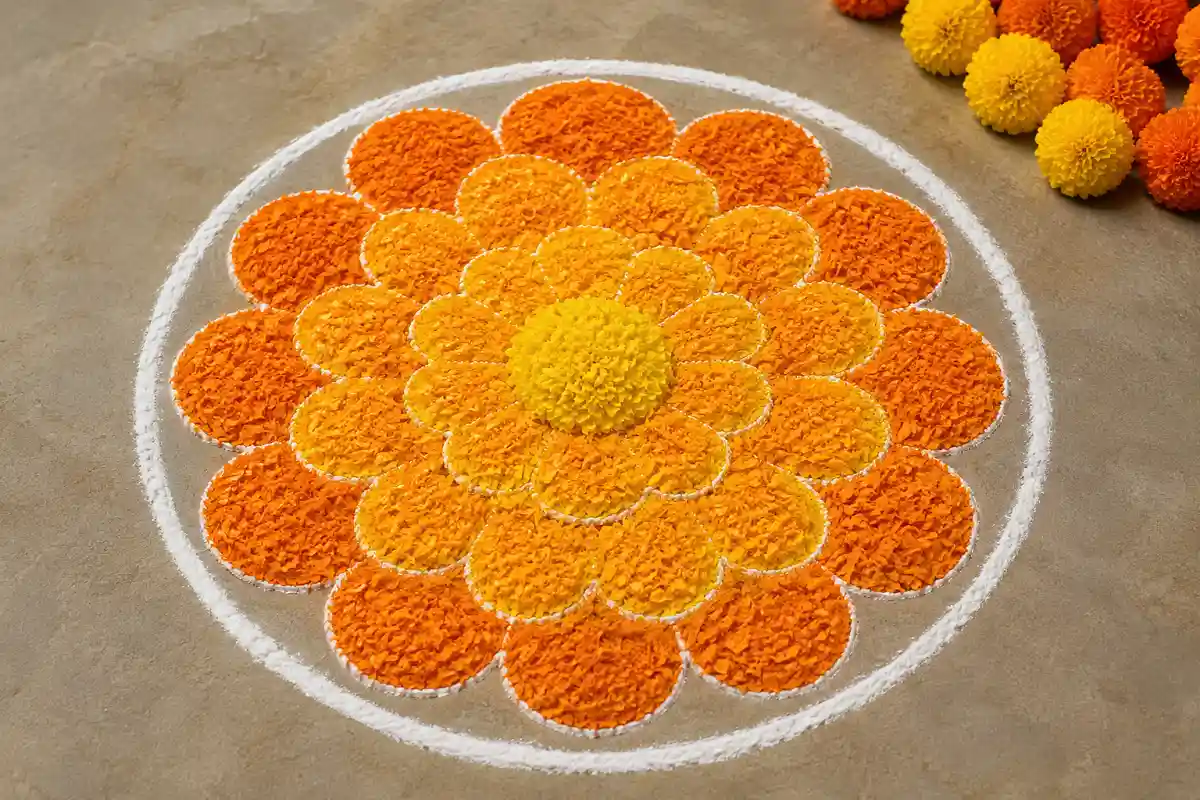
A marigold-inspired rangoli is easy to recognize because of its rounded, closely packed petals. Start with a small yellow center and draw short rounded petals around it. Add a second row of orange or yellow petals outside the first row to make the flower look fuller. You can finish it with a thin white circular border. This design works especially well for festivals because the warm yellow and orange colors create a cheerful appearance. It is also simple enough for beginners to complete without much practice.
Flower With Green Leaves
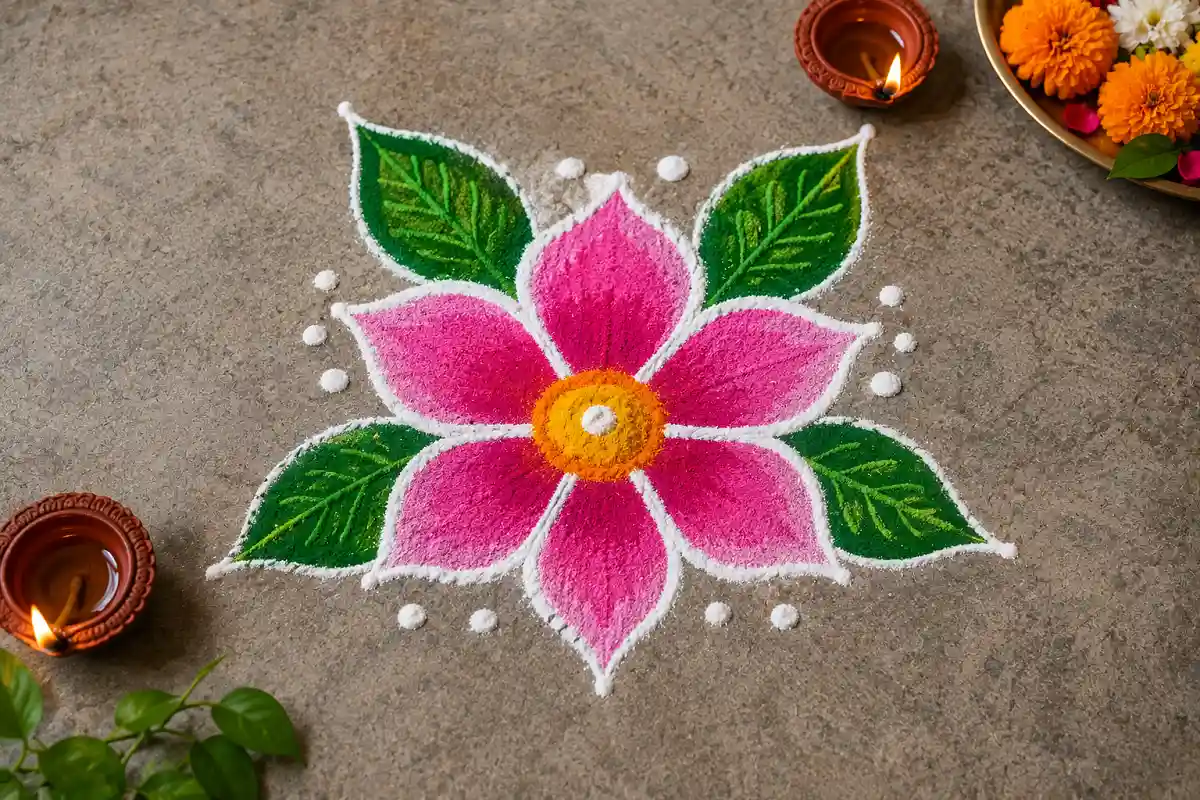
If you want a natural looking design without making it complicated, try a flower with green leaves. Draw a simple five or six petal flower in the center and add two or four leaves around the sides. Use pink, yellow, or orange for the flower and green for the leaves. You can add a few small dots between the leaves to fill empty spaces. This design is easy to adjust according to the available space, making it suitable for doorways, balconies, and small corners.
Double Layer Flower Rangoli
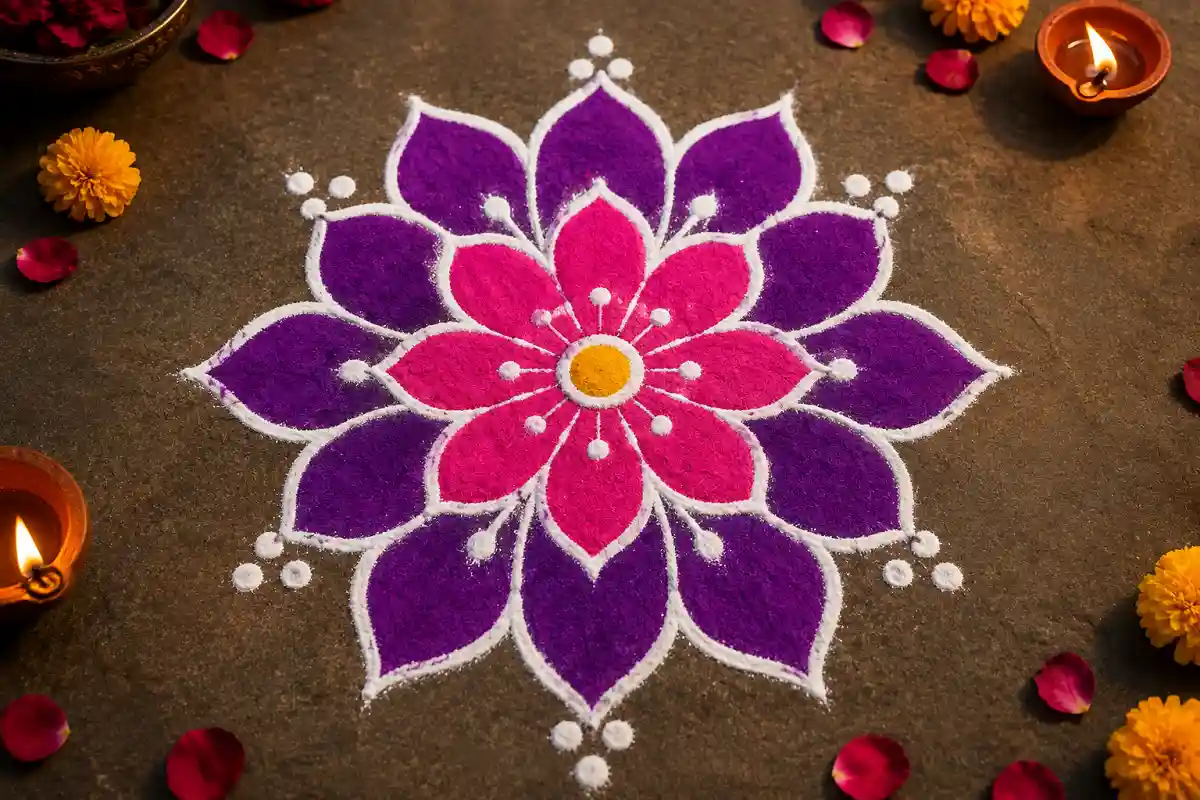
A double-layer flower rangoli is a simple way to make a basic flower look more detailed. Start with a small flower in the center and draw a second row of larger petals around it. Try placing the outer petals between the inner petals so the design looks balanced. Use one color for the inner flower and another for the outer layer. Finish with a white outline and a few decorative dots. Once you are comfortable with basic petals, this design is an easy next step.
Simple Floral Mandala
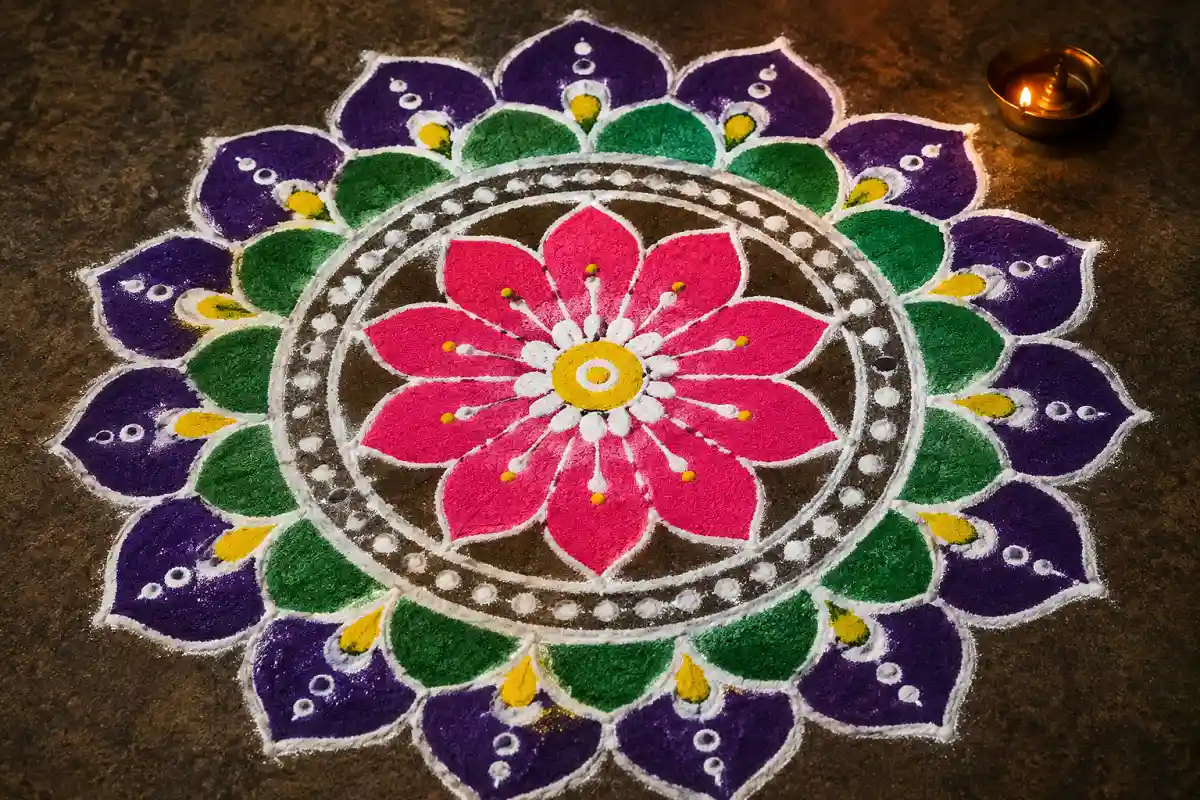
A simple floral mandala combines a central flower with circular rings, petals, and small decorative details. Start with a small flower in the middle and slowly build outward with another ring of petals. Add dots or simple curves between the layers to make the design more interesting. Beginners should start with only two or three layers instead of trying to create a large mandala immediately. Working from the center outward makes it easier to maintain balance and gives you more control over the overall shape.
Circular Petal Rangoli
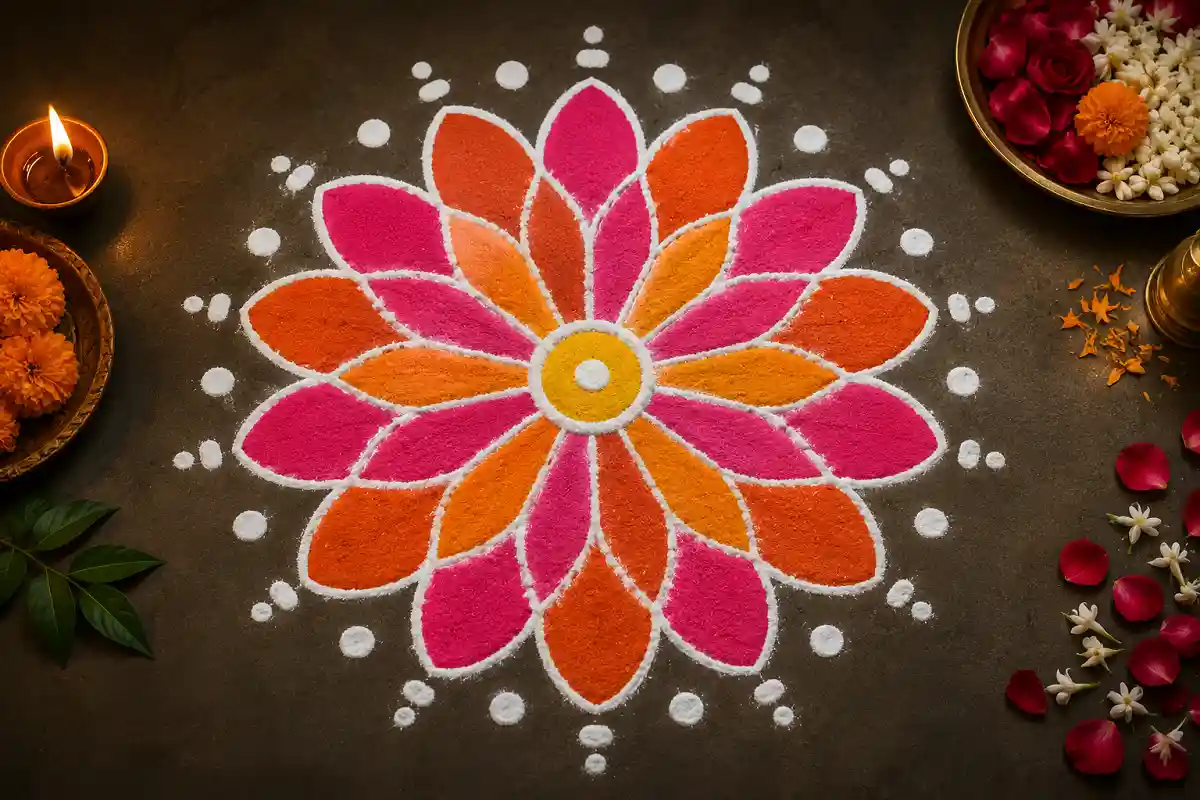
For this design, choose one simple petal shape and repeat it around a small center circle. Keep repeating the same shape until the petals form a complete circular flower. Because you are using one basic shape throughout the design, it becomes easier to maintain consistency. You can use alternating colors for the petals or keep the entire flower in one shade. Add a white outer border and a few dots around it for a simple finish. This is an excellent daily rangoli for beginners.
Rose-Inspired Flower Rangoli
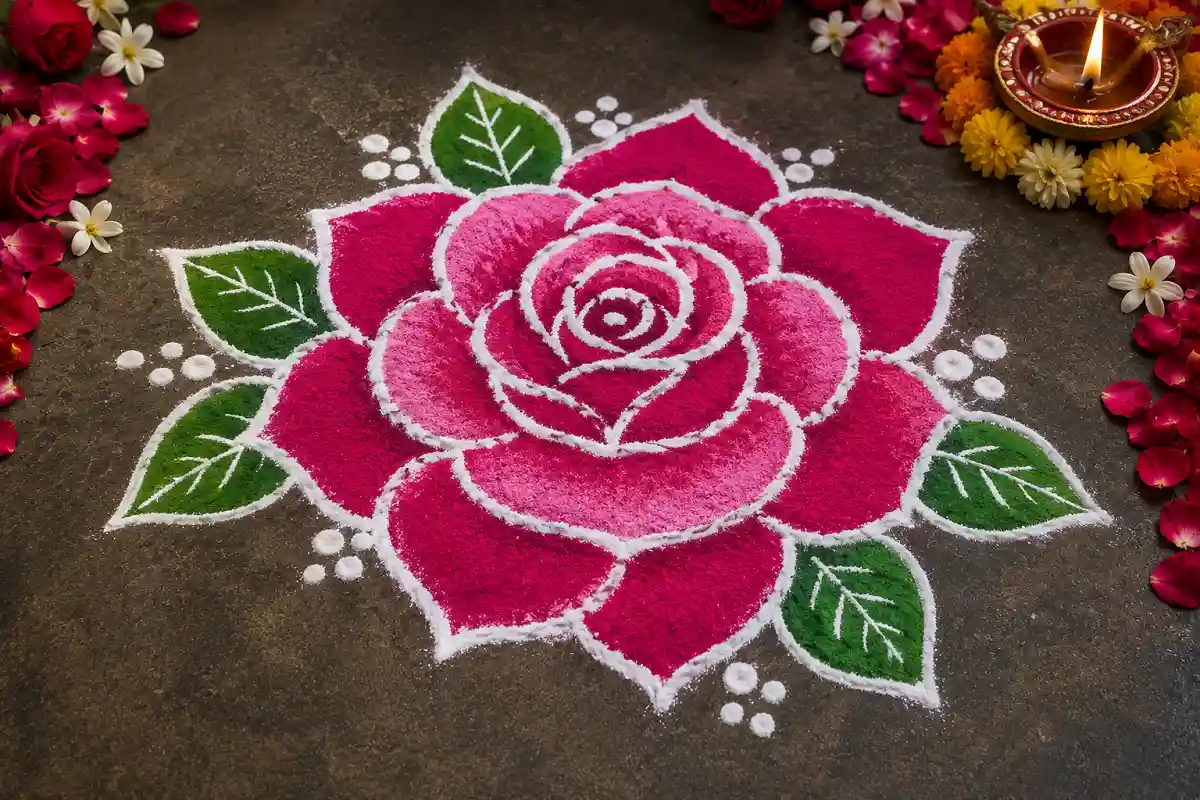
A rose-inspired rangoli uses curved and overlapping petals to create the appearance of a blooming rose. Start with a small curved center and slowly add larger curved petals around it. You do not need to make every petal perfect because the overlapping shapes naturally create a soft floral effect. Pink, red, white, or purple can work beautifully for this design. Keep the outer details simple, especially if you are a beginner, and use a thin white outline to make the petals easier to see.
Flower Border Rangoli
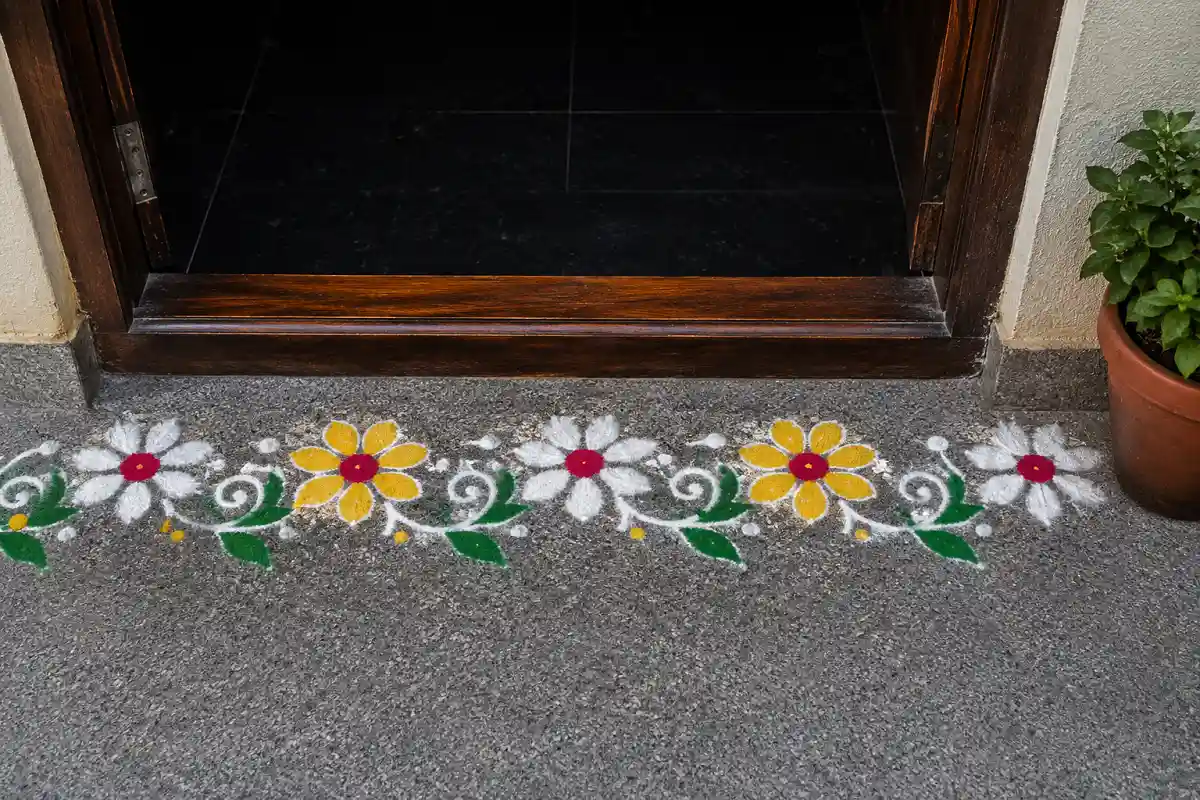
A flower border rangoli is a great option when you have limited floor space. Instead of creating one large circular design, draw several small flowers in a row along your doorway or entrance. Connect them with simple leaves, curves, or dots to create a continuous border. You can use the same flower throughout the design or alternate between two simple flower shapes. This style is quick to make and can also be used around larger rangoli designs as a decorative outer border.
Flower and Diya Rangoli
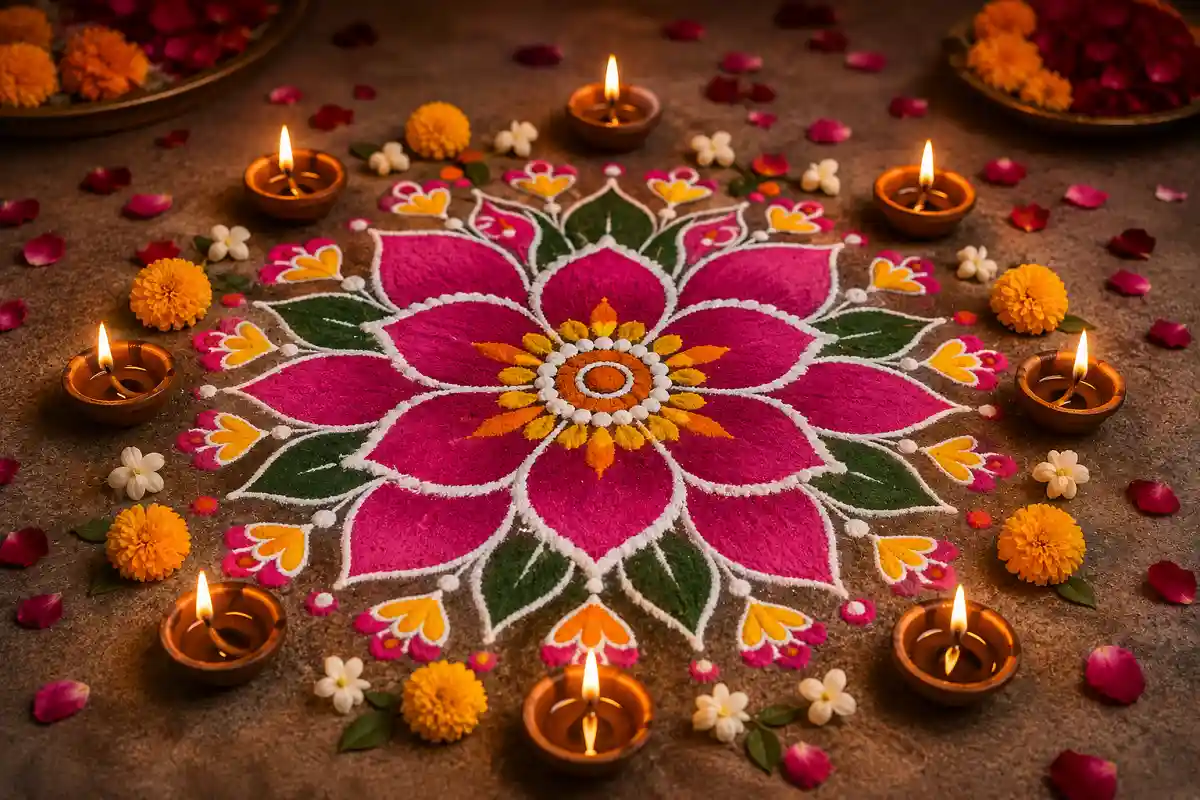
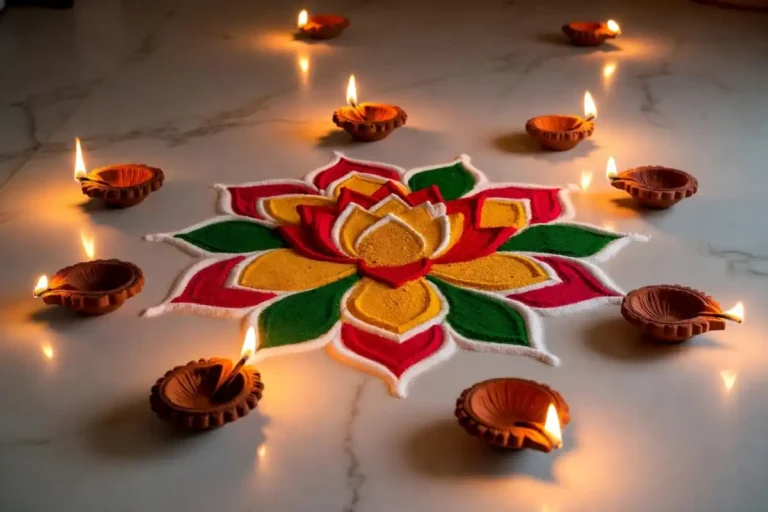
Combine a simple flower rangoli with small diyas to create a warm and festive design. Begin with a five- or six-petal flower in the center and decorate the outer area with small dots or leaves. Once the rangoli is complete, place diyas around the outside while leaving enough clear space between the flames and the powder. Pink, yellow, orange, and white are lovely color choices for this style. It works particularly well for Diwali, pooja, and other evening celebrations.
Fresh Flower Petal Rangoli
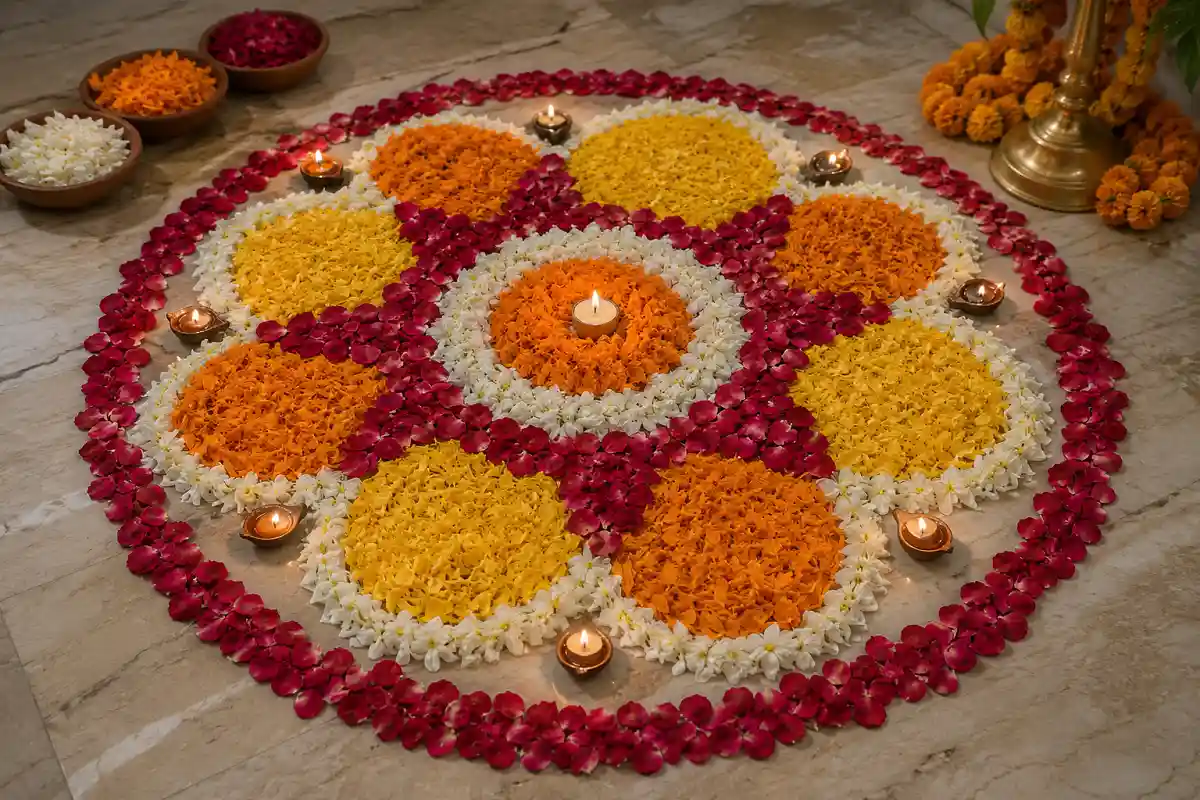
If you prefer natural decoration, try making your rangoli with fresh flower petals instead of colored powder. Marigold, rose, and jasmine petals can be arranged into simple flowers, circles, or borders. Start with a clear center and work outward, just as you would with powder rangoli. You can also combine fresh petals with a small white powder outline to make the shapes clearer. This is a beautiful option for beginners because you can rearrange the petals easily until you are happy with the design.
Layered Lotus Flower Rangoli
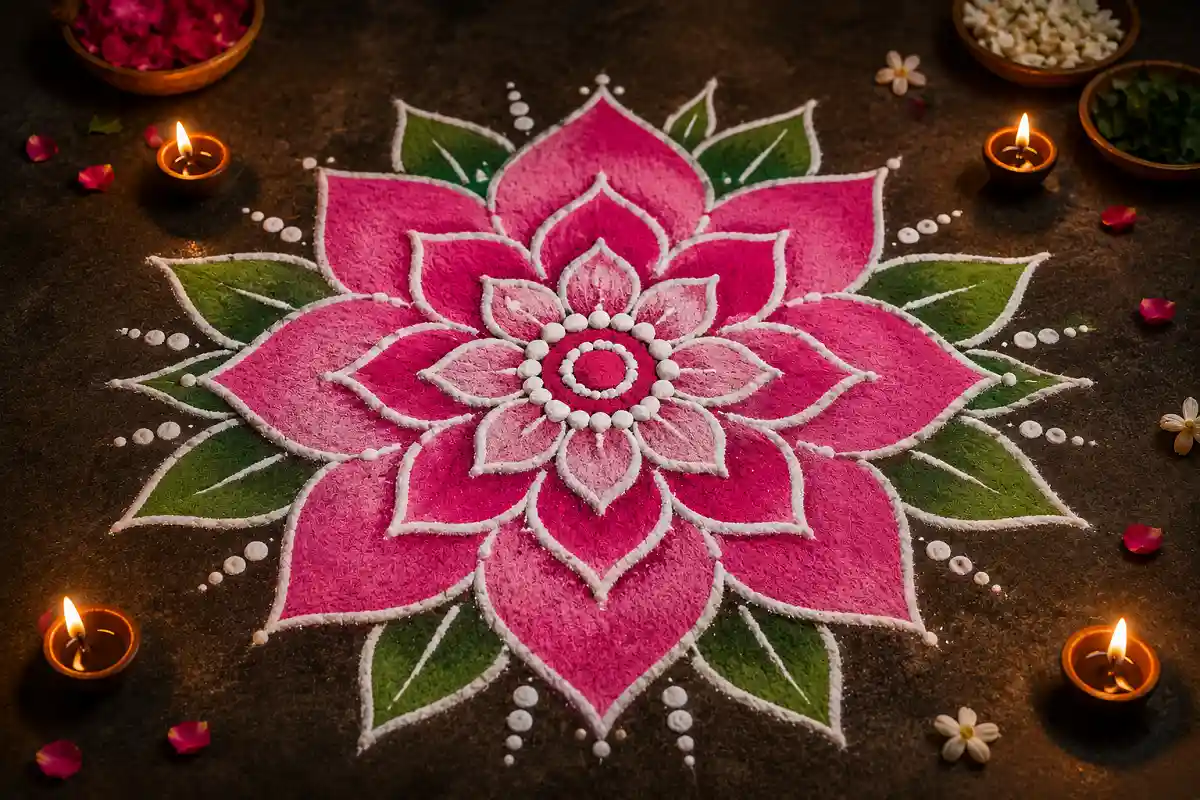
A layered lotus is a beautiful design to try once you are comfortable with basic flowers. Start with a small center circle and create the first ring of pointed petals. Add a second ring behind the first, placing the larger petals between the inner ones. You can add a third layer if you have enough space. Use pink and white for the petals, green for the leaves, and white powder for the outline. Building the lotus layer by layer makes this detailed-looking design easier for beginners.
How to Choose Colors for a Flower Rangoli
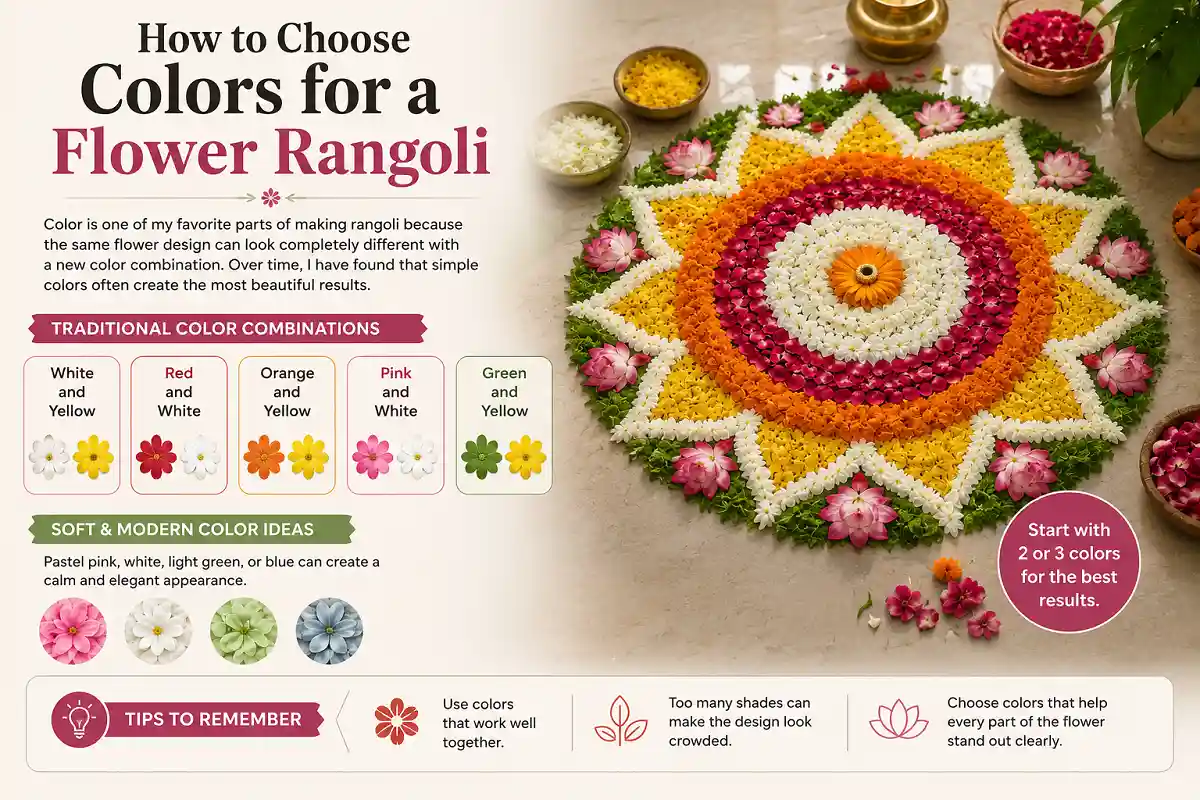
Color is one of my favorite parts of making rangoli because the same flower design can look completely different with a new color combination. Over time, I have found that simple colors often create the most beautiful results.
For a traditional look, try combinations such as:
- White and yellow
- Red and white
- Orange and yellow
- Pink and white
- Green and yellow
If you prefer a softer, more modern style, pastel pink, white, light green, or blue can create a calm and elegant appearance. I usually recommend starting with two or three colors, especially for a small flower rangoli. Too many shades can make the design look crowded and hide the beauty of the petals.
The goal is not to use as many colors as possible. It is to choose colors that work well together and help every part of the flower stand out clearly.
Simple Tips I Learned From Practicing Rangoli
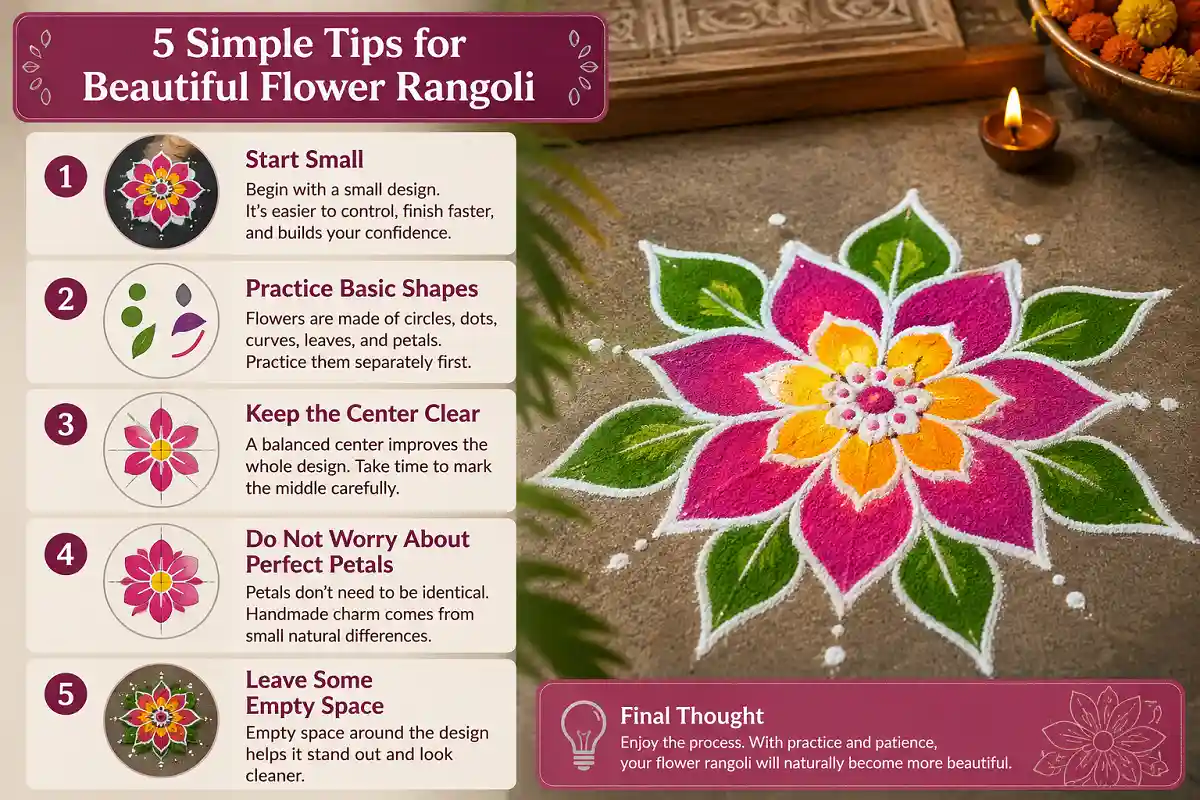
Start Small
When I first began trying designs myself, I quickly realized that a small rangoli is much easier to control. You can finish it faster, correct mistakes more easily, and gradually build confidence.
Practice Basic Shapes
Most flower rangoli designs are built from simple shapes. Practice circles, dots, curves, leaves, and petals separately. Once you become comfortable with them, combining them into a complete rangoli becomes much easier.
Keep the Center Clear
A balanced center makes the whole flower look better. Take a little extra time when marking the middle before drawing the petals.
Do Not Worry About Perfect Petals
This is something I learned over time. Your petals may not all look exactly the same, and that is okay. Rangoli is handmade. The small differences are part of its character.
Leave Some Empty Space
You do not have to cover every inch of the floor. A little empty space around a flower can actually make the design stand out more.
Flower Rangoli Ideas for Everyday Use
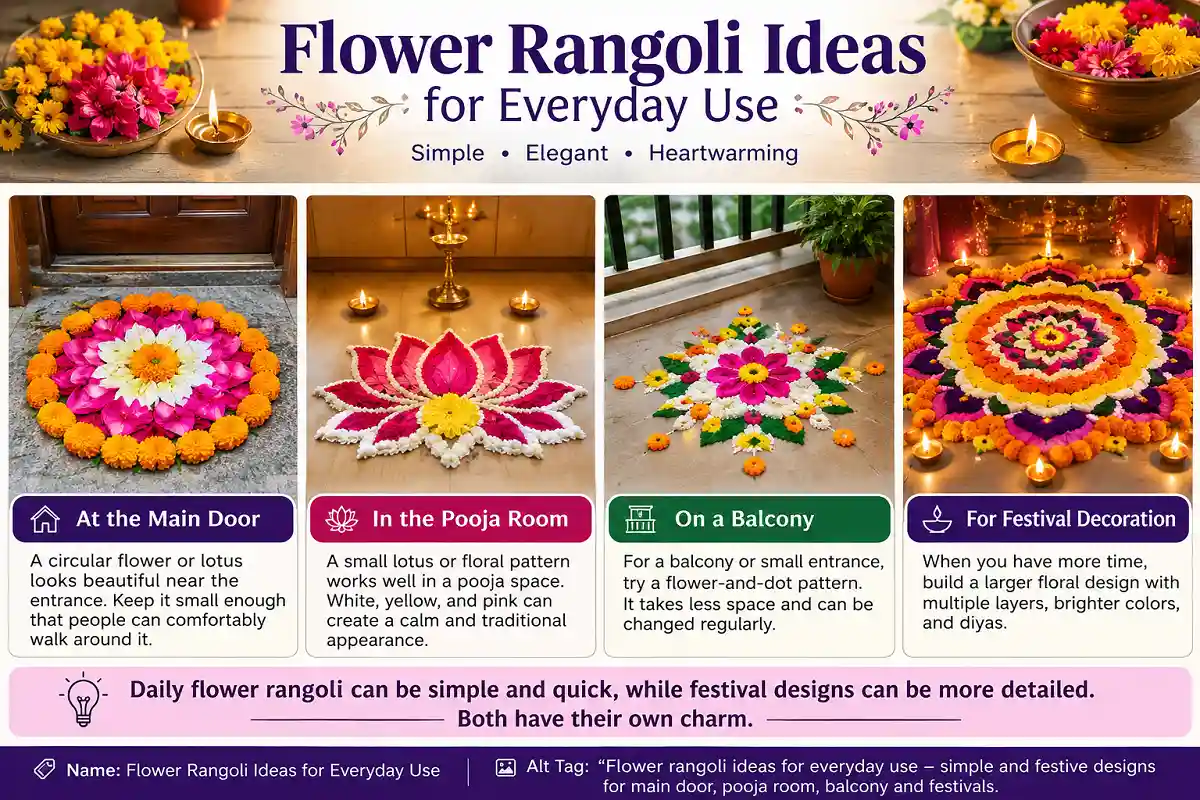
One of the things I love most about daily rangoli is that it does not have to be a big project.
At the Main Door
A circular flower or lotus looks beautiful near the entrance. Keep it small enough that people can comfortably walk around it.
In the Pooja Room
A small lotus or floral pattern works well in a pooja space. White, yellow, and pink can create a calm and traditional appearance.
On a Balcony
For a balcony or small entrance, try a flower-and-dot pattern. It takes less space and can be changed regularly.
For Festival Decoration
When you have more time, build a larger floral design with multiple layers, brighter colors, and diyas. Daily flower rangoli can be simple and quick, while festival designs can be more detailed. Both have their own charm.
Common Mistakes to Avoid
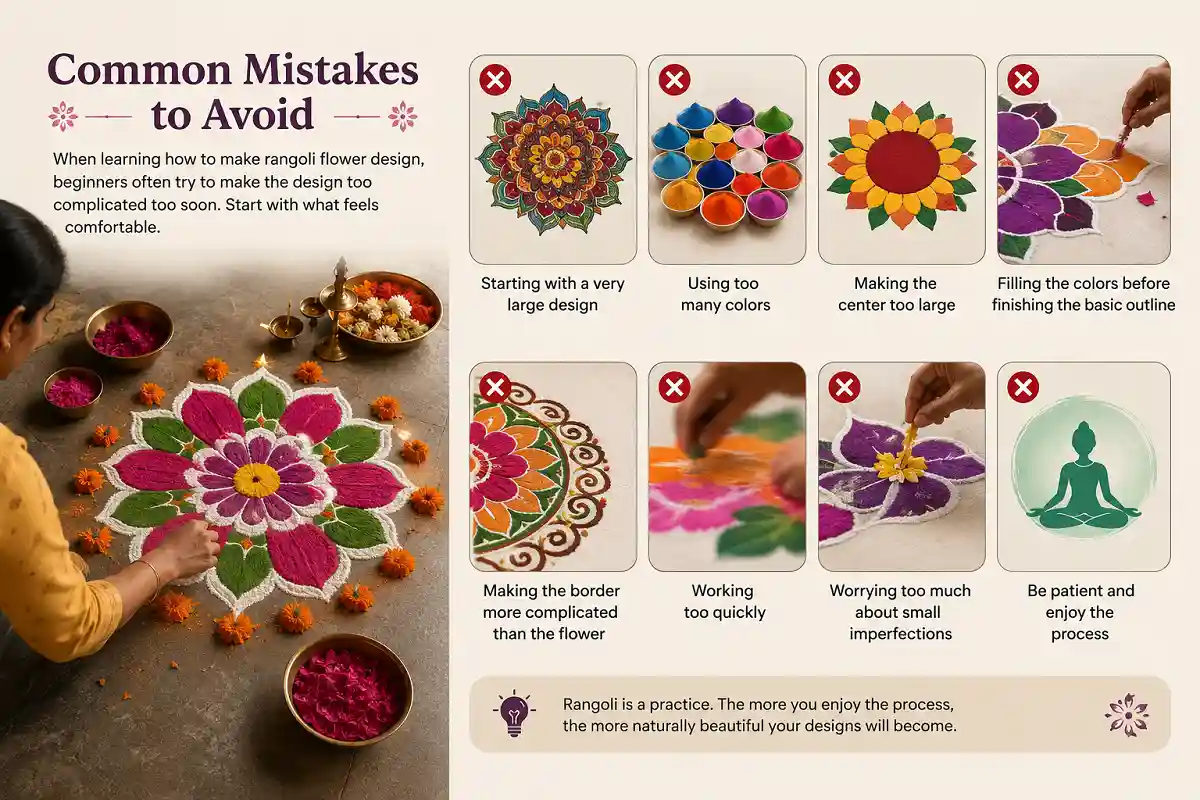
When learning how to make rangoli flower design, beginners often try to make the design too complicated too soon. Start with what feels comfortable.
Here are a few things I would avoid:
- Starting with a very large design
- Using too many colors
- Making the center too large
- Filling the colors before finishing the basic outline
- Making the border more complicated than the flower
- Working too quickly
- Worrying too much about small imperfections
How to Make Your Flower Rangoli More Personal
For me, rangoli has never been only about copying a beautiful pattern. The designs I remember most are connected to moments: watching my grandmother work quietly in the morning, seeing my mother finish the last few petals, and later trying those same patterns myself.
That is why I encourage you to make the design your own. Change the number of petals. Try a different color combination. Add leaves, dots, or a small diya. Use flower petals instead of powder. There is no need to make every rangoli exactly like the one before it. The basic shapes can remain traditional while your own personality slowly becomes part of the design.
Keeping the Tradition Alive
Whenever I think about rangoli, I still remember those quiet mornings sitting on the steps and watching my mother and grandmother work. What seemed so simple to me as a child was actually a beautiful combination of patience, practice, and a tradition passed down through generations.
You do not need to create a perfect or complicated design to enjoy that same feeling. Start with a small flower, add a few petals and dots, choose two colors, and let the design grow naturally. If you want to explore more simple patterns, you can also try these simple daily flower rangoli designs or discover more easy flower rangoli ideas for beginners.
With time, you may develop your own favorite patterns, just as I did. You can experiment with a simple lotus rangoli design for festivals or try rangoli with real flowers when you want something more natural and colorful.
For me, collecting, practicing, and photographing rangoli has been a way to keep those childhood memories alive. I hope these simple flower rangoli ideas inspire you to create something beautiful and carry a little of that tradition into your own home. If you would like to learn more about the history and cultural tradition behind rangoli, visit Pinterest.
Frequently Asked Questions
How to make rangoli flower design for beginners?
Start by cleaning the floor and marking a small center point. Draw five or six simple petals around it, add dots or leaves, and fill the petals with two or three colors.
What is the easiest flower rangoli design?
A simple five-petal flower is one of the easiest designs for beginners. It uses basic curved shapes and can be completed quickly.
How many colors should I use for a flower rangoli?
For a small flower rangoli, two or three colors are usually enough. You can add more colors as you become comfortable.
Can I make flower rangoli with real flowers?
Yes. You can arrange fresh marigold, rose, jasmine, and other flower petals into floral patterns. You can also combine flower petals with colored rangoli powder.
How can I make my flower rangoli look symmetrical?
Start with a clear center point and space the petals evenly around it. A small dot grid or light chalk guide can also help you maintain balance. Dot-based methods are particularly useful when you are learning symmetry.