15 Stunning 3D Rangoli Design Ideas for Your Home
I’ve been drawing and documenting rangoli for eight years, but my connection with this art form started much earlier. I grew up in Kolkata watching my mother and grandmother draw rangoli at our doorway every morning before sunrise. I would sit quietly on the steps and watch the patterns take shape, dot by dot and colour by colour. At the time, I didn’t realise how much those simple mornings would influence me.
Over the years, I started collecting the designs I learned from them, trying new patterns myself, and photographing the ones I wanted to remember. Traditional rangoli will always have a special place for me, but I also enjoy experimenting with newer styles, including 3D rangoli designs that use shading, highlights, and perspective to create the illusion of depth.
If you are looking for 3D rangoli design ideas for your home, you do not have to begin with something complicated. A simple flower, diya, geometric shape, or mandala can become three-dimensional with the right use of light and shadow. I’ve put together 15 ideas here that you can use for everyday decoration, festivals, Diwali, weddings, or any occasion when you want your entrance to feel a little more special.
What Makes a Rangoli Look 3D?
The main difference between a regular rangoli and a 3D rangoli is the illusion of depth. Instead of making every part look flat, you use colour and shading to make some areas appear closer, raised, or even as though they are floating above the floor.
The technique is actually easier to understand when you break it down.
A lighter colour can act like a highlight, while a darker shade can create a shadow. When these are placed consistently around a shape, our eyes interpret the difference as depth.
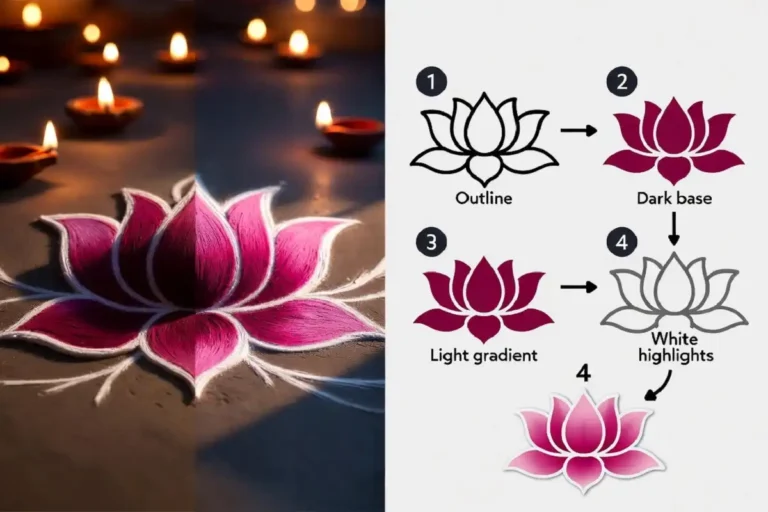
For example, if you draw a lotus petal, adding a darker shade near its lower edge and a lighter highlight along its upper edge can make the petal appear raised. You can use the same idea with diyas, flowers, cubes, hearts, and other motifs.
The important thing is consistency. Decide where your imaginary light is coming from and keep your highlights and shadows in the same direction throughout the design.
15 Stunning 3D Rangoli Design Ideas
3D Lotus Rangoli Design
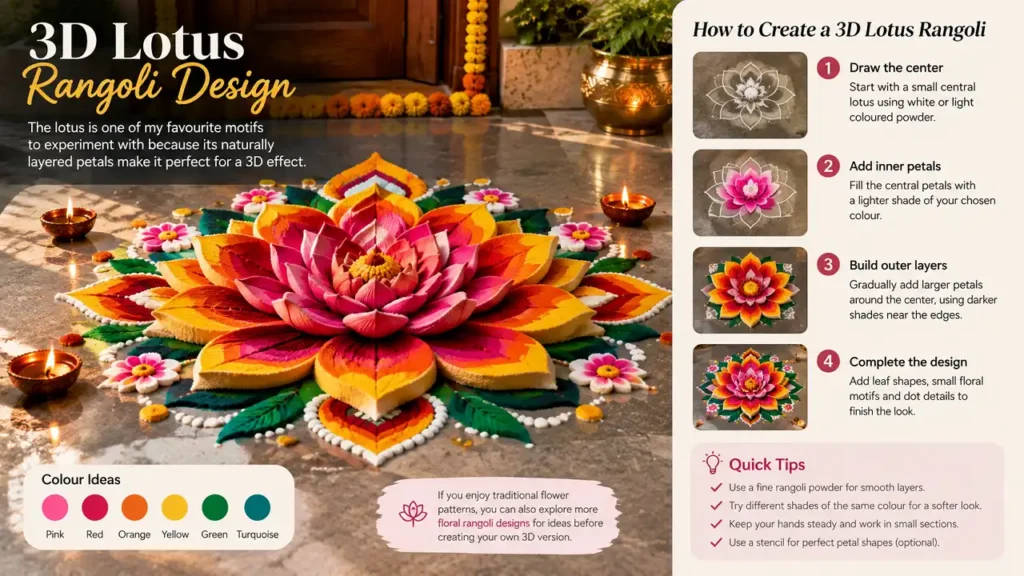
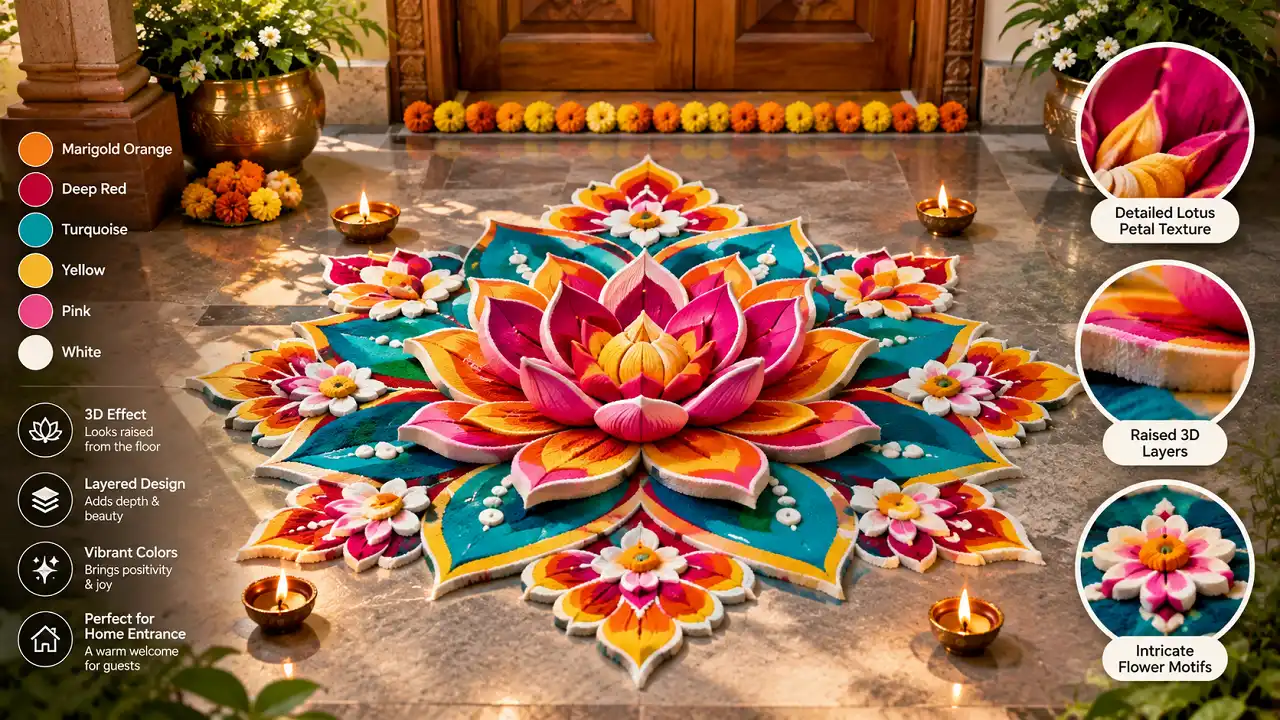
The lotus is one of my favourite motifs to experiment with because its naturally layered petals make it perfect for a 3D effect.
Start with a small central lotus and gradually build larger petals around it. Use a lighter shade on the upper portion of each petal and a darker shade near the overlapping edges.
Pink, red, orange, and yellow work beautifully, but you can also create a softer version using two or three shades of the same colour.
If you enjoy traditional flower patterns, you can also explore more floral rangoli designs for ideas before creating your own 3D version.
3D Diya Rangoli
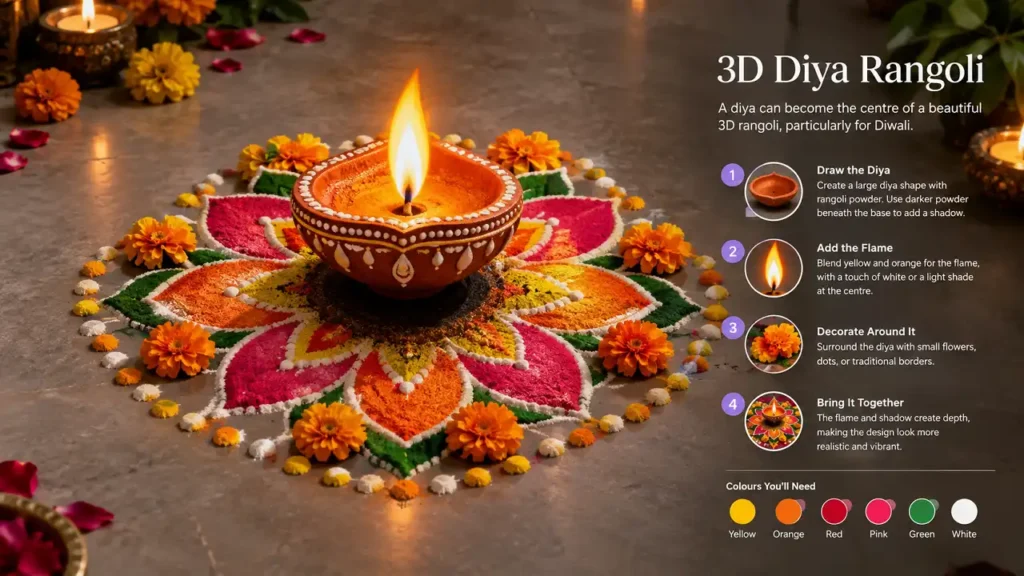
A diya can become the centre of a beautiful 3D rangoli, particularly for Diwali.
Draw a large diya and use darker powder beneath its base to create a shadow. For the flame, blend yellow and orange with a small amount of white or another light shade near the centre.
You can surround the diya with small flowers, dots, or traditional borders. The combination of the flame and shadow naturally gives the design a sense of depth.
3D Peacock Rangoli
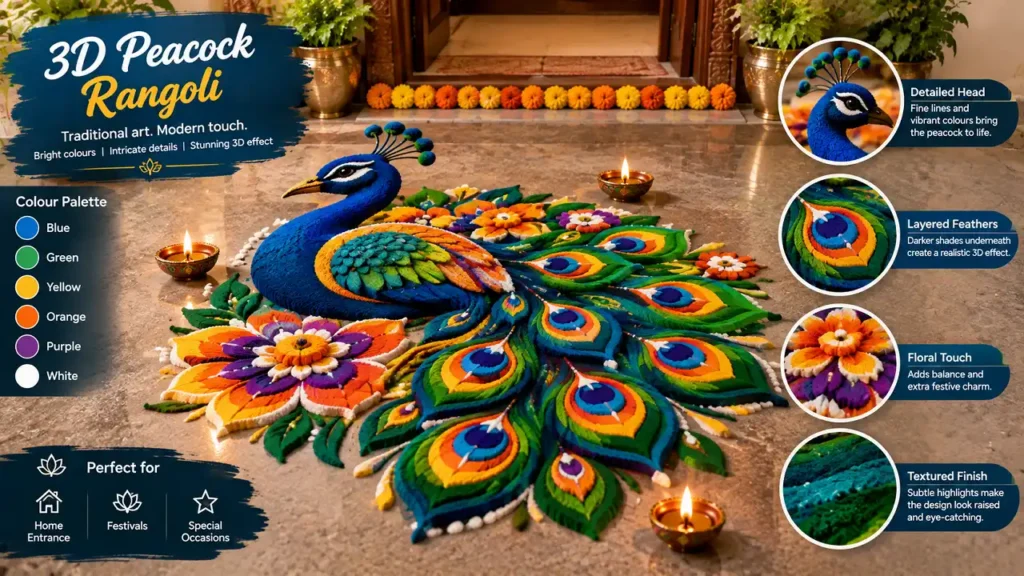
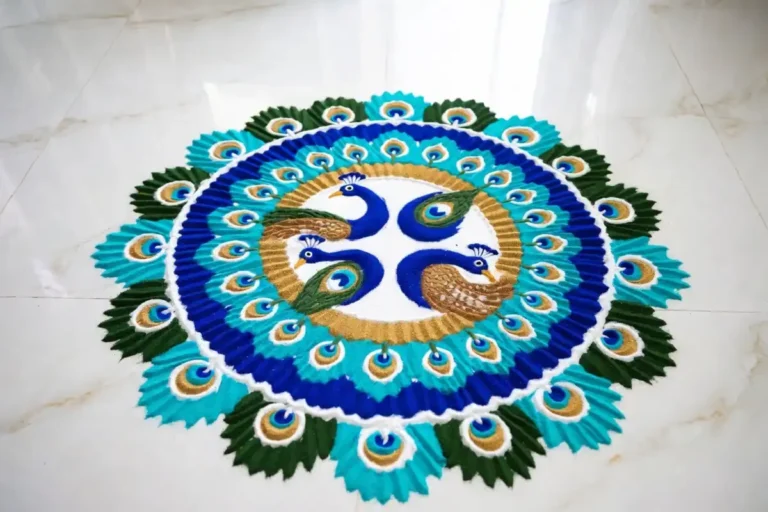
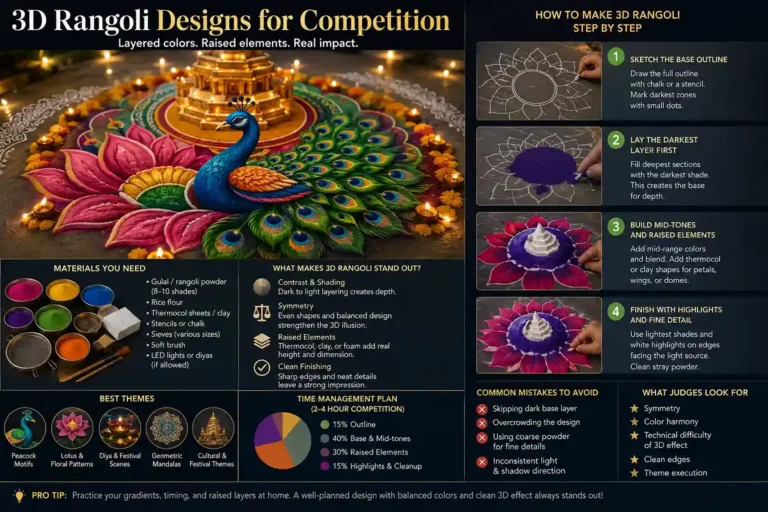
Peacock rangoli designs already have plenty of colour and detail, so adding 3D shading can make them especially eye-catching.
Use blue and green for the body and feathers, then add darker shades underneath individual feather sections. Small highlights can be added to the feather patterns to make them appear closer to the viewer.
If you are making this for a festival, adding yellow, orange, or purple details can give the design a more colourful finish.
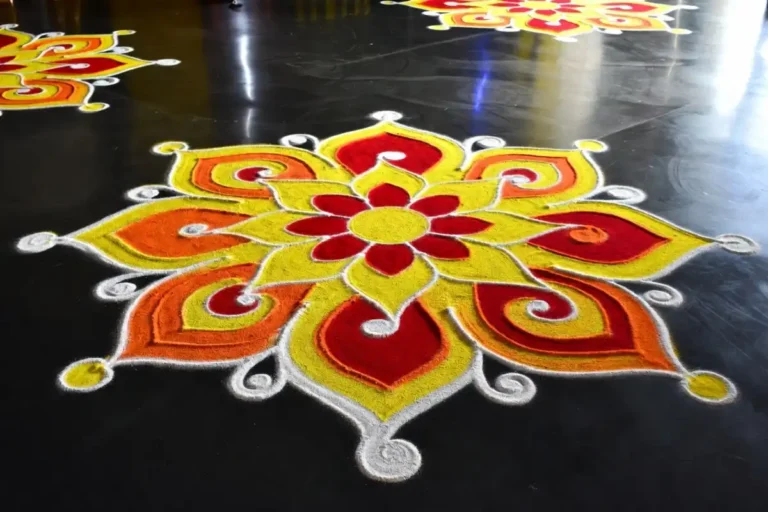
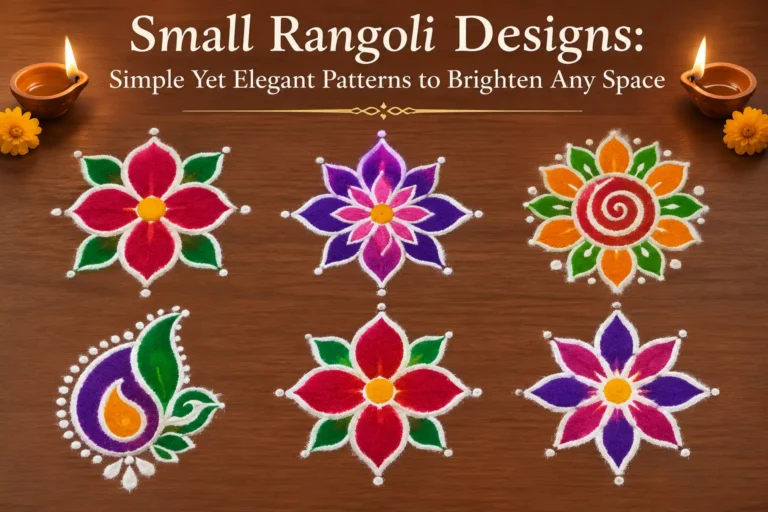
3D Flower Rangoli
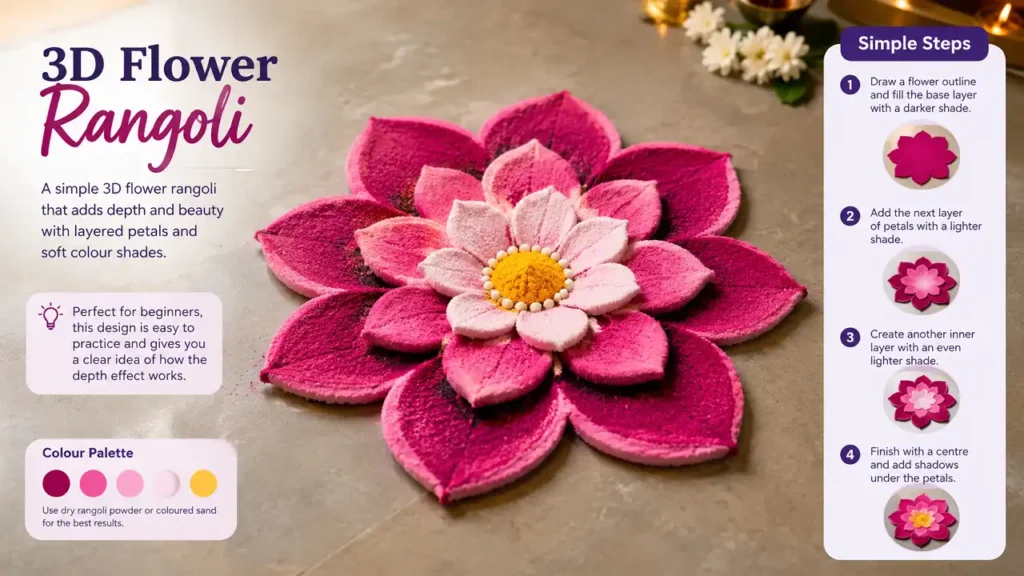
You can create a simple 3D effect without drawing a complicated subject.
Try making one large flower with several layers of petals. Give each layer a slightly different shade, and place a darker shadow underneath the overlapping petals.
This is one of the designs I would suggest to someone trying 3D rangoli for the first time. It is simple enough to practise but still gives you a clear idea of how the depth effect works.
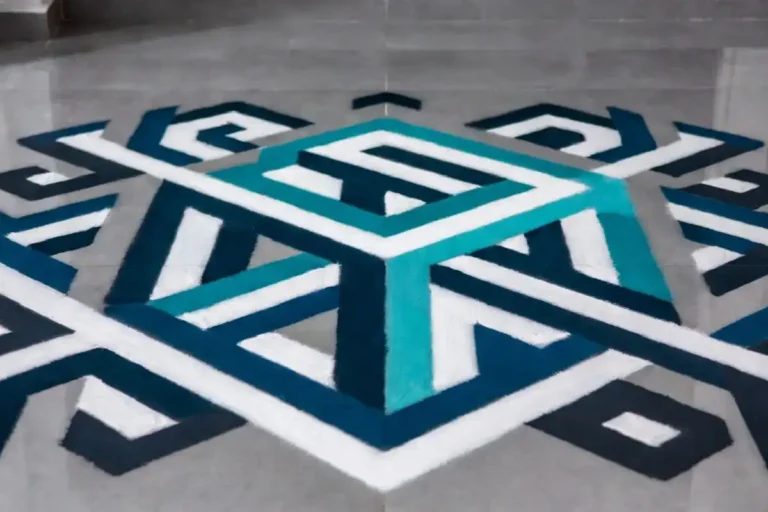
3D Geometric Rangoli
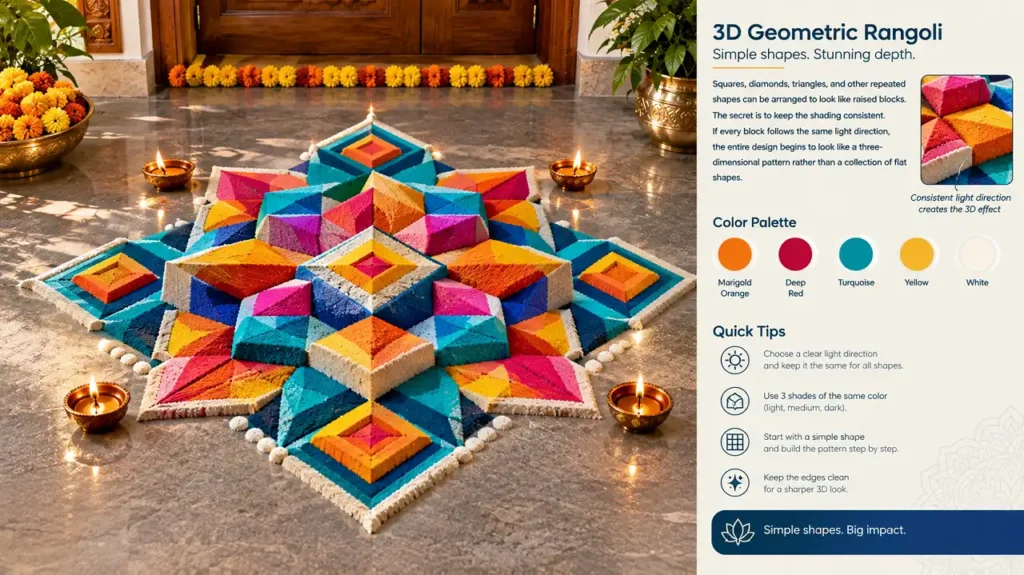
If floral designs are not your style, try a geometric pattern.
Squares, diamonds, triangles, and other repeated shapes can be arranged to look like raised blocks. Use light, medium, and dark shades on different sides of each shape.
The secret is to keep the shading consistent. If every block follows the same light direction, the entire design begins to look like a three-dimensional pattern rather than a collection of flat shapes.
3D Mandala Rangoli
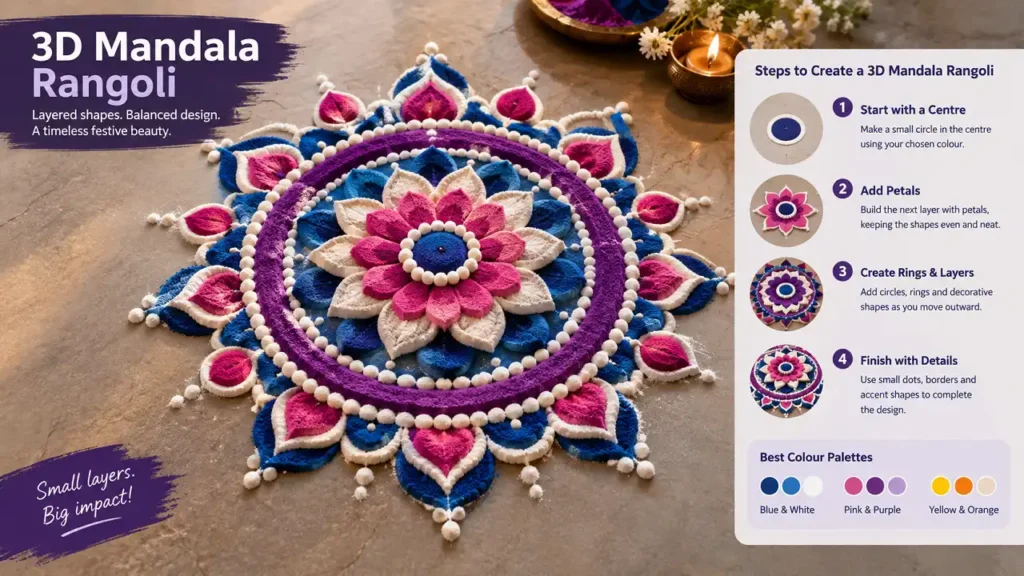
A mandala is another excellent starting point because of its natural symmetry.
Begin with a small circle in the centre and build outward using petals, rings, and decorative shapes. Give each layer a subtle shadow and highlight.
You can keep the colour palette simple with blue and white, pink and purple, or yellow and orange. A limited palette often makes the 3D effect easier to see.
3D Floating Flower Rangoli
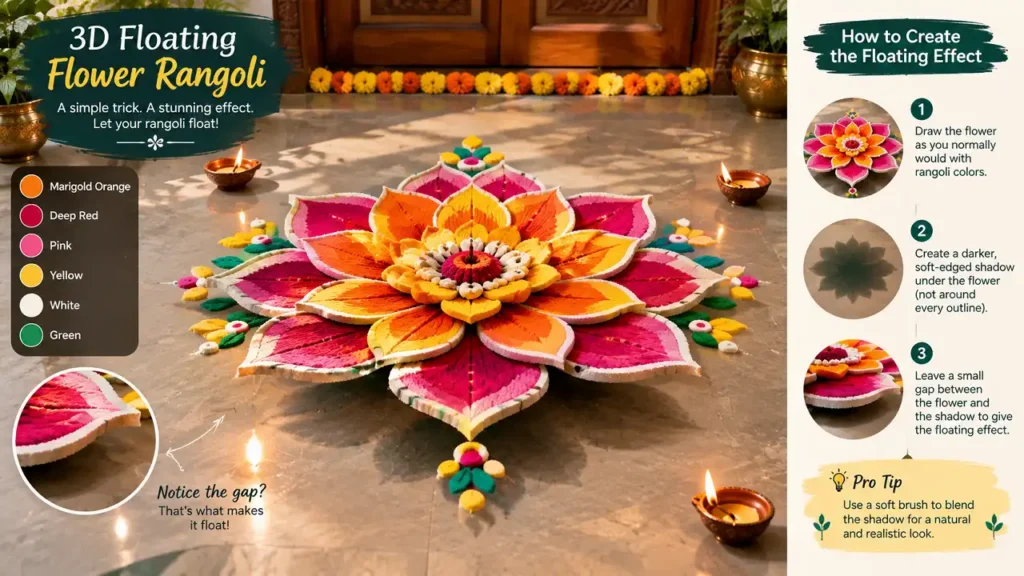
For a more unusual design, create a flower that appears to be floating above the floor.
The trick is the shadow. Draw the flower normally, then place a darker soft-edged shape underneath it rather than directly around every part of the outline.
Leave a small visual gap between the flower and its shadow. This helps create the impression that the flower is slightly above the floor.
3D Butterfly Rangoli
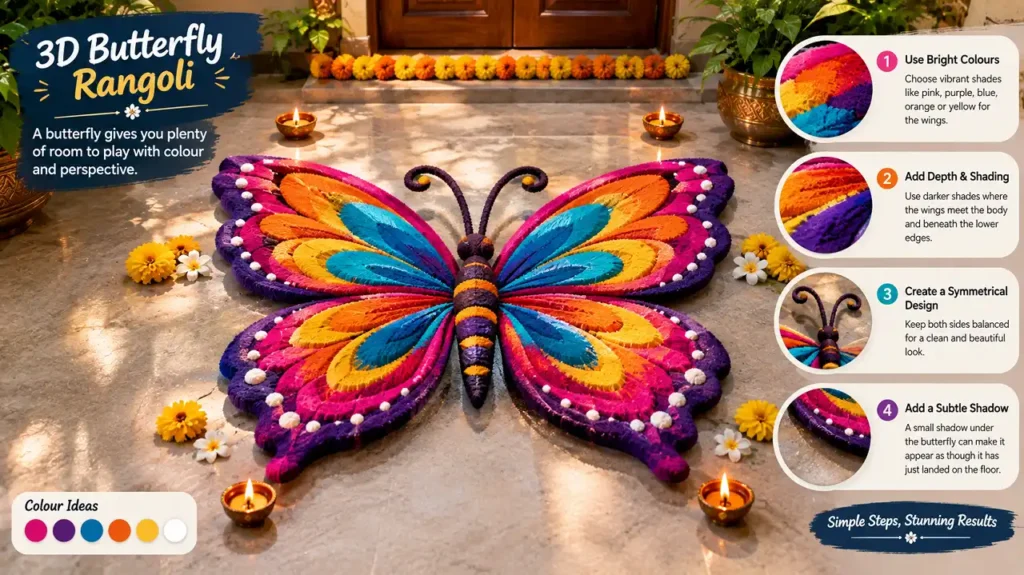
A butterfly gives you plenty of room to play with colour and perspective.
Create symmetrical wings using bright colours such as pink, purple, blue, orange, or yellow. Add darker shading where the wings meet the body and beneath the lower edges.
A small shadow under the butterfly can make it appear as though it has just landed on the floor.
3D Spiral Rangoli
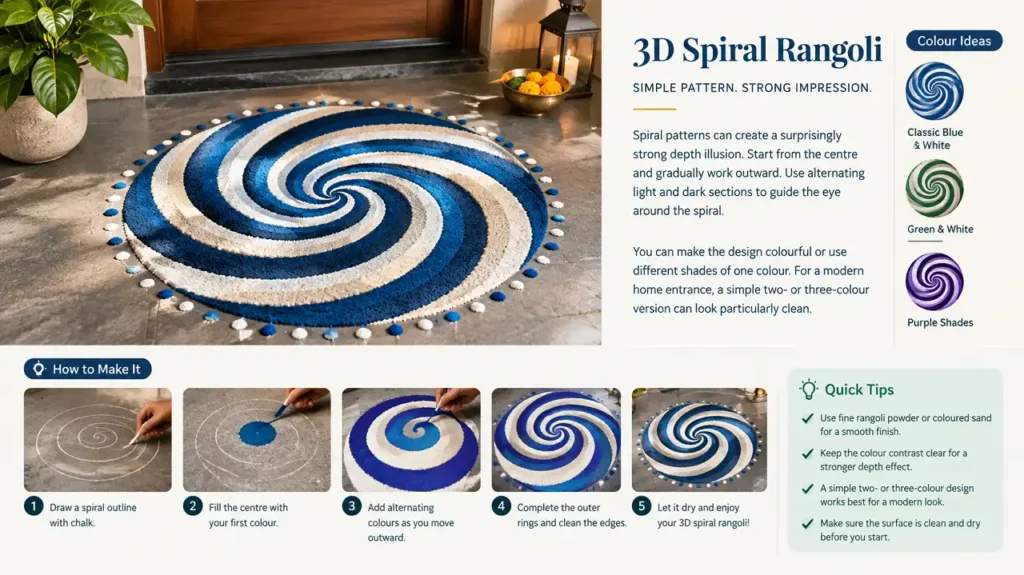
Spiral patterns can create a surprisingly strong depth illusion.
Start from the centre and gradually work outward. Use alternating light and dark sections to guide the eye around the spiral.
You can make the design colourful or use different shades of one colour. For a modern home entrance, a simple two- or three-colour version can look particularly clean.
3D Cube Rangoli
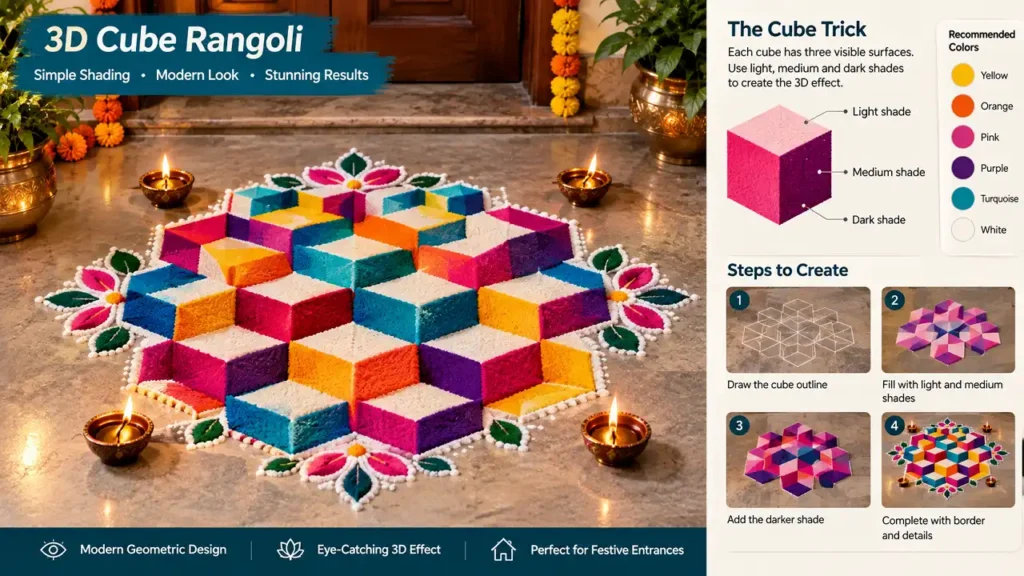
Cube designs are a great option if you want something modern and geometric.
Each cube needs to show three visible surfaces. Give one surface a light shade, another a medium shade, and the third a darker shade.
Once several cubes are connected, the pattern can create an optical illusion that looks almost like a three-dimensional floor structure.
This design takes a little more practice than a flower, but the basic shading principle is quite simple.
3D Heart Rangoli
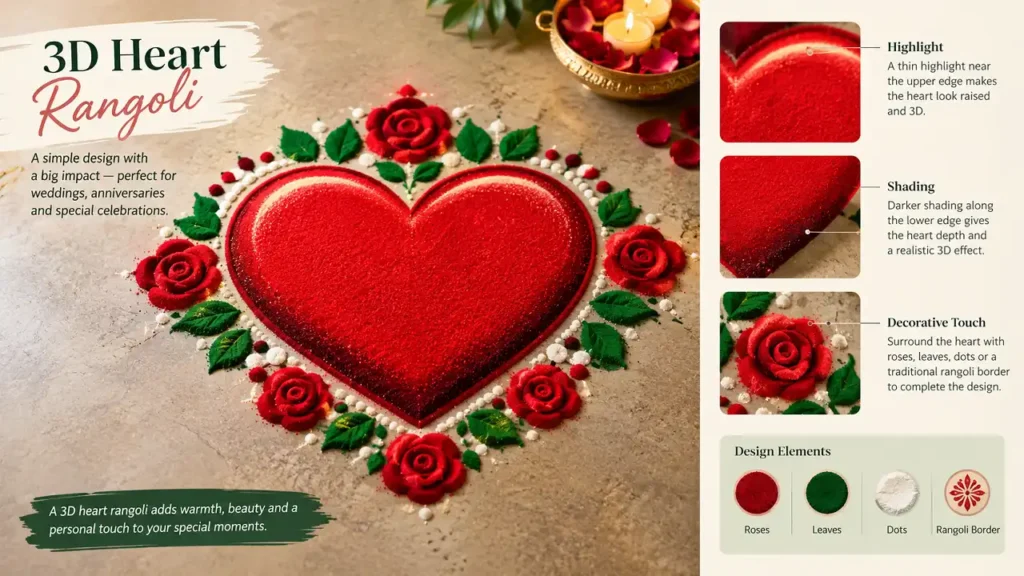
A 3D heart can work beautifully for weddings, anniversaries, or other celebrations.
Draw the heart with a bold outline and use darker shading along its lower edge. Add a thin highlight near the upper edge to make it appear slightly raised.
You can surround it with small roses, leaves, dots, or a traditional rangoli border to give the design a more complete appearance.
3D Kalash Rangoli
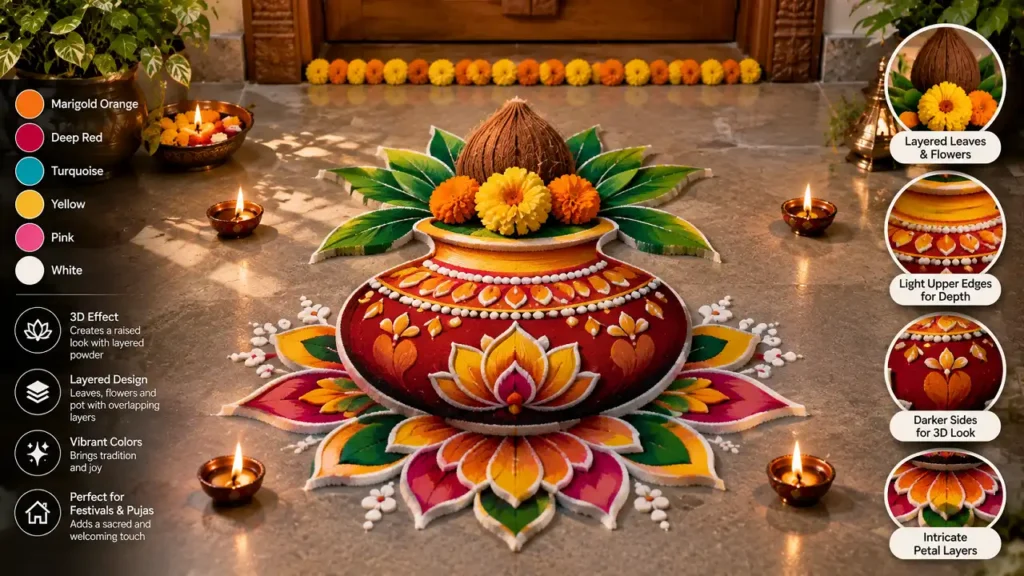
For a more traditional look, try turning a kalash into a 3D rangoli motif.
Use darker colours around the bottom and sides of the pot while keeping the upper edges lighter. Add leaves and flowers above the kalash using overlapping layers.
Because the design combines a familiar traditional motif with modern shading, it can work well for festive and religious occasions.
3D Staircase Rangoli
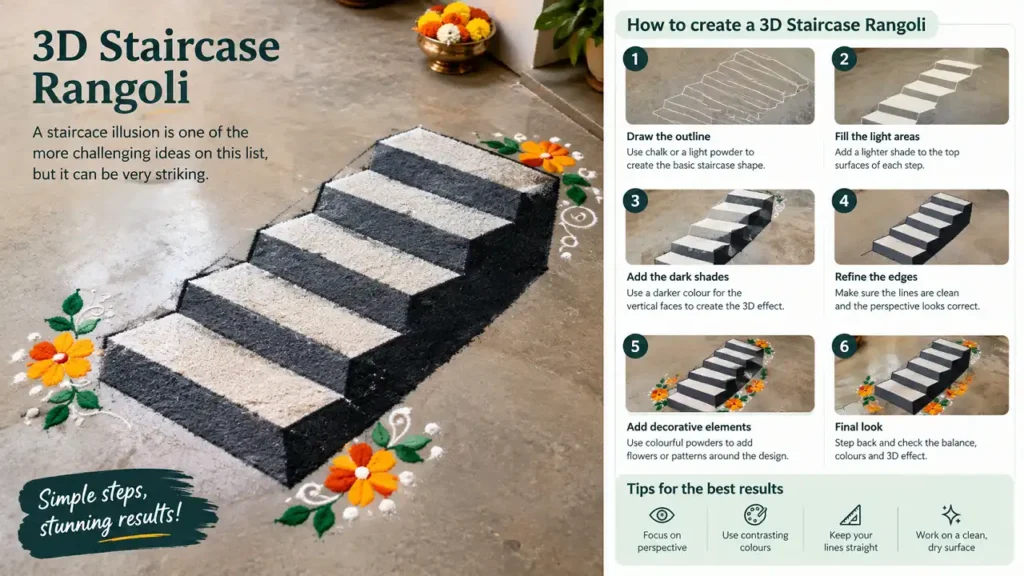
A staircase illusion is one of the more challenging ideas on this list, but it can be very striking.
Create a series of rectangular or step-like shapes that gradually change in size. Use contrasting light and dark shades to make each step appear to have a different surface.
Perspective is particularly important here. Before adding colour, make sure the basic lines are positioned correctly.
3D Hexagon Rangoli
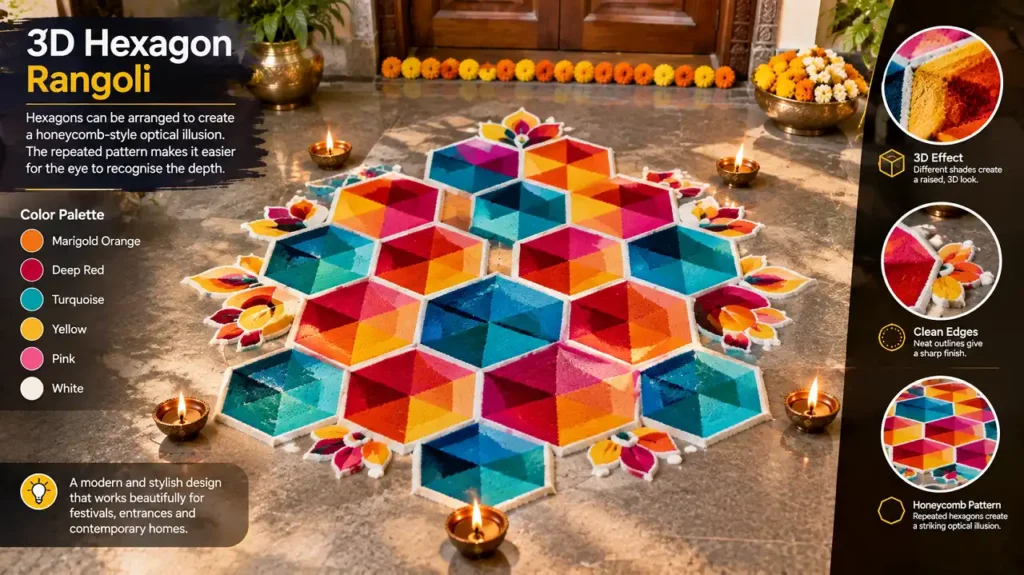
Hexagons can be arranged to create a honeycomb-style optical illusion.
Draw connected hexagons and divide their surfaces into different shades. The repeated pattern makes it easier for the eye to recognise the illusion of depth.
This is a good choice if you prefer contemporary rangoli rather than floral designs. It can also be adapted to different sizes depending on the space available.
3D Diwali Rangoli with Diyas and Flowers
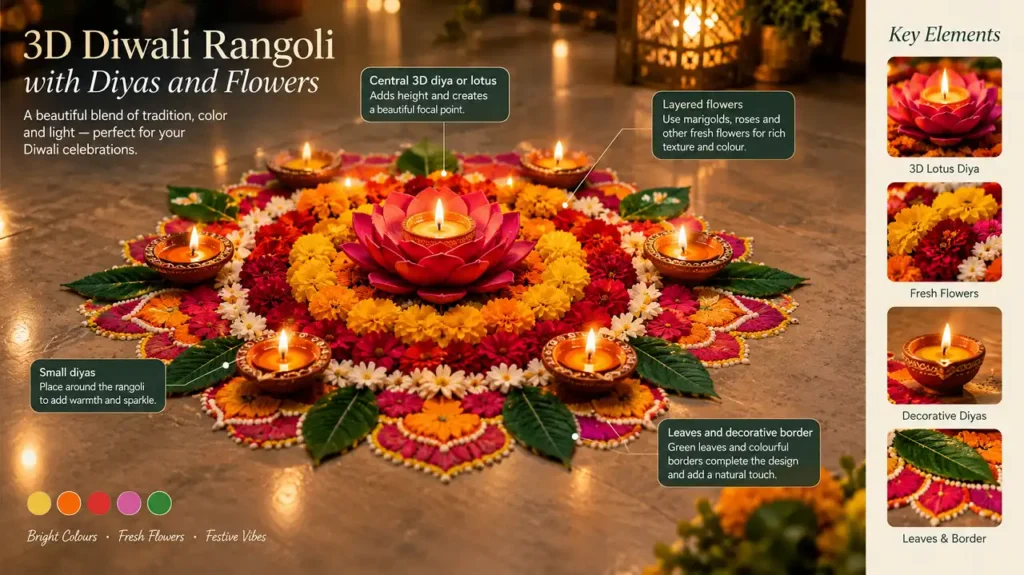
For Diwali, I love the idea of bringing several elements together instead of relying on just one motif.
You can place a 3D diya or lotus in the centre and surround it with layered flowers, leaves, small diyas, and decorative borders. Warm colours such as yellow, orange, red, and pink work naturally with the festive theme.
If you are planning a larger festive floor decoration, you can also explore more Diwali rangoli designs for additional ideas and inspiration.
Add small highlights to the flames and darker shadows underneath the diyas. These little details can make the whole composition feel more dimensional.
How to Create a Simple 3D Rangoli at Home
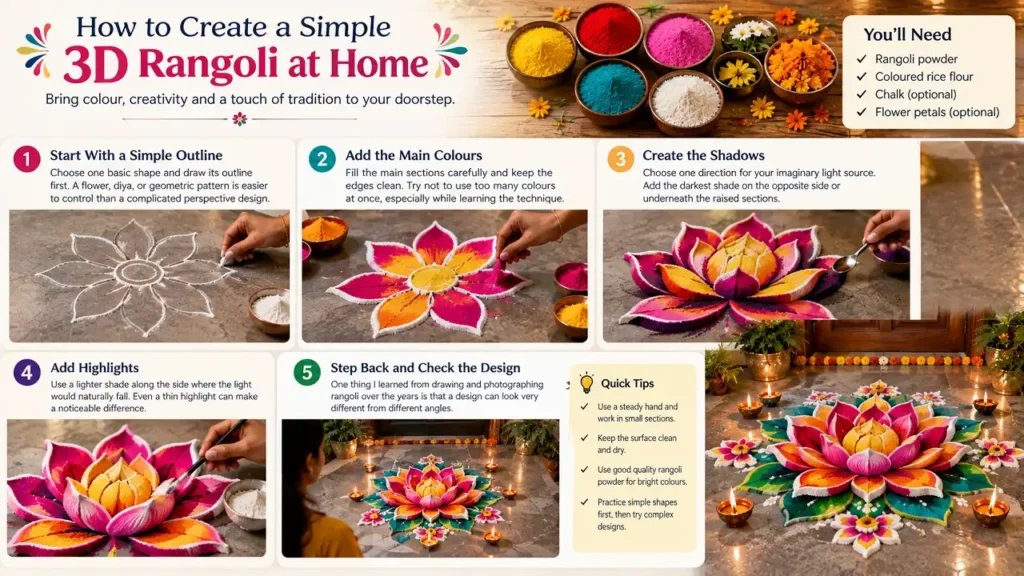
You do not need special materials to start practising. Traditional rangoli powder is enough, and you can also experiment with coloured rice flour, chalk, or flower petals depending on the design.
Start With a Simple Outline
Choose one basic shape and draw its outline first. A flower, diya, or geometric pattern is easier to control than a complicated perspective design.
Add the Main Colours
Fill the main sections carefully and keep the edges clean. Try not to use too many colours at once, especially while learning the technique.
Create the Shadows
Choose one direction for your imaginary light source. Add the darkest shade on the opposite side or underneath the raised sections.
Add Highlights
Use a lighter shade along the side where the light would naturally fall. Even a thin highlight can make a noticeable difference.
Step Back and Check the Design
One thing I learned from drawing and photographing rangoli over the years is that a design can look very different from different angles.
After finishing, step back and look at it from the position where visitors will normally see it. If the shadow and highlight feel balanced from that angle, the 3D effect will be much stronger.
Tips for Making Your 3D Rangoli Look Realistic
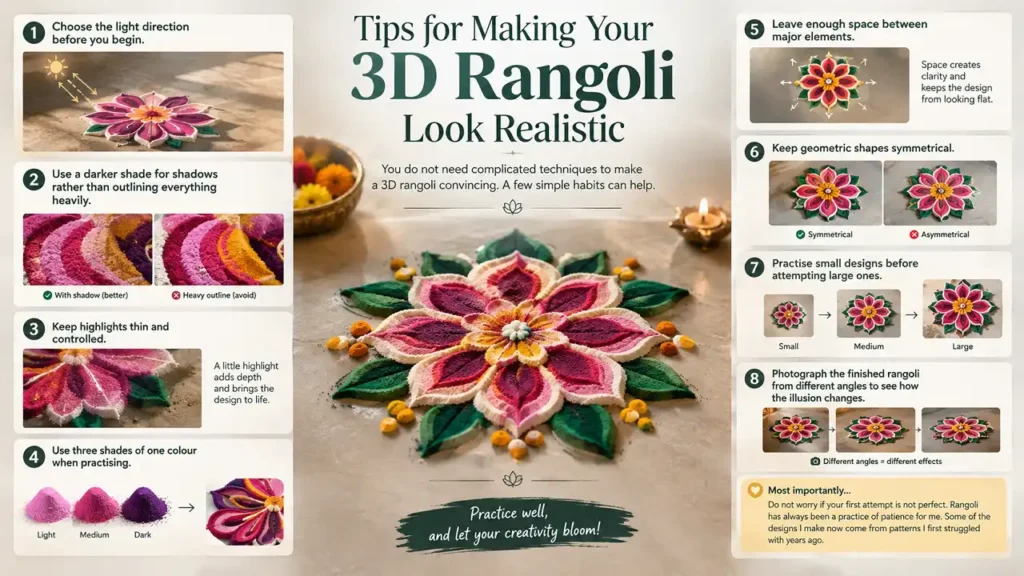
You do not need complicated techniques to make a 3D rangoli convincing. A few simple habits can help.
Decide where the imaginary light is coming from before you begin. Your highlights and shadows should follow the same direction throughout the entire rangoli.
Choose the Light Direction
Choose the light direction before you begin.
Use Natural Shadows
Use a darker shade for shadows rather than outlining everything heavily.
Keep Highlights Thin
Keep highlights thin and controlled.
Practise With Three Shades
Use three shades of one colour when practising.
Leave Enough Space
Leave enough space between major elements.
Keep Shapes Symmetrical
Keep geometric shapes symmetrical.
Start Small
Practise small designs before attempting large ones.
Photograph From Different Angles
Photograph the finished rangoli from different angles to see how the illusion changes.
Most importantly, do not worry if your first attempt is not perfect. Rangoli has always been a practice of patience for me. Some of the designs I make now come from patterns I first struggled with years ago.
After eight years of drawing, trying, and documenting rangoli, I still find something special about watching a simple pattern develop on the floor. That feeling takes me back to those mornings in Kolkata when I would sit on the steps and watch my mother and grandmother work before sunrise, creating each pattern slowly, dot by dot and colour by colour.
3D rangoli gives that familiar tradition a different visual character. It lets you experiment with depth and perspective while still using the colours, shapes, and patience that make rangoli so enjoyable.
You don’t have to create a huge or complicated design. Start with a small flower or diya, practise the shadows and highlights, and see where your creativity takes you. The most beautiful rangoli is often not the most complicated one, but the one that carries a little of your own time, patience, and tradition into the home.
✦ Create slowly. Create patiently. Create something of your own. ✦FAQs
What is a 3D rangoli design?
A 3D rangoli is a floor-art pattern that uses shadows, highlights, colour contrast, overlapping shapes, and perspective to create the appearance of depth.
Which 3D rangoli is easiest for beginners?
A layered flower, lotus, diya, or simple geometric pattern is a good place to start. These designs let you practise light and shadow without requiring complicated perspective.
What colours should I use for a 3D rangoli?
Start with three shades: light, medium, and dark. Pink and red, yellow and orange, or blue and turquoise are simple combinations to experiment with.
Can I make a 3D rangoli for Diwali?
Yes. Diyas, lotus flowers, mandalas, and traditional festive motifs can all be adapted into 3D designs for Diwali.
Do I need special materials for 3D rangoli?
No. You can start with ordinary rangoli powder. Depending on the design, coloured rice flour, chalk, or flower petals can also be used.
How do I make the 3D effect more realistic?
Keep the direction of your light source consistent. Use darker shades for shadows and lighter shades for highlights, and avoid changing the shading direction between different parts of the design.