Beautiful Geometric Drawing Patterns for Rangoli: 15 Creative Designs to Try
Rangoli is a way to bring color, creativity and tradition to any space. While floral and freehand designs are always popular, geometric drawing patterns for Rangoli offer something a little different.
With shapes such as triangles, squares, diamonds, circles and hexagons, you can create designs that look detailed and artistic without being overly difficult to draw.
Start from the center, use a dot grid for guidance, and repeat your shapes evenly to create natural symmetry.
The best part about Rangoli is symmetry. I find that when you mark a center point or build a dot grid, you can repeat the shapes around the design to keep everything balanced. A dot grid can be especially helpful for beginners because it gives you points to follow and makes spacing easier to manage.
These Geometric Drawing Patterns for Rangoli can help you create balanced designs even if you are just starting out.
Whether you want a design for Diwali, a Rangoli for your entrance or a modern pattern for everyday decoration, geometric Rangoli offers many creative possibilities. From diamond patterns to eye-catching stars and hexagonal designs, these ideas can fit both large and small spaces.
With these geometric drawing patterns for Rangoli, you can easily adjust the size and complexity of your design to match your space and skill level.
Why Choose Geometric Rangoli Patterns?
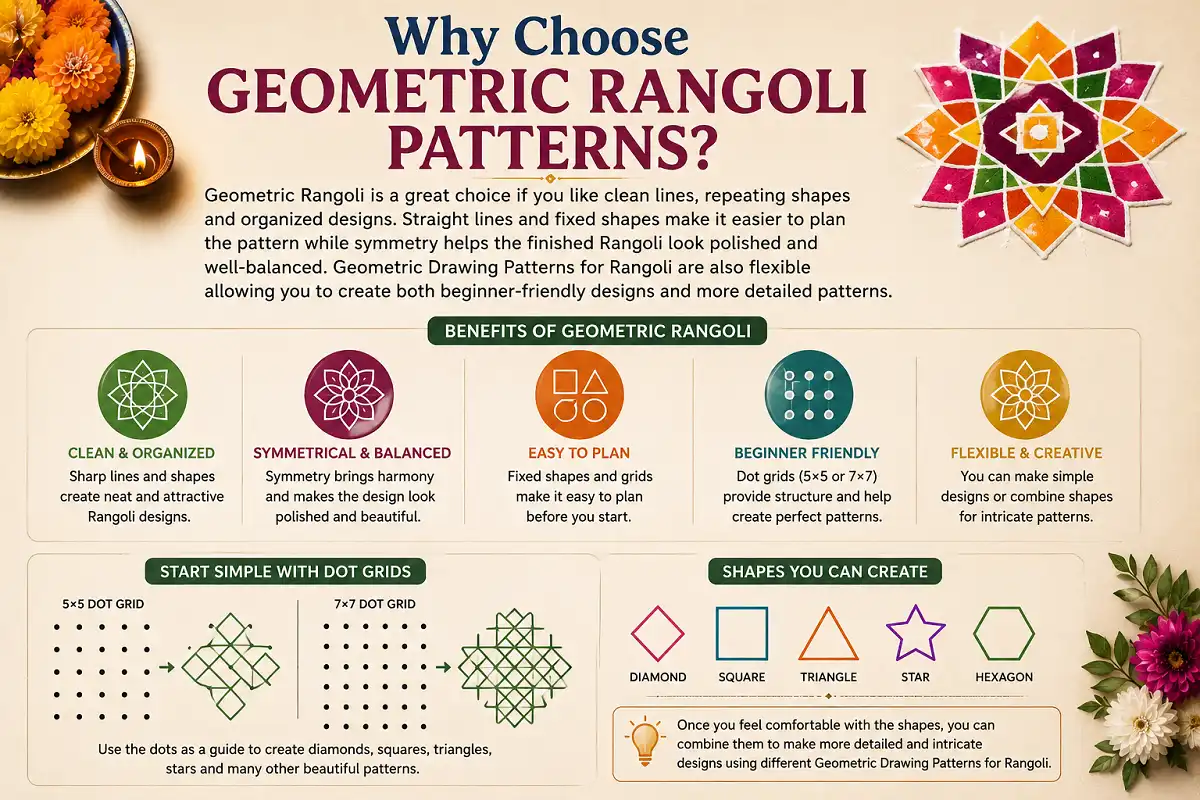
Geometric Rangoli is a great choice if you like clean lines, repeating shapes and organized designs. Straight lines and fixed shapes make it easier to plan the pattern, while symmetry helps the finished Rangoli look polished and well-balanced.
Geometric Drawing Patterns for Rangoli are also flexible, allowing you to create both beginner-friendly designs and more detailed patterns.
Guide dots make spacing and shape placement easier.
Repeating shapes help keep every section balanced.
Scale the same pattern for small or large spaces.
You don’t need to start with something complicated. A simple 5×5 or 7×7 dot grid can give you enough structure to create diamonds, stars, squares, triangles and other attractive patterns.
Once you feel comfortable with the shapes, you can combine them to make more detailed and intricate designs using different geometric drawing patterns for Rangoli.
15 Beautiful Geometric Rangoli Designs to Try
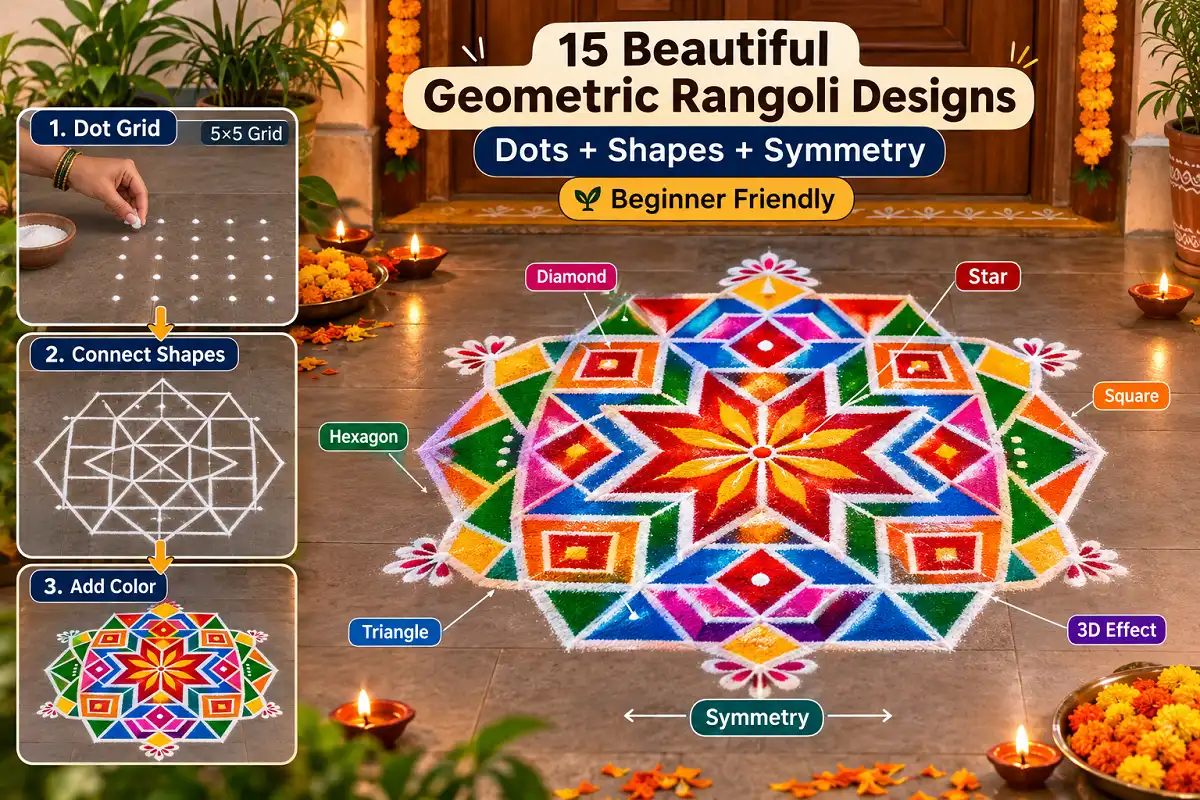
Explore these beautiful geometric Rangoli designs featuring stars, squares, hexagons, diamonds, triangles, 3D effects, and more. Each pattern offers a simple way to practice symmetry, repeated shapes and creative color combinations for a stunning floor design.
Geometric Star Rangoli
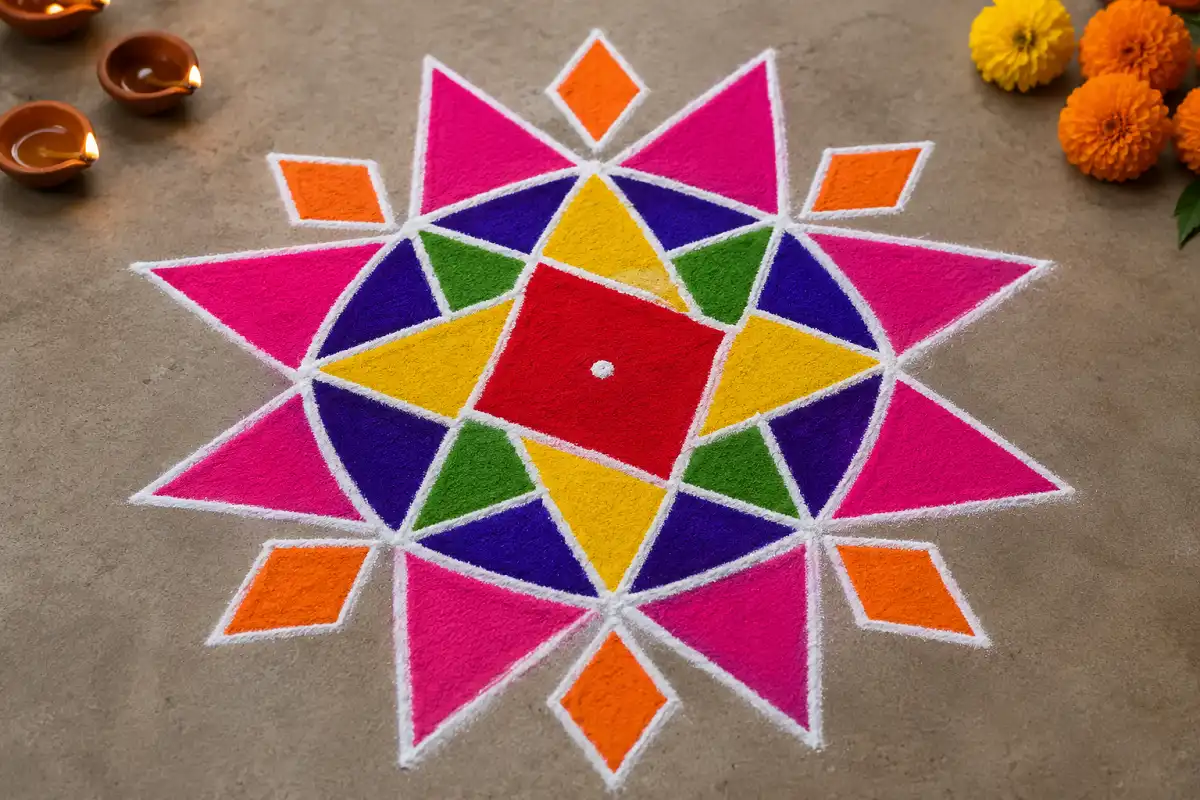
Start by preparing a clean, flat surface and marking a small center point. Use a few evenly spaced guide dots around the center to maintain symmetry. Draw two or more overlapping triangles to create a six-pointed or eight-pointed star. Keeping each section equal will make the finished design look balanced and precise.
Next, extend smaller triangles or diamond shapes around the central star. Repeat the same shapes on every side instead of drawing each section differently. This repetition gives the Rangoli a strong geometric appearance and makes the pattern easier to complete, especially for beginners.
Finally, outline the star with white Rangoli powder and fill alternate sections with bright colors. Red, yellow, blue, pink and green can create a festive appearance. Leave a little space between the colored sections so the geometric shapes remain clearly visible.
Concentric Square Rangoli
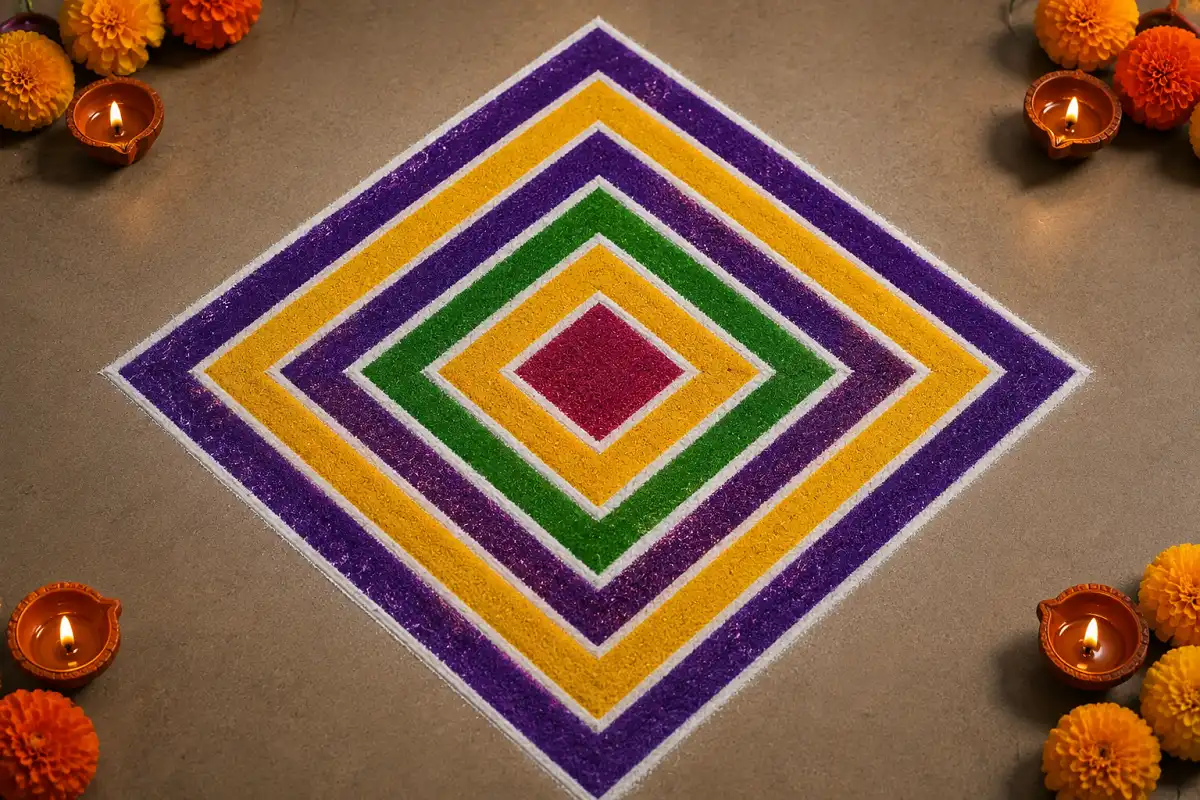
Begin with a small square at the exact center of your working area. Around this square, draw progressively larger squares while keeping equal spacing between each layer. You can use a ruler or light guide marks to keep the sides straight and the corners aligned.
For a more creative effect, rotate every second square slightly so the layers gradually form a diamond-like or spiral appearance. Continue adding squares until the design reaches your desired size. The repeated shapes create a structured pattern without requiring complicated freehand drawing.
Once the outline is complete, choose two or three contrasting colors for the different sections. Fill the squares from the center outward to avoid disturbing the finished areas. A thin white outline around each layer will make the geometric structure sharper and more attractive.
Hexagon Rangoli
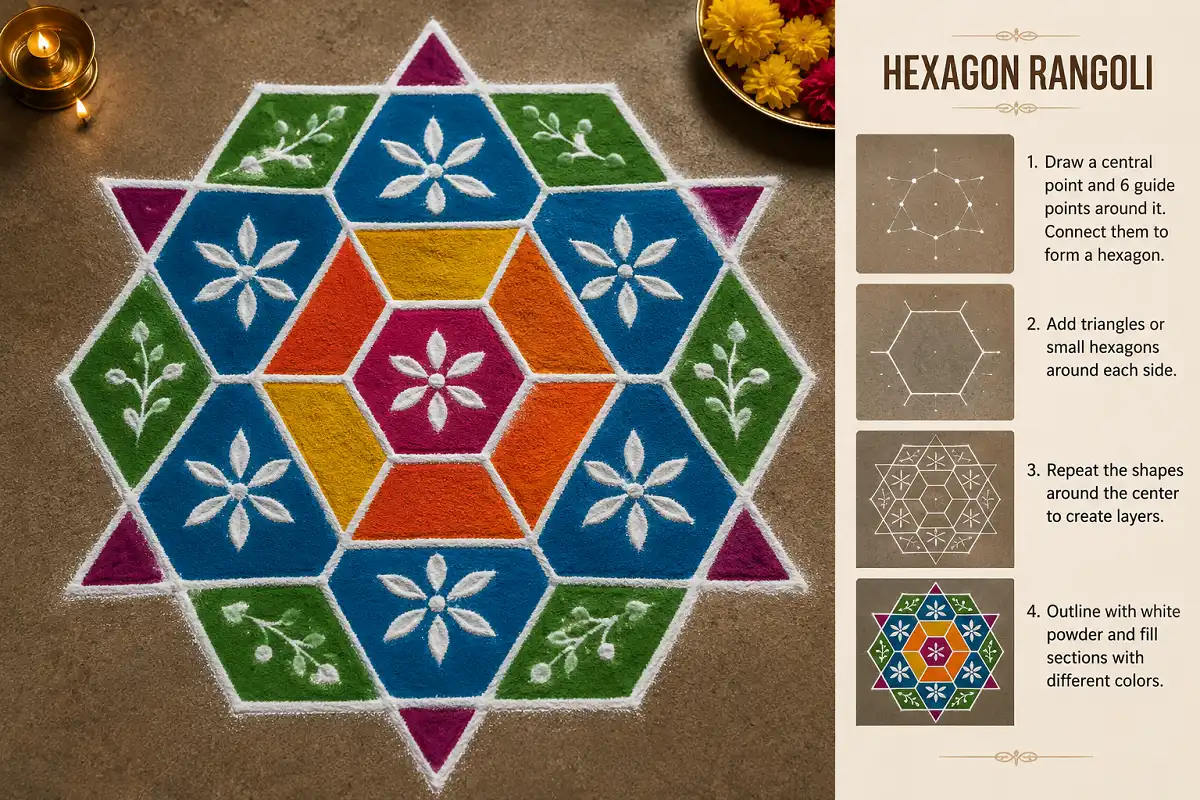
Begin by marking a central point and placing six evenly spaced guide points around it. Connect these points carefully to form a regular hexagon. Keeping all six sides approximately equal is important because the entire design will grow from this central shape.
After completing the center, add smaller triangles or hexagons around each side. Repeat the same shape around the entire center so that the design remains symmetrical. You can continue adding another layer of shapes if you have a larger floor area available.
For the final step, outline the hexagons with white powder and fill selected sections with different colors. Hexagonal patterns are especially useful for larger Rangoli because hexagons can connect naturally without leaving awkward gaps.
Diamond Pattern Rangoli
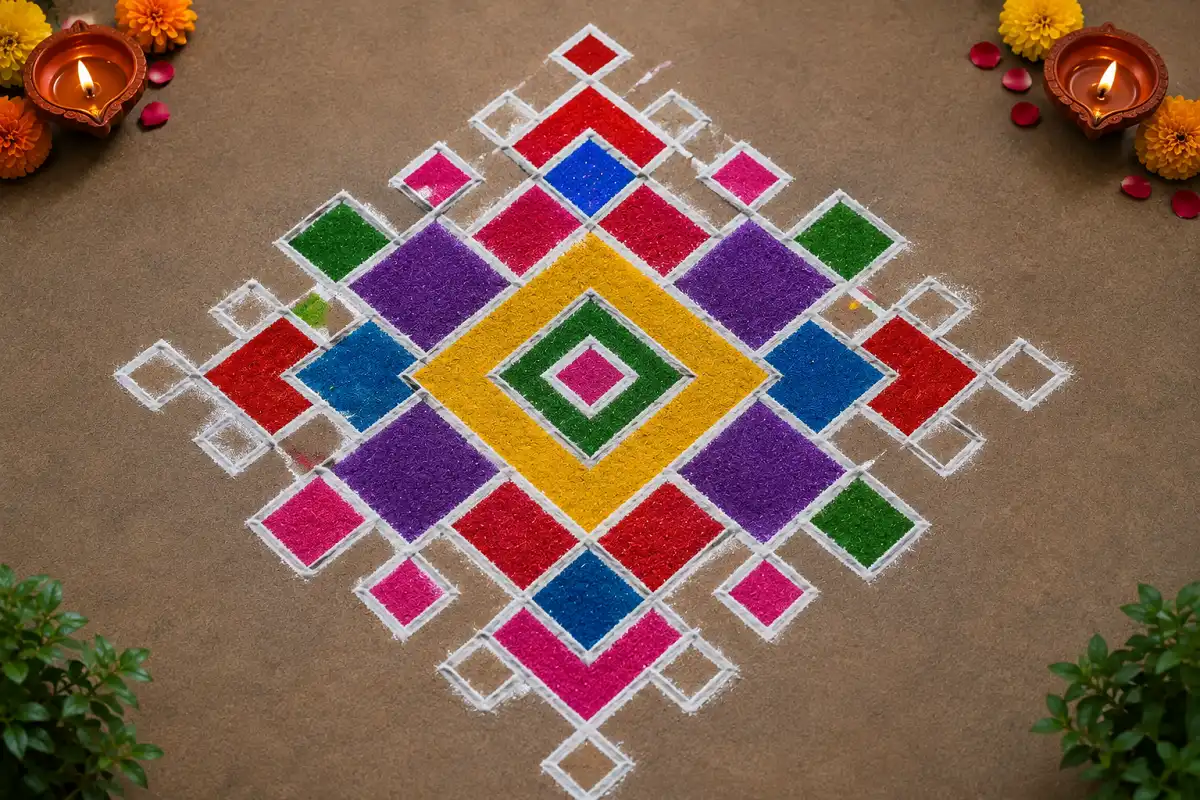
Start with a small diamond in the center of the Rangoli. Place guide dots around it so that each side can be extended evenly. Connect the dots diagonally to create additional diamonds around the central shape.
Continue building outward by repeating the diamond shape in different sizes. You can arrange several diamonds around the center or create a larger diamond grid that fills the entire design area. A square dot grid is particularly useful because it helps maintain consistent angles and spacing.
Finish the pattern by adding a simple border around the outermost diamonds. Use white powder for the outlines and bright colors for selected sections. Leaving some areas unfilled can also create an attractive modern appearance.
Triangle Mandala Rangoli
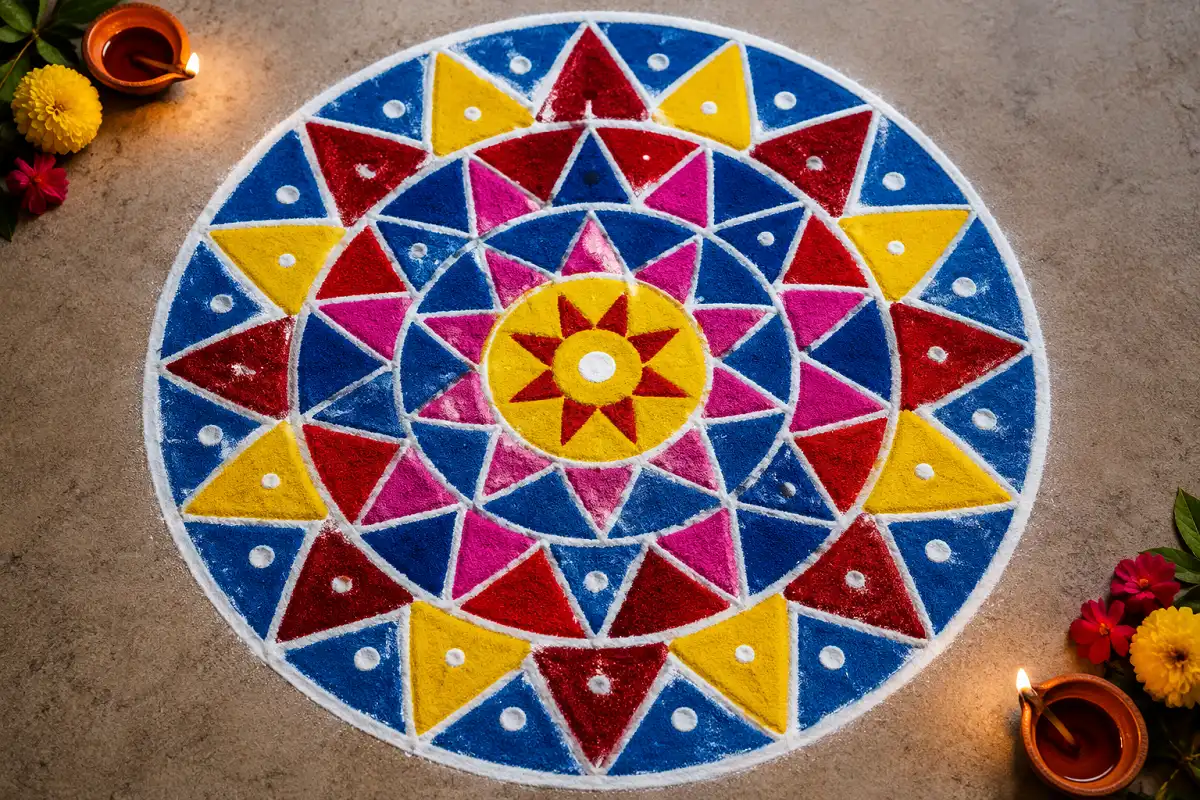
Begin by placing a small dot at the center of your Rangoli. Around this point, mark several equally spaced guide points to create a circular arrangement. Connect the points to form small triangles that face toward or away from the center.
Continue adding triangles around the first layer, rotating each new triangle by the same amount. As the pattern expands, the repeated shapes will create a circular mandala effect. You can alternate between large and small triangles to introduce more visual detail.
Once the geometric structure is finished, carefully outline each triangle. Fill alternate sections with complementary colors such as yellow and red or blue and pink. A simple circular border around the outside can complete the mandala.
3D Geometric Rangoli
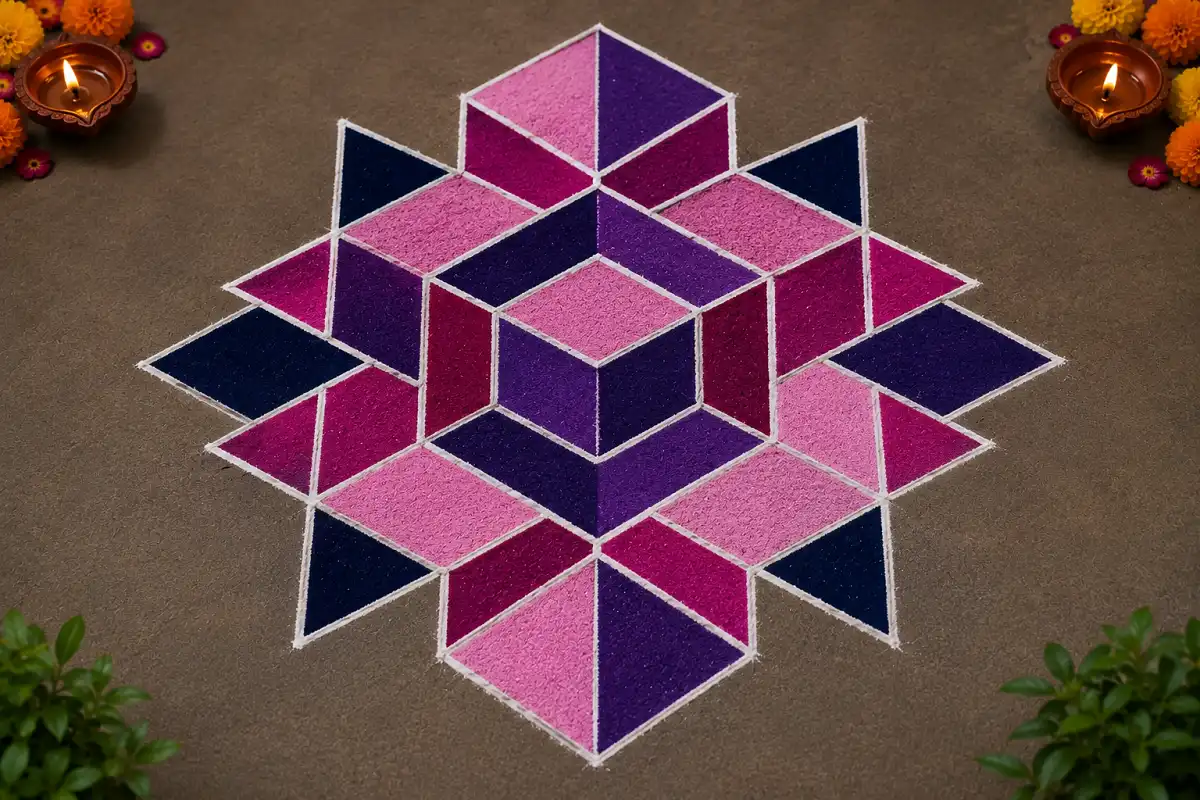
Start with a central diamond, square or hexagon as the foundation of the design. From each side, extend lines outward to create additional diamonds and triangles. The shapes should be carefully aligned because the illusion of depth depends on consistent angles and repeated patterns.
Next, divide the shapes into smaller sections using diagonal lines. Use darker and lighter shades in neighboring sections to create the impression that some shapes are raised while others appear to go deeper into the floor.
Finish by adding clean white outlines around the major shapes. Avoid using too many colors because excessive color can reduce the 3D effect. Two or three carefully selected shades can create a striking optical illusion Rangoli.
Interlocking Square Rangoli
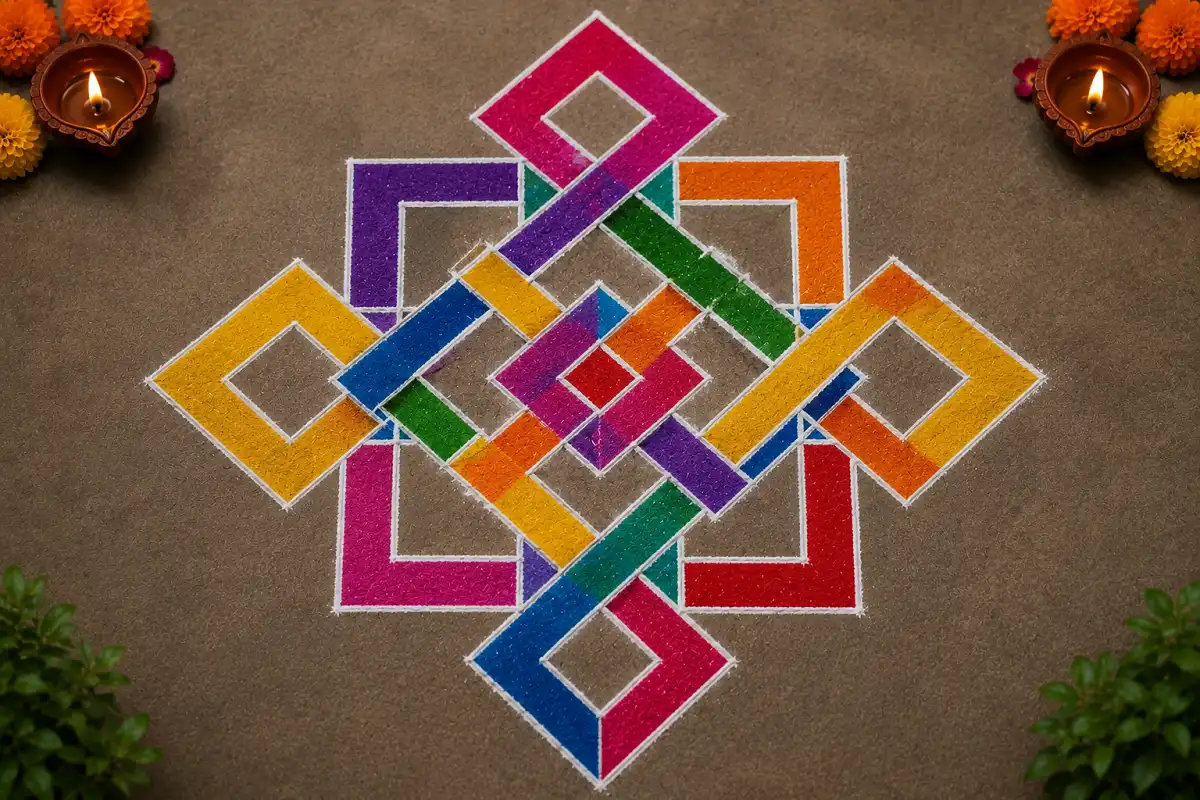
Begin by drawing a small square in the center and marking equal guide points around it. Extend lines from the corners to create additional squares and diamonds. The goal is to make the shapes appear connected, almost like pieces of a woven geometric pattern.
As you expand the design, repeat the same sequence of lines around all four sides. Make sure each square has similar dimensions and that the connecting lines meet neatly. A light dot grid can help you maintain the same spacing throughout the pattern.
After completing the structure, highlight the overlapping sections with different colors. You can use two colors for a minimalist look or several bright colors for a festive Rangoli.
Geometric Flower Rangoli
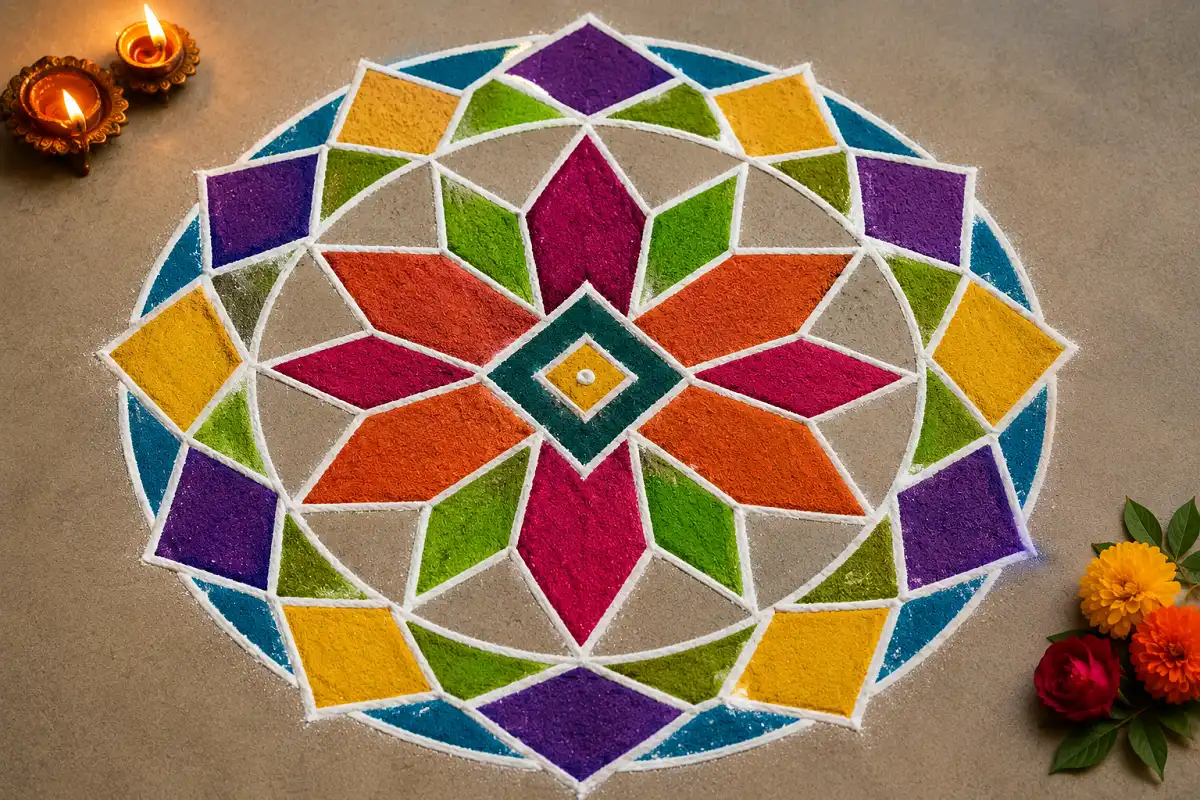
Start by creating a small geometric shape in the center, such as a diamond or hexagon. Around it, draw pointed triangles that work as the petals of the flower. Unlike a traditional floral Rangoli, this design uses straight lines and sharp angles instead of curved petals.
Repeat the same triangular or diamond-shaped petal around the center. Count the petals carefully so that the flower remains symmetrical. Eight petals are a simple choice for beginners, while twelve or sixteen petals can create a more detailed design.
Once the flower outline is finished, add a geometric border around it using small diamonds or triangles. Fill the petals with alternating colors and keep the center in a contrasting shade.
Star and Diamond Rangoli
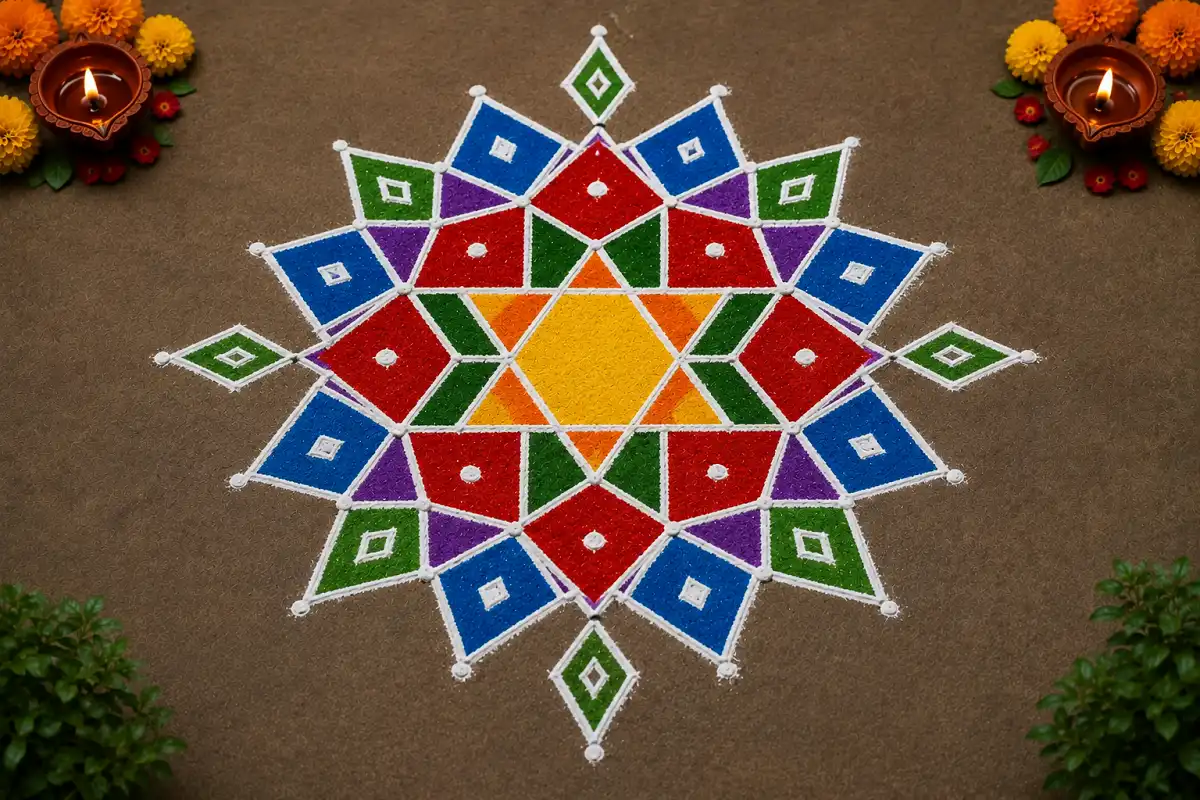
Begin with a simple star at the center using overlapping triangles. Once the star is complete, draw a ring of diamonds around it. Keep every diamond the same size and distance from the center so the overall design remains symmetrical.
Continue adding another layer of diamonds or triangles around the first ring. You can make each outer layer slightly larger than the previous one to create a natural sense of expansion.
For coloring, choose contrasting shades for the star and diamond sections. You could use yellow in the center, red in the first layer, and blue or green farther outside.
Dot Grid Geometric Rangoli
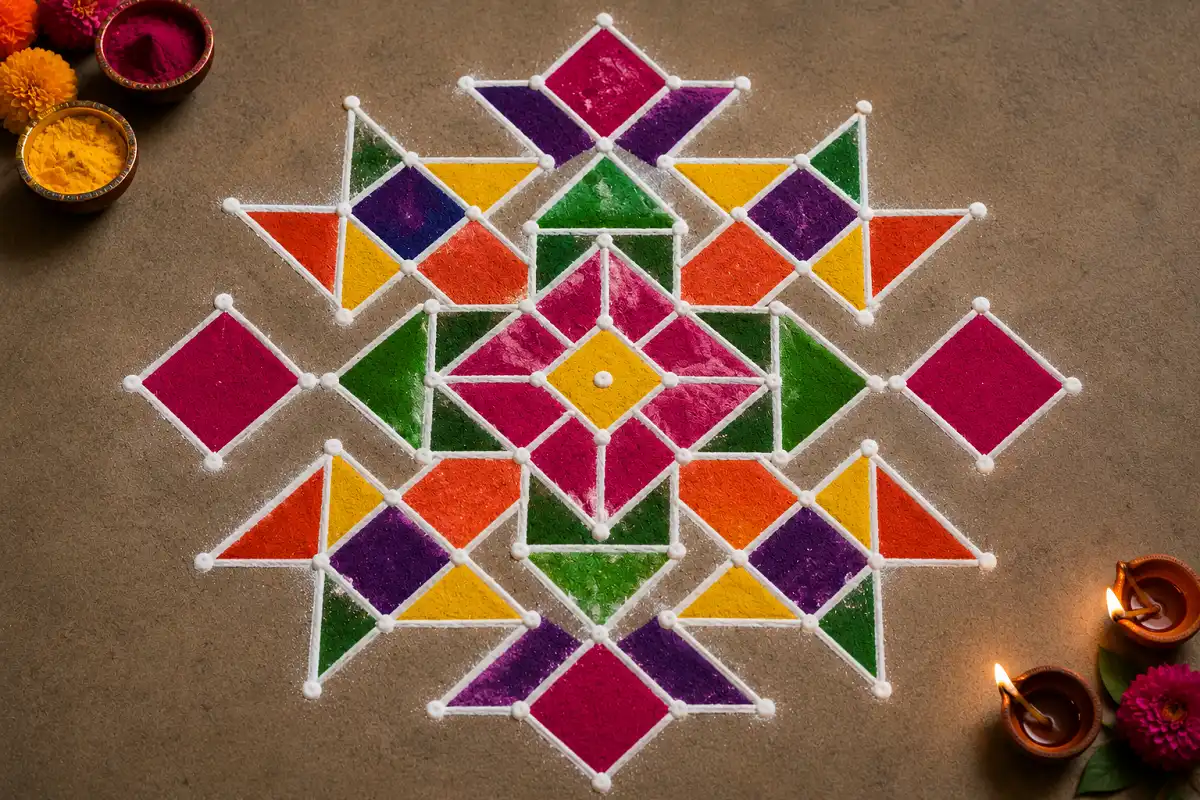
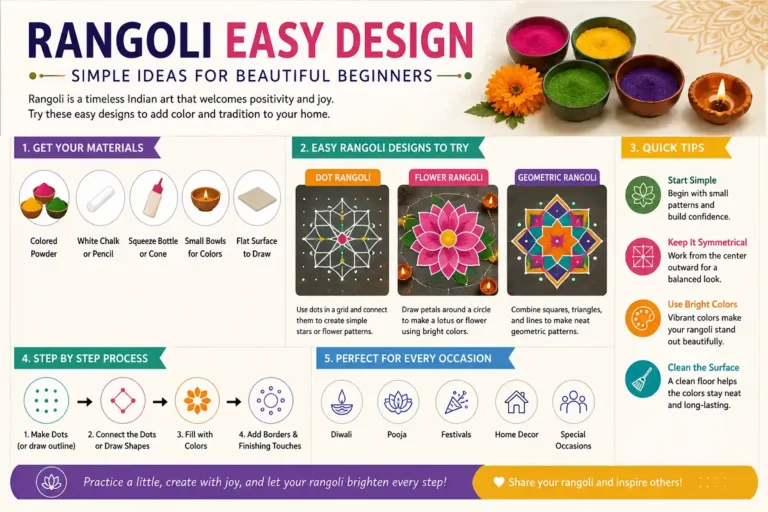
Start by choosing an appropriate dot-grid size. A 5×5 grid is suitable for a small and simple Rangoli, while a 7×7 or larger grid gives you more space for detailed geometric patterns.
Once the grid is ready, connect selected dots using straight or diagonal lines. You can create diamonds, triangles, stars, squares or lattice patterns depending on the arrangement. Work from the center outward and repeat the same section around the grid.
Finally, outline the completed pattern and fill the enclosed sections with Rangoli powder. Start coloring from the center and gradually move outward.
Spiral Geometric Rangoli
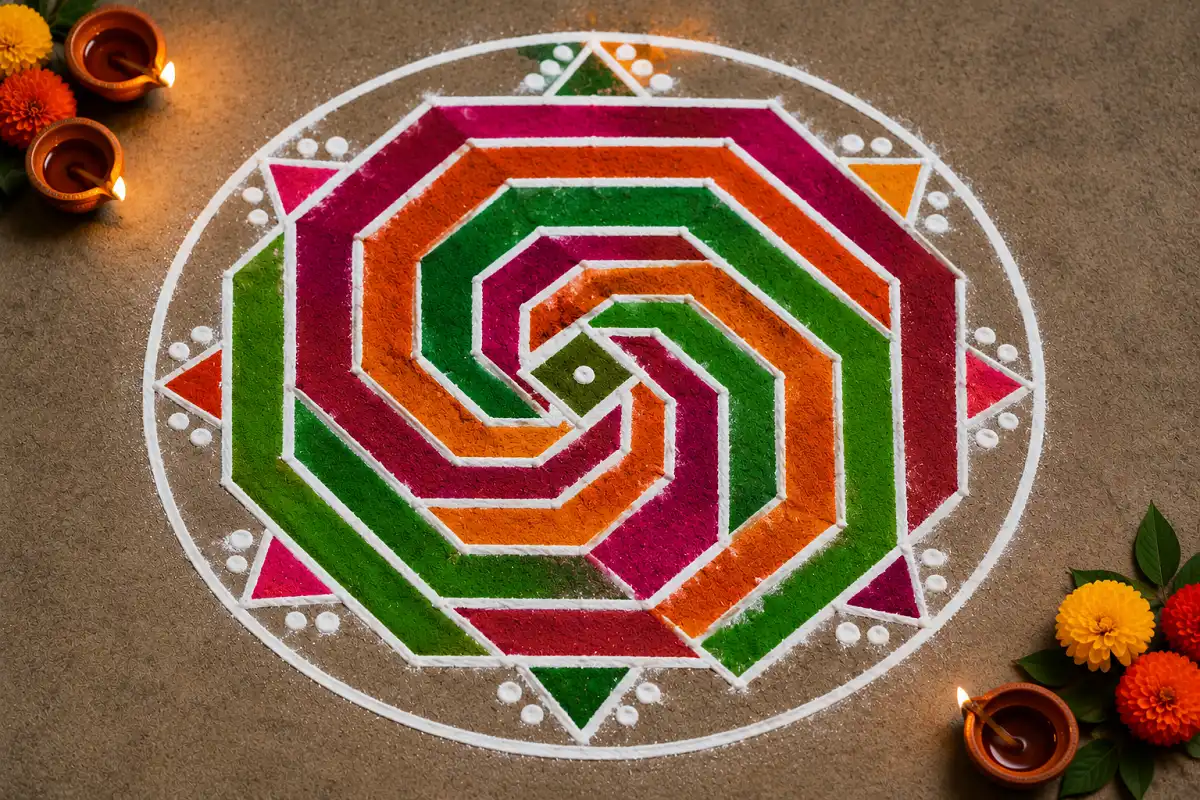
Begin with a small geometric shape in the center rather than drawing a traditional curved spiral. From the central shape, extend angular lines that gradually turn in the same direction. Keep the distance between the lines consistent so the spiral remains visually balanced.
Continue extending the pattern outward using repeated corners and straight sections. You can create four, six or eight repeating arms depending on the size of your Rangoli.
After completing the spiral structure, use two or three colors to emphasize the movement of the pattern. Alternate colors between neighboring sections or use one color for the outline and another for the main shapes.
Red and White Geometric Rangoli
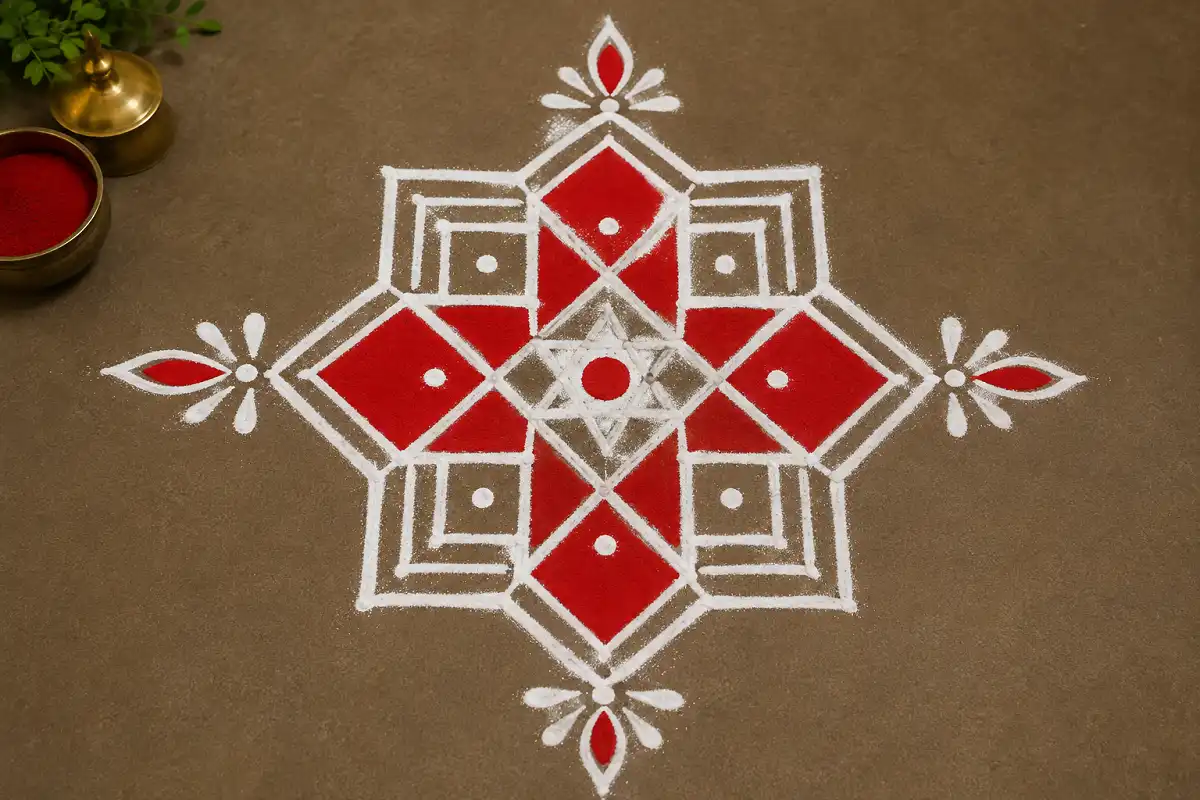
Begin with a simple geometric structure such as a star, diamond, square or triangle pattern. Use white Rangoli powder to draw the complete outline first. White provides a strong foundation and makes it easier to see the individual sections before adding color.
Next, choose specific areas to fill with red powder. You do not need to color every section; leaving some areas white creates a clean and traditional contrast. Keep the red sections symmetrical.
Finally, strengthen the white outlines around the red sections and clean away any loose powder. This two-color approach works especially well when you want a sophisticated Rangoli without using many materials.
Concentric Circle Rangoli
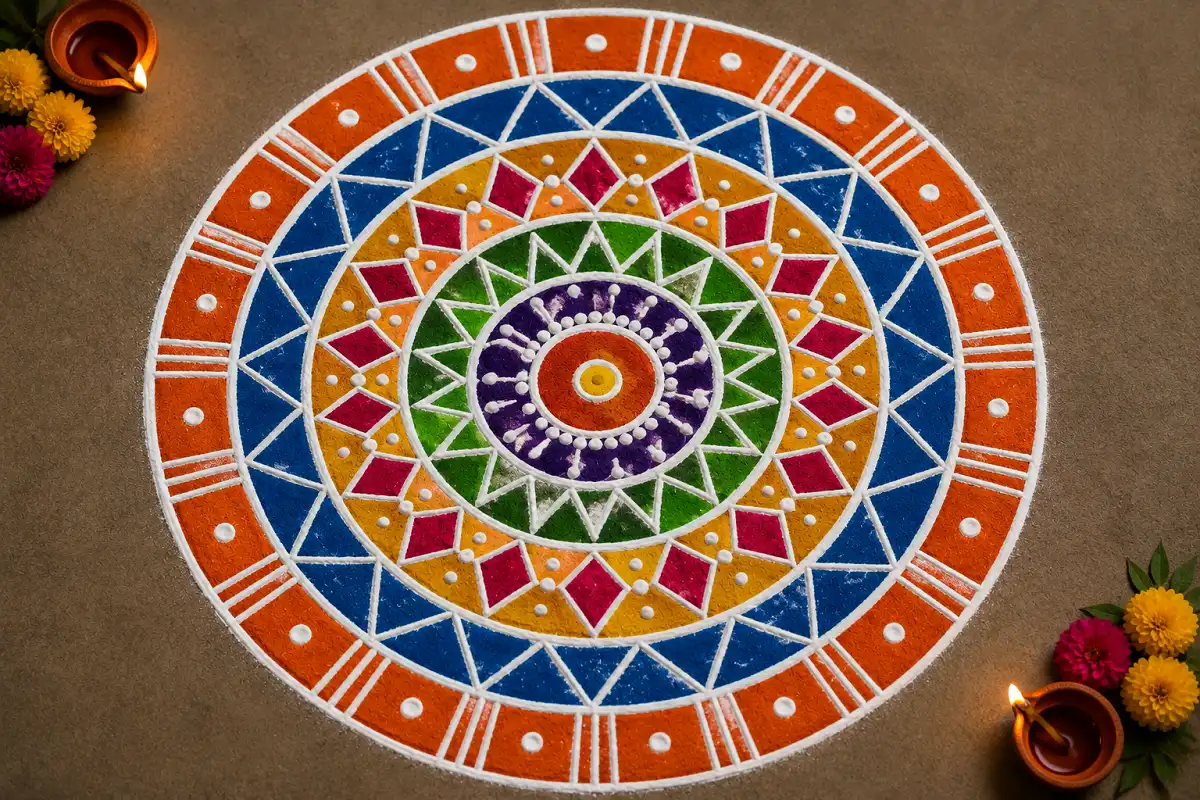
Begin by placing a small dot at the center of the floor. Draw a small circle around it and then create several larger circles at equal distances. These concentric rings form the basic framework for the entire design.
Next, divide the spaces between the circles using triangles, diamonds or short radial lines. You can repeat the same shape around each ring to create a symmetrical mandala-like effect.
For the final stage, color alternate sections between the rings. Use contrasting shades to separate each layer and highlight the circular structure. A thin white outline can be added between major sections.
Geometric Border Rangoli
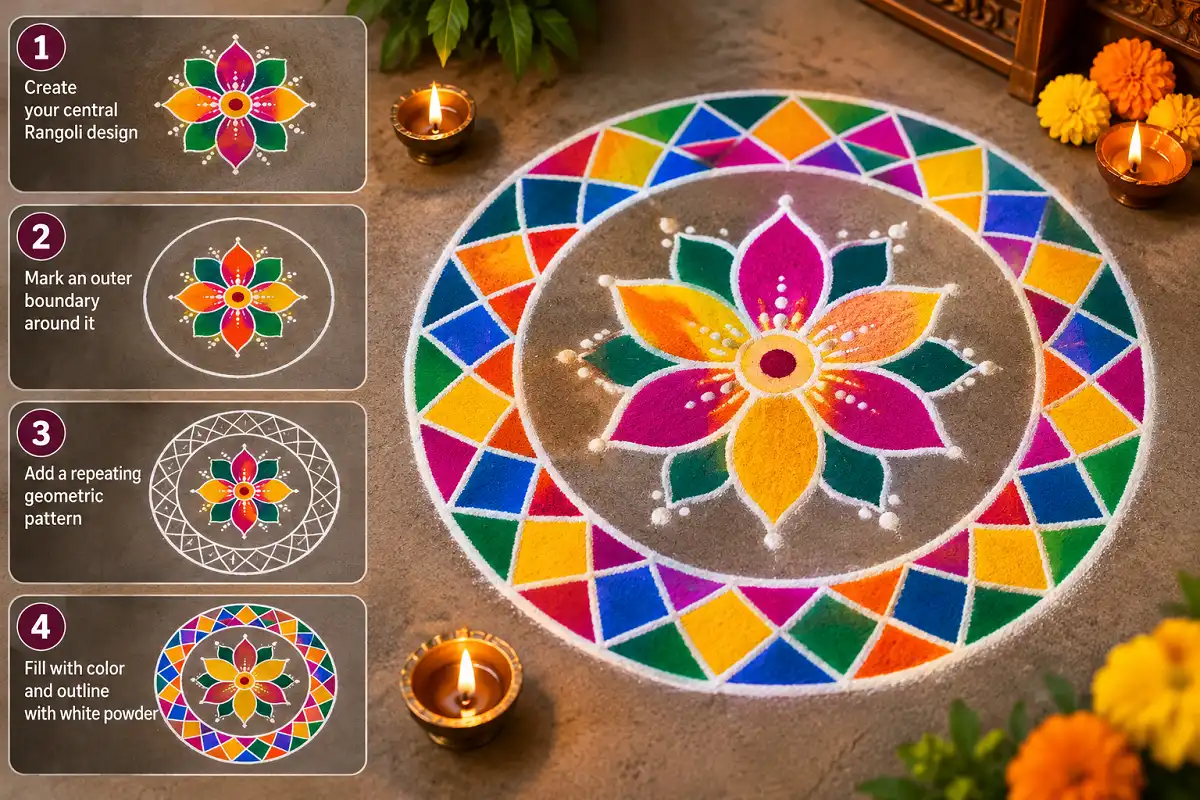
Start by deciding the shape and size of your central Rangoli. Once the main design is complete, mark an outer boundary around it. This boundary will provide a guide for creating a consistent geometric border around the entire artwork.
Choose a repeating pattern such as diamonds, triangles, squares, zigzags or chevrons. Draw the first section carefully and then repeat exactly the same shape around the border.
Finally, fill selected sections with color and outline the pattern with white powder. You can use a single color for a minimalist appearance or alternate several colors for a festive design.
Minimalist Geometric Rangoli
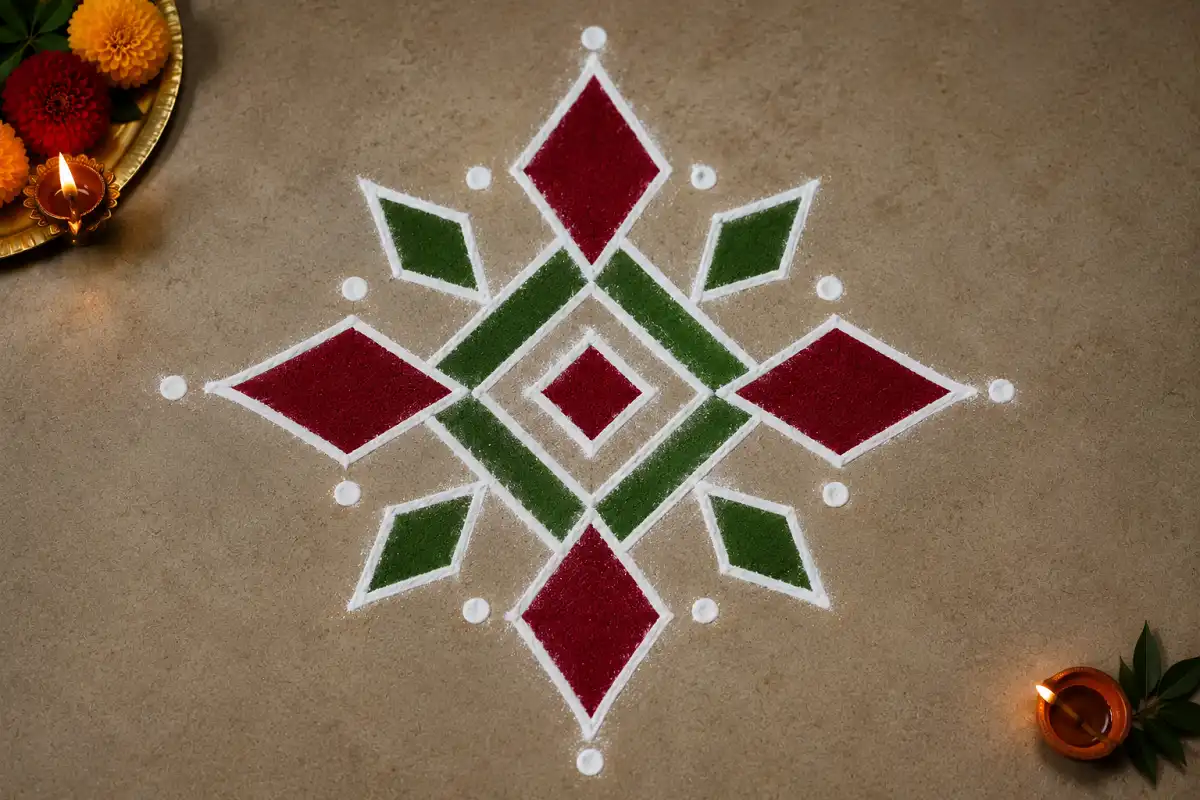
Begin with one simple geometric shape, such as a diamond, hexagon, square or four-pointed star. Mark a center point and use a few light guide dots to maintain symmetry. The goal of minimalist Rangoli is to keep the design simple rather than filling every available space.
Next, repeat the main shape around the center or add one simple outer border. Avoid adding too many decorative elements because negative space is an important part of the minimalist appearance.
Finally, choose only two or three colors. White with one bold color or two shades of the same color can work particularly well. Fill only the important sections and leave some of the floor visible.
Tips for Drawing Geometric Rangoli
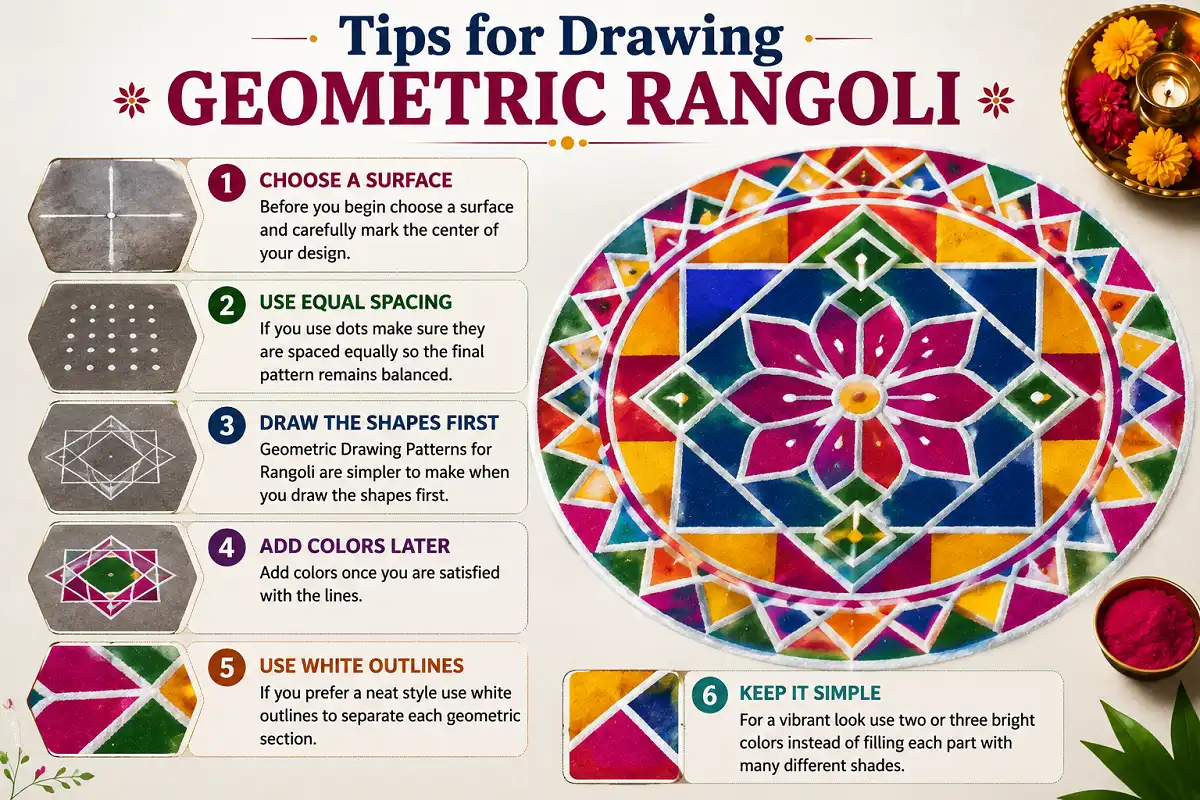
Mark the Center
Start by carefully marking the center of your design. It becomes the reference point for keeping the entire pattern symmetrical.
Use Equal Spacing
If you use dots, make sure they are spaced equally. Consistent spacing makes geometric patterns look cleaner.
Draw Before Coloring
Complete the main shapes and outlines first. Add Rangoli colors only after you are satisfied with the structure.
Limit Your Colors
Two or three strong colors are often enough. Too many shades can make a geometric design harder to read.
Beautiful Geometric Rangoli Designs: Simple Patterns That Make a Big Impact
Rangoli is a form of geometric art that shows how simple shapes can come together to create something truly eye-catching. You do not need advanced drawing skills to start—just a little patience, careful spacing and an understanding of symmetry.
Geometric Drawing Patterns for Rangoli make it easy to experiment with shapes while keeping the overall design balanced.
Start with a diamond, square or triangle pattern and then try stars, hexagons, interlocking shapes and 3D effects. If you are new to this style, explore these Geometric Rangoli Designs for Beginners to learn how simple shapes can be arranged step by step.
You can also use Rangoli Grid Pattern Designs to practice dots, lines and repeated geometric shapes before creating a larger design.
Once you understand how basic shapes repeat around the center, you can create your own unique Rangoli designs and make them as simple or detailed as you like. For a cleaner and more contemporary look, Minimalist Geometric Rangoli is another great style to explore.
Whether you are decorating for a festival or simply enjoying Rangoli as a hobby, Geometric Drawing Patterns for Rangoli are a fun and flexible way to make your floor art stand out.
For additional background on the history, materials, traditions and different styles of Rangoli, visit Wikipedia .
FAQs
What are geometric Rangoli patterns? +
Geometric Rangoli patterns use shapes such as squares, triangles, diamonds, circles, stars and hexagons to create symmetrical floor designs. Repeated shapes and guide points make these patterns easy to plan and customize.
Are geometric Rangoli designs good for beginners? +
Yes. Geometric Rangoli can be particularly beginner-friendly because you can use a center point, ruler or dot grid to guide the design. Starting with a simple 5×5 or 7×7 grid is a good way to practice.
Which shapes are easiest to use for geometric Rangoli? +
Diamonds, squares, triangles and simple circles are among the easiest shapes to start with. Once you become comfortable with symmetry, you can combine them to create stars, hexagons and more intricate patterns.
How do I keep a geometric Rangoli symmetrical? +
Start from the center and use evenly spaced guide dots. Repeat the same shape around the center rather than drawing every section differently. A dot grid can make spacing and alignment much easier.
How many colors should I use in a geometric Rangoli? +
Two or three colors are often enough for a clean geometric design. For festive Rangoli, you can use more colors, but keeping a clear contrast between neighboring sections will help the shapes remain visible.
Can I make geometric Rangoli in a small space? +
Absolutely. Minimalist geometric patterns, small diamond designs and simple star Rangoli can work well near doorways, entrances and smaller decorative areas. Simply reduce the number of layers while keeping the center and spacing consistent.