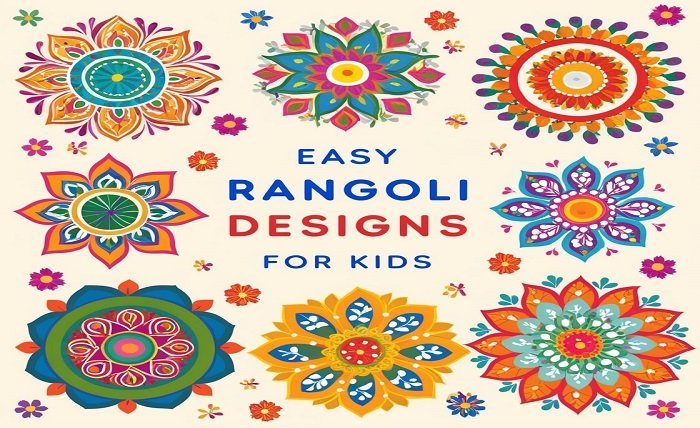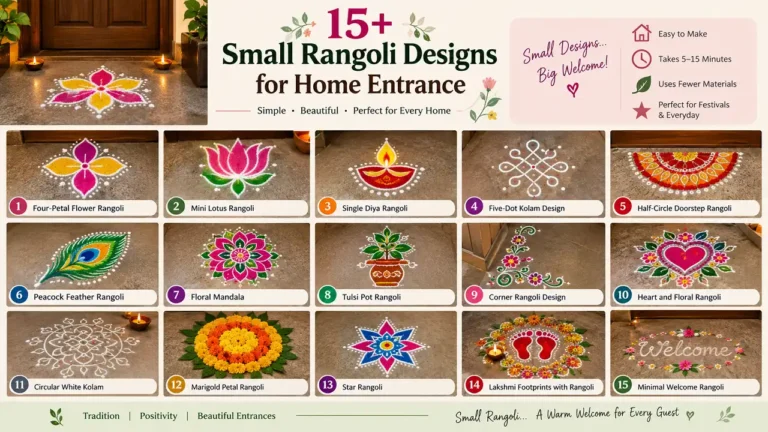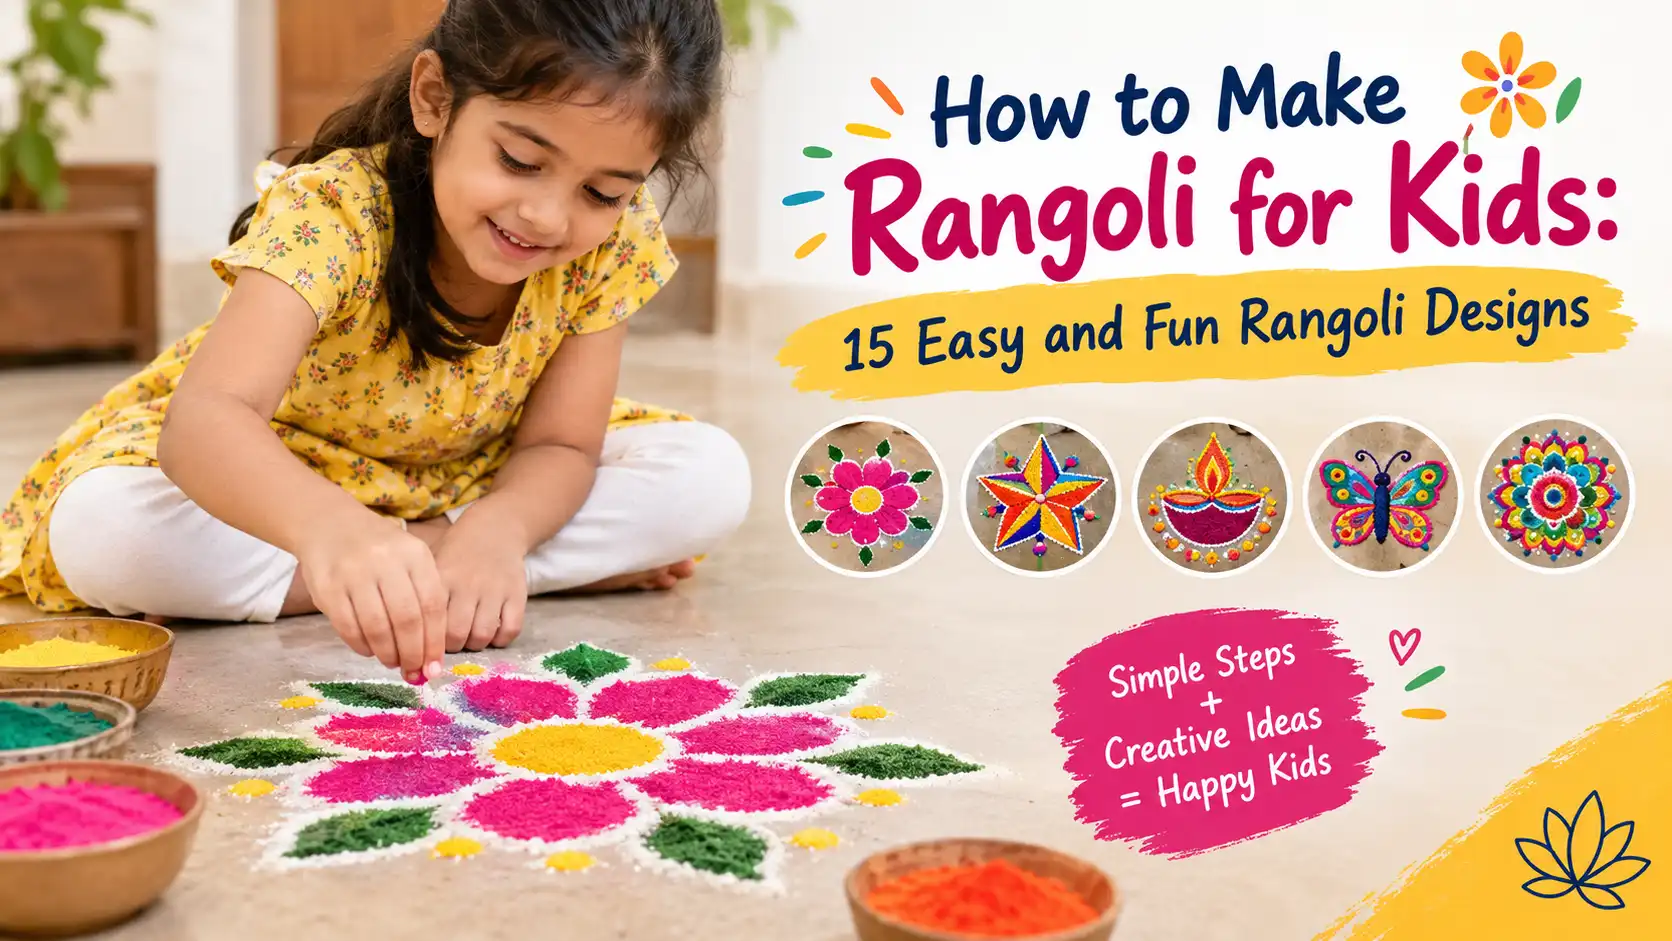
How to Make Rangoli for Kids: 15 Easy and Fun Rangoli Designs
I’m based in Kolkata, and I’ve been drawing and documenting rangoli for the past eight years. But my connection with this art began long before I started collecting, photographing, and writing about different designs.
I grew up watching my mother and grandmother draw rangoli at our doorway every morning before sunrise. I would sit quietly on the steps and watch them work. A few dots would appear first, followed by curves, flowers, borders, and finally colour. What looked simple from a distance always felt magical to me as a child.
I remember being fascinated by how a handful of lines could slowly become a complete pattern.
That is one reason I believe rangoli is such a lovely activity for children. Kids do not need to begin with complicated designs or perfect symmetry. They can start with a flower, a circle, a few dots, or even a simple star. Once they understand how the basic shapes come together, making rangoli becomes much less intimidating.
Over the years, I’ve tried many different patterns and watched children and beginners approach rangoli in their own ways. The biggest lesson I’ve learned is simple: a child’s first rangoli should be enjoyable, not perfect.
In this guide, I’ll show you how to make rangoli for kids using simple materials, easy steps, and 15 beginner-friendly designs that children can actually try at home. Some are perfect for younger children, while others can be introduced as their confidence grows.
So, choose a few colours, clear a small space, and let’s begin.
Why Rangoli Is a Great Activity for Kids
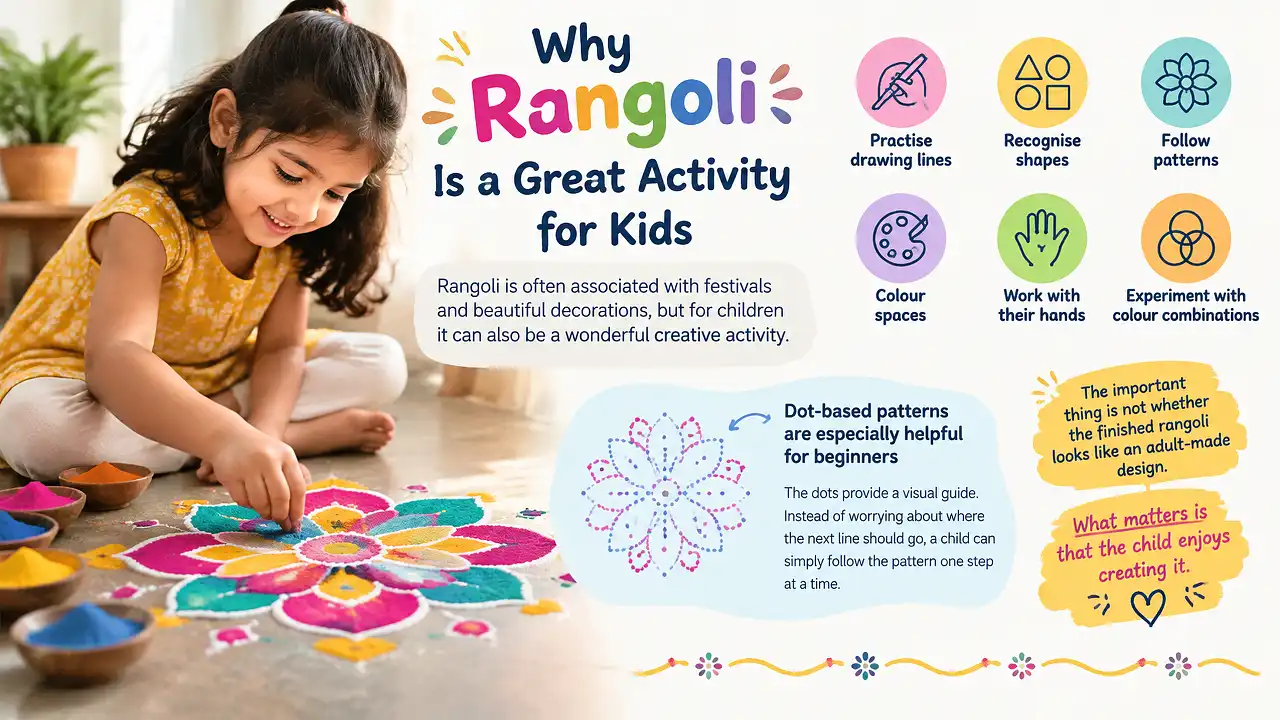
Rangoli is often associated with festivals and beautiful decorations, but for children it can also be a wonderful creative activity.
A simple rangoli allows kids to practise drawing lines, recognising shapes, following patterns, colouring spaces, and working with their hands. They can also experiment with colour combinations and create their own versions of familiar designs.
Dot-based patterns are especially helpful for beginners because the dots provide a visual guide. Instead of worrying about where the next line should go, a child can simply follow the pattern one step at a time.
The important thing is not whether the finished rangoli looks like an adult-made design. What matters is that the child enjoys creating it.
What You Need to Make Rangoli With Kids
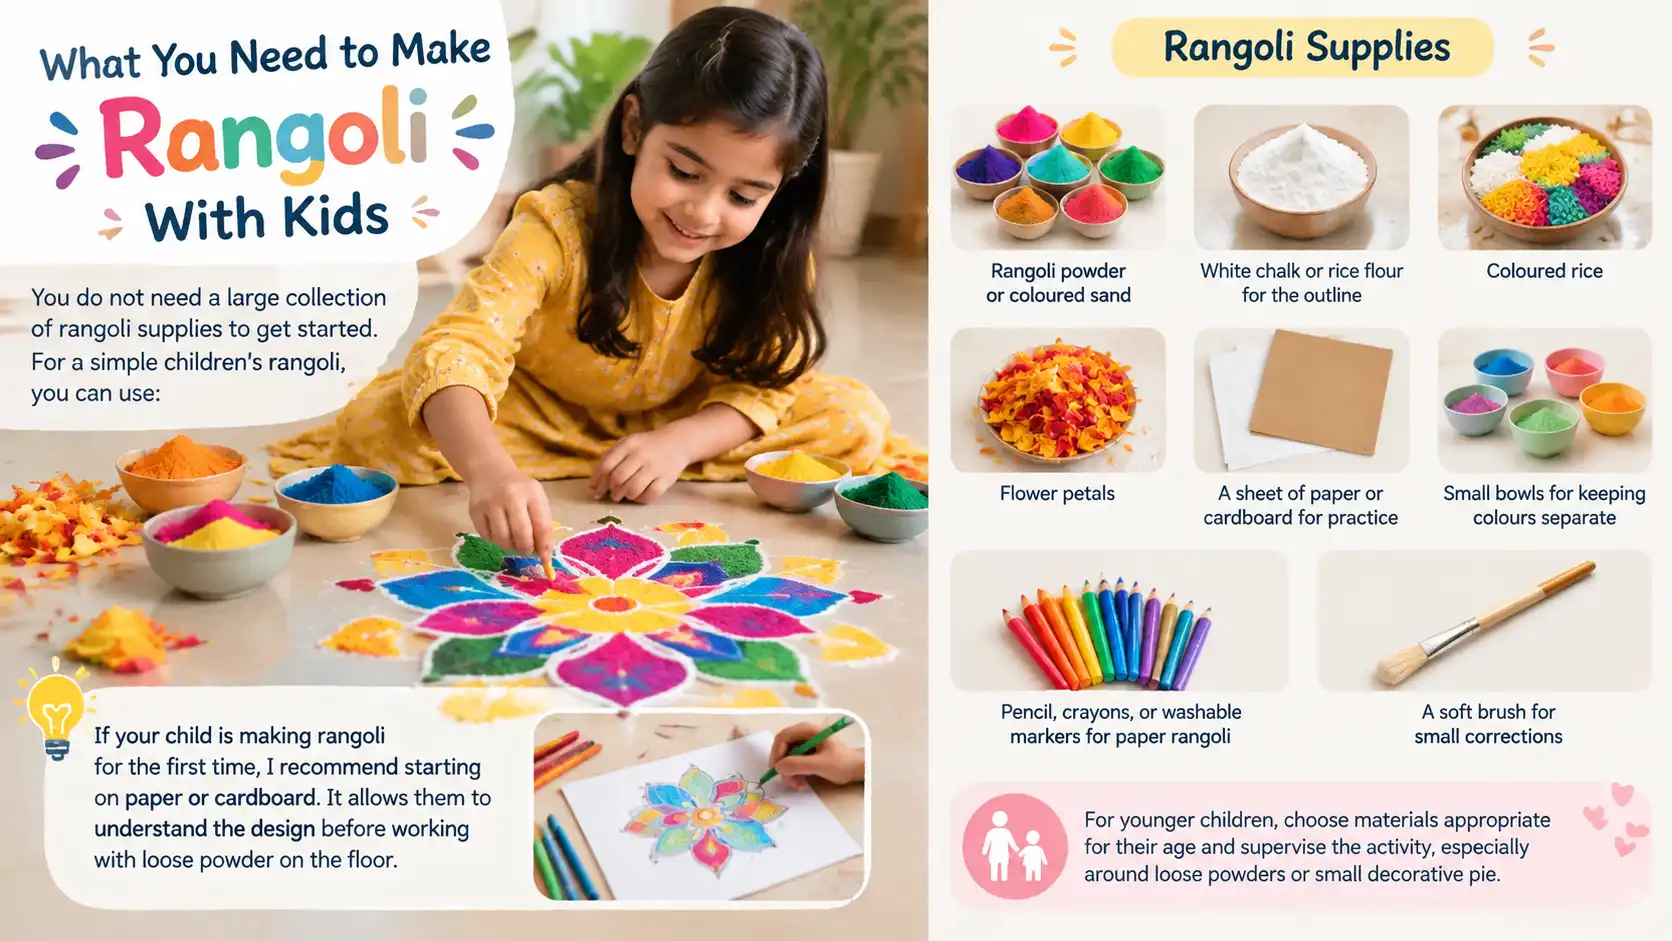
You do not need a large collection of rangoli supplies to get started.
For a simple children’s rangoli, you can use:
Simple option for kids.
Simple option for kids.
Simple option for kids.
Simple option for kids.
Simple option for kids.
Simple option for kids.
Simple option for kids.
Simple option for kids.
If your child is making rangoli for the first time, I recommend starting on paper or cardboard. It allows them to understand the design before working with loose powder on the floor.
For younger children, choose materials appropriate for their age and supervise the activity, especially around loose powders or small decorative pieces.
15 Easy and Fun Rangoli Designs for Kids
Now comes the fun part. These 15 designs start with very simple shapes and gradually introduce patterns that older or more confident children can try.
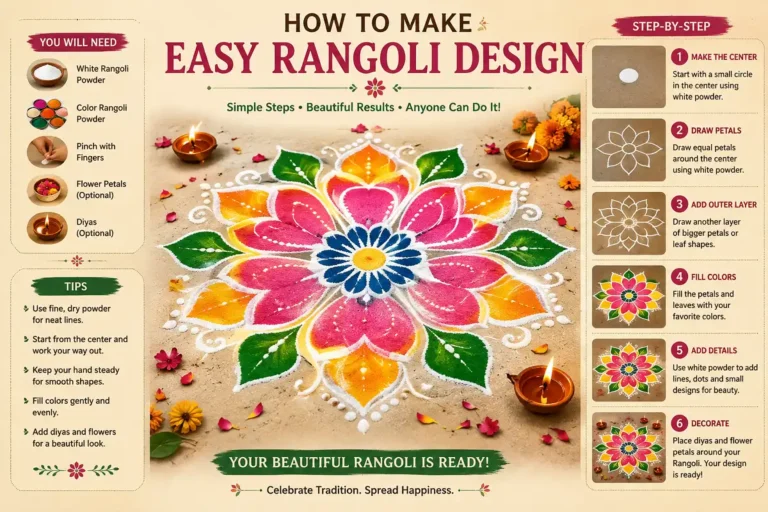
1. Simple Flower Rangoli
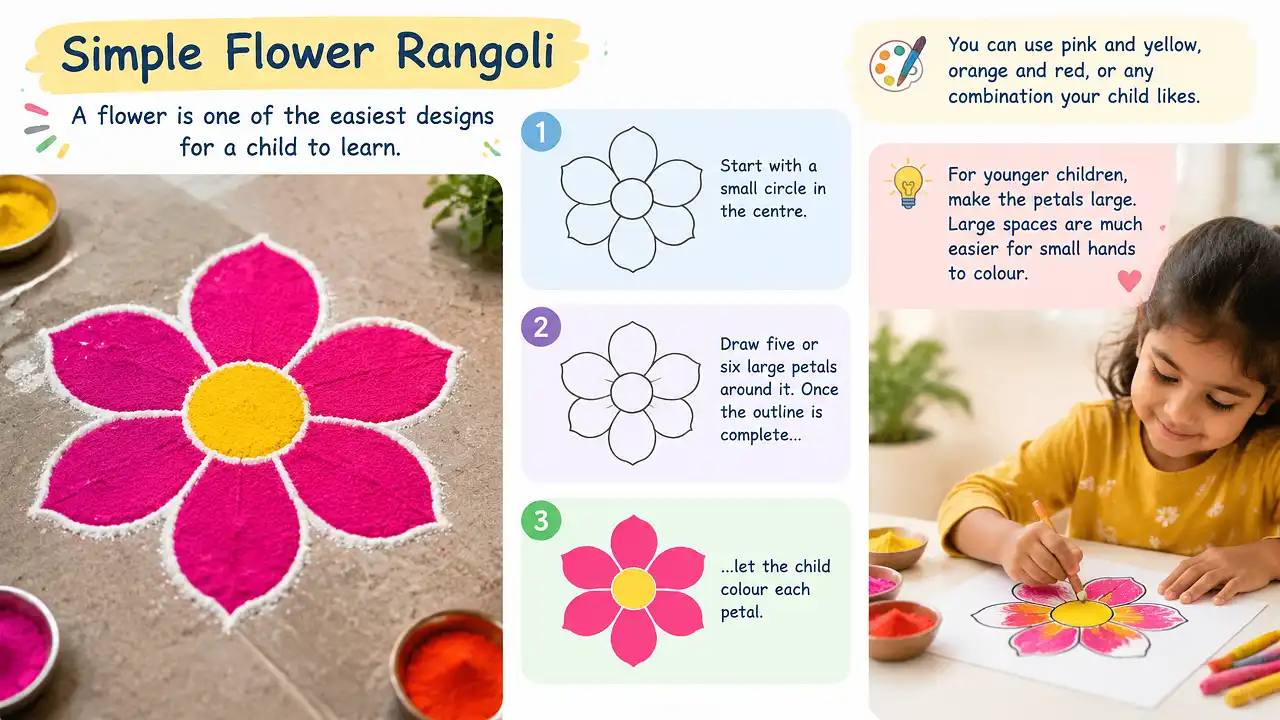
A flower is one of the easiest designs for a child to learn.
Start with a small circle in the centre. Draw five or six large petals around it. Once the outline is complete, let the child colour each petal.
You can use pink and yellow, orange and red, or any combination your child likes.
For younger children, make the petals large. Large spaces are much easier for small hands to colour.
2. Five-Petal Rangoli
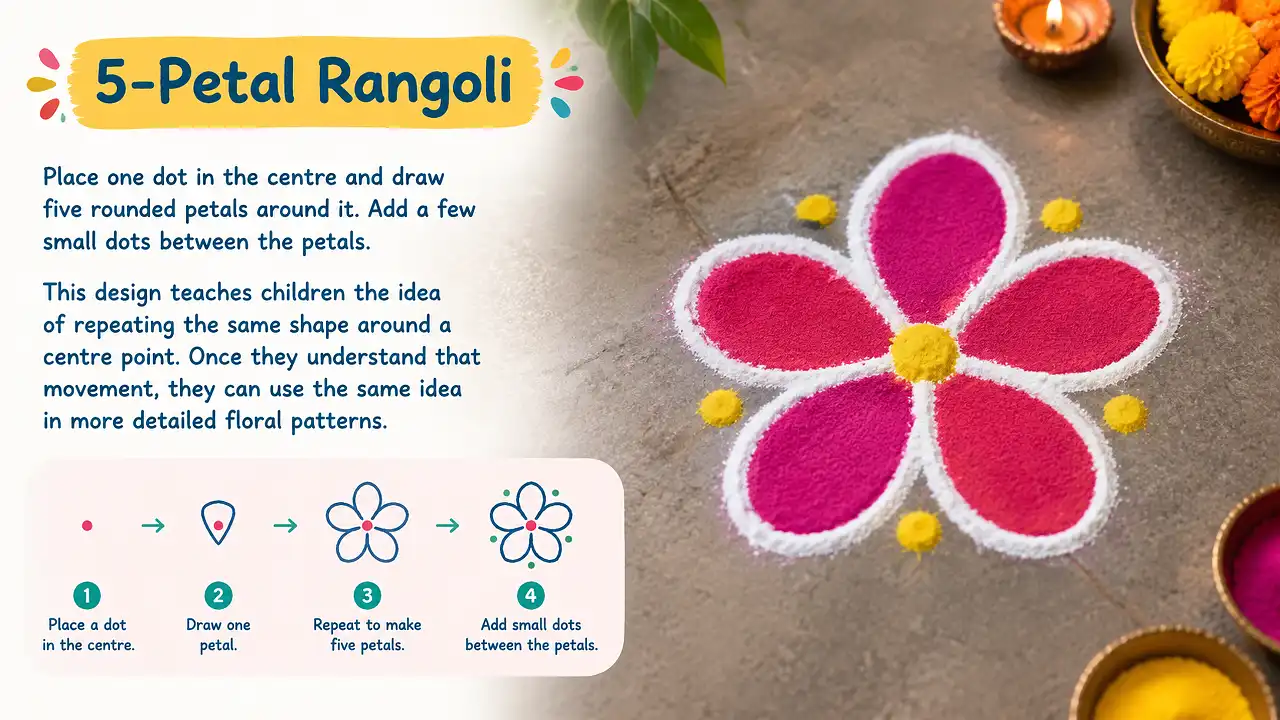
If a full flower feels too difficult, make the design even simpler.
Place one dot in the centre and draw five rounded petals around it. Add a few small dots between the petals.
This design teaches children the idea of repeating the same shape around a centre point. Once they understand that movement, they can use the same idea in more detailed floral patterns.
3. Dotted Rangoli
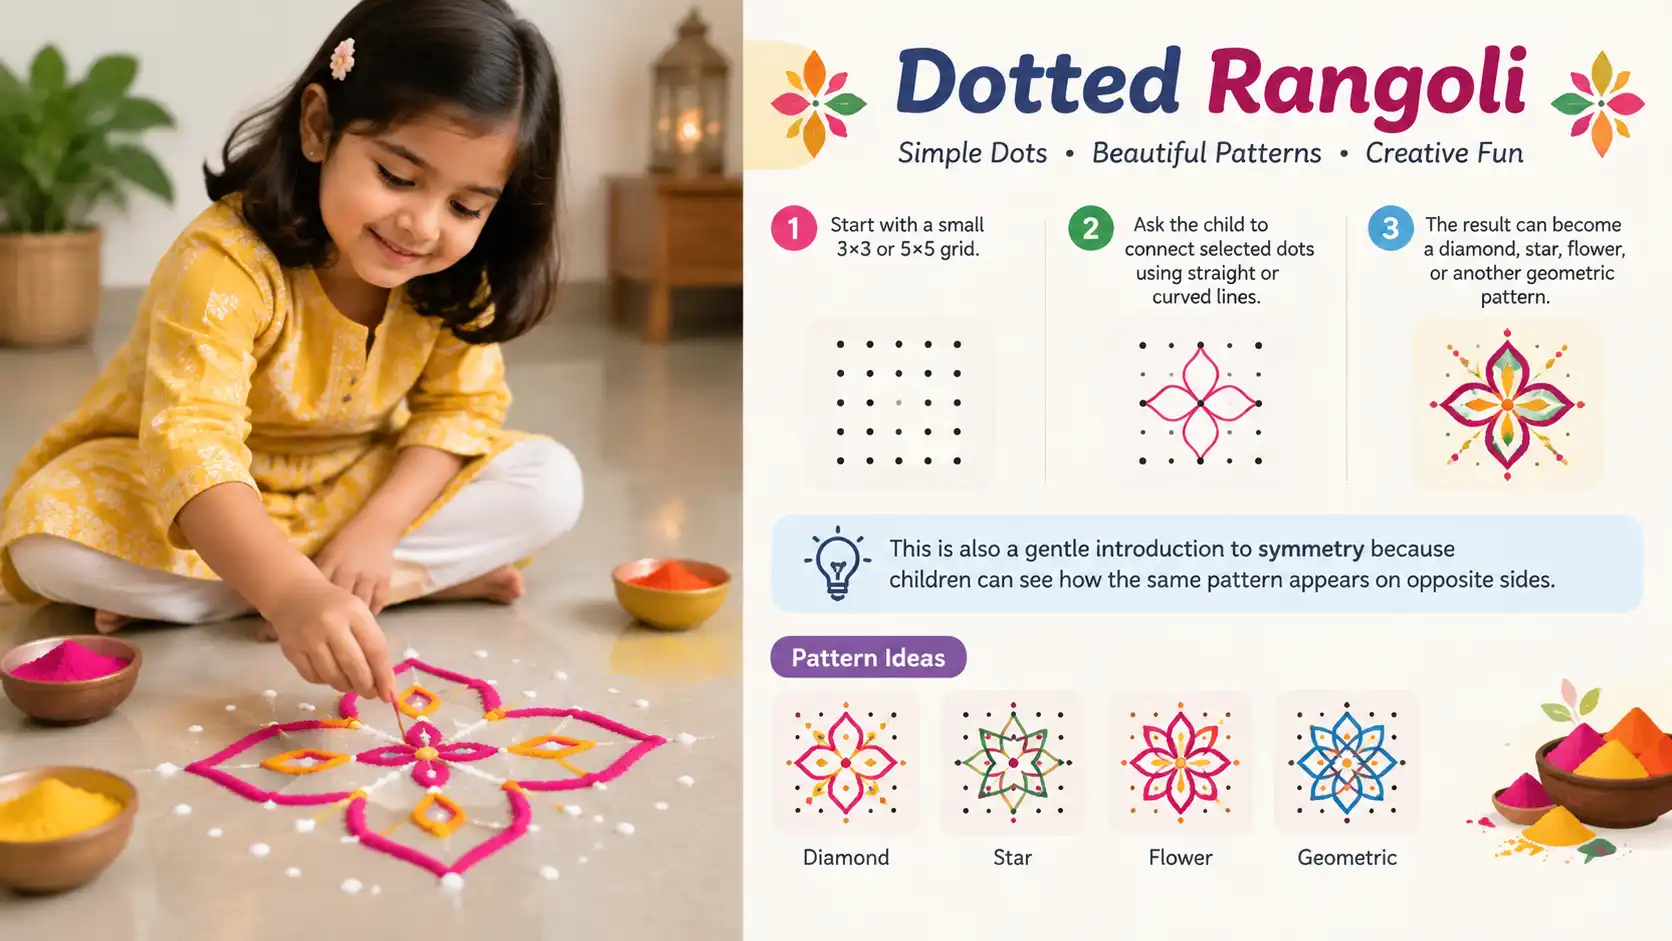
Dotted rangoli is particularly useful for beginners because the dots act as a guide.
Start with a small 3×3 or 5×5 grid. Ask the child to connect selected dots using straight or curved lines.
The result can become a diamond, star, flower, or another geometric pattern.
This is also a gentle introduction to symmetry because children can see how the same pattern appears on opposite sides.
4. Circle and Dot Rangoli
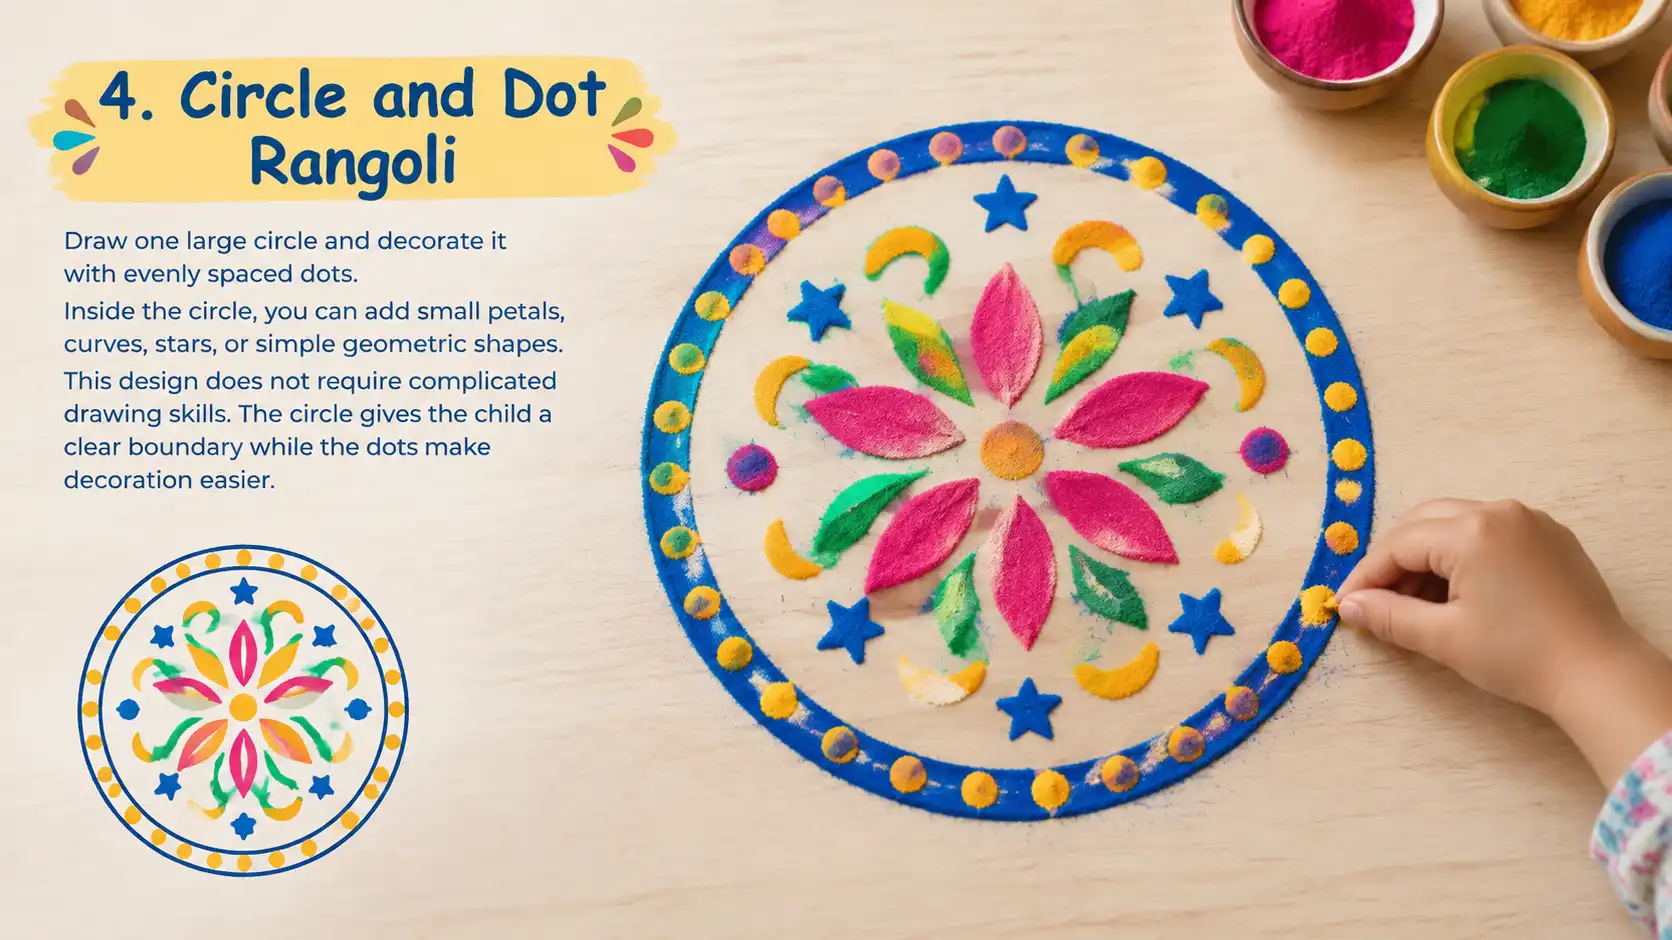
Draw one large circle and decorate it with evenly spaced dots.
Inside the circle, children can add small petals, curves, stars, or simple geometric shapes.
This design does not require complicated drawing skills. The circle gives the child a clear boundary while the dots make decoration easier.
5. Easy Star Rangoli
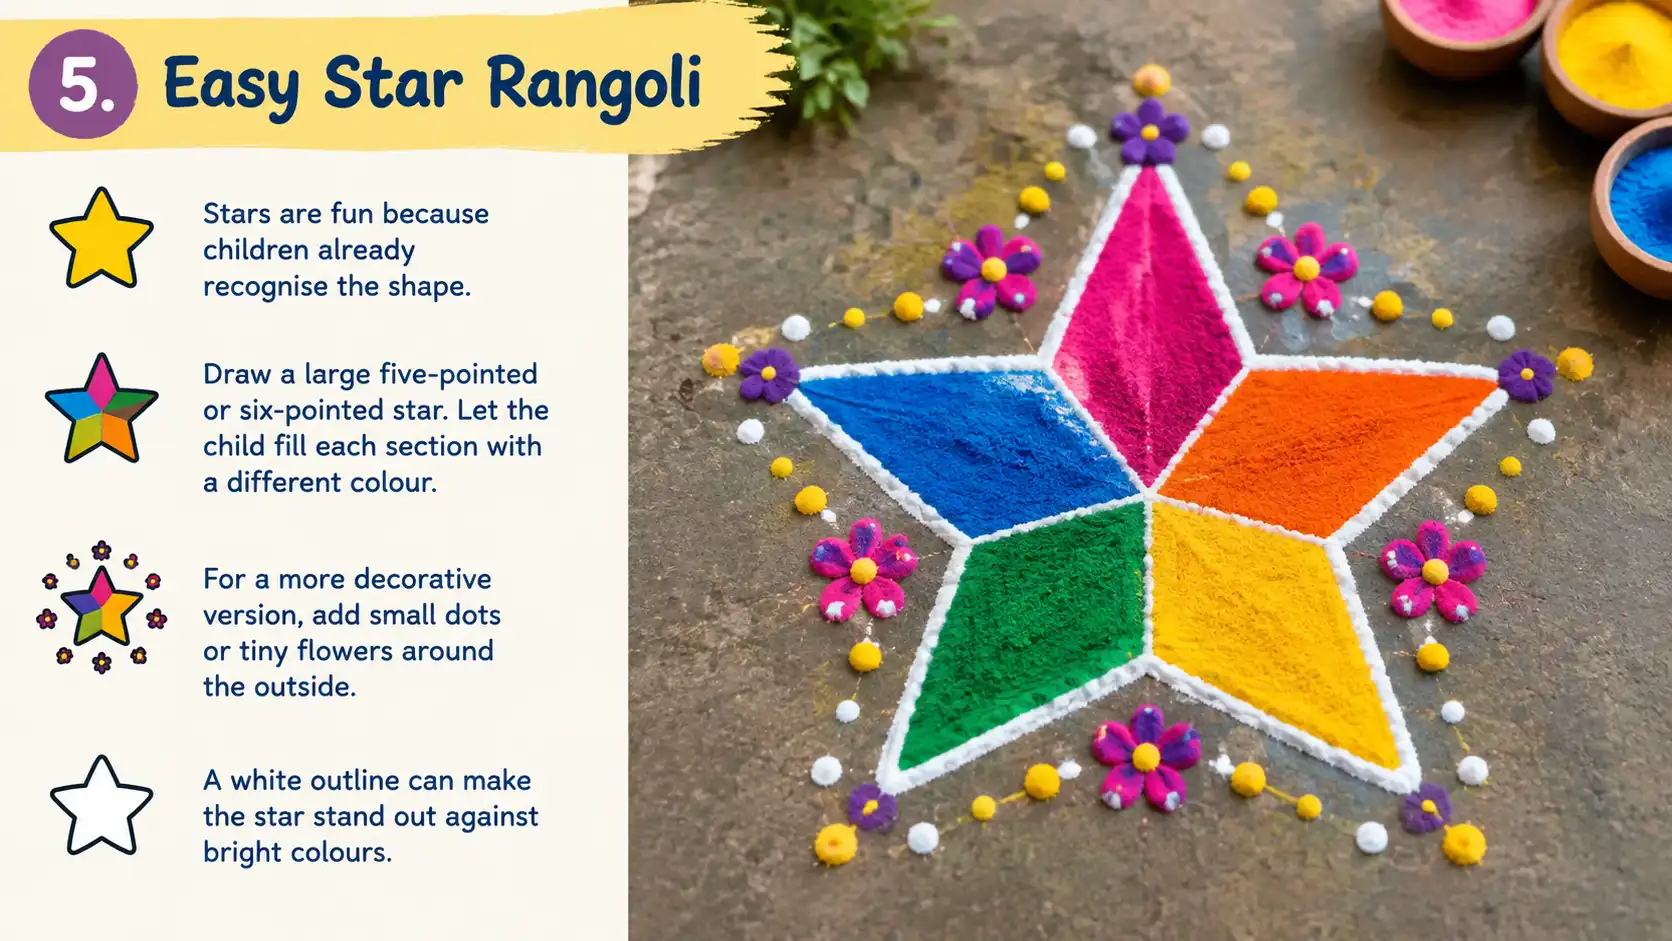
Stars are fun because children already recognise the shape.
Draw a large five-pointed or six-pointed star. Let the child fill each section with a different colour.
For a more decorative version, add small dots or tiny flowers around the outside.
A white outline can make the star stand out against bright colours.
6. Heart Rangoli
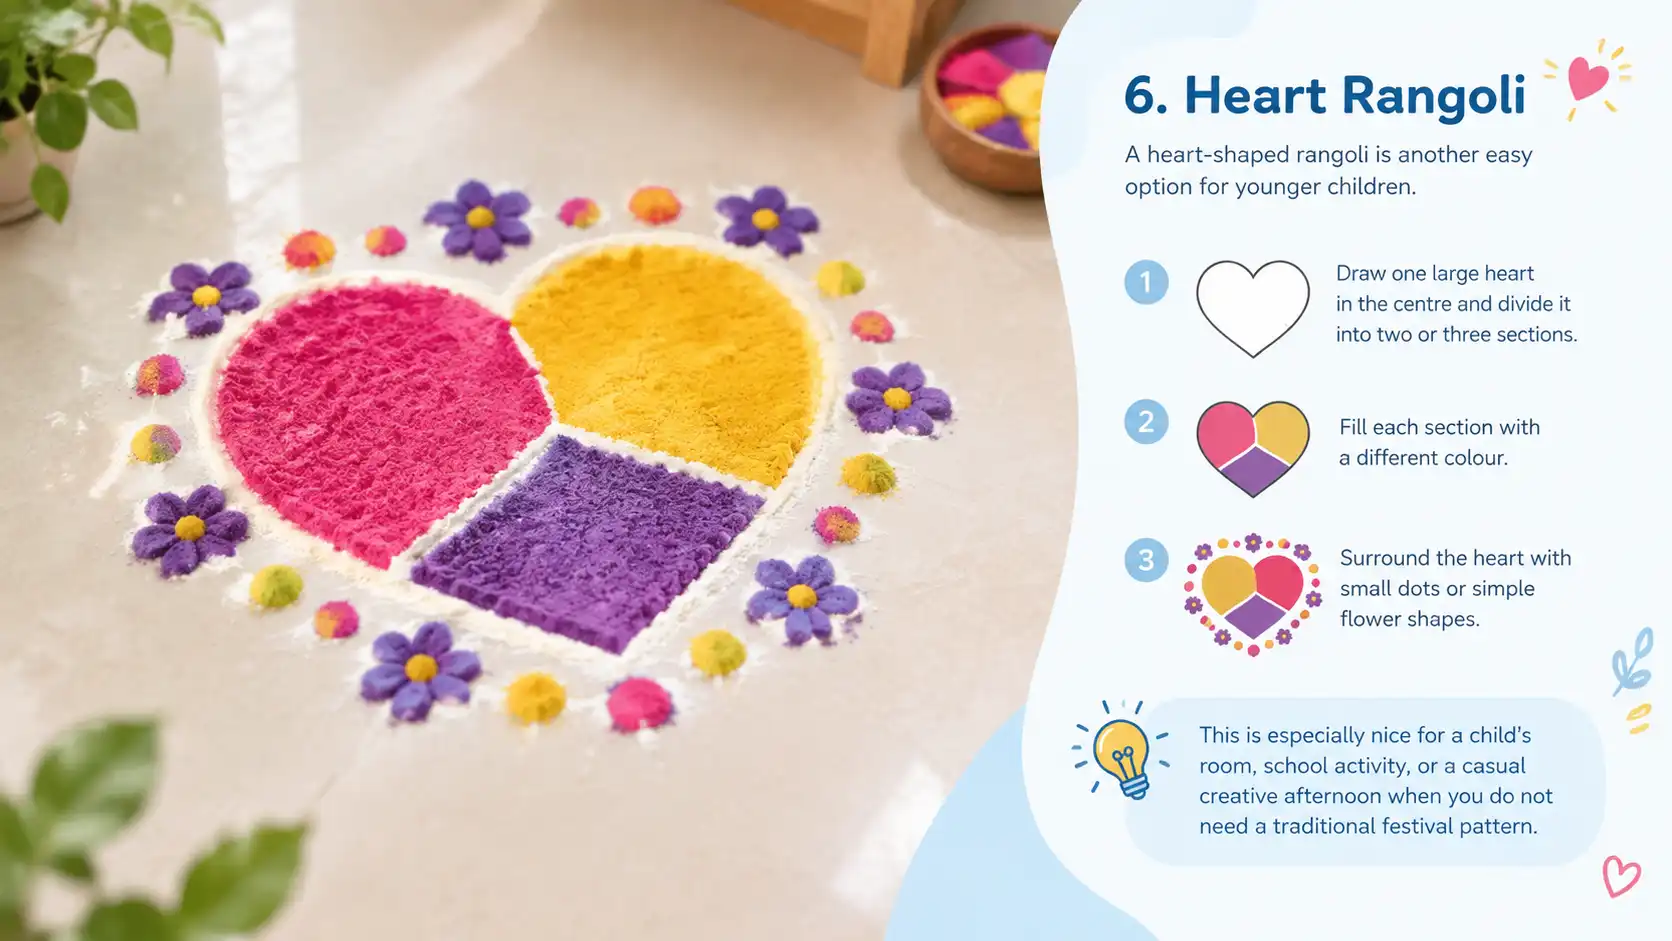
A heart-shaped rangoli is another easy option for younger children.
Draw one large heart in the centre and divide it into two or three sections. Fill each section with a different colour.
You can then surround the heart with small dots or simple flower shapes.
This is especially nice for a child’s room, school activity, or a casual creative afternoon when you do not need a traditional festival pattern.
7. Diya Rangoli
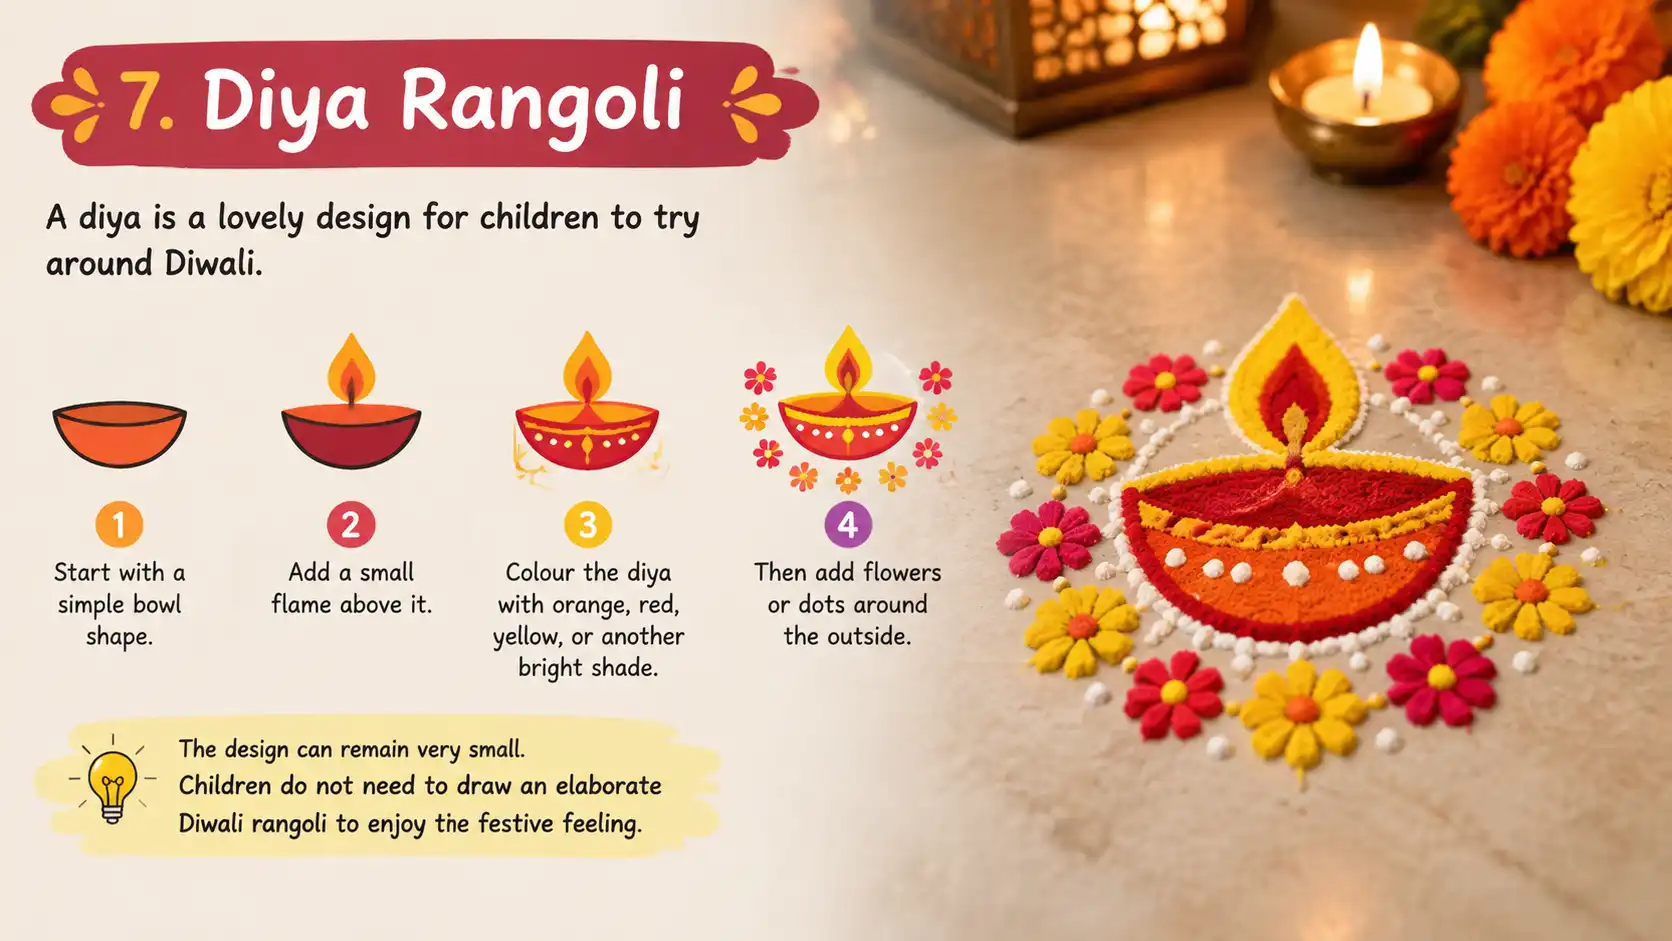
A diya is a lovely design for children to try around Diwali.
Start with a simple bowl shape and add a small flame above it. Colour the diya with orange, red, yellow, or another bright shade.
Then add flowers or dots around the outside.
The design can remain very small. Children do not need to draw an elaborate Diwali rangoli to enjoy the festive feeling.
8. Butterfly Rangoli
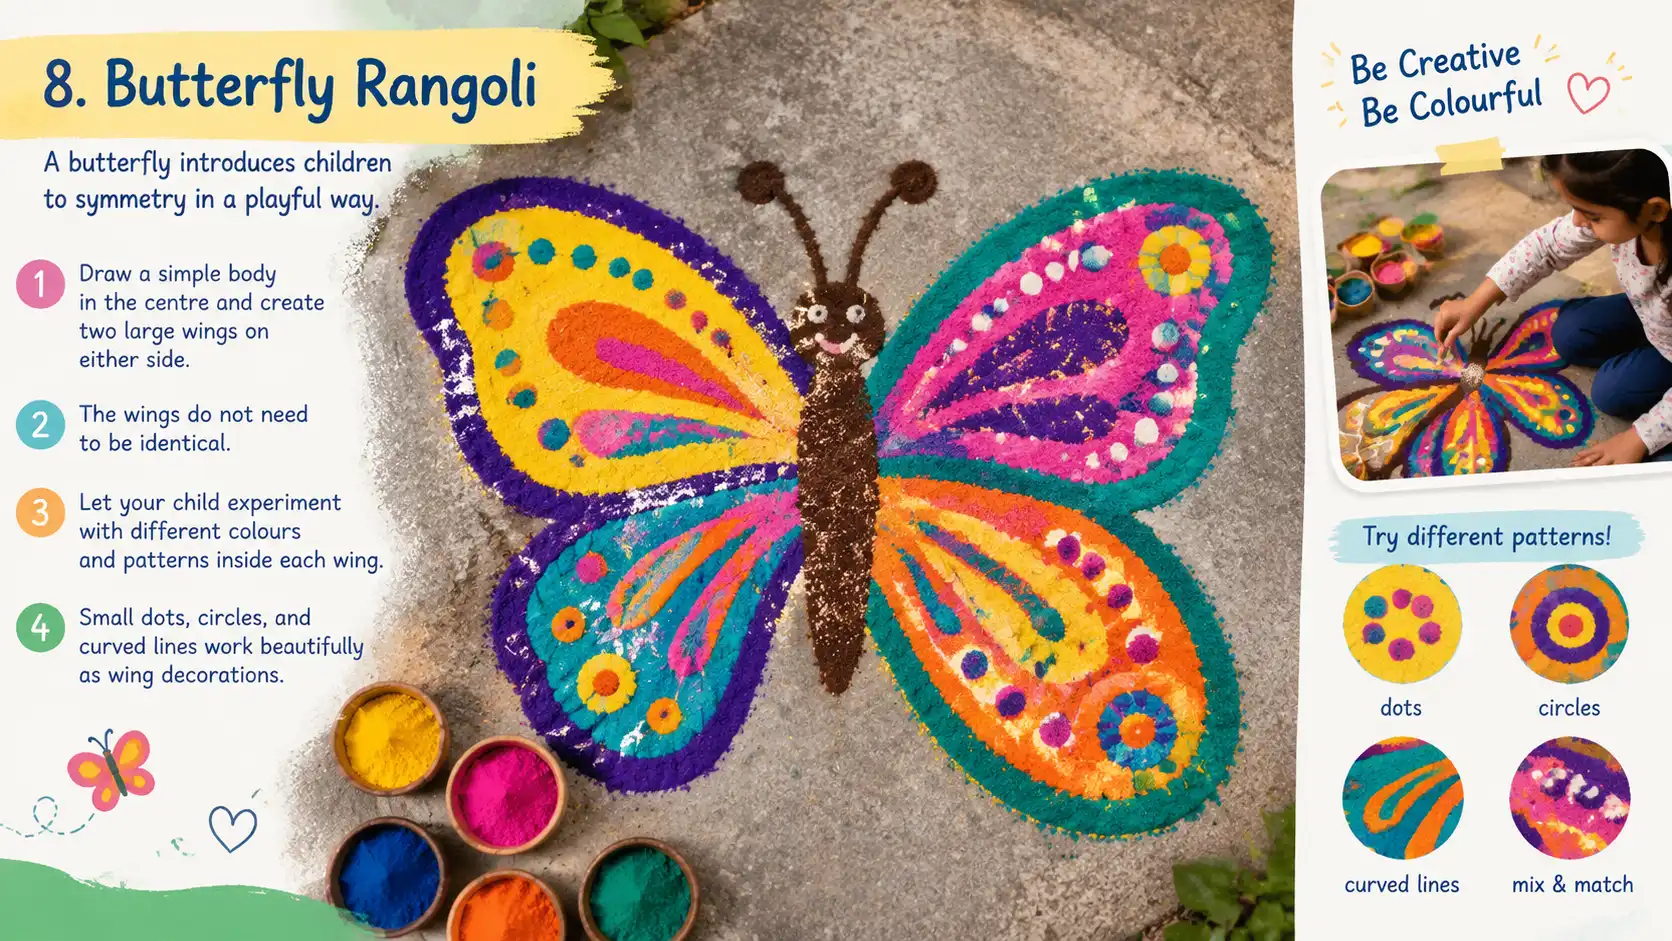
A butterfly introduces children to symmetry in a playful way.
Draw a simple body in the centre and create two large wings on either side. The wings do not need to be identical.
Let your child experiment with different colours and patterns inside each wing.
Small dots, circles, and curved lines work beautifully as wing decorations.
9. Rainbow Rangoli
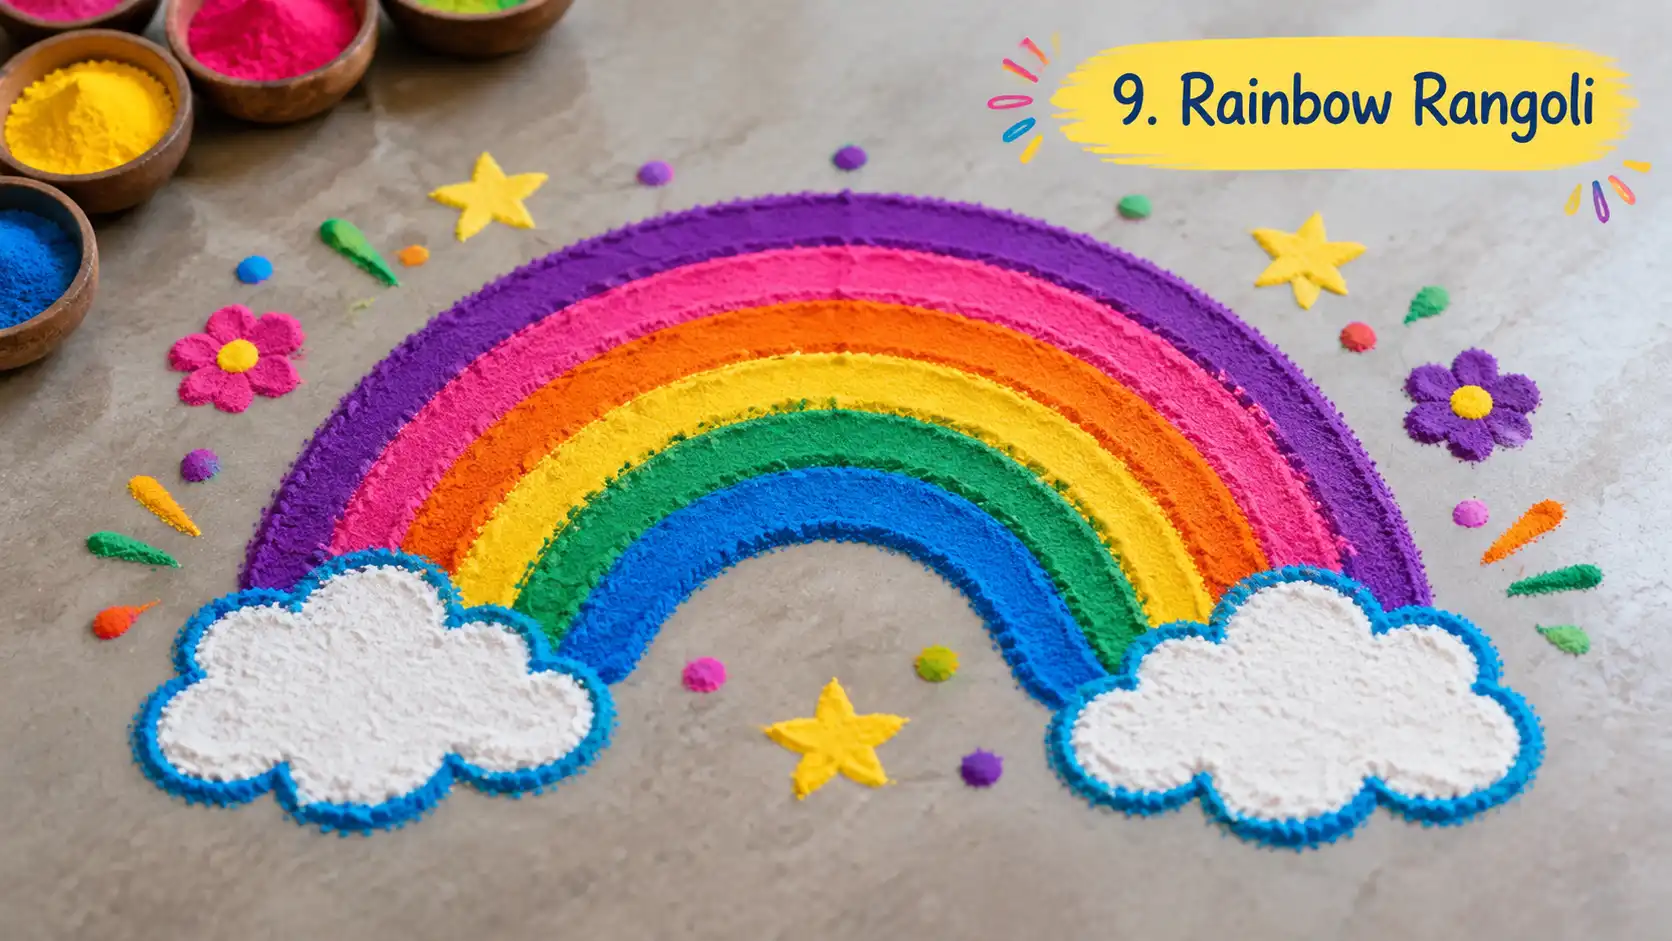
This is one of the most playful designs on the list.
Instead of making a traditional circular rangoli, draw several curved bands like a rainbow. Fill each band with a different colour.
Add small stars, dots, clouds, or flowers around it.
There is no need to follow traditional colour arrangements. Let children create their own colourful version.
10. Leaf Rangoli
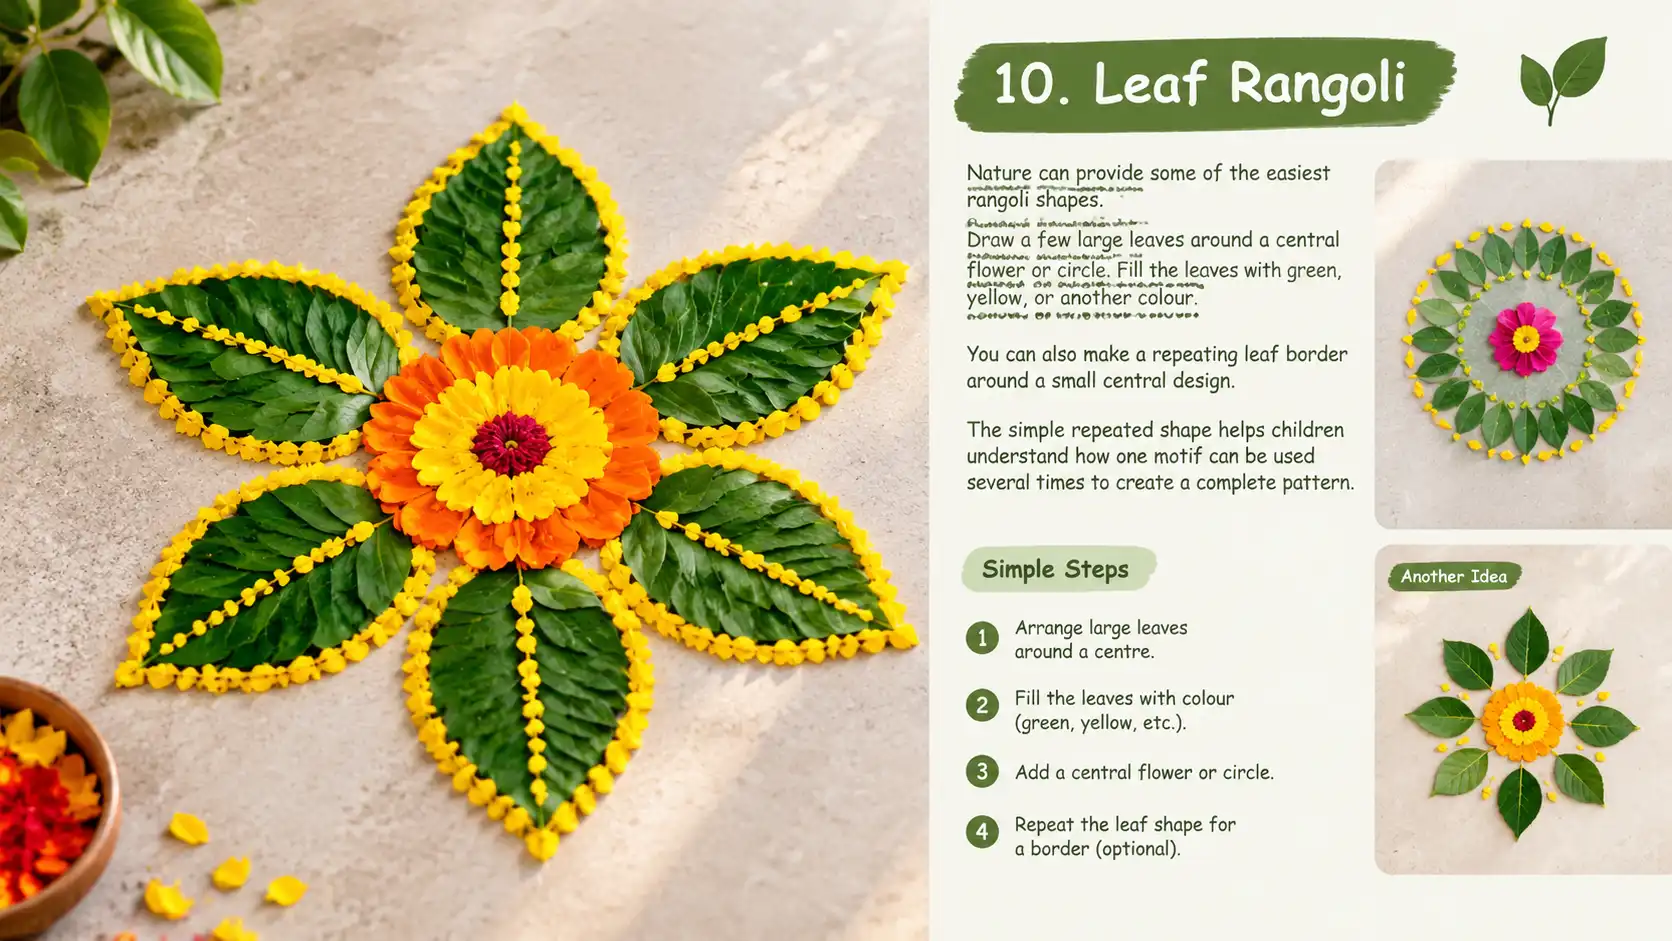
Nature can provide some of the easiest rangoli shapes.
Draw a few large leaves around a central flower or circle. Fill the leaves with green, yellow, or another colour.
You can also make a repeating leaf border around a small central design.
The simple repeated shape helps children understand how one motif can be used several times to create a complete pattern.
11. Lotus Rangoli
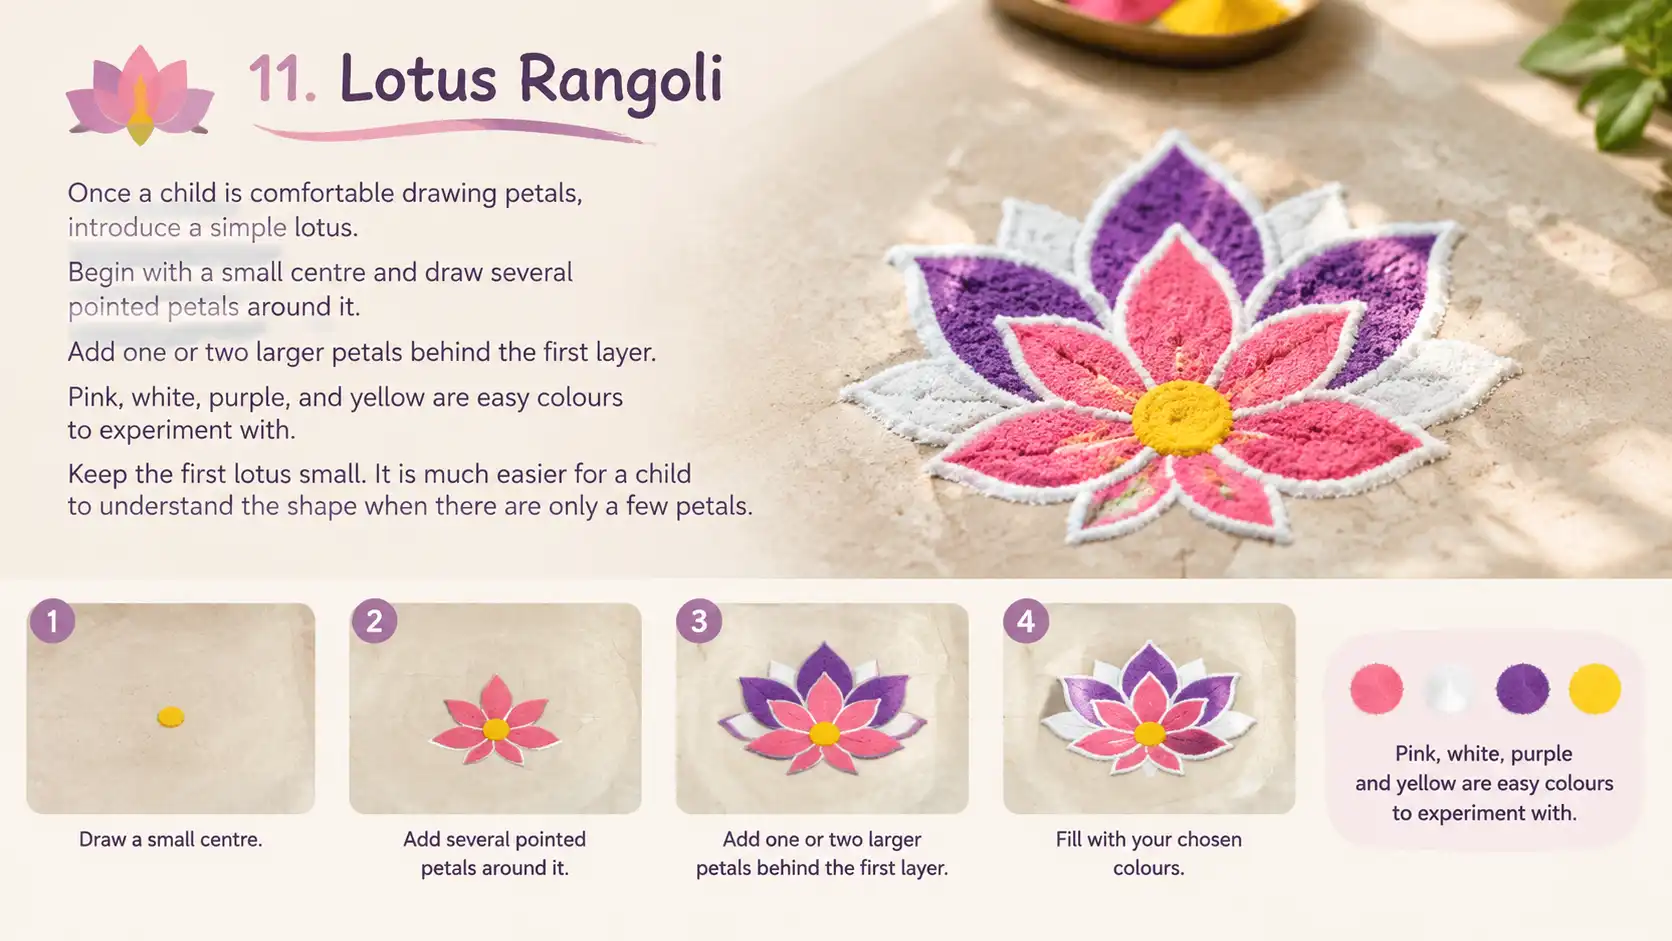
Once a child is comfortable drawing petals, introduce a simple lotus.
Begin with a small centre and draw several pointed petals around it. Add one or two larger petals behind the first layer.
Pink, white, purple, and yellow are easy colours to experiment with.
Keep the first lotus small. It is much easier for a child to understand the shape when there are only a few petals.
12. Flower and Dot Rangoli
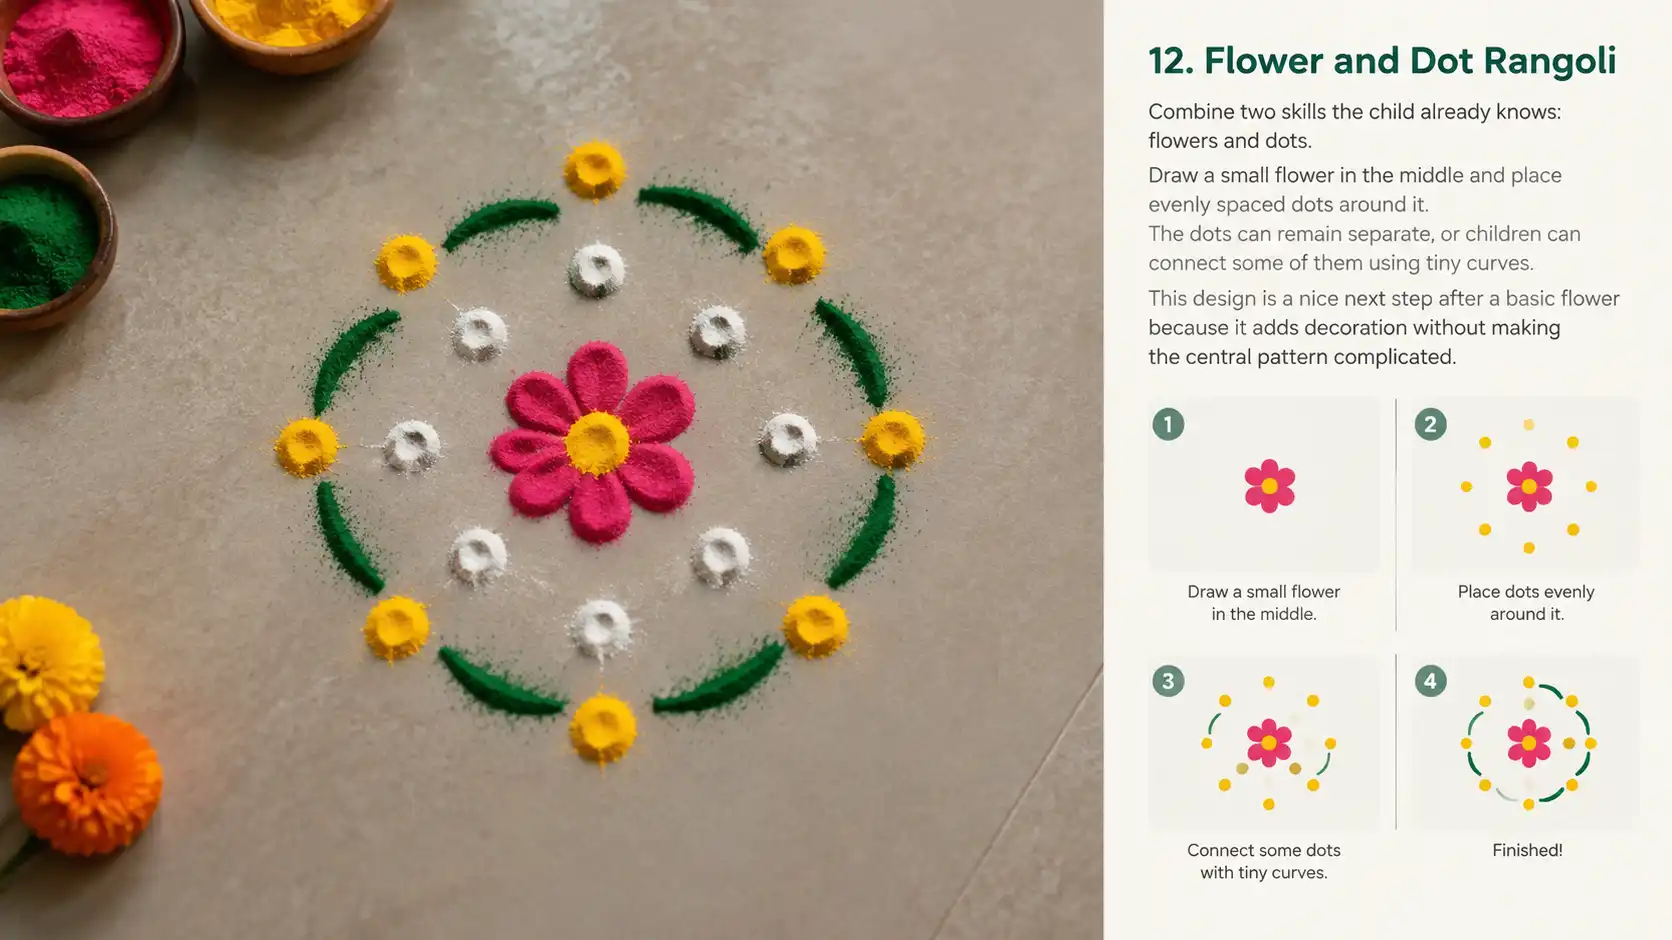
Combine two skills the child already knows: flowers and dots.
Draw a small flower in the middle and place evenly spaced dots around it.
The dots can remain separate, or children can connect some of them using tiny curves.
This design is a nice next step after a basic flower because it adds decoration without making the central pattern complicated.
13. Geometric Rangoli
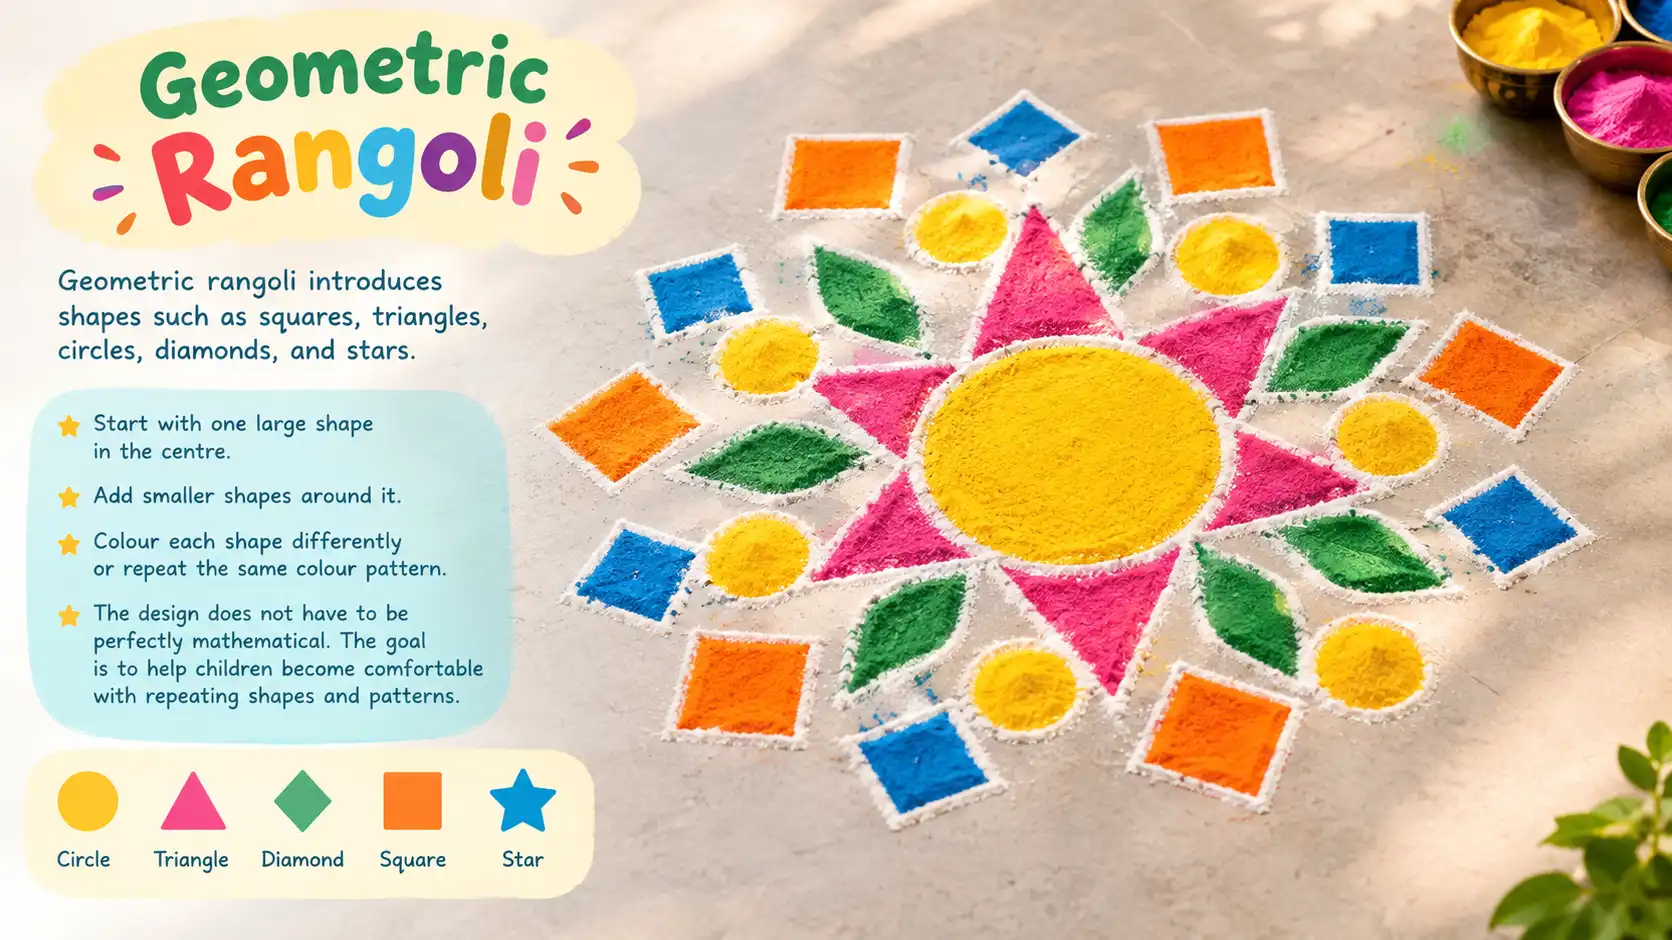
Geometric rangoli introduces shapes such as squares, triangles, circles, diamonds, and stars.
Start with one large shape in the centre. Add smaller shapes around it.
Children can colour each shape differently or repeat the same colour pattern.
For example, they might use yellow for circles, pink for triangles, and green for leaves.
The design does not have to be perfectly mathematical. The goal is to help children become comfortable with repeating shapes and patterns.
14. Simple Peacock Rangoli
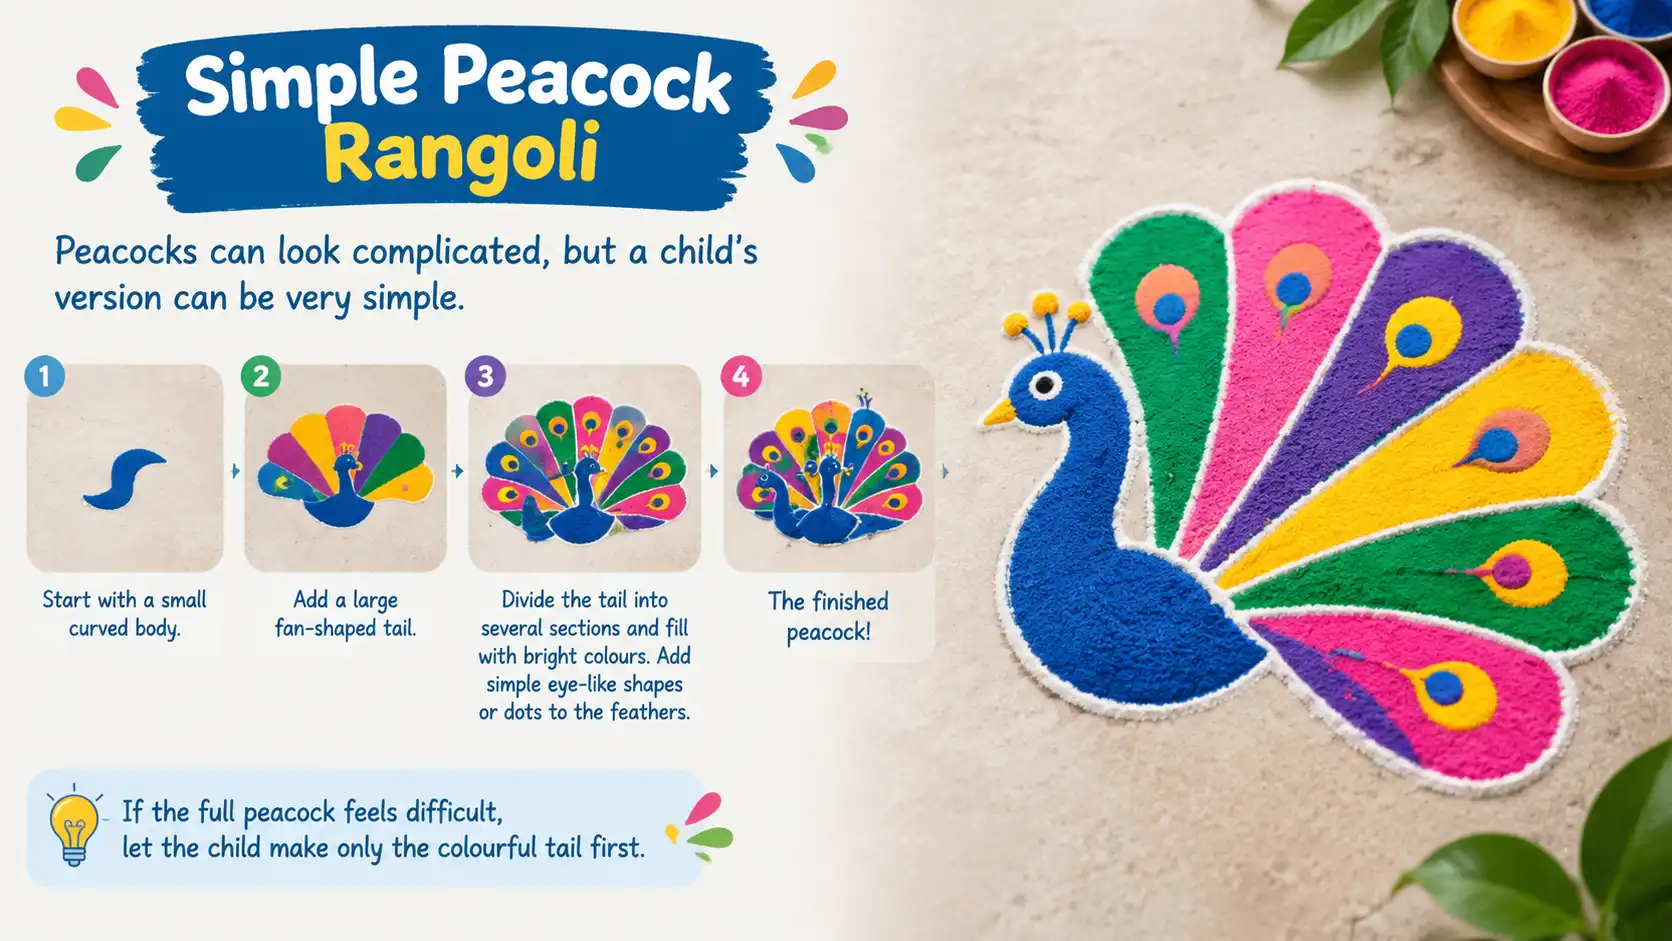
Peacocks can look complicated, but a child’s version can be very simple.
Start with a small curved body and a large fan-shaped tail.
Divide the tail into several sections and fill them with bright colours. Add simple eye-like shapes or dots to the feathers.
Blue, green, purple, yellow, and pink can make the design lively.
If the full peacock feels difficult, let the child make only the colourful tail first.
15. Easy Mandala Rangoli
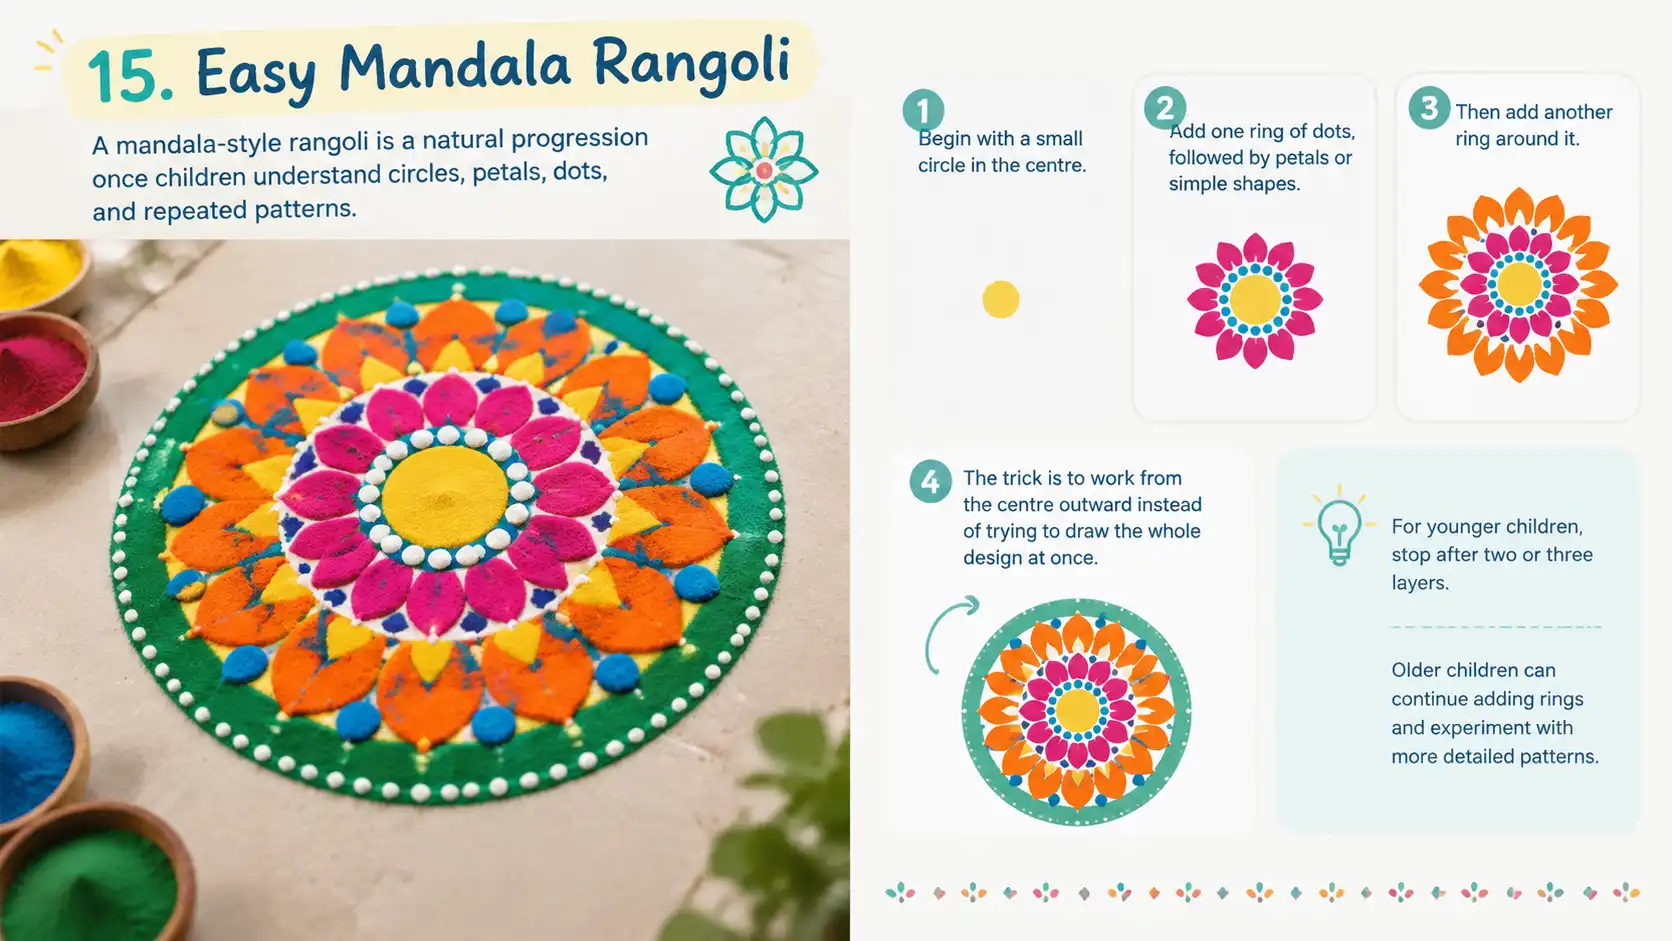
A mandala-style rangoli is a natural progression once children understand circles, petals, dots, and repeated patterns.
Begin with a small circle in the centre. Add one ring of dots, followed by petals or simple shapes.
Then add another ring around it.
The trick is to work from the centre outward instead of trying to draw the whole design at once.
For younger children, stop after two or three layers. Older children can continue adding rings and experiment with more detailed patterns.
Easy Rangoli Ideas by Age
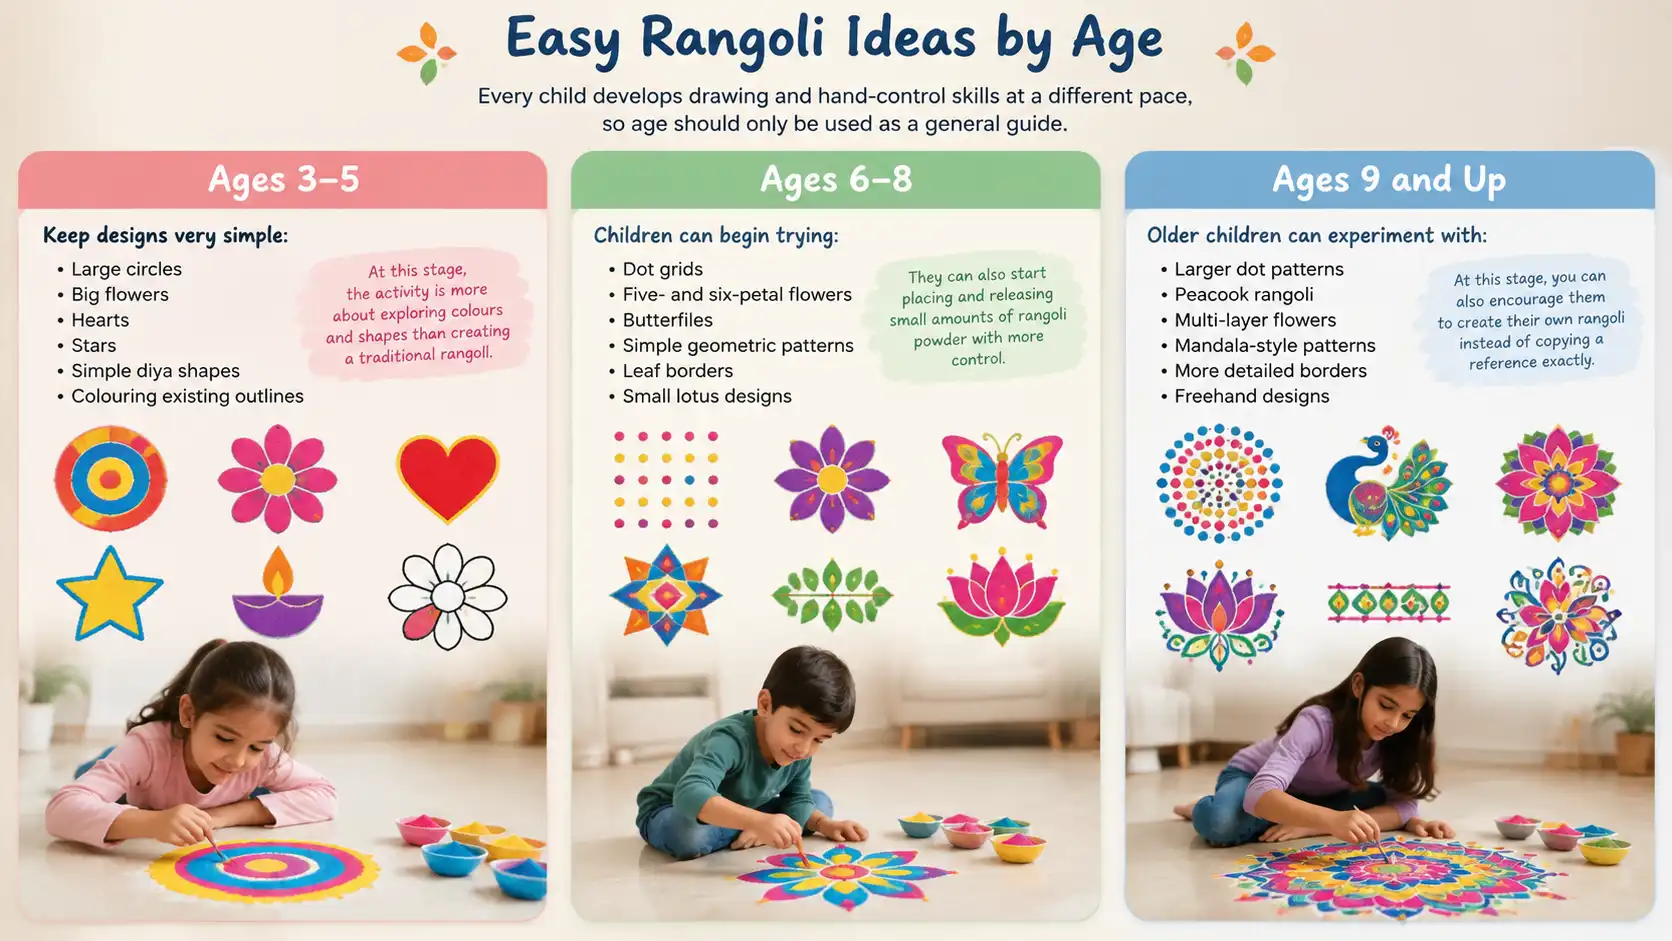
Every child develops drawing and hand-control skills at a different pace, so age should only be used as a general guide.
Ages 3–5
Keep designs very simple:
- Large circles
- Big flowers
- Hearts
- Stars
- Simple diya shapes
- Colouring existing outlines
At this stage, the activity is more about exploring colours and shapes than creating a traditional rangoli.
Ages 6–8
Children can begin trying:
- Dot grids
- Five- and six-petal flowers
- Butterflies
- Simple geometric patterns
- Leaf borders
- Small lotus designs
They can also start placing and releasing small amounts of rangoli powder with more control.
Ages 9 and Up
Older children can experiment with:
- Larger dot patterns
- Peacock rangoli
- Multi-layer flowers
- Mandala-style patterns
- More detailed borders
- Freehand designs
At this stage, you can also encourage them to create their own rangoli instead of copying a reference exactly.
Simple Colour Combinations for Kids’ Rangoli
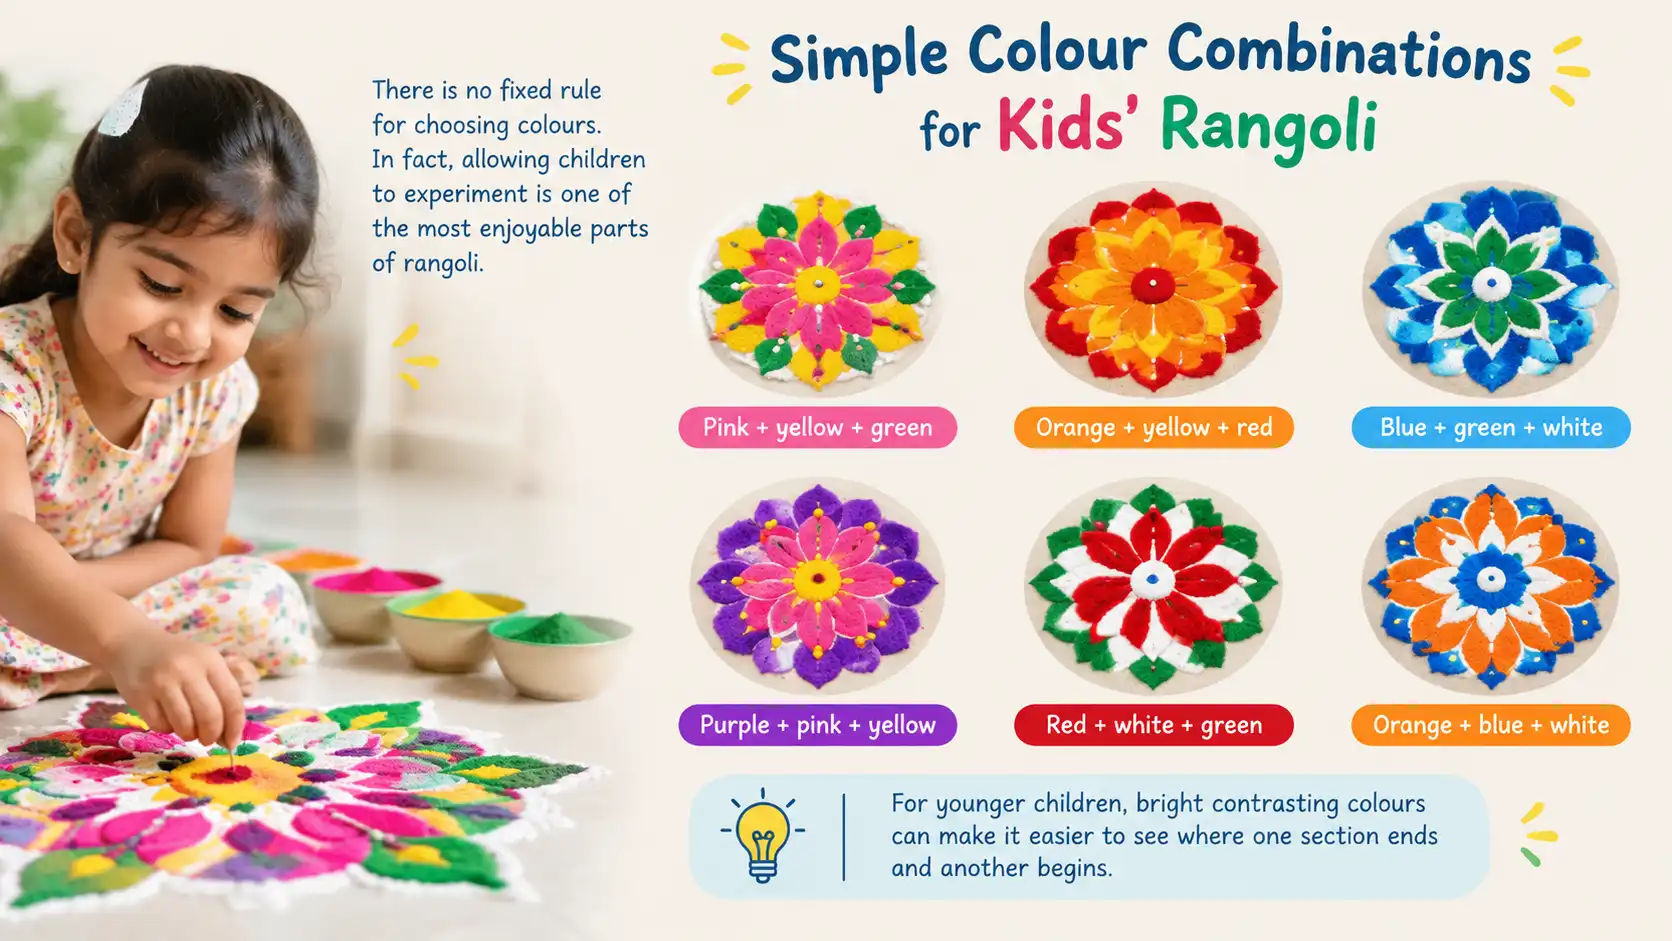
There is no fixed rule for choosing colours. In fact, allowing children to experiment is one of the most enjoyable parts of rangoli.
Still, these combinations are easy places to begin:
For younger children, bright contrasting colours can make it easier to see where one section ends and another begins.
Should Kids Make Rangoli on the Floor or Paper?
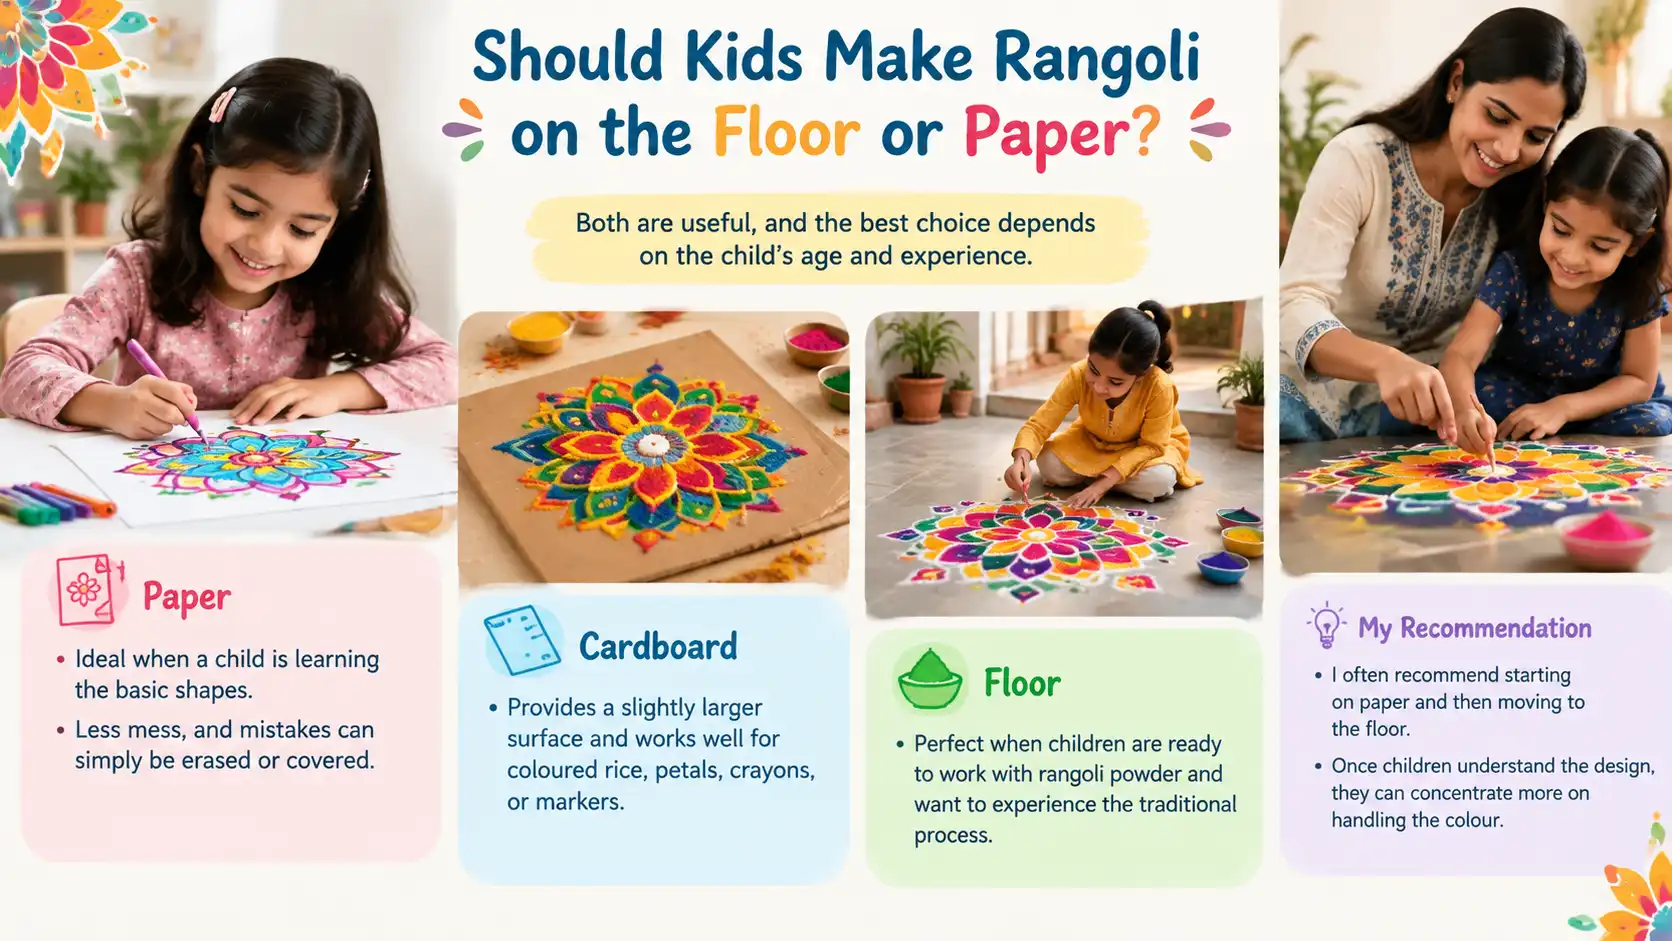
Both are useful, and the best choice depends on the child’s age and experience.
is ideal when a child is learning the basic shapes. There is less mess, and mistakes can simply be erased or covered.
provides a slightly larger surface and works well for coloured rice, petals, crayons, or markers.
is perfect when children are ready to work with rangoli powder and want to experience the traditional process.
I often recommend starting on paper and then moving to the floor. Once children understand the design, they can concentrate more on handling the colour.
A Few Simple Tips for Parents
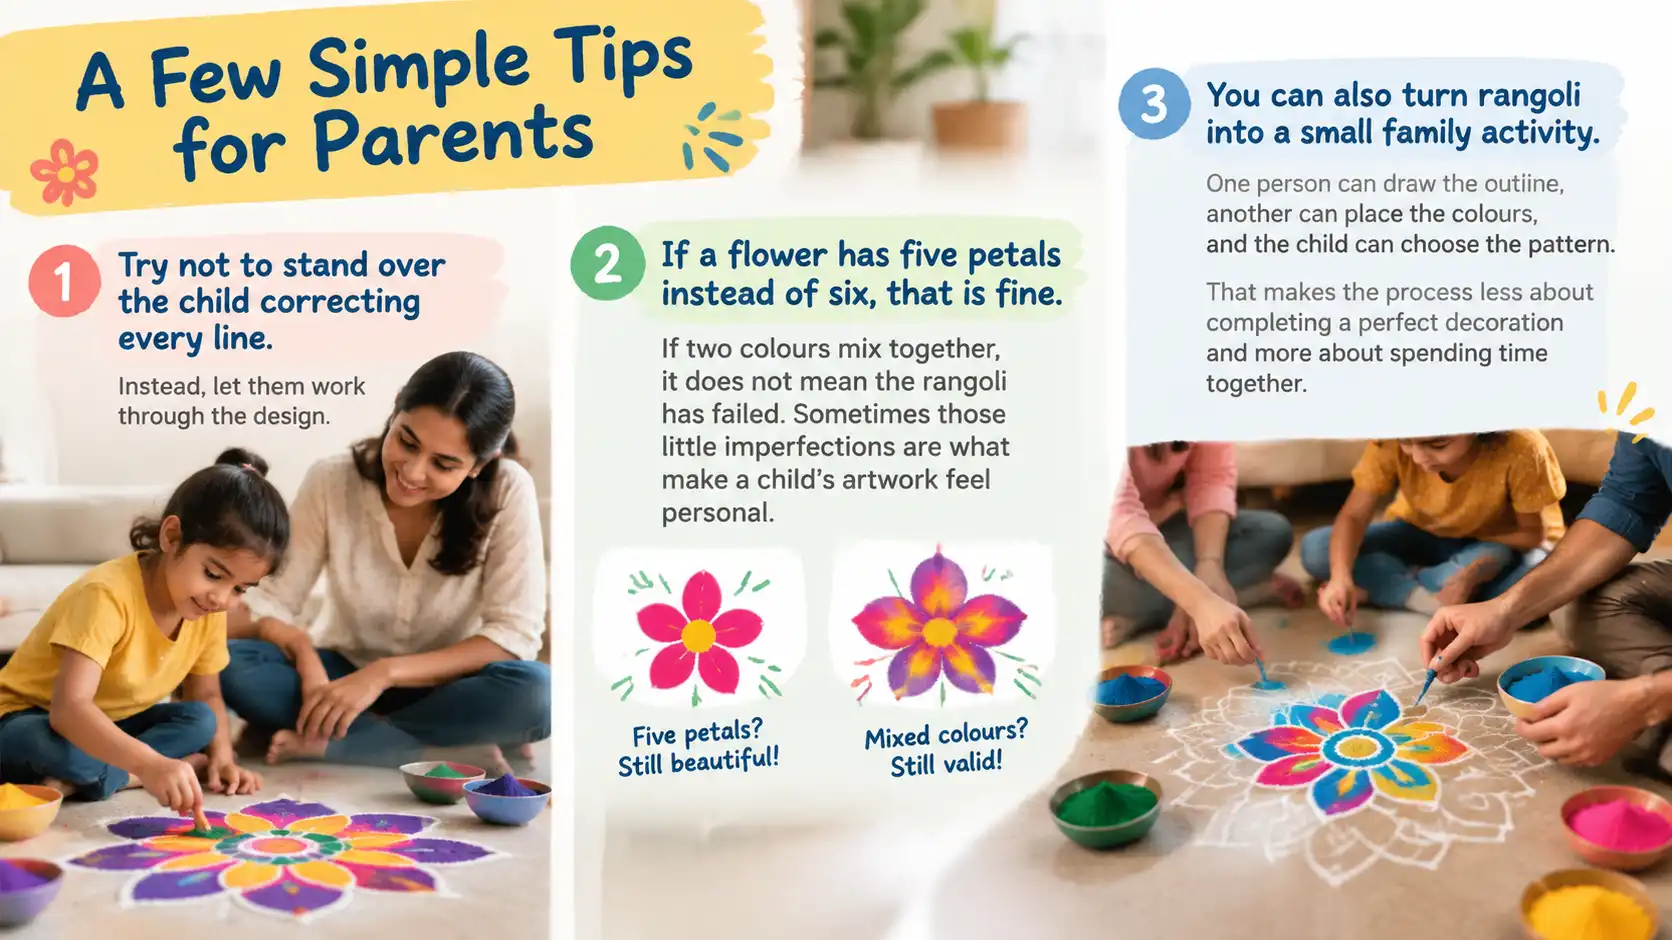
Try not to stand over the child correcting every line.
Instead, let them work through the design.
If a flower has five petals instead of six, that is fine. If two colours mix together, it does not mean the rangoli has failed. Sometimes those little imperfections are what make a child’s artwork feel personal.
You can also turn rangoli into a small family activity. One person can draw the outline, another can place the colours, and the child can choose the pattern.
That makes the process less about completing a perfect decoration and more about spending time together.
Why I Like Teaching Rangoli Through Simple Designs
After years of drawing and documenting rangoli, I have learned that complexity is not what makes a design memorable.
Some of the designs I remember most clearly are the small ones I saw growing up: a few white lines at the doorway, a simple flower filled with colour, or a handful of dots arranged carefully before the morning began.
That is also why I prefer simple rangoli designs for children.
They leave room for the child.
A complicated design tells them exactly what to do. A simple design gives them a starting point and lets them decide what comes next.
And that, to me, is where the real joy of rangoli begins.
Let Kids Discover the Joy of Rangoli
When I think back to those mornings in Kolkata, I do not remember whether my mother or grandmother made every line perfectly. What I remember is the feeling of watching something beautiful appear slowly in front of our doorway.
That feeling stayed with me.
It is one of the reasons I have spent the last eight years drawing, collecting, photographing, and documenting rangoli designs. The patterns may change, the colours may change, and every family may have its own way of making them, but the simple pleasure of creating something with your hands remains.
That is what I hope children experience too.
If your child is learning how to make rangoli for the first time, start with a flower, a few dots, a star, or a simple diya. Give them a small space, a few colours, and enough freedom to make the design their own.
It does not have to be perfect.
Let the lines wobble. Let the colours surprise you. Let the child change the pattern halfway through.
Because sometimes the most beautiful part of rangoli is not the finished design on the floor. It is watching a child discover, one dot and one colour at a time, that they can create something beautiful themselves.
FAQs
What is the easiest rangoli design for kids?
A simple flower, circle, star, or dot-based rangoli is a good place for children to start. Begin with large shapes and a small design so they can finish it without feeling overwhelmed. A small dot grid can also make it easier to create balanced lines and curves.
What materials do kids need to make rangoli?
Kids can make rangoli with coloured rangoli powder, chalk, coloured rice, flower petals, crayons, washable markers, or coloured sand. For beginners, paper or cardboard is a good surface for practice before moving to a floor design. Keep the materials simple so children can focus on the pattern rather than handling too many supplies.
What age can children start making rangoli?
Children can begin simple rangoli activities from around age three, using age-appropriate materials and adult supervision. Younger children can start with colouring large shapes or making simple patterns on paper, while older children can gradually try dots, flowers, geometric designs, and more detailed rangoli.
How can I teach my child to make rangoli easily?
Start by showing your child one small design instead of a large, complicated pattern. Draw a light outline or dot grid first, then let the child follow the lines and fill the sections with colour. Starting with flowers, circles, dots, and simple geometric shapes can make the first few attempts much easier.
Can kids make rangoli without traditional rangoli powder?
Yes. Children can practise rangoli using crayons, coloured pencils, washable markers, coloured rice, flower petals, or other suitable craft materials. Paper and cardboard are particularly useful when you want a less messy activity or when a child is learning the basic shapes before trying