How to Make Beautiful Rangoli Design: A Complete Guide for Beginners
Some of my earliest memories are of sitting on our doorstep in Kolkata, half-asleep, watching my mother work before the sun was even properly up. There was no phone timer, no fancy tools just a bowl of rice flour, her fingers moving almost on instinct, and a pattern that seemed to appear out of nowhere by the time I’d fully woken up. My grandmother did the same thing every single morning of her life, and honestly, I never got tired of watching it.
I didn’t plan on falling in love with rangoli, it just sort of happened from all those mornings spent sitting there. Eight years ago I started drawing my own, mostly just to see if I could get anywhere close to what I’d grown up watching. I’ve messed up more designs than I can count, photographed the ones that actually worked, and slowly picked up little tricks along the way the kind you only learn by getting powder all over your hands and starting over.
This guide is basically everything I wish someone had told me when I was starting out. So if you’ve been searching for how to make beautiful rangoli design and don’t know where to begin, you’re in the right place no fancy equipment needed, just a bit of patience and maybe a willingness to make a mess the first few times.
Materials You’ll Need for Rangoli
Before you start, picking the right materials makes a big difference. Here are the ones I’ve come to rely on most.
Rangoli Powder
Bright, vibrant and easy to shape for colorful designs.
Rice Flour
Traditional material for crisp white kolam lines.
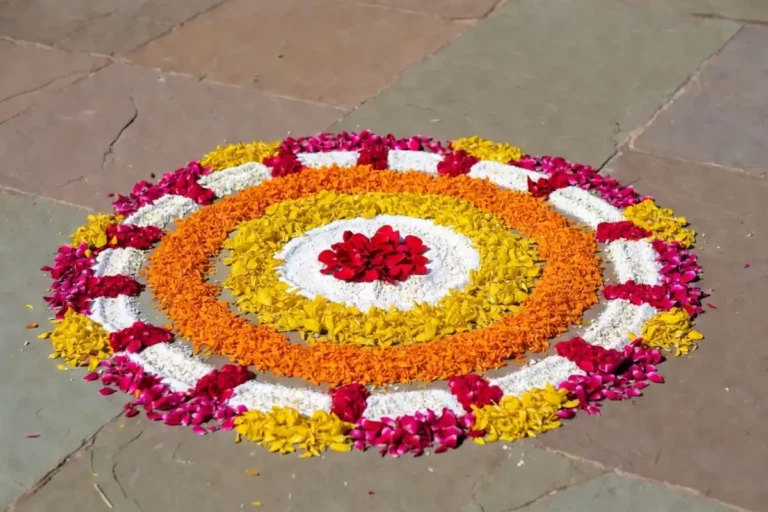
Flower Petals
Natural texture and soft color for organic designs.
Colored Sand
Perfect for large and bold outdoor rangoli designs.
Pulses & Grains
Affordable materials for an earthy rustic finish.
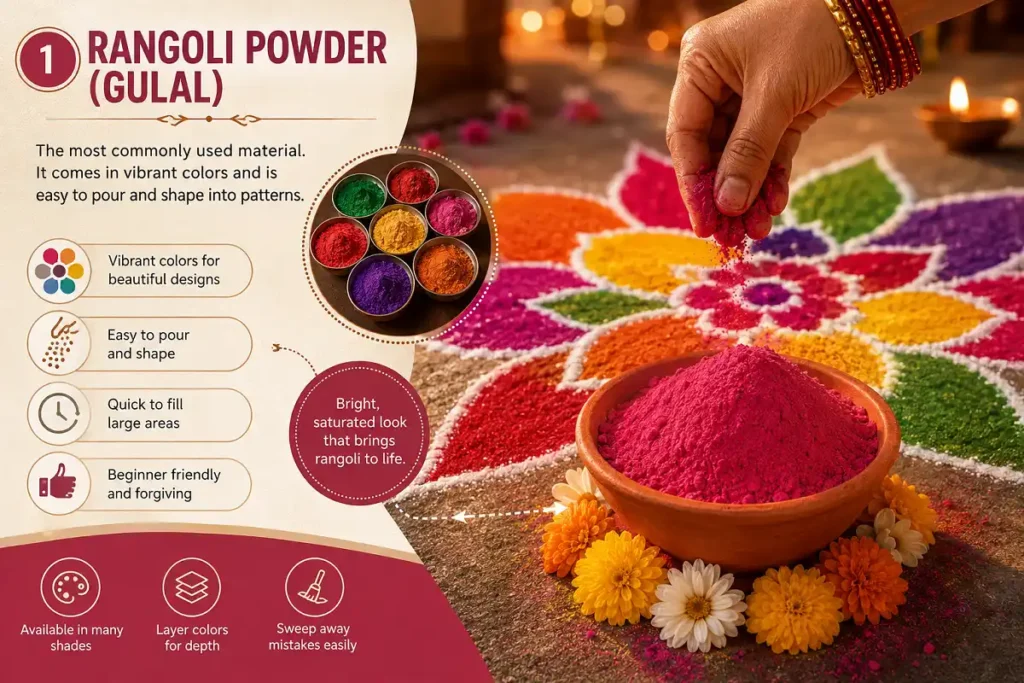
1. Rangoli Powder (Gulal)
The most commonly used material. It comes in vibrant colors and is easy to pour and shape into patterns. I keep a small stock of this at home because it fills large areas quickly and gives that bright, saturated look most people picture when they imagine rangoli. It’s also fairly forgiving for beginners you can layer it or sweep away a mistake without much fuss.
2. Rice Flour or Wet Chalk Paste
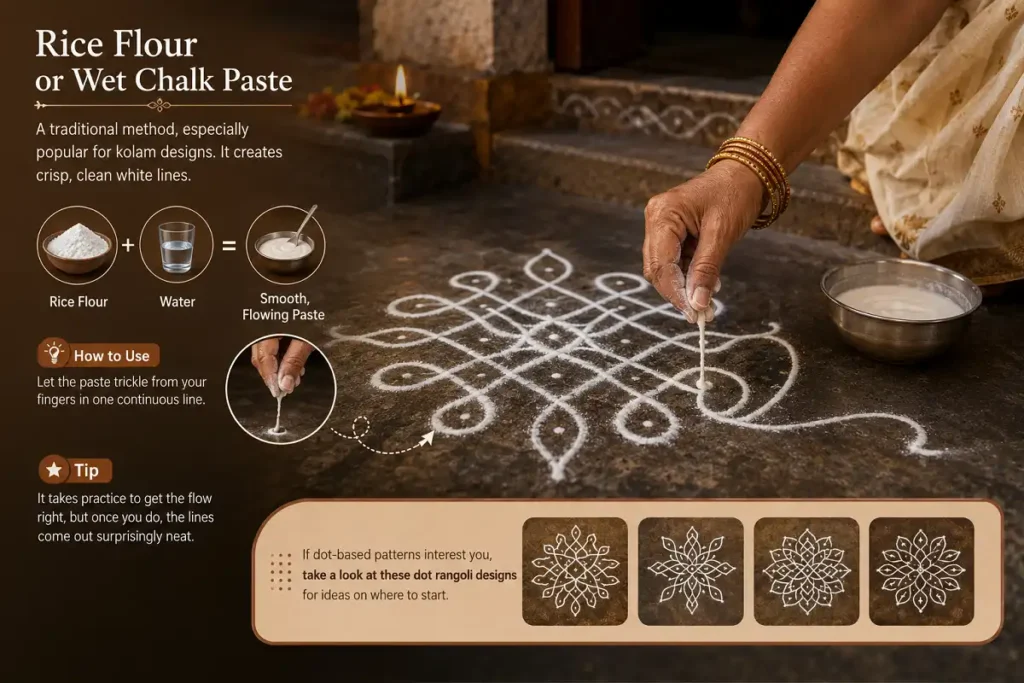
A traditional method, especially popular for kolam designs. It creates crisp, clean white lines this is what I remember my grandmother using most often. She’d mix it with just enough water to get a smooth, flowing consistency, then let it trickle from her fingers in one continuous line. It takes practice to get the flow right, but once you do, the lines come out surprisingly neat. If dot-based patterns interest you, take a look at these dot rangoli designs for ideas on where to start.
3. Flower Petals
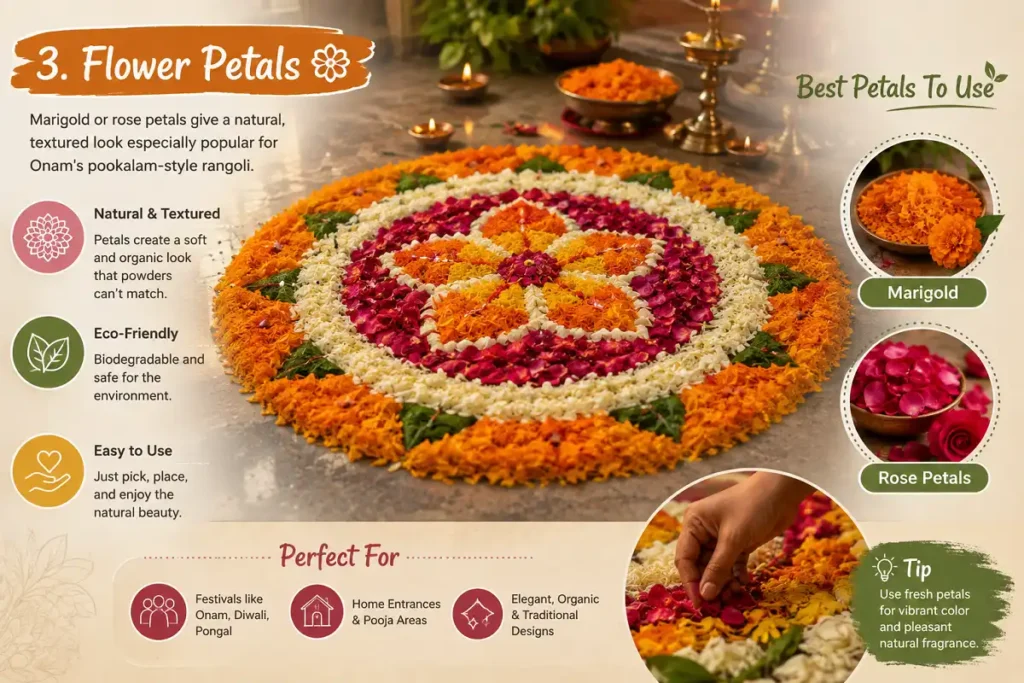
Marigold or rose petals give a natural, textured look especially popular for Onam’s pookalam-style rangoli. I like reaching for these when I want something less structured and more organic, since petals naturally vary in shape and size and give the design a softer finish that powder just can’t replicate. They’re also biodegradable, which is handy if the rangoli needs to be cleared away quickly afterward.
4. Colored Sand or Sawdust
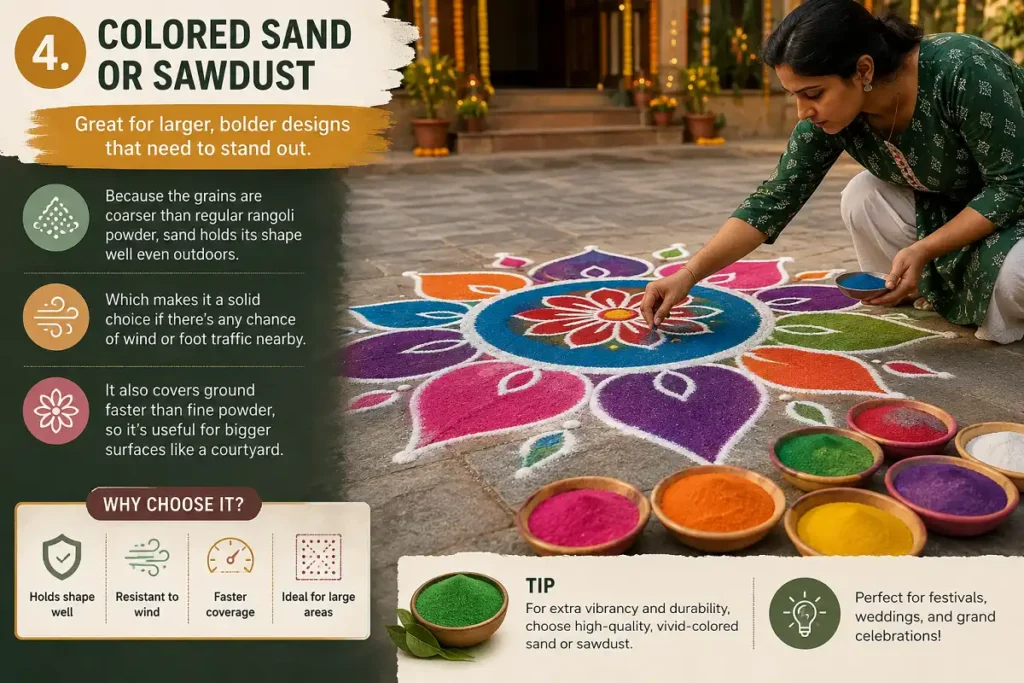
Great for larger, bolder designs that need to stand out. Because the grains are coarser than regular rangoli powder, sand holds its shape well even outdoors, which makes it a solid choice if there’s any chance of wind or foot traffic nearby. It also covers ground faster than fine powder, so it’s useful for bigger surfaces like a courtyard.
5. Pulses and Grains
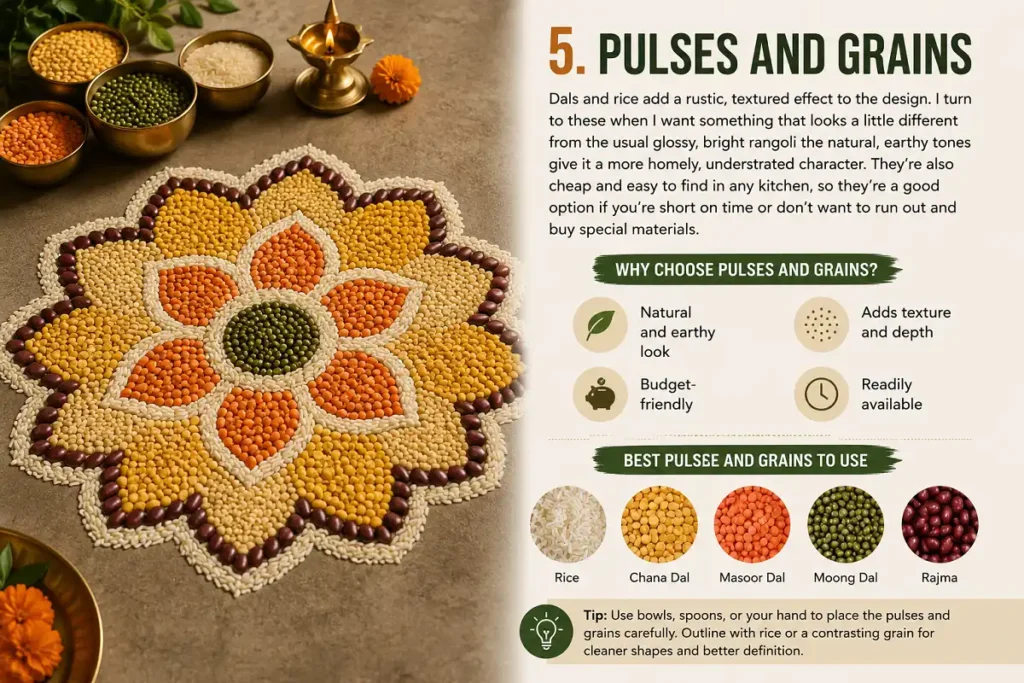
Dals and rice add a rustic, textured effect to the design. I turn to these when I want something that looks a little different from the usual glossy, bright rangoli the natural, earthy tones give it a more homely, understated character. They’re also cheap and easy to find in any kitchen, so they’re a good option if you’re short on time or don’t want to run out and buy special materials.
Step-by-Step Guide: How to Make Beautiful Rangoli Design
Follow these steps to create a beautiful, symmetrical rangoli design.
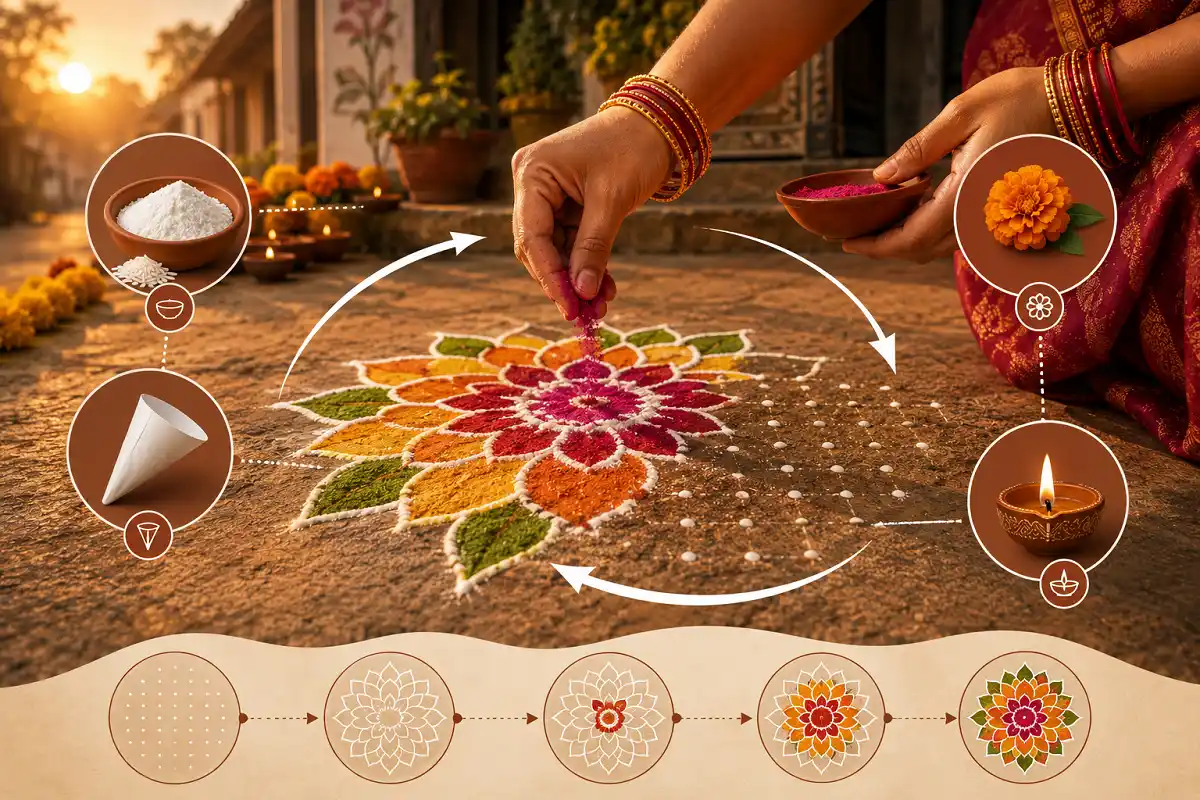
Step 1: Choose the Right Surface
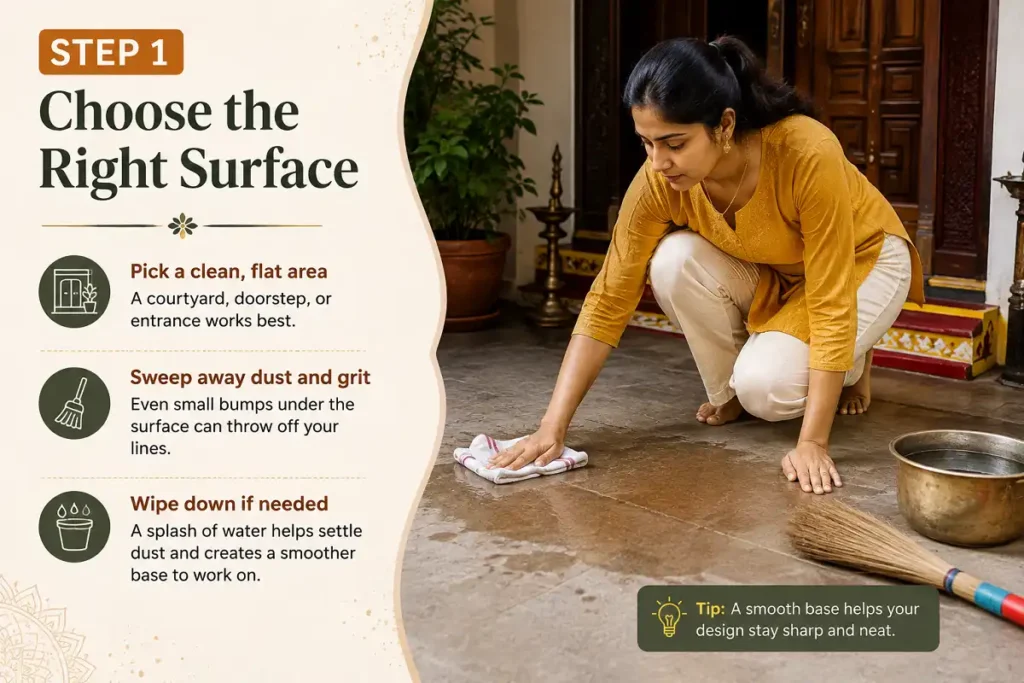
Pick a clean, flat area a courtyard, doorstep, or entrance works best. Sweep away any dust or loose grit first, because even small bumps under the surface can throw off your lines once you start pouring powder. If the ground is slightly uneven, a quick splash of water and a wipe-down usually helps settle the dust and gives you a smoother base to work on.
Step 2: Mark a Grid or Dots
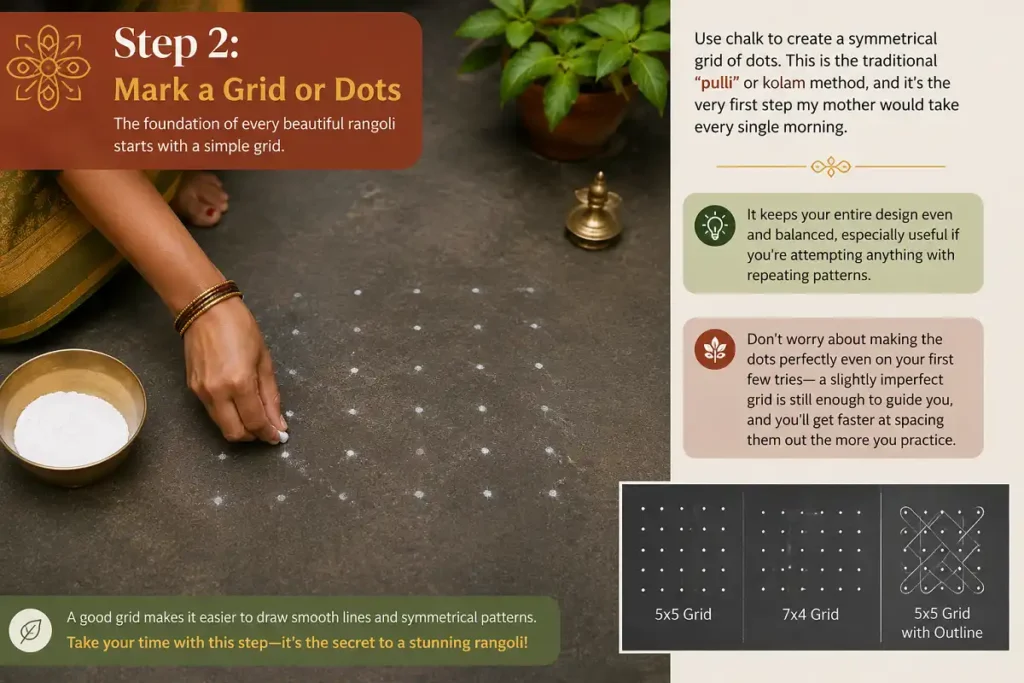
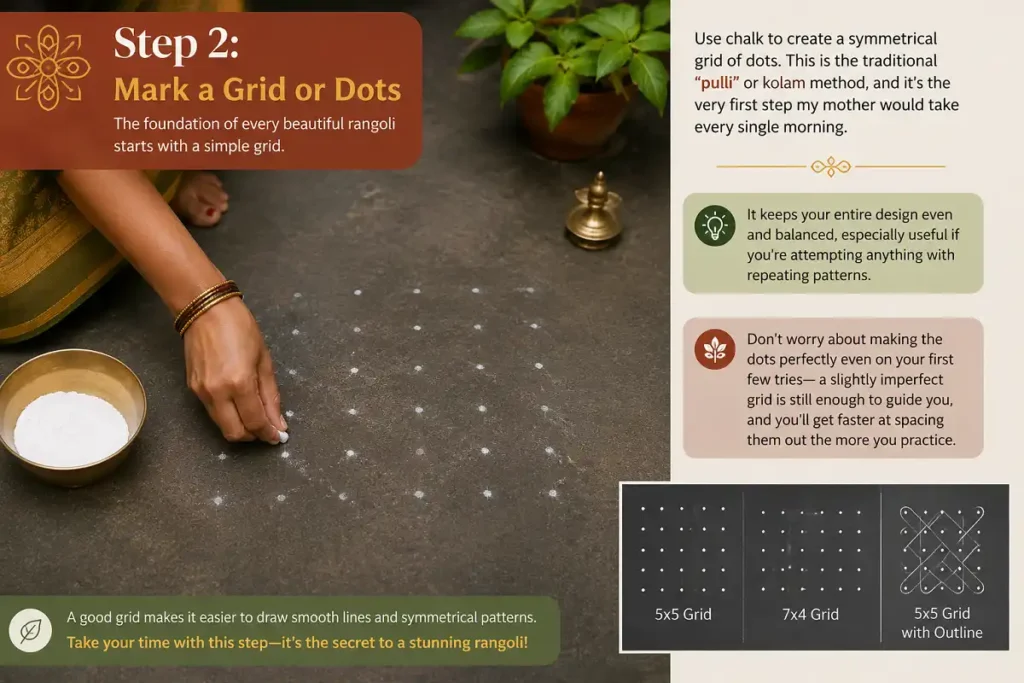
Use chalk to create a symmetrical grid of dots. This is the traditional “pulli” or kolam method, and it’s the very first step my mother would take every single morning. It keeps your entire design even and balanced, especially useful if you’re attempting anything with repeating patterns. Don’t worry about making the dots perfectly even on your first few tries a slightly imperfect grid is still enough to guide you, and you’ll get faster at spacing them out the more you practice.
Step 3: Sketch the Outline
Connect the dots using curved or straight lines to form your pattern flowers, peacocks, or geometric mandalas are all popular choices. I usually go over the outline twice, once lightly to check the overall shape and balance, and a second time a bit firmer once I’m happy with how it looks. This way, if something feels off, it’s easy to smudge away and correct before you commit to filling it in with color.
Step 4: Fill in the Colors
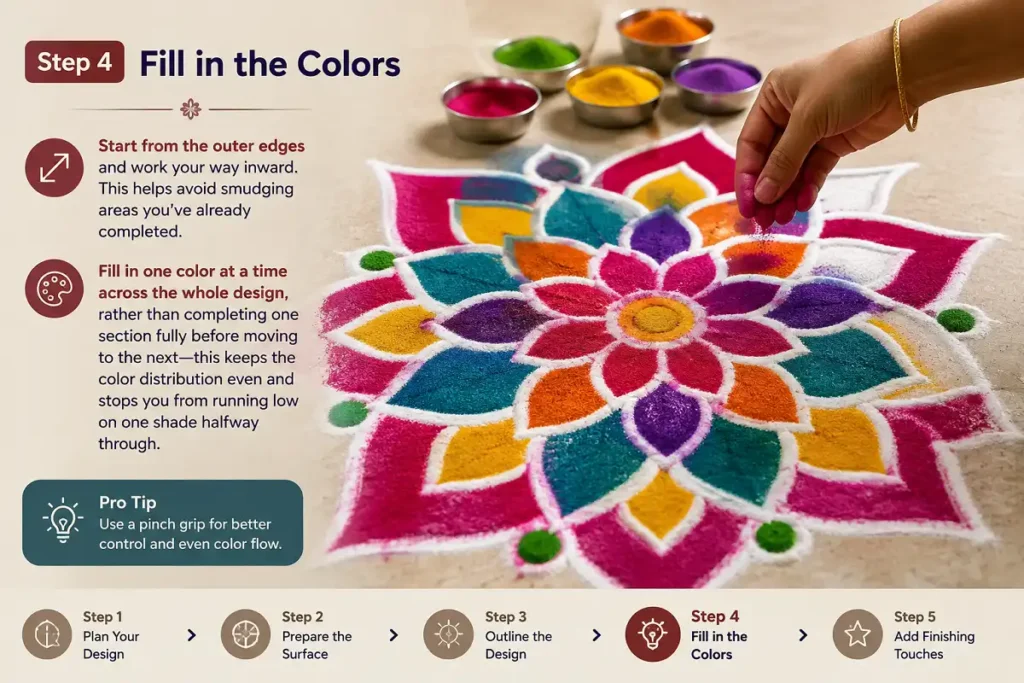
Start from the outer edges and work your way inward. This helps avoid smudging areas you’ve already completed. It also helps to fill in one color at a time across the whole design, rather than completing one section fully before moving to the next this keeps the color distribution even and stops you from running low on one shade halfway through.
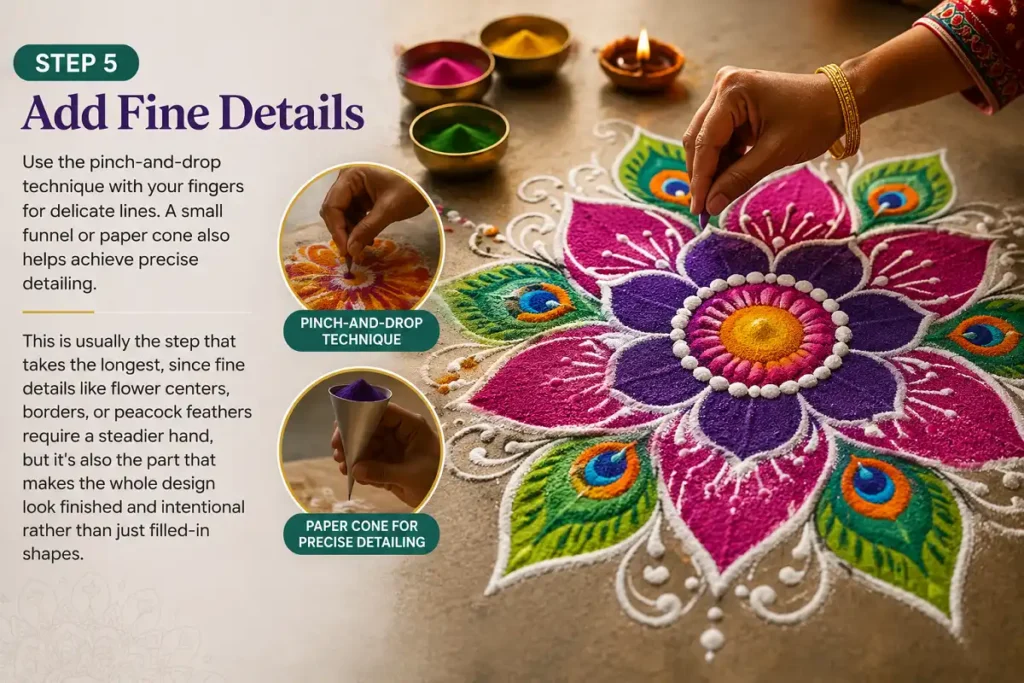
Step 5: Add Fine Details
Use the pinch-and-drop technique with your fingers for delicate lines. A small funnel or paper cone also helps achieve precise detailing. This is usually the step that takes the longest, since fine details like flower centers, borders, or peacock feathers require a steadier hand, but it’s also the part that makes the whole design look finished and intentional rather than just filled-in shapes.
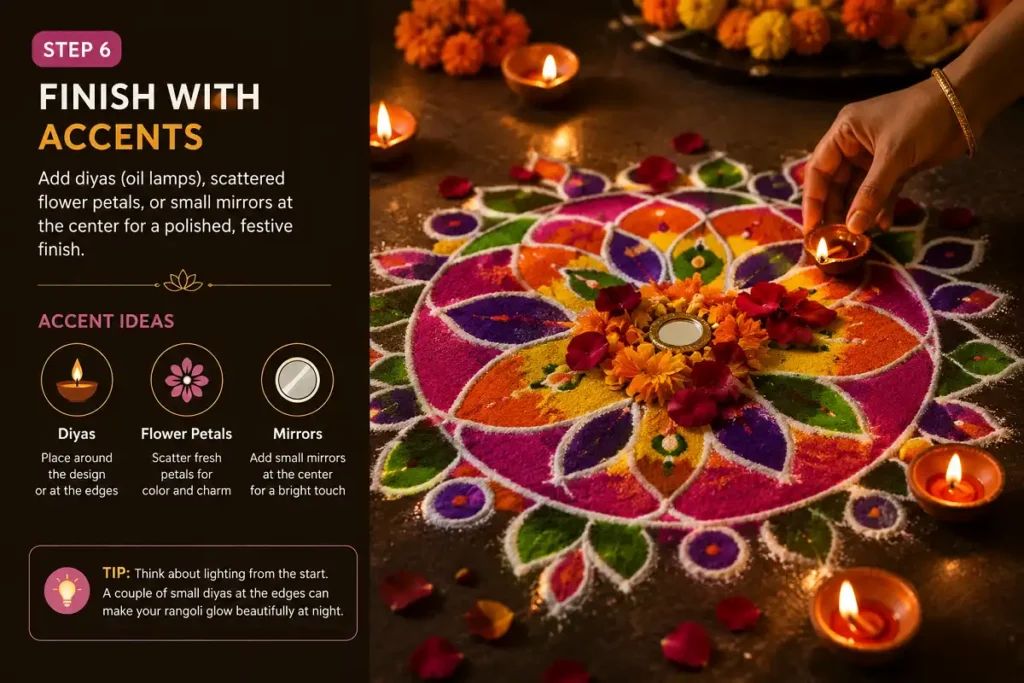
Step 6: Finish with Accents
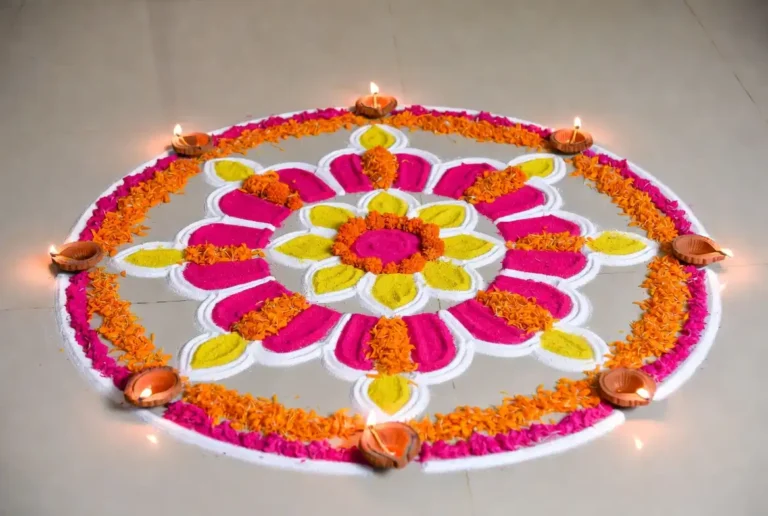
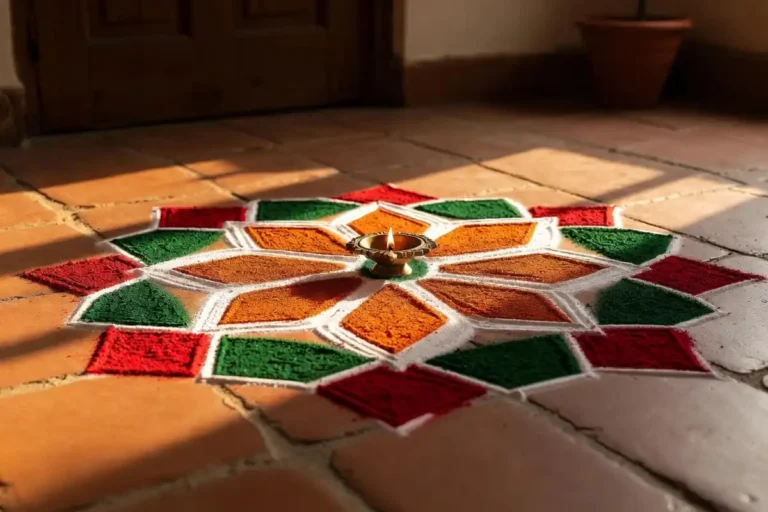
Add diyas (oil lamps), scattered flower petals, or small mirrors at the center for a polished, festive finish. This is especially popular around Diwali you can see more ideas in this collection of Diwali rangoli designs. Even a couple of small diyas placed at the edges can completely change how the design reads once it gets dark, so it’s worth thinking about lighting from the start if you’re planning to display the rangoli into the evening.
Techniques for a Professional Looking Rangoli
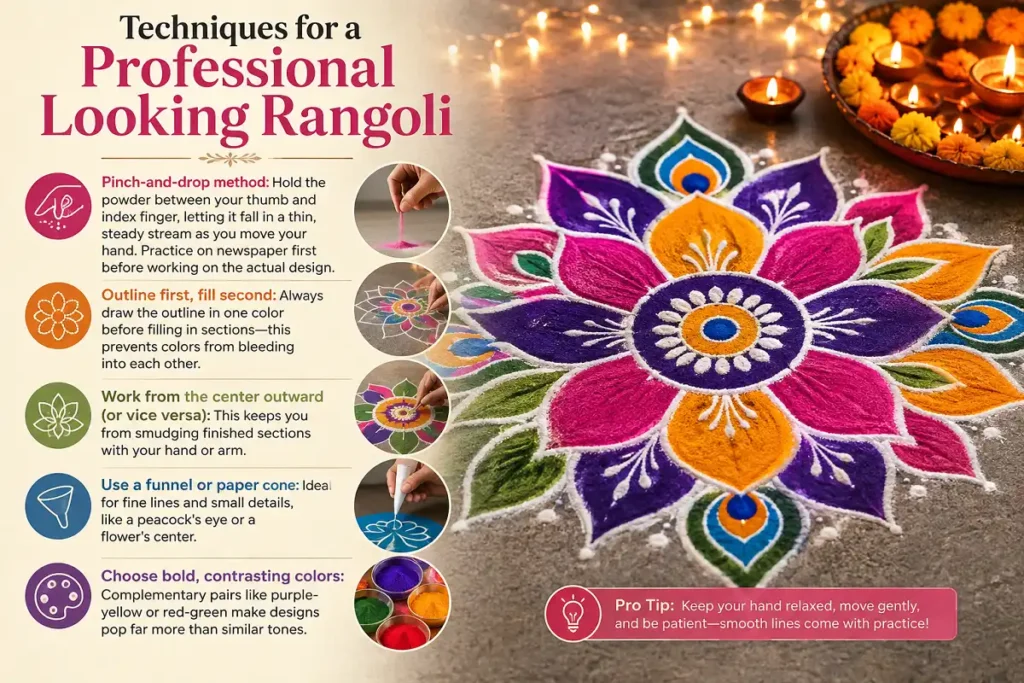
Pinch-and-drop method
Hold the powder between your thumb and index finger, letting it fall in a thin, steady stream as you move your hand.
Outline first, fill second
Draw the outline before filling sections to help prevent colors from bleeding into each other.
Work from the center outward
This can help prevent your hands or arms from touching finished sections.
Use a funnel or paper cone
Ideal for fine lines and small details such as a peacock’s eye or a flower’s center.
Choose bold, contrasting colors
Complementary pairs like purple-yellow or red-green can make designs pop.
- Pinch-and-drop method: Hold the powder between your thumb and index finger, letting it fall in a thin, steady stream as you move your hand. Practice on newspaper first before working on the actual design.
- Outline first, fill second: Always draw the outline in one color before filling in sections this prevents colors from bleeding into each other.
- Work from the center outward (or vice versa): This keeps you from smudging finished sections with your hand or arm.
- Use a funnel or paper cone: Ideal for fine lines and small details, like a peacock’s eye or a flower’s center.
- Choose bold, contrasting colors: Complementary pairs like purple-yellow or red-green make designs pop far more than similar tones.
Color Palette Ideas
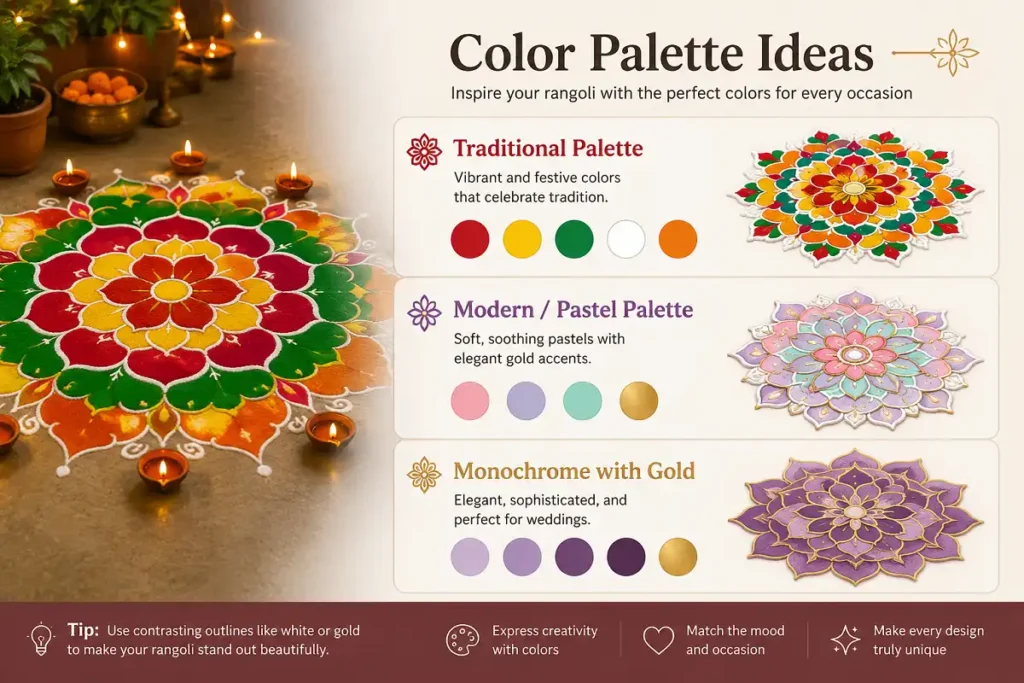
Traditional Palette
Red · Yellow · Green · White · Orange
Modern / Pastel Palette
Pink · Lavender · Mint · Gold
Monochrome + Gold
One color family · Metallic gold
- Traditional palette: Red, yellow, green, white, orange
- Modern/pastel palette: Pink, lavender, mint, with gold accents
- Monochrome with gold: Elegant for weddings uses different shades of a single color paired with metallic gold outlines
Finishing Touches
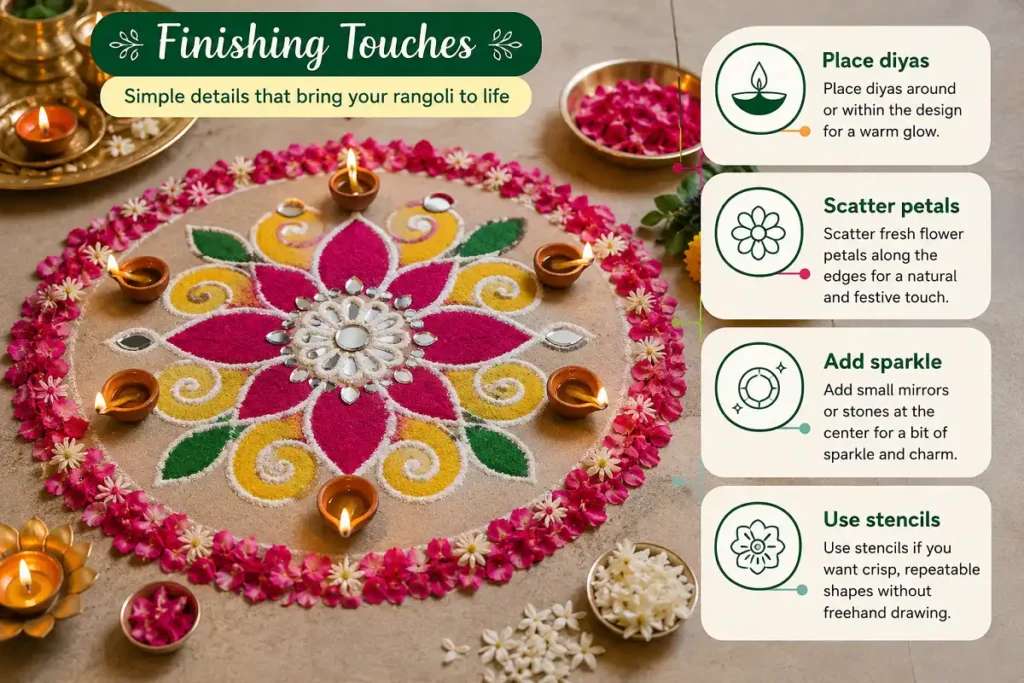
Diyas
Place them around or within the design.
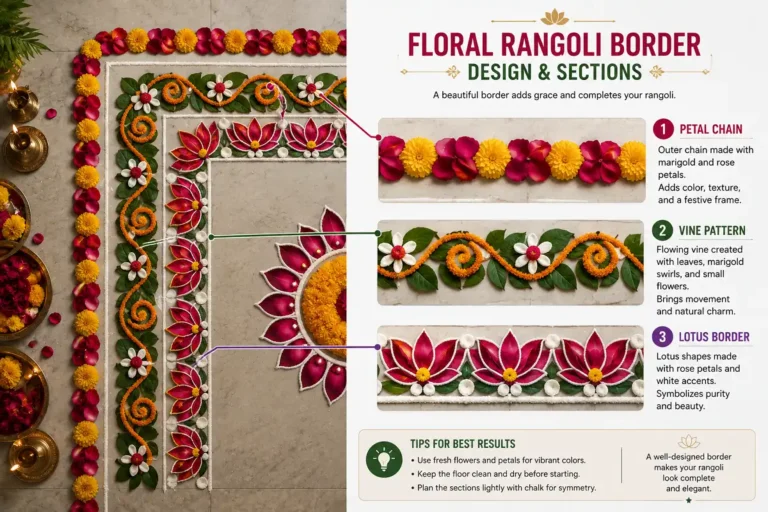
Flower Petals
Scatter fresh petals along the edges.
Mirrors or Stones
Add sparkle and visual interest at the center.
Stencils
Create crisp, repeatable shapes without freehand drawing.
- Place diyas around or within the design
- Scatter fresh flower petals along the edges
- Add small mirrors or stones at the center for a bit of sparkle
- Use stencils if you want crisp, repeatable shapes without freehand drawing
Tips for Beginners
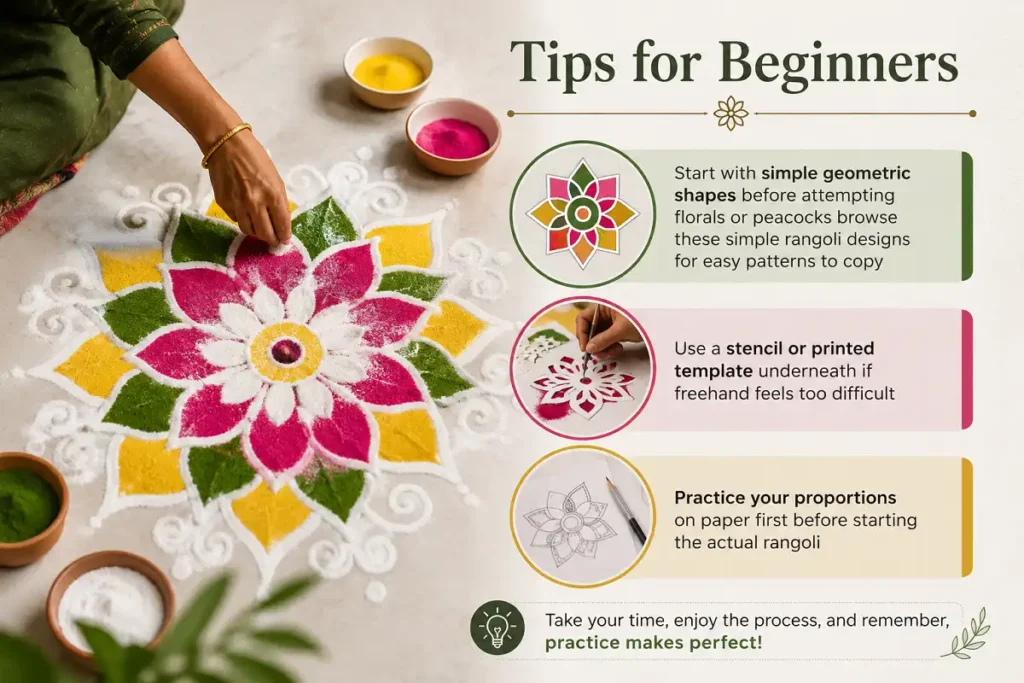
Start Small. Practice Often.
Start with simple geometric shapes before attempting florals or peacocks browse these simple rangoli designs for easy patterns to copy.
- Start with simple geometric shapes before attempting florals or peacocks browse these simple rangoli designs for easy patterns to copy
- Use a stencil or printed template underneath if freehand feels too difficult
- Practice your proportions on paper first before starting the actual rangoli
A Little Something to Take With You
Learning how to make beautiful rangoli design isn’t about getting it perfect on the first try it’s about showing up, day after day, the way my mother and grandmother did. Eight years of drawing, documenting, and photographing rangoli have taught me that this art form is never really about perfection. It’s about the ritual the quiet morning hours, the patience of placing one dot after another, the satisfaction of watching a pattern slowly come alive under your fingers, the same way I once watched my mother and grandmother do it on our doorstep in Kolkata.
If you’re just starting out, don’t worry about getting it exactly right the first time. Start small, start simple, and let the practice build your confidence the way it built mine. A rangoli doesn’t just decorate a home it carries a small piece of memory and tradition with it every time you draw one. I hope this guide helps you begin your own version of that ritual, and that it brings the same quiet joy into your mornings that it has always brought into mine.
If you’d like to keep exploring, I regularly add new patterns to the site you can browse them by style on the Rangoli Designs homepage, or follow along visually on Pinterest for daily inspiration.
FAQs
What is the easiest way to start making rangoli at home?
Begin with a small dot grid and a simple geometric shape, like a star or flower with five or six petals. Keep the size to one or two feet across until your hand gets steadier.
How do I keep my rangoli colors from mixing or smudging?
Always draw and fill the outline first, then work from the outer edge inward. Let each color settle before adding the next one next to it, and avoid dragging your hand across finished sections.
What is the best material for a beginner to use?
Rice flour or basic rangoli powder is the easiest to control. Flower petals and 3D shading are worth trying once you’re comfortable with the basics.
Can I make rangoli designs indoors, not just at the doorstep?
Yes. Small rangoli patterns work well on a puja table, a tray, or even a corner of a living room floor anywhere flat and clean.
How do I make my rangoli look more festive for Diwali?
Add diyas, use warm colors like red, orange, and yellow, and finish the outline in gold or white for extra contrast.