Geometric Rangoli for Beginners: Easy Patterns You Can Learn in a Day
If you’ve ever stared at an intricate rangoli design and thought “I could never make that,” geometric rangoli for beginners is about to change your mind. Unlike freehand floral art that takes years to master, geometric rangoli for beginners relies on something anyone can learn in an afternoon: straight lines, repeating shapes, and a simple dot grid. Give it one practice session and you’ll walk away with a design that looks like it took a professional to create.
This guide breaks down everything a first-timer needs — tools, the dot-grid technique, a full step-by-step pattern, color pairing tips, and festival variations — so you can go from a blank floor to a finished rangoli with confidence.
Why Geometric Rangoli for Beginners Works So Well
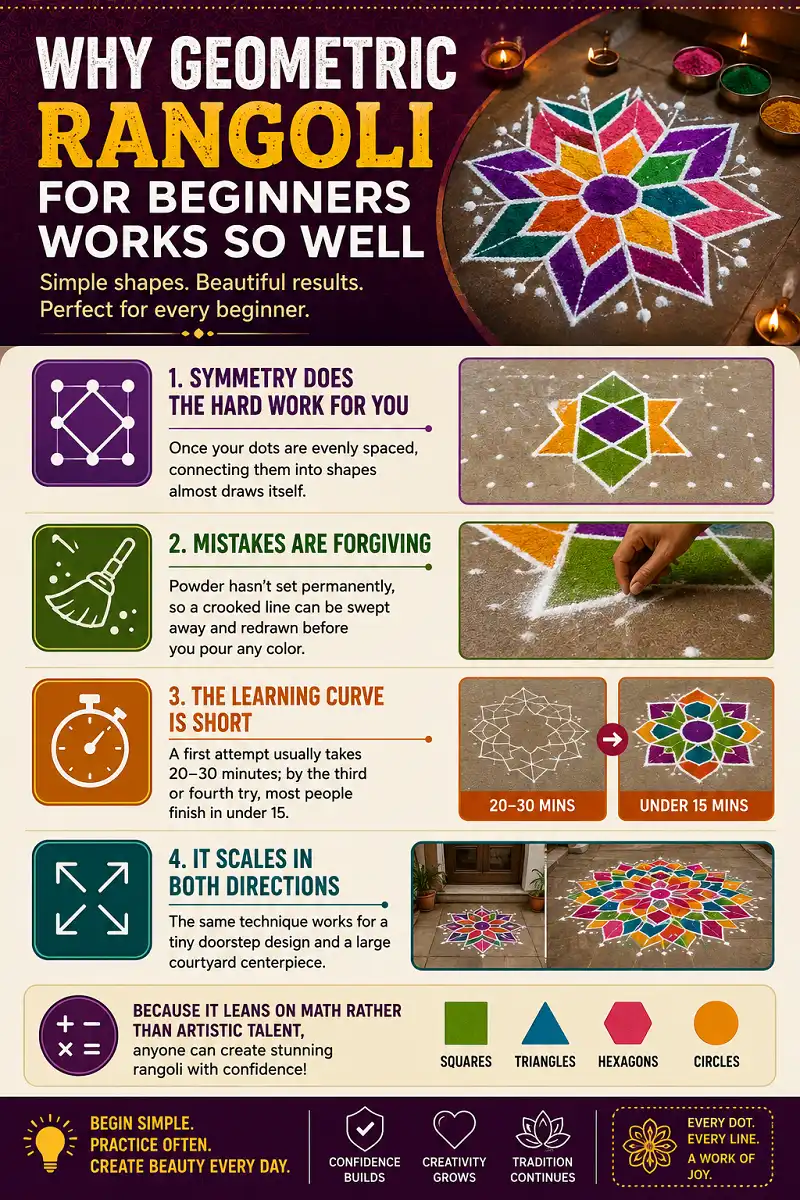
Most people quit rangoli art before they start because floral and figurative designs demand a steady, freehand touch. Geometric rangoli for beginners removes that barrier completely. Every pattern is built from shapes you already know — squares, triangles, hexagons, and circles — arranged around a grid of dots. Here’s what makes this style so approachable:
-
Symmetry Does the Hard Work for You
Once your dots are evenly spaced, connecting them into shapes almost draws itself.
-
Mistakes Are Forgiving
Powder hasn’t set permanently, so a crooked line can be swept away and redrawn before you pour any color.
-
The Learning Curve Is Short
A first attempt at geometric rangoli for beginners usually takes 20–30 minutes; by the third or fourth try, most people finish in under 15.
-
It Scales in Both Directions
The same technique works for a tiny doorstep design and a large courtyard centerpiece.
Because it leans on math rather than artistic instinct, geometric rangoli for beginners is genuinely one of the few art forms where a first attempt can look nearly as polished as a tenth.
A Quick Note on Where Geometric Rangoli Comes From
Rangoli itself is centuries old, traditionally drawn at thresholds to welcome guests and mark auspicious occasions across Indian households. The geometric style specifically draws on the same dot-and-line logic found in kolam art from South India, where grids of dots are connected into continuous, symmetrical loops. That shared mathematical foundation is part of why this approach translates so easily into a modern, beginner-friendly practice — the underlying logic hasn’t changed in generations, only the tools used to draw it.
Geometric vs. Freehand Floral Rangoli: What’s the Real Difference?
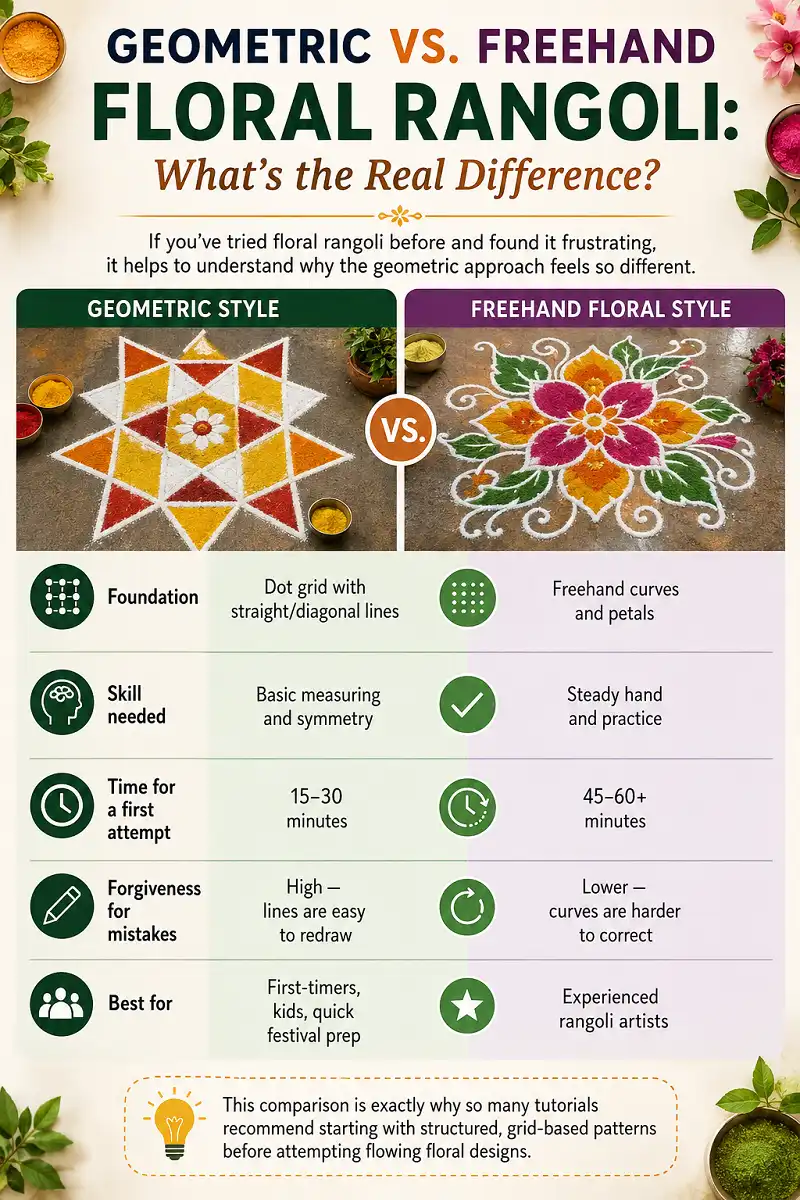
If you’ve tried floral rangoli before and found it frustrating, it helps to understand why the geometric approach feels so different.
| Aspect | Geometric Style | Freehand Floral Style |
|---|---|---|
| Foundation | Dot grid with straight/diagonal lines | Freehand curves and petals |
| Skill Needed | Basic measuring and symmetry | Steady hand and practice |
| Time for First Attempt | 15–30 minutes | 45–60+ minutes |
| Forgiveness for Mistakes | High — lines are easy to redraw | Lower — curves are harder to correct |
| Best For | First-timers, kids, quick festival prep | Experienced rangoli artists |
This comparison is exactly why so many tutorials recommend starting with structured, grid-based patterns before attempting flowing floral designs.
Tools and Materials You’ll Need
You don’t need a large kit to get started. Most households already own everything required.
Dry rangoli powder holds its shape best, which matters because this style depends on sharp, clean edges rather than soft, blended ones. Colored sand or rice flour are good substitutes if you’re working outdoors or want a more traditional finish.
The Dot Grid Method: Your Foundation
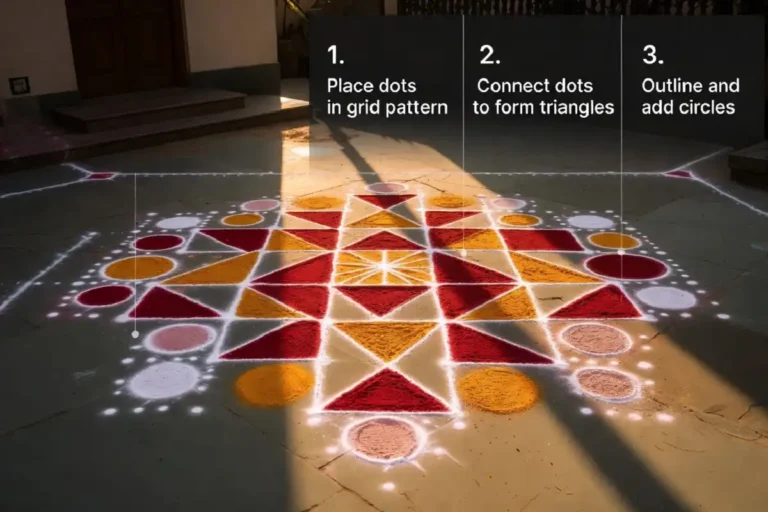
Nearly every classic Indian rangoli starts with a dot grid, and it’s the single most useful skill in geometric rangoli for beginners. Instead of guessing where lines should go, you place a grid of evenly spaced dots first and simply connect them.
-
Choose a Grid Size
A 7×7 or 9×9 grid is manageable for a first attempt.
-
Space the Dots
Roughly 2–3 cm apart, using chalk.
-
Connect the Dots
With straight or diagonal lines to outline your shapes.
-
Fill Each Section
With powder, working from the center outward.
-
Finish With a White Outline
A clean white line around every shape sharpens the whole design.
Once this method clicks, you’ll notice how much faster and more confident your work becomes. This is the exact reason rangoli grid pattern designs remain the most recommended starting point in geometric rangoli for beginners tutorials — the grid takes the guesswork out of symmetry.
Step-by-Step: Your First Geometric Rangoli Design
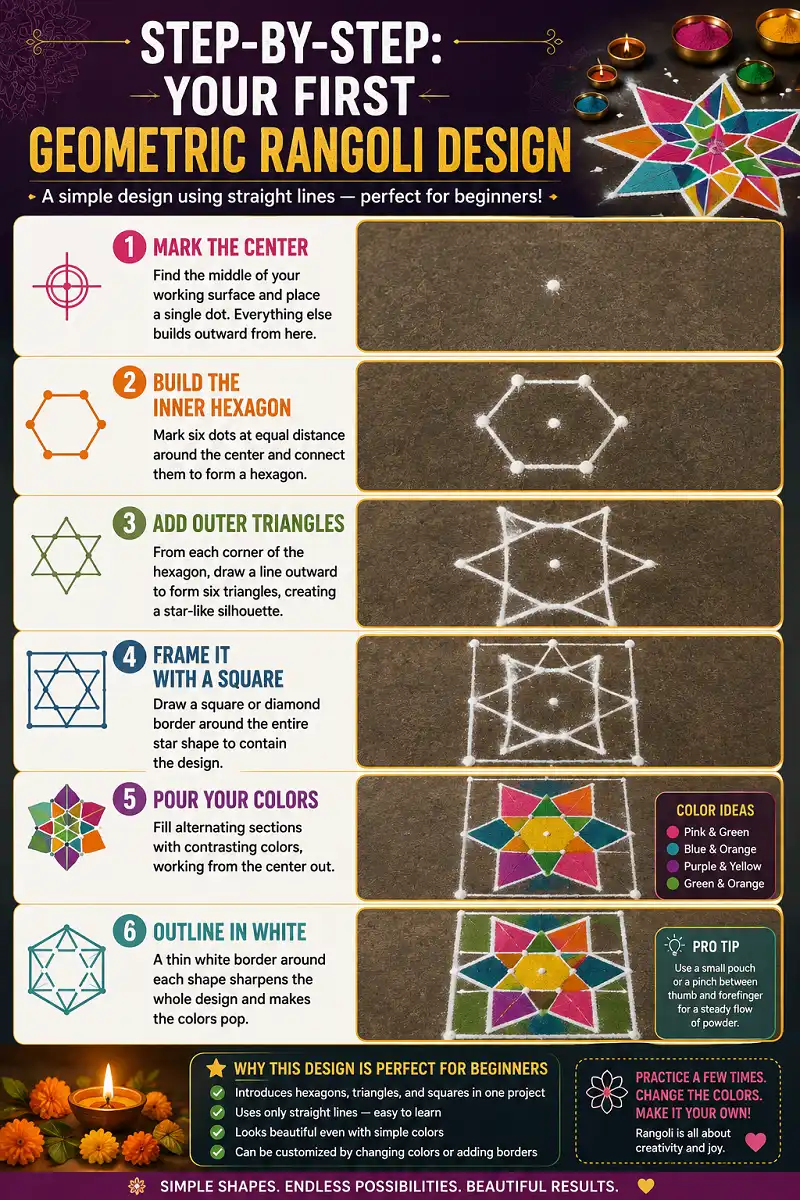
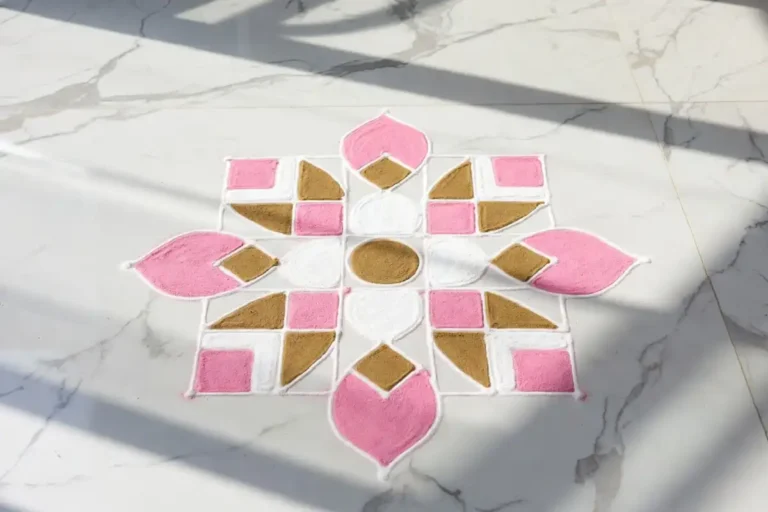
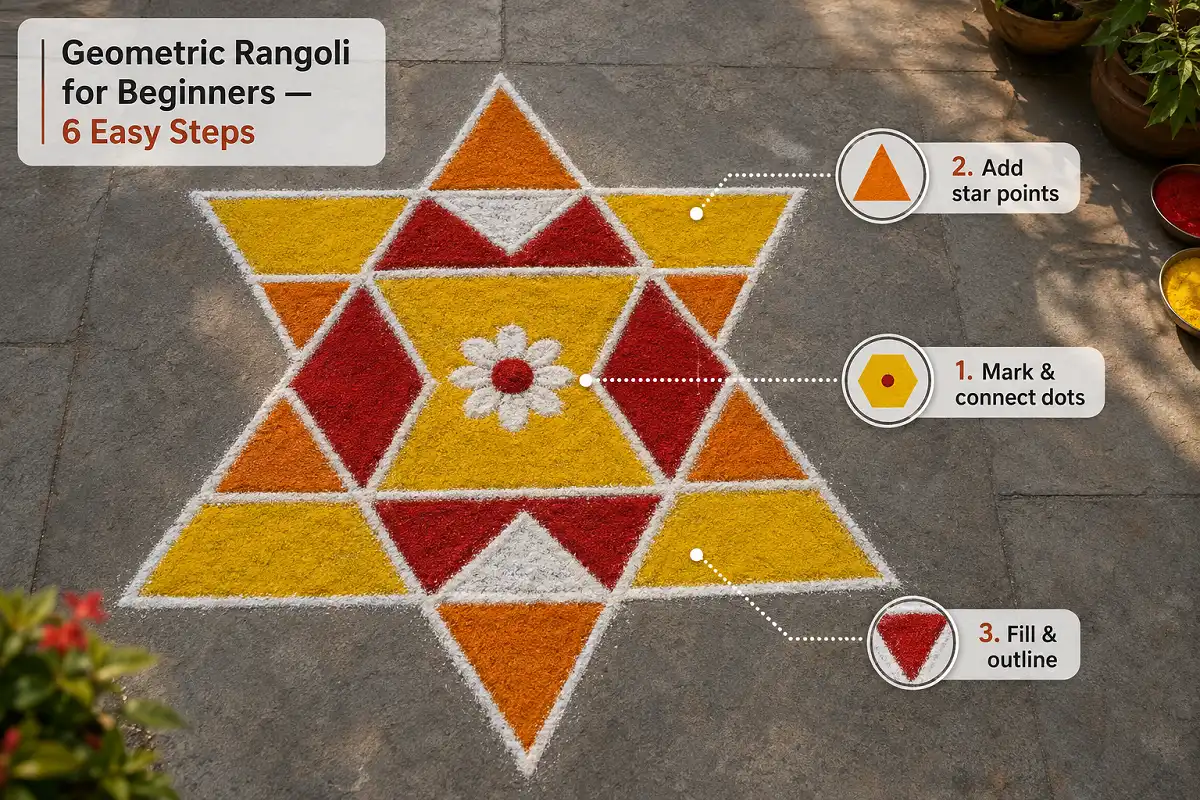
Here’s a complete, beginner-friendly pattern that uses only straight lines — no curves required.
-
Mark the Center
Find the middle of your working surface and place a single dot. Everything else builds outward from here.
-
Build the Inner Hexagon
Mark six dots at equal distance around the center and connect them to form a hexagon.
-
Add Outer Triangles
From each corner of the hexagon, draw a line outward to form six triangles, creating a star-like silhouette.
-
Frame It With a Square
Draw a square or diamond border around the entire star shape to contain the design.
-
Pour Your Colors
Fill alternating sections with contrasting colors, working from the center out.
-
Outline in White
A thin white border around each shape sharpens the whole design and makes the colors pop.
This single pattern is often used to teach geometric rangoli for beginners because it introduces hexagons, triangles, and squares in one project. Once you’ve made it a couple of times, you’ll be able to swap in new shapes without needing a fresh tutorial.
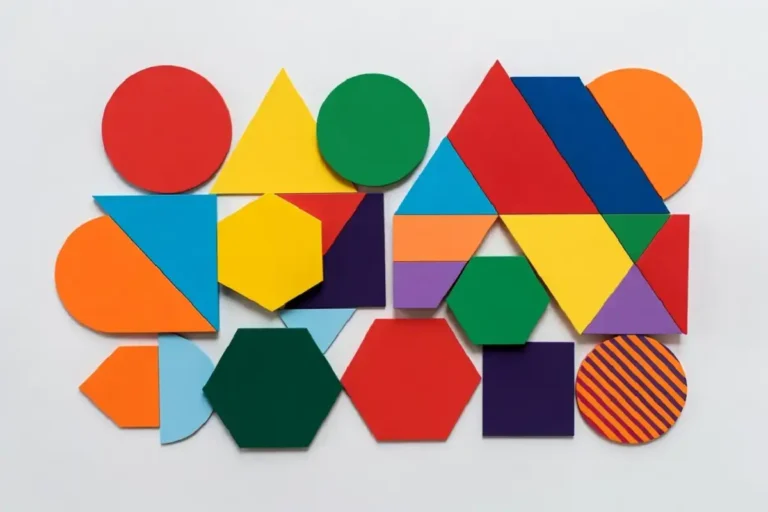
Shapes Every Beginner Should Know
Not all shapes behave the same way with powder. Knowing their strengths helps you plan a design before you start pouring.
Combining two or three shapes — say, triangles inside a diamond frame — creates far more visual interest than relying on one shape alone. For more shape combinations, this breakdown of geometric rangoli shapes, colors, and tips is a useful next step once you’ve got the basics down.
Choosing Colors That Actually Pop
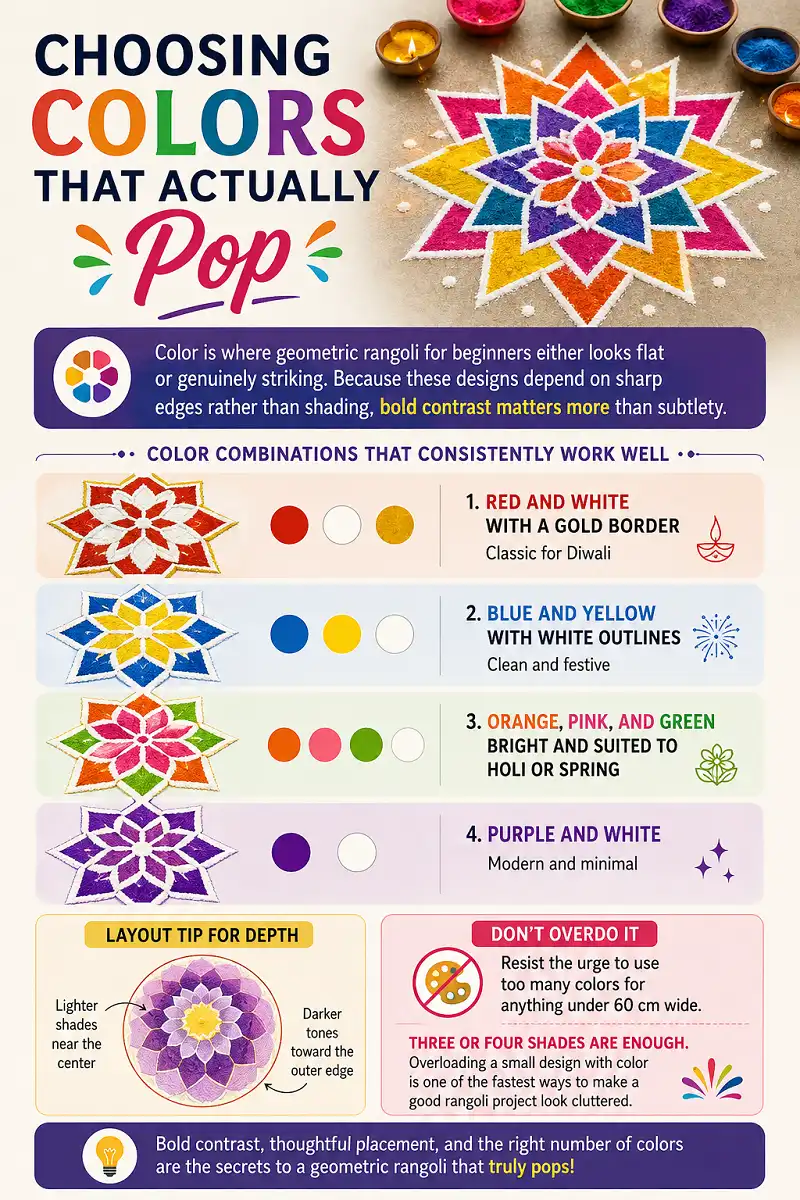
Color is where geometric rangoli for beginners either looks flat or genuinely striking. Because these designs depend on sharp edges rather than shading, bold contrast matters more than subtlety. A few combinations that consistently work well:
Classic for Diwali.
Clean and festive.
Bright and suited to Holi or spring.
Modern and minimal.
Keep lighter shades near the center and darker tones toward the outer edge to add a sense of depth. And resist the urge to use too many colors — for anything under 60 cm wide, three or four shades are enough. Overloading a small design with color is one of the fastest ways to make a good geometric rangoli for beginners project look cluttered.
Small Geometric Designs for Home Entrances
Not every geometric rangoli for beginners needs to fill a courtyard. Some of the most effective designs are compact — perfect for a doorstep, balcony, or pooja corner. Try one of these smaller layouts:
Triangular corners with a single flower dot in the center.
Points meeting at the center to form a petal shape.
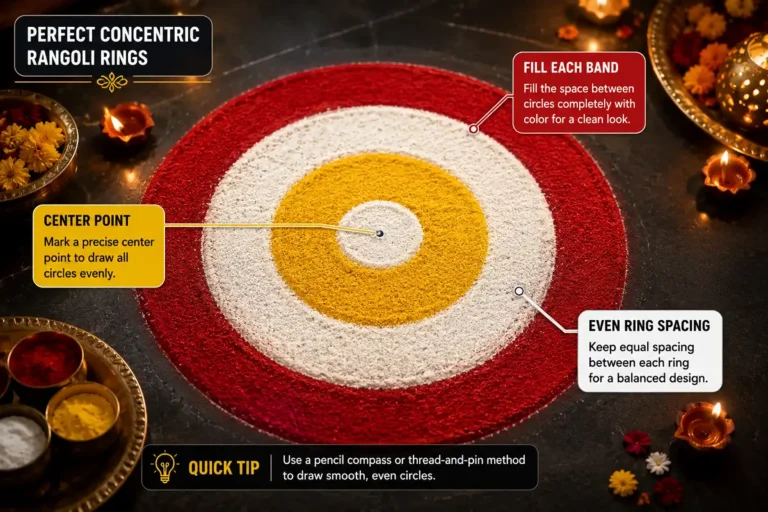
Alternating red and white for a bold, simple look.
Arranged around a central point.
A lit diya placed at the center of a small design instantly elevates it for festival occasions. If you want to build on that idea, these diya symbol rangoli design ideas pair traditional symbols with simple geometric layouts that are easy to recreate.
Adapting the Same Design for Different Festivals
One of the biggest advantages of geometric rangoli for beginners is versatility — you rarely need to learn a new layout for a new occasion. A change in palette is often all it takes.
Warm reds, oranges, and gold, often centered around a diya or lotus shape. This beginner’s guide to Diwali rangoli has more ideas for the festival.
Earthy yellows, greens, and browns fit harvest festivals, with simple grids and floral accents.
Bright pinks, purples, and blues suit the festival’s energy — a nine-section grid works particularly well.
Fresh greens and whites reflect new beginnings, paired with open, uncluttered borders.
This flexibility is exactly why geometric rangoli for beginners has such staying power — master one grid, and you can theme it for the entire festival calendar.
Common Mistakes to Avoid
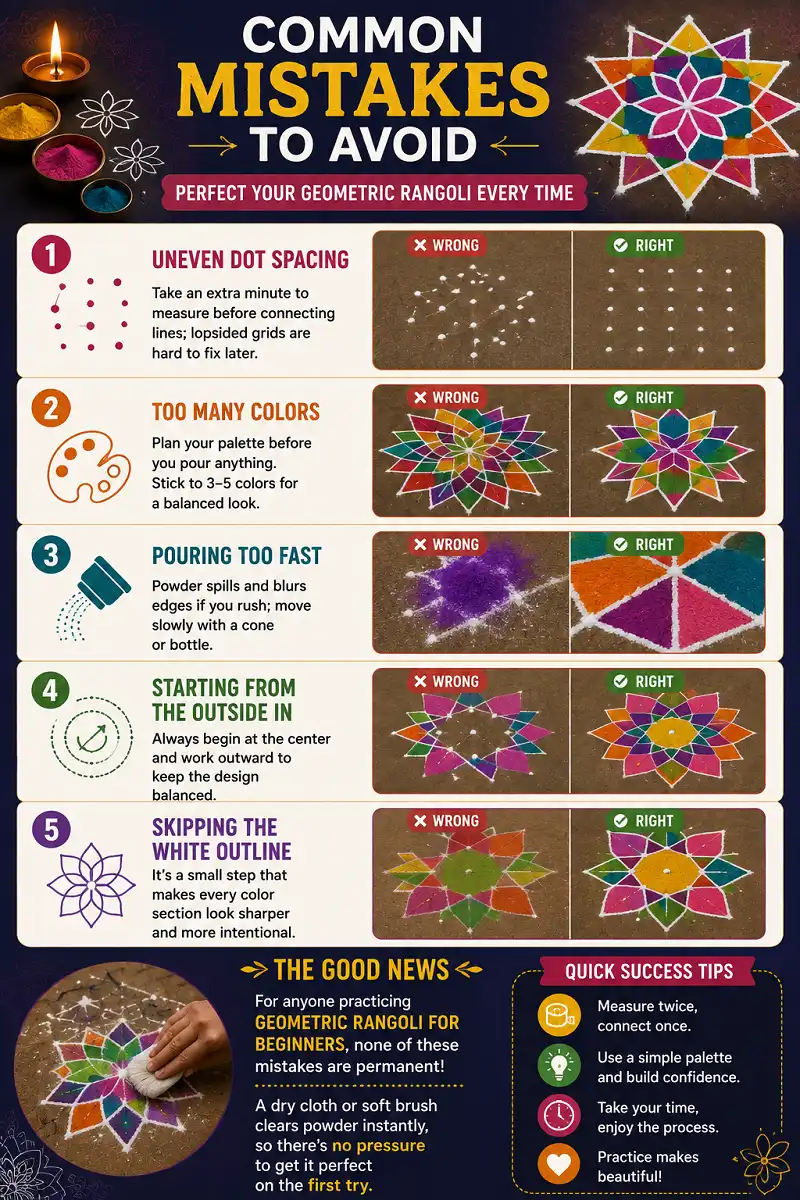
Even simple designs can go wrong in predictable ways. Watch out for these when you’re starting out:
-
Uneven Dot Spacing
Take an extra minute to measure before connecting lines; lopsided grids are hard to fix later.
-
Too Many Colors
Plan your palette before you pour anything.
-
Pouring Too Fast
Powder spills and blurs edges if you rush; move slowly with a cone or bottle.
-
Starting From the Outside In
Always begin at the center and work outward to keep the design balanced.
-
Skipping the White Outline
It’s a small step that makes every color section look sharper and more intentional.
The good news for anyone practicing geometric rangoli for beginners is that none of these mistakes are permanent — a dry cloth or soft brush clears powder instantly, so there’s no pressure to get it perfect on the first try.
Shortcuts: Stencils and Digital Templates
If you’re pressed for time, stencils are a legitimate shortcut, not a compromise. Rangoli stencils are widely available at craft and festival supply stores — place one down, pour powder through the openings, and lift it away for a clean result.
Digital rangoli apps are another useful tool, letting you preview a layout before committing chalk to the floor. This is especially handy when you’re testing a new pattern for the first time and want to check the proportions in advance.
If you’re curious about the cultural roots behind this art form, Wikipedia’s entry on rangoli offers useful background on its regional history and symbolism across India.
Start Simple, Create Beautiful Geometric Rangoli
Geometric rangoli for beginners proves that you don’t need years of practice to create something beautiful — just a dot grid, a few bold colors, and a little patience. Start small, stick to two or three shapes, and let symmetry do the heavy lifting. Once the basic grid feels familiar, you’ll find yourself experimenting with new shapes and color palettes for every festival on the calendar.
FAQs
What is the easiest geometric rangoli for absolute beginners?
A simple square or diamond with four triangles pointing outward from each side is the best starting point. It uses only straight lines and can be finished in under 15 minutes with three colors.
How do I keep my lines straight while pouring powder?
Draw your outline in chalk first, and use a ruler or folded cardboard as a guide when pouring. This one habit alone will make any first attempt look far more polished.
Can I make geometric rangoli without rangoli powder?
Yes — colored sand, rice flour, or even flower petals work well. Each material creates a slightly different texture, so it’s worth experimenting once you’re comfortable with the basic shapes.
How long does a geometric rangoli design last?
Indoors, on a dry, undisturbed floor, a design can last two to three days. Outdoor rangoli is more exposed to wind and foot traffic, so it may need refreshing after just a few hours.
Is this style suitable for small entryways or apartments?
Very much so. Geometric rangoli for beginners scales down easily — a 30 cm design with clean lines and three bold colors can look just as striking as a much larger one.
Do I need any drawing skill to start?
No. Because the entire method is built on dots, straight lines, and repetition rather than freehand sketching, geometric rangoli for beginners is one of the most accessible art forms to pick up with zero prior experience.