How to Draw Rangoli Design: Easy Step-by-Step Guide, Ideas, Tips & Techniques for Beginners
I’m based in Kolkata, and for the past eight years, I’ve been drawing, collecting, photographing, and documenting rangoli designs. But my connection with this art began long before I started documenting it.
I grew up watching my mother and grandmother draw patterns at our doorway. They would wake up early, clean the entrance, and begin drawing while the morning was still quiet. I would sit on the steps and watch the design slowly take shape one dot, one curve, and one color at a time.
At that age, I didn’t think of it as an art I would someday write about. It was simply part of home. Looking back, though, those mornings taught me almost everything I love about rangoli: patience, balance, repetition, creativity, and the beauty of making something that does not have to last forever.
That is also why I wanted to create this guide. Over the years, I’ve tried many patterns, practiced different techniques, photographed designs, and learned what makes a rangoli easier or harder to draw. Here, I’m sharing the methods and small lessons that have helped me most, especially if you’re just starting out.
What Is Rangoli and Why Is It So Popular?
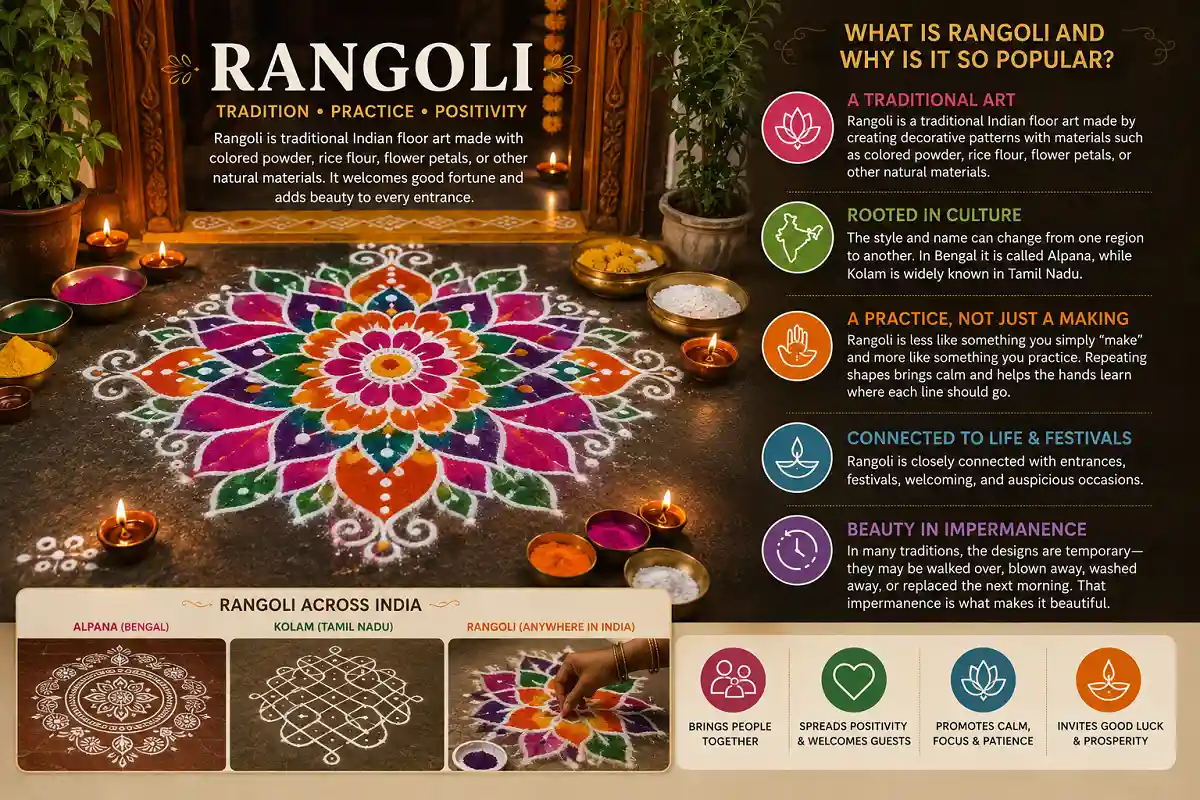
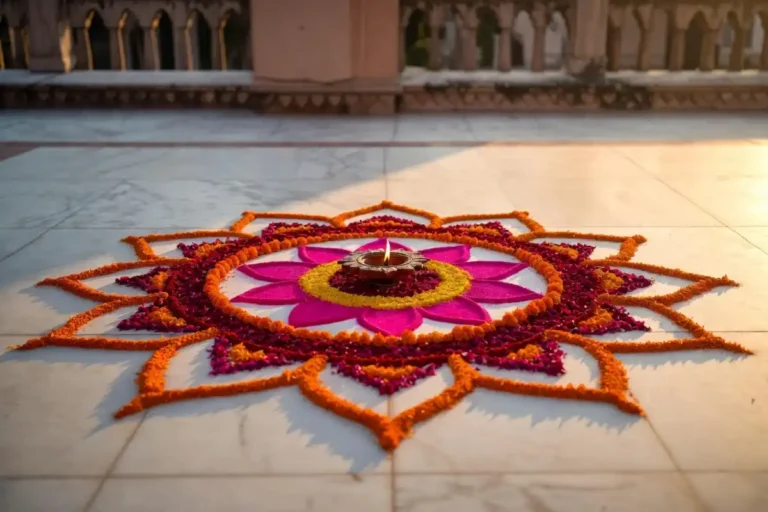
Rangoli is a traditional Indian floor art made by creating decorative patterns with materials such as colored powder, rice flour, flower petals, or other natural materials. The style and name can change from one region to another. In Bengal, for example, a related threshold art is known as alpana, while kolam is strongly associated with Tamil Nadu.
For me, however, rangoli has always felt less like something you simply “make” and more like something you practice.
I remember watching my mother and grandmother repeat familiar shapes until their hands seemed to know exactly where each line should go. Sometimes the design was simple. Sometimes it became surprisingly detailed. What stayed with me was the calmness of the process.
Rangoli is also closely connected with entrances, festivals, welcoming, and auspicious occasions. In many traditions, the designs are intentionally temporary they may be walked over, blown away, washed away, or replaced the next morning.
That impermanence is one of the things I find most beautiful about it.
What You Need to Draw a Rangoli Design
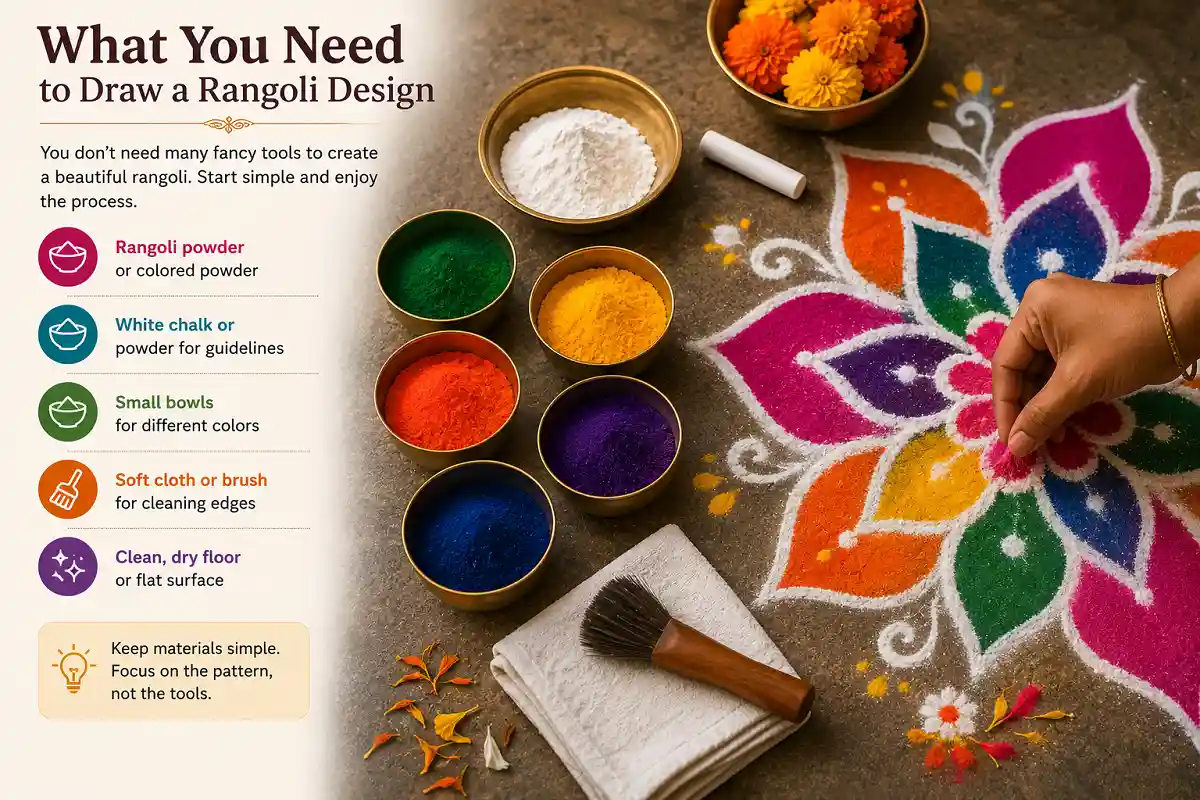
One thing I learned from watching my family is that you don’t need a large collection of fancy materials to create a beautiful rangoli. In fact, some of the simplest designs can be the most satisfying to draw.
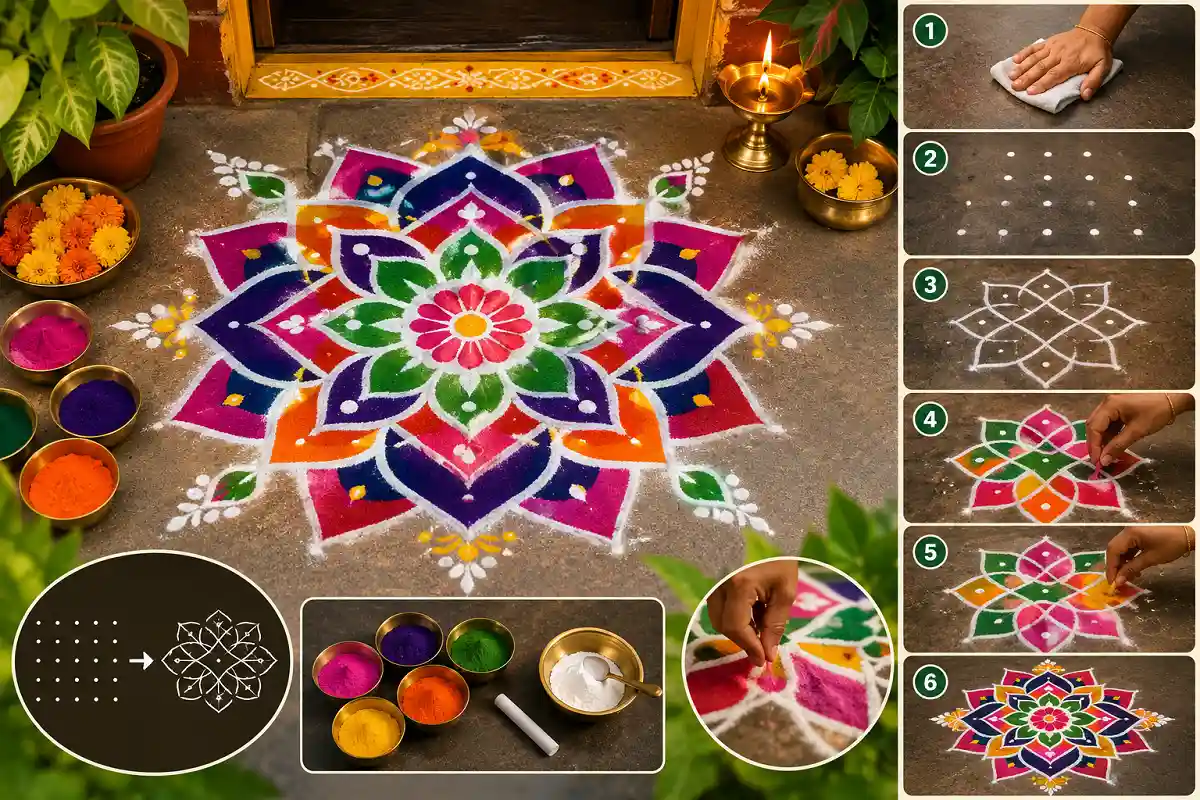
For a basic design, you can start with colored rangoli powder, white powder or chalk for guidelines, and a clean, flat surface. Depending on the style, rice flour or flower petals can also be used. Traditional floor-art practices across India use different materials and techniques, so there is plenty of room to adapt.
Basic materials I recommend
- Rangoli powder or colored powder
- White chalk or powder for guidelines
- Small bowls for different colors
- A soft cloth or brush for cleaning edges
- A clean, dry floor
When I’m trying a new design, I also like to keep the materials simple. Too many colors or tools can sometimes make a beginner focus more on the materials than the actual pattern.
How to Draw Rangoli Design Step by Step
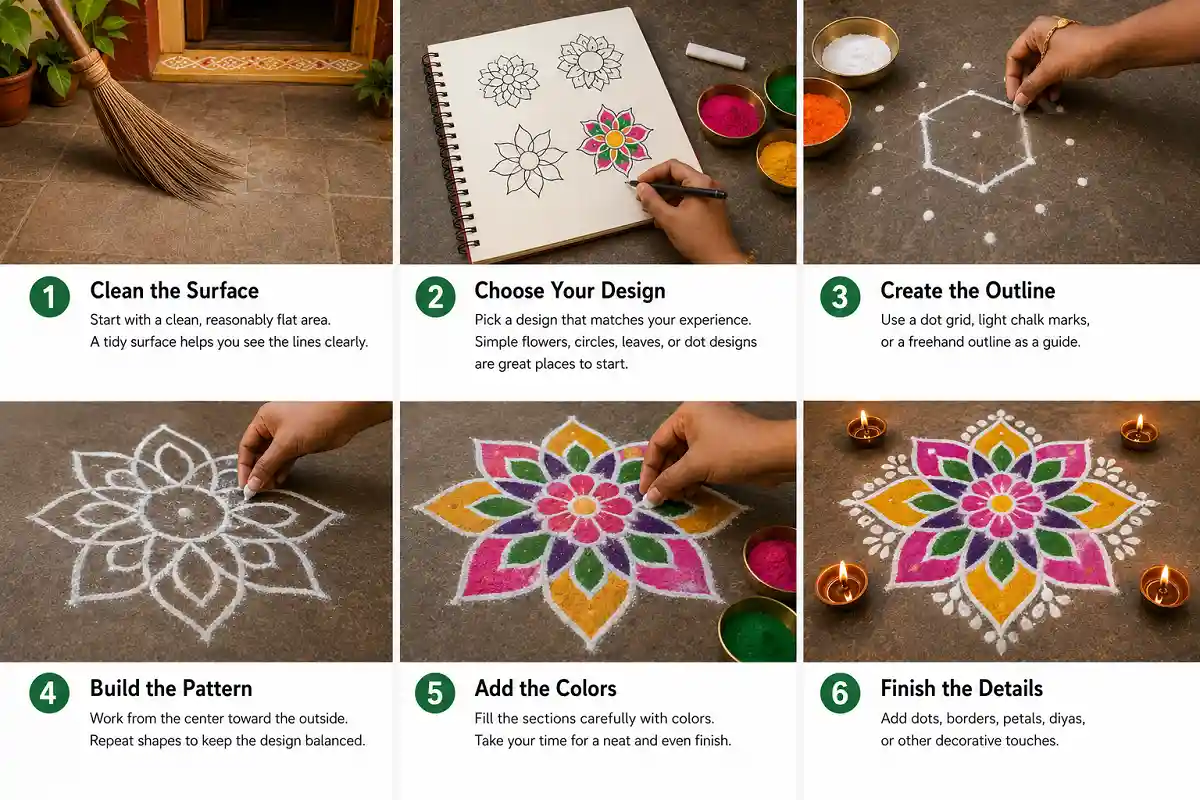
If you’re wondering how to draw rangoli design for the first time, my biggest advice is: start smaller than you think you need to.
I made plenty of mistakes when I was learning. I used to think a larger and more detailed rangoli would automatically look better. With time, I learned that a simple design with clean lines and good spacing can be much more attractive.
Here is the basic process I still follow:
Clean the Surface
Start with a clean, reasonably flat area. A tidy surface makes it easier to control the powder and see your lines clearly.
Choose Your Design
Pick a design that matches your experience. Flowers, circles, leaves, simple geometric patterns, and dot-based designs are good places to start.
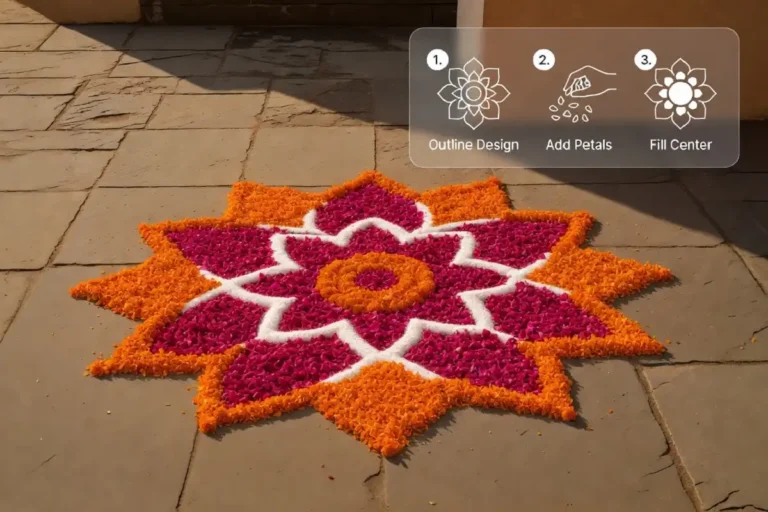
Create the Outline
Depending on the design, use a dot grid, light chalk marks, or a simple freehand outline.
Build the Pattern
Work gradually from the center toward the outside. Repeat similar shapes so that the design remains balanced.
Add the Colors
Once you are happy with the outline, fill the sections carefully. Take your time rather than trying to finish quickly.
Finish the Details
Add small dots, borders, petals, diyas, or other decorative elements if they suit the design.
The important thing is not to rush. Rangoli has always taught me that slowing down often produces a better result.
How to Draw Rangoli Using the Dot Grid Method
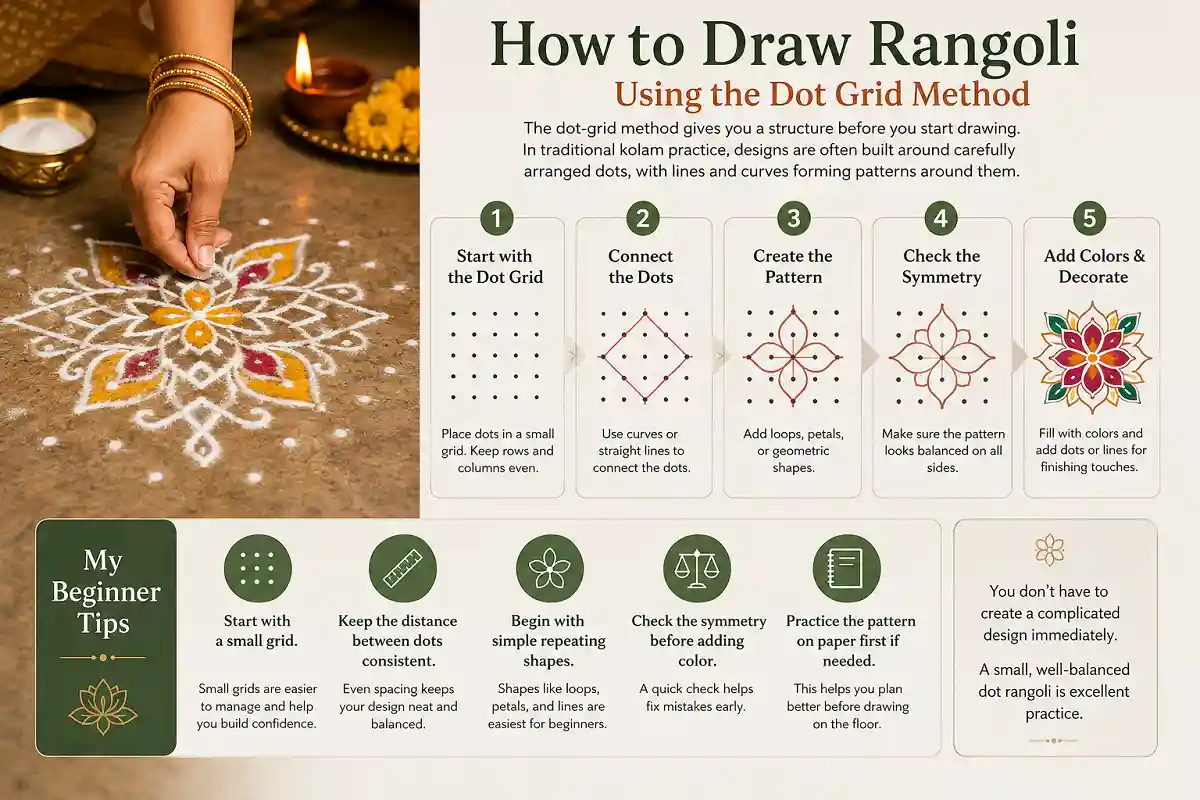
The dot-grid method is one of my favorite techniques to recommend to beginners because it gives you a structure before you start drawing. In traditional kolam practice, designs are often built around carefully arranged dots, with lines and curves forming patterns around them.
When I first started paying closer attention to dot-based designs, I realized how much easier symmetry becomes when the starting points are already organized.
Start with a small grid. Place the dots at consistent distances, then connect them using curves, loops, petals, or geometric lines.
- Start with a small grid.
- Keep the distance between dots consistent.
- Begin with simple repeating shapes.
- Check the symmetry before adding color.
- Practice the pattern on paper first if needed.
You don’t have to create a complicated design immediately. A small, well-balanced dot rangoli is excellent practice.
Small Rangoli Designs for Doorways and Limited Spaces
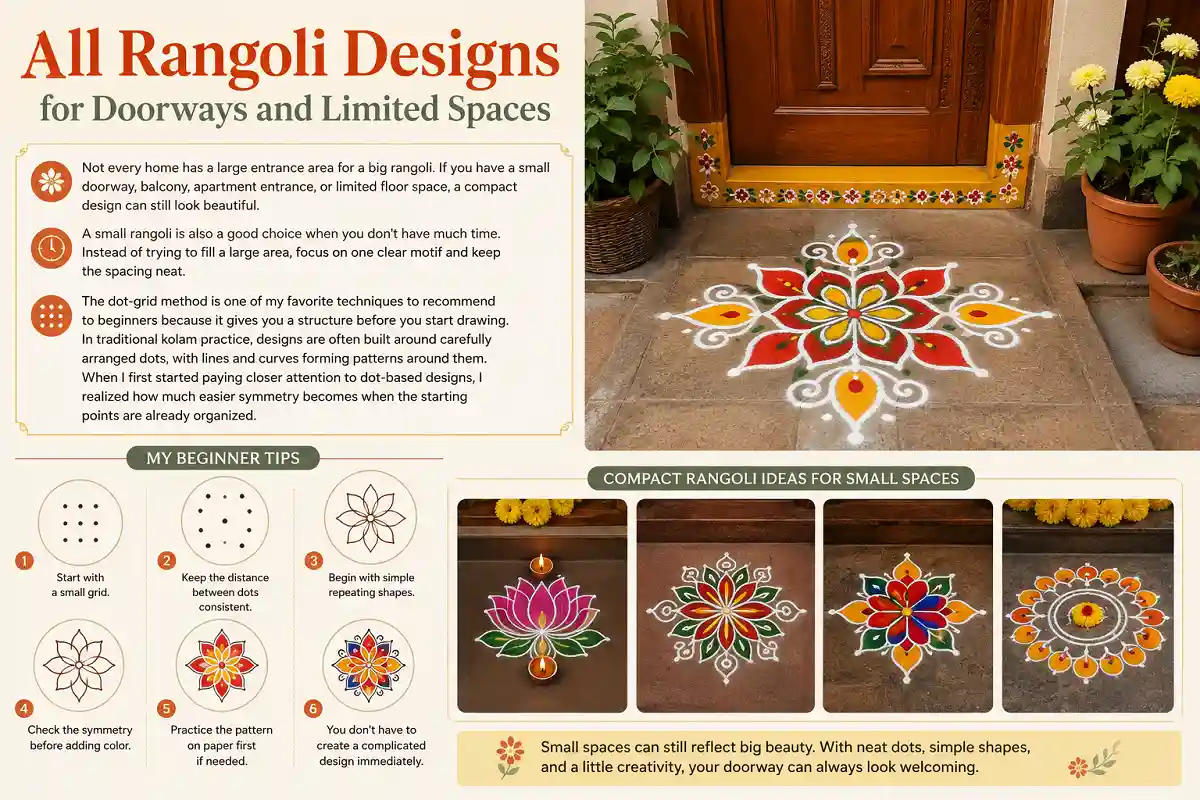
Not every home has a large entrance area for a big rangoli. If you have a small doorway, balcony, apartment entrance, or limited floor space, a compact design can still look beautiful.
A small rangoli is also a good choice when you don’t have much time. Instead of trying to fill a large area, focus on one clear motif and keep the spacing neat.
The dot-grid method is one of my favorite techniques to recommend to beginners because it gives you a structure before you start drawing. In traditional kolam practice, designs are often built around carefully arranged dots, with lines and curves forming patterns around them.
When I first started paying closer attention to dot-based designs, I realized how much easier symmetry becomes when the starting points are already organized.
Start with a small grid. Place the dots at consistent distances, then connect them using curves, loops, petals, or geometric lines.
My beginner tips:
- Start with a small grid.
- Keep the distance between dots consistent.
- Begin with simple repeating shapes.
- Check the symmetry before adding color.
- Practice the pattern on paper first if needed.
You don’t have to create a complicated design immediately. A small, well-balanced dot rangoli is excellent practice.
Easy Geometric Rangoli Ideas
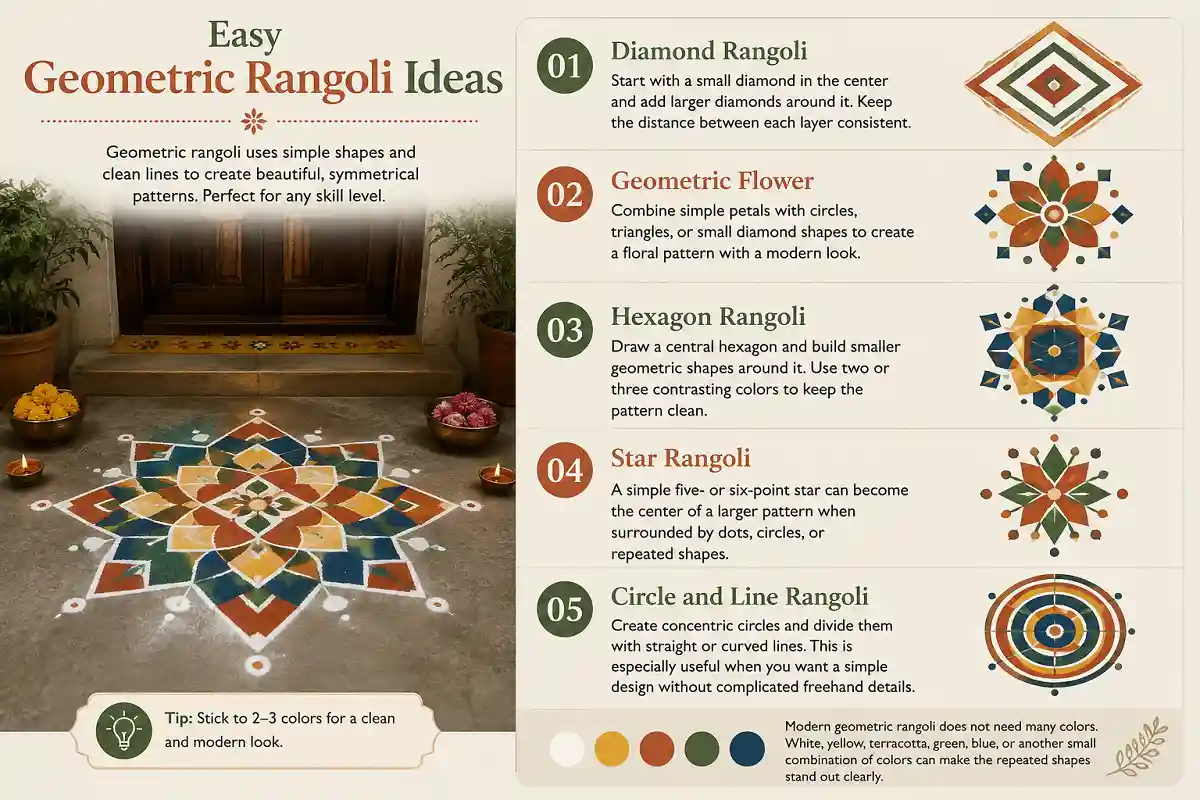
Diamond Rangoli
Start with a small diamond in the center and add larger diamonds around it. Keep the distance between each layer consistent.
Geometric Flower
Combine simple petals with circles, triangles, or small diamond shapes to create a floral pattern with a modern look.
Hexagon Rangoli
Draw a central hexagon and build smaller geometric shapes around it. Use two or three contrasting colors to keep the pattern clean.
Star Rangoli
A simple five or six point star can become the center of a larger pattern when surrounded by dots, circles, or repeated shapes.
Circle and Line Rangoli
Create concentric circles and divide them with straight or curved lines. This is especially useful when you want a simple design without complicated freehand details.
Modern geometric rangoli does not need many colors. White, yellow, terracotta, green, blue, or another small combination of colors can make the repeated shapes stand out clearly.
How to Draw Rangoli Freehand
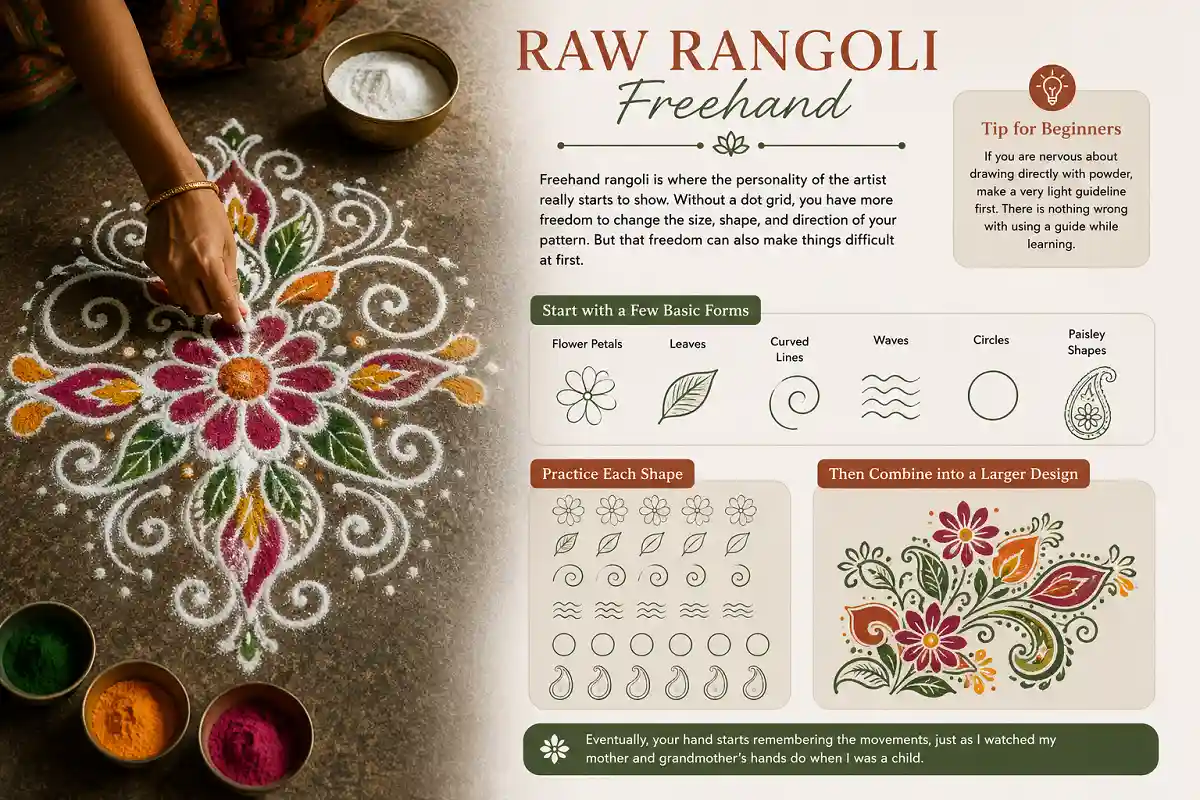
Freehand rangoli is where I think the personality of the artist really starts to show.
Without a dot grid, you have more freedom to change the size, shape, and direction of your pattern. But that freedom can also make things difficult at first. I found that practicing individual shapes helped much more than repeatedly trying to copy an entire complicated rangoli.
Start with a few basic forms:
- Flower petals
- Leaves
- Curved lines
- Waves
- Circles
- Paisley shapes
Try drawing each shape several times until your hand becomes comfortable with it. Then combine those shapes into a larger design.
If you are nervous about drawing directly with powder, make a very light guideline first. There is nothing wrong with using a guide while learning. Eventually, your hand starts remembering the movements, just as I watched my mother and grandmother’s hands do when I was a child.
Easy Rangoli Designs for Beginners
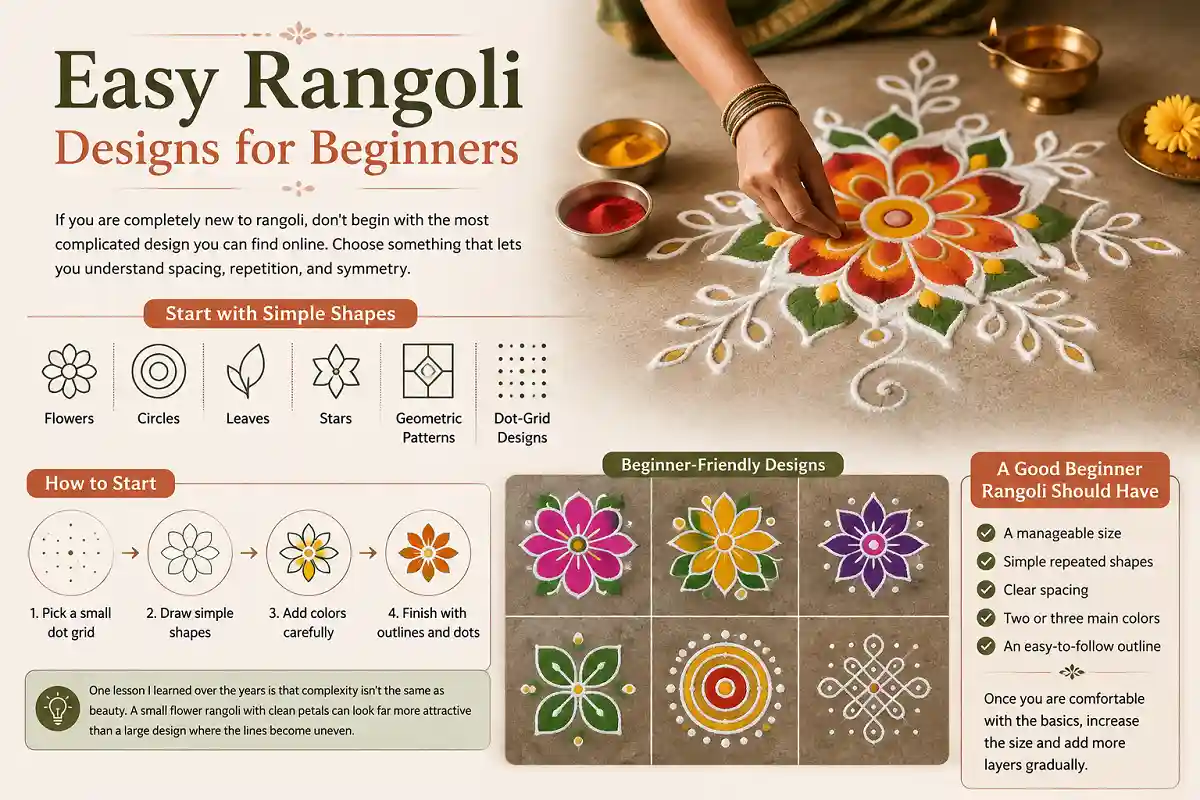
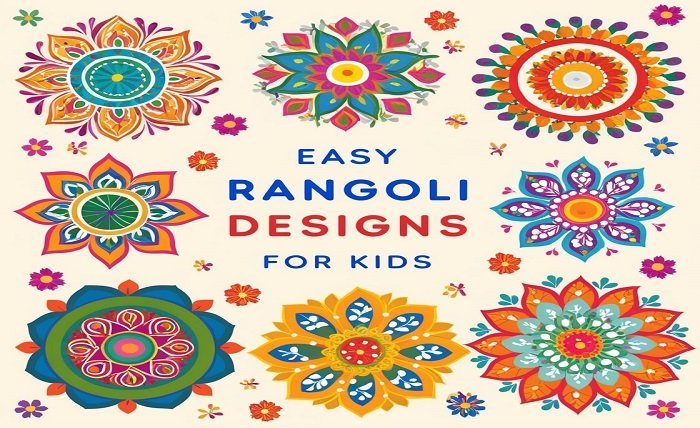
If you are completely new to rangoli, don’t begin with the most complicated design you can find online. Choose something that lets you understand spacing, repetition, and symmetry.
I usually recommend starting with flowers, circles, leaves, stars, simple geometric patterns, or small dot-grid designs.
A good beginner rangoli should ideally have
- A manageable size
- Simple repeated shapes
- Clear spacing
- Two or three main colors
- An easy-to-follow outline
One lesson I learned over the years is that complexity isn’t the same as beauty. A small flower rangoli with clean petals can look far more attractive than a large design where the lines become uneven.
Once you are comfortable with the basics, increase the size and add more layers gradually.
How to Draw a Simple Flower Rangoli
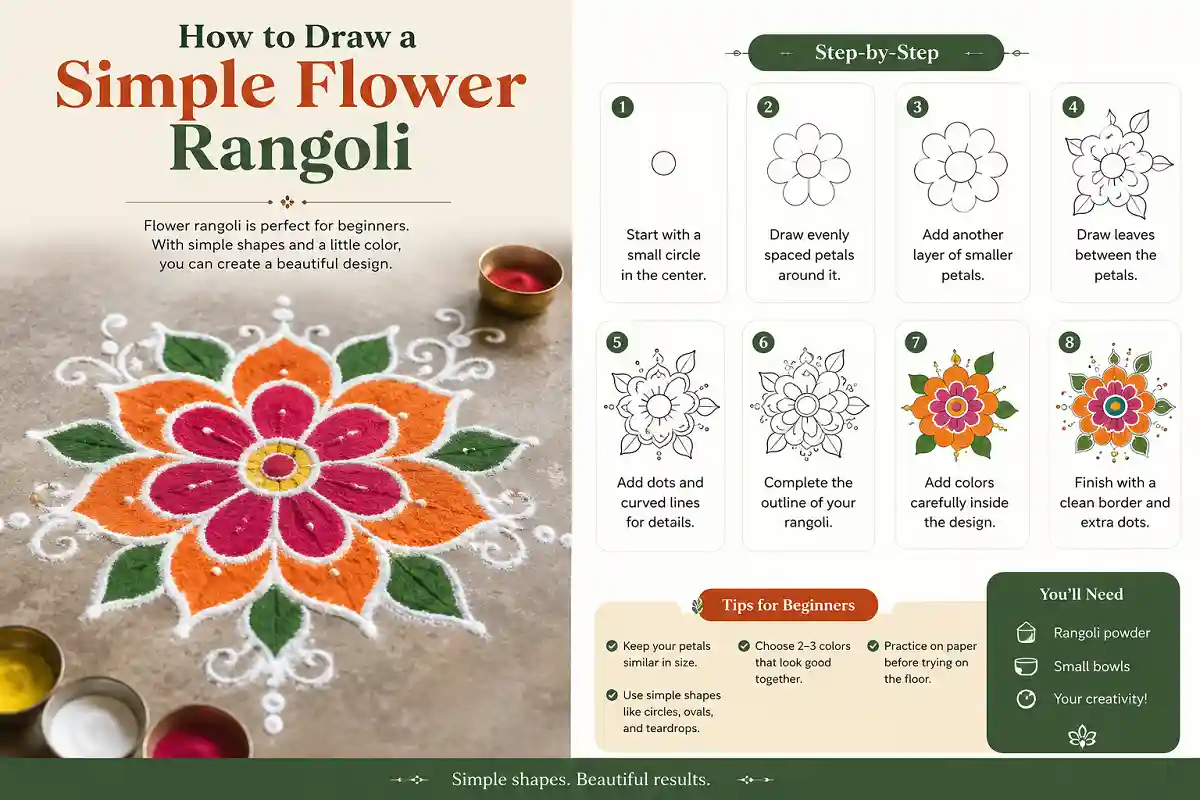
Flower rangoli is one of the designs I would suggest to anyone learning how to draw rangoli design.
Start with a small circle in the center. Around it, draw evenly spaced petals. Don’t worry about making the first attempt perfect. Focus on making each petal approximately the same size.
Once the first layer is complete, you can add another layer of smaller petals, leaves, dots, or curved lines.
I often find that flower designs are especially forgiving because repeating the same shape naturally creates a sense of balance.
After completing the outline, add color carefully. You can use a single color for the petals or experiment with two or three shades.
For a simple home rangoli, that’s often enough. You don’t need dozens of details to make it feel special.
How to Add Colors and Make Your Rangoli Look Beautiful
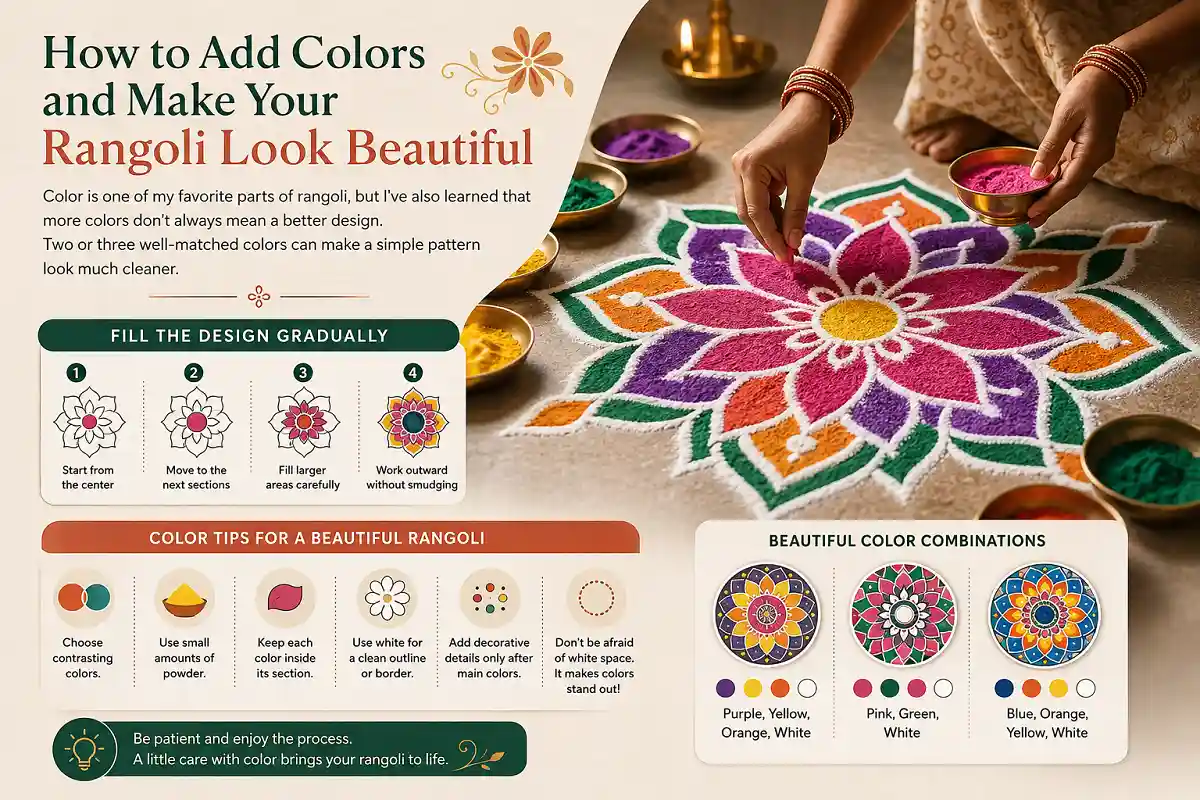
Color is one of my favorite parts of rangoli, but I’ve also learned that more colors don’t always mean a better design.
When I was starting out, I was tempted to use every color available. Over time, I became more selective. Two or three well-matched colors can make a simple pattern look much cleaner.
I usually recommend filling the design gradually, starting from the center and working outward. Be careful around completed sections so that the colors don’t mix or smudge.
- Choose contrasting colors.
- Use small amounts of powder at a time.
- Keep each color inside its section.
- Use white for a clean outline or border.
- Add decorative details only after the main colors are finished.
And don’t be afraid of white space. Leaving some parts of the floor visible can actually make the colors stand out more.
Common Rangoli Drawing Mistakes and How to Fix Them
After eight years of drawing and documenting rangoli, I’ve learned that mistakes are simply part of the process. Even now, not every design turns out exactly as I imagined.
Some of the most common beginner problems are uneven spacing, complicated patterns, messy edges, and using too much powder.
| Common Mistake | What to Do |
|---|---|
| Uneven dots | Mark them more carefully before drawing |
| Uneven petals | Practice one shape repeatedly |
| Too much powder | Add color gradually |
| Smudged lines | Work slowly and avoid touching finished areas |
| Design feels crowded | Remove unnecessary details |
| Pattern looks uneven | Check the center and repeated shapes |
Most importantly, don’t throw away a design just because one line isn’t perfect. Sometimes the small imperfections are what make a handmade rangoli feel personal.
Easy Rangoli Ideas for Diwali and Other Festivals
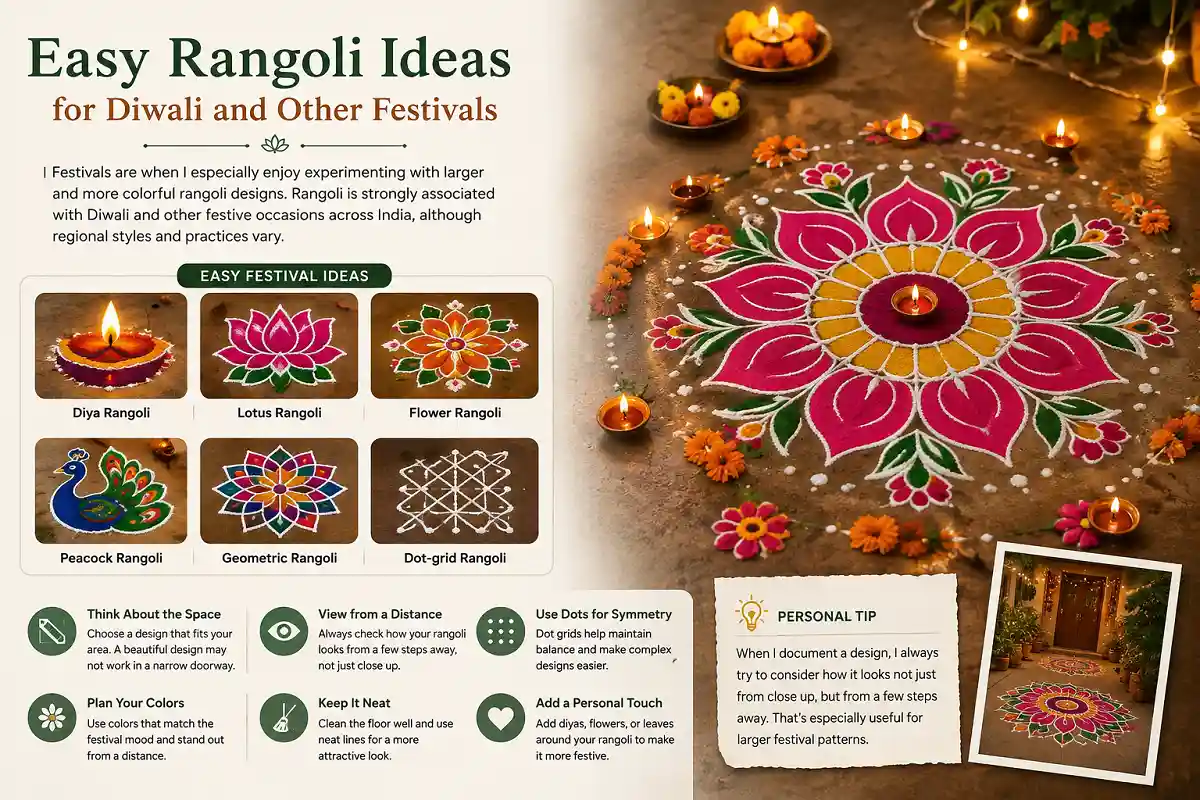
Festivals are when I especially enjoy experimenting with larger and more colorful rangoli designs.
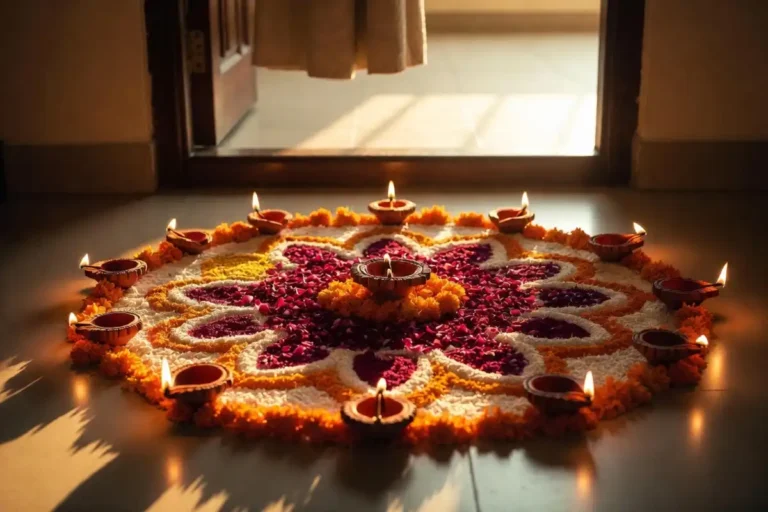
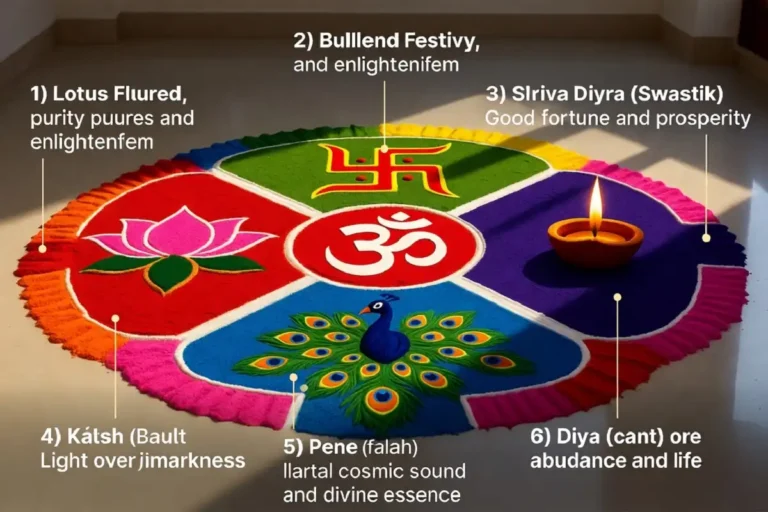
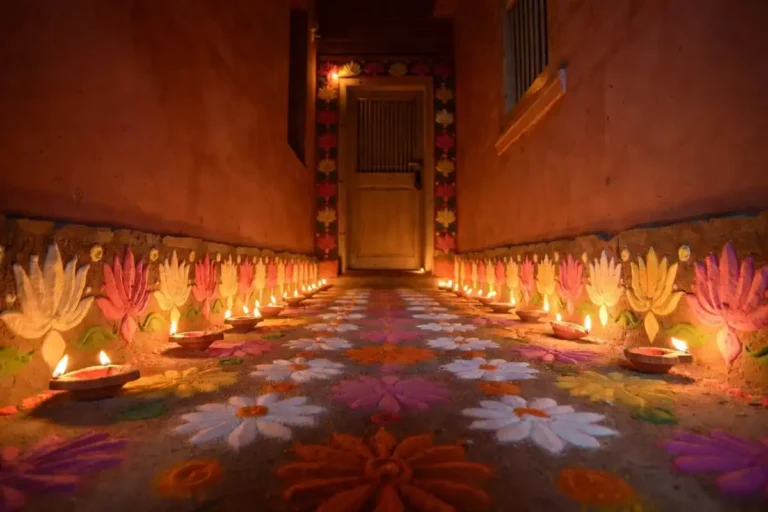
For Diwali, you can try traditional diya patterns, flowers, lotus designs, peacocks, geometric shapes, or a combination of several motifs. Rangoli is strongly associated with Diwali and other festive occasions across India, although regional styles and practices vary.
If you’re creating a festival rangoli, think about the space first. A design that looks beautiful in a photograph may not work well in a narrow doorway.
When I document a design, I always try to consider how it looks not just from close up, but from a few steps away. That’s especially useful for larger festival patterns.
Tips to Make Your Rangoli Neat, Symmetrical, and Attractive
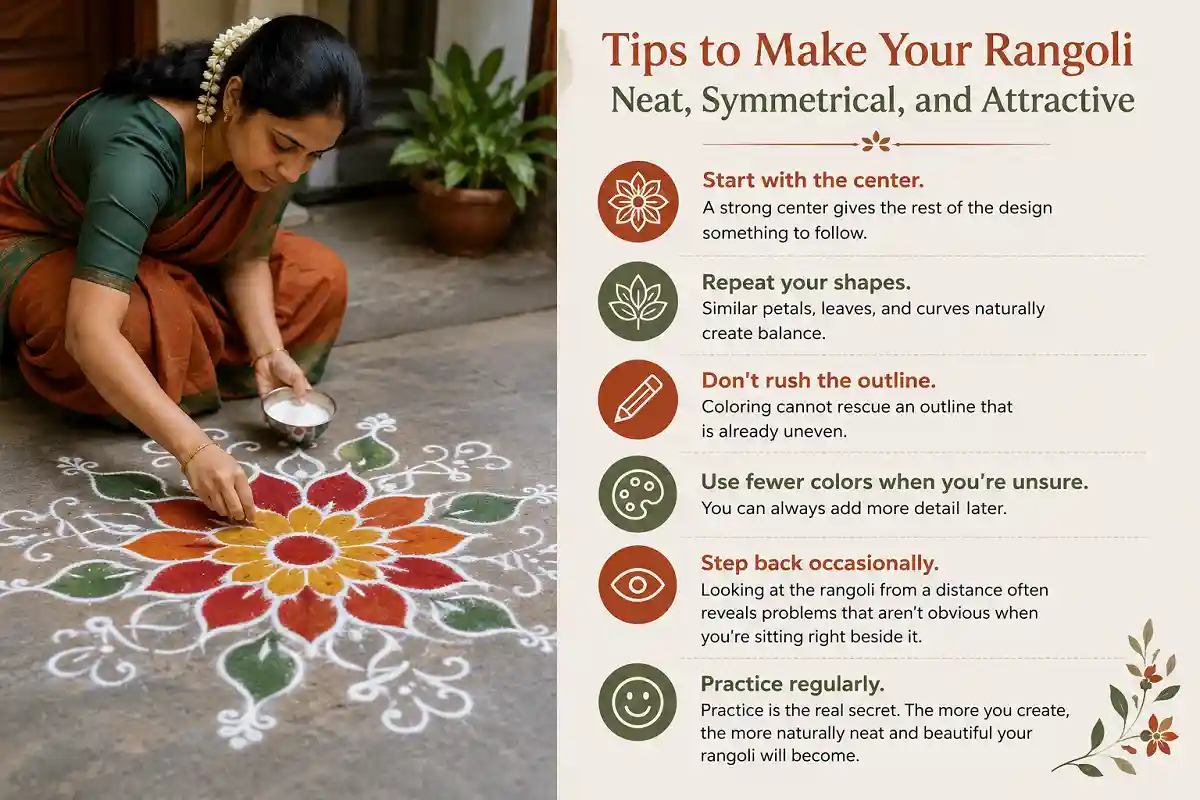
If I had to share just a handful of lessons I’ve learned over eight years, these would be at the top of my list.
Start with the center. A strong center gives the rest of the design something to follow.
Repeat your shapes. Similar petals, leaves, and curves naturally create balance.
Don’t rush the outline. Coloring cannot rescue an outline that is already uneven.
Use fewer colors when you’re unsure. You can always add more detail later.
Step back occasionally. Looking at the rangoli from a distance often reveals problems that aren’t obvious when you’re sitting right beside it.
And perhaps the most important tip: practice regularly.
My mother and grandmother didn’t become comfortable with rangoli because they had a secret technique. They practiced it as part of everyday life. In traditions such as kolam, the design itself is often temporary and recreated again and again, making repetition part of the practice.
Keeping the Tradition Alive, One Rangoli at a Time
After eight years of drawing and documenting rangoli, I still come back to the same lesson I learned as a child: a rangoli doesn’t have to be perfect to be beautiful.
I grew up in Kolkata watching my mother and grandmother draw at our doorway before sunrise. I would sit on the steps and watch the design appear slowly dot by dot, line by line, and color by color. I didn’t know it at the time, but those quiet mornings became the beginning of my love for rangoli.
Over the years, I’ve tried different patterns, practiced easy rangoli designs, experimented with dot rangoli patterns, and photographed designs I wanted to remember. Some turned out beautifully, while others taught me what to do differently next time. Every attempt has been part of the learning process.
That’s what I hope you take from this guide. Learning how to draw rangoli design isn’t about getting everything right on your first try. Start with a flower, a few dots, or a simple geometric pattern. As you become more comfortable, explore more rangoli ideas and try something of your own.
For me, rangoli is more than a decoration. It carries memories of family, early mornings, patience, and a tradition that was quietly passed down to me. The design may disappear the next day, but the experience of creating it stays.
And perhaps that is what makes rangoli so special. You begin with a single dot, and before you know it, you have created something that tells a little story of its own.
If you’d like to learn more about the history, regional names, and traditions of this art form, visit the Rangoli Designs on Pinterest.
FAQs
Simple answers to common questions about learning rangoli.
How do I start learning how to draw rangoli design?
Start with a small and simple pattern instead of a complicated one. A flower, circle, or 5×5 dot-grid design is a good choice for beginners. First, prepare a clean surface, create your outline, and then slowly add colors. With regular practice, your lines and symmetry will naturally improve.
What materials do I need to draw a rangoli?
You only need a few basic materials to get started. Rangoli powder, rice flour, or colored powder can be used for the design. You can also keep white chalk for making guidelines, small bowls for colors, and a soft cloth for correcting mistakes. A clean, flat surface makes the process much easier.
Is the dot grid method good for beginners?
Yes. The dot-grid method is one of the easiest ways to create a balanced rangoli design because the dots provide a guide for your lines and curves. Start with a small grid, such as 5×5, and connect the dots to create simple flowers, geometric shapes, or other patterns.
How can I make my rangoli look neat and symmetrical?
Start from the center and repeat similar shapes around it. If you are using dots, keep the spacing as even as possible. Take your time with the outline before adding colors, and avoid using too much powder at once. Stepping back occasionally and looking at the complete pattern can also help you notice uneven areas.
What is the easiest rangoli design for a beginner?
Simple flower, circle, geometric, and small dot-rangoli designs are great choices for beginners. Try using only two or three colors and keep the overall design small. Once you become comfortable with basic shapes and symmetry, you can gradually move on to larger and more detailed rangoli designs.