Dot Rangoli Design: A Complete Guide to Patterns, Tips, and Ideas
Dot rangoli design is one of the most accessible and widely practiced forms of Indian floor art. Rooted in traditions across South and Central India, this style uses a grid of evenly spaced dots as a structural guide, making it easier for beginners to achieve balanced, symmetrical patterns. Whether drawn for daily decoration, a festival like Diwali or Pongal, or a special occasion at home, a dot rangoli design brings color, pattern, and a sense of cultural warmth to any space. This guide covers the techniques, styles, and ideas you need to get started.
What Is a Dot Rangoli Design
A dot rangoli design, known in South India as kolam or pulli kolam, is created by first placing a grid of dots on the floor and then drawing lines, curves, or loops around and through them to form a complete pattern. The dots act as anchors, helping the artist maintain even spacing and proportion without freehand guesswork.
This structure is what makes the dot method so popular for beginners. Rather than starting with a blank surface, you have a built-in guide that keeps the design symmetrical from the very first line.
The tradition extends across Tamil Nadu, Andhra Pradesh, Karnataka, and Maharashtra, with each region developing its own distinctive dot patterns, line styles, and naming conventions.
Types of Dot Rangoli Design Patterns
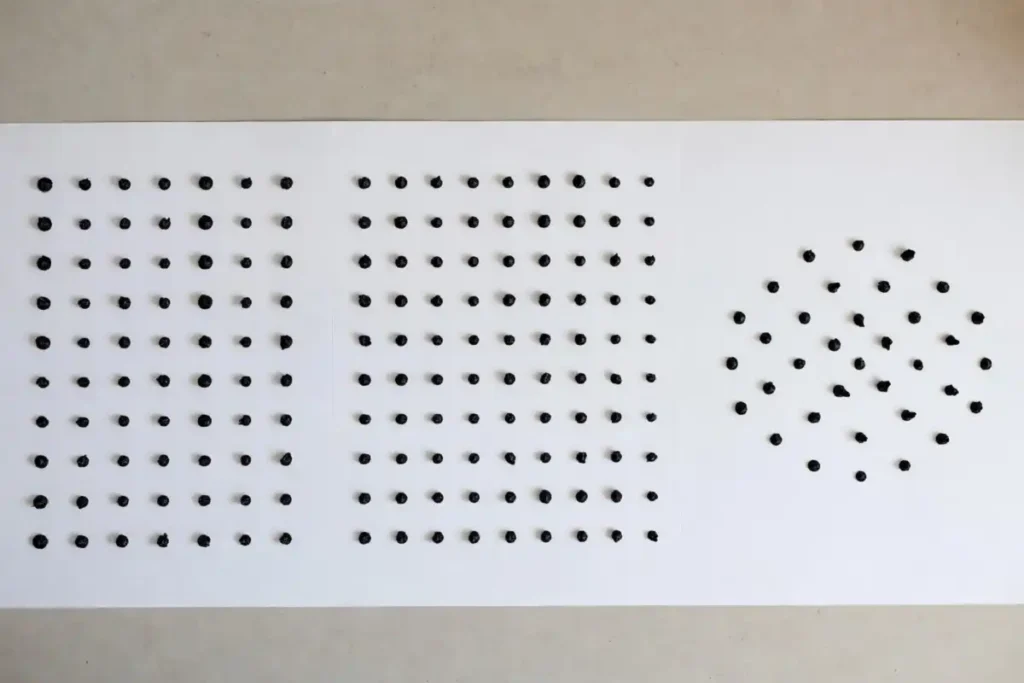
Simple Straight Grid Patterns
A straight grid places dots in even rows and columns, like a square matrix. This is the most beginner-friendly arrangement. Designs built on a straight grid tend to feature geometric shapes such as squares, diamonds, and stars that repeat outward from a central point.
These patterns work well for daily use and quick festival decoration because they come together quickly and look clean even on a smaller scale.
Diagonal and Offset Grid Patterns
An offset or diagonal grid staggers alternate rows of dots, creating a diamond-shaped layout rather than a square one. This arrangement opens up more complex floral and curved patterns that feel organic and flowing compared to straight-grid designs.
Offset grids are commonly used for intricate kolam patterns and tend to result in designs that look more elaborate even when the underlying dot count is modest.
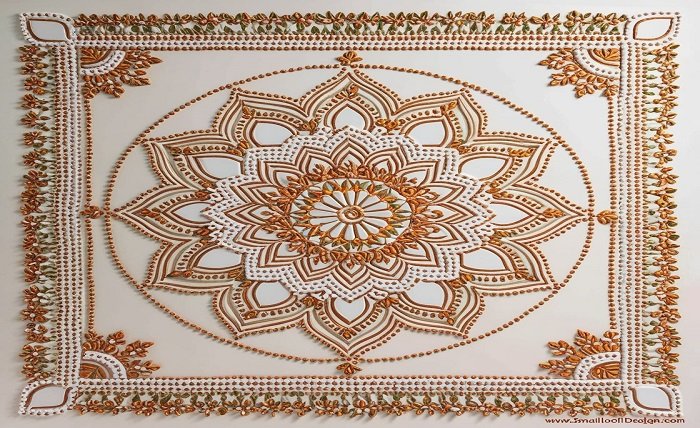
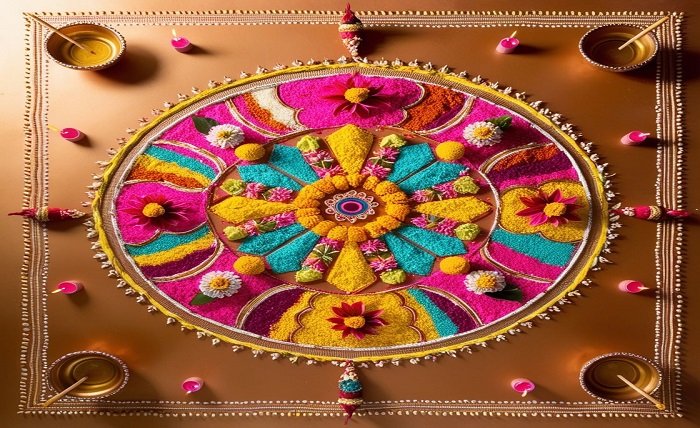
Expanding Radial Patterns
Some dot rangoli designs use a central cluster of dots that expand outward in concentric rings rather than a flat grid. These radial patterns suit circular or mandala-style designs and are a natural fit for festival centerpieces or entrance displays.
Radial dot arrangements reward patience but produce some of the most visually impressive results once completed.
How to Create a Dot Rangoli Design Step by Step
Getting started is simpler than most beginners expect. Follow these steps to draw your first dot rangoli design:
- Choose your dot count. A 5×5 or 7×7 grid is ideal for beginners. Larger grids like 9×9 or 13×13 suit more intricate patterns.
- Mark your dots. Use chalk, rice flour, or a dot pen to place dots in your chosen grid arrangement. Keep spacing even, roughly one to two inches apart.
- Identify the center. Most patterns start from the center and build outward, so mark your central dot clearly before drawing.
- Draw the outline first. Connect dots with curved or straight lines to form the outer boundary of your pattern before filling in inner details.
- Add inner details and motifs. Petals, leaves, and connecting curves fill the spaces between the outer framework.
- Fill with color. Use colored rangoli powder, chalk pastels, or flower petals to fill each section. Work from the center outward to avoid smudging completed areas.
- Add a border. A clean outer border, usually a single color, frames the design and gives it a finished look.
For a beginner-friendly walkthrough with visual steps, the guide on easy rangoli design ideas for beginners is a helpful companion resource.
Popular Dot Rangoli Design Themes
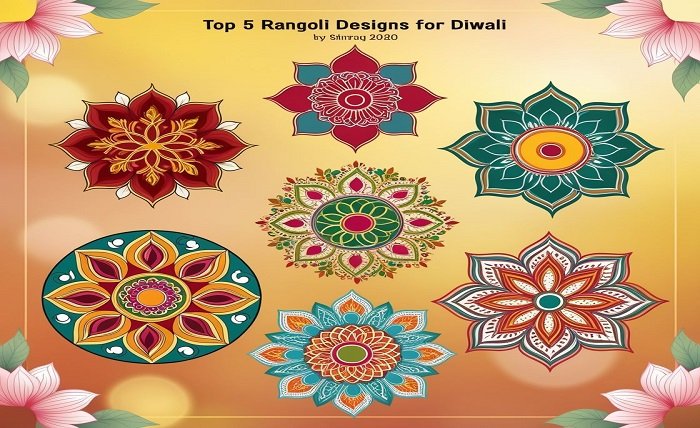
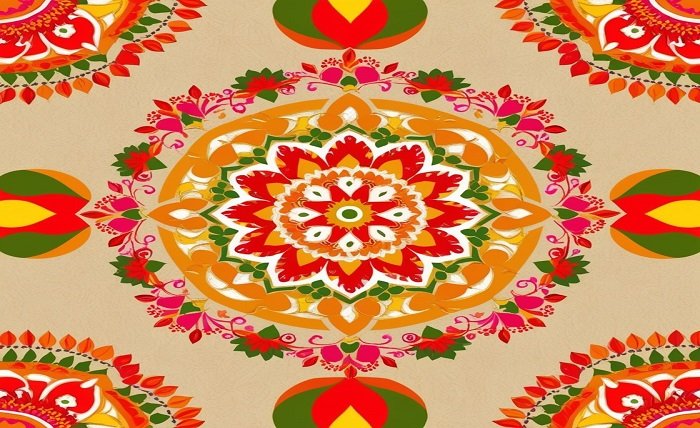
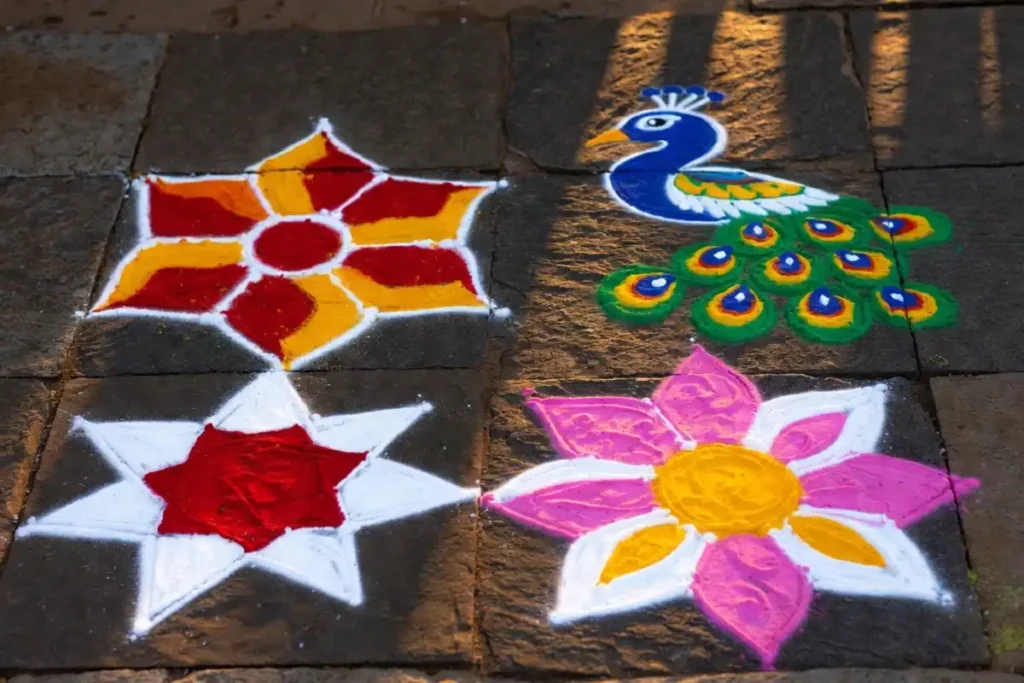
Floral and Petal Designs
Floral patterns are the most common theme in dot rangoli design. Petals are drawn by connecting nearby dots with curved lines, building outward layer by layer from a central point. The result resembles a blooming flower and can be scaled from simple four-petal designs to elaborate sixteen-petal mandalas.
Marigold, lotus, and jasmine-inspired patterns are especially popular during festivals.
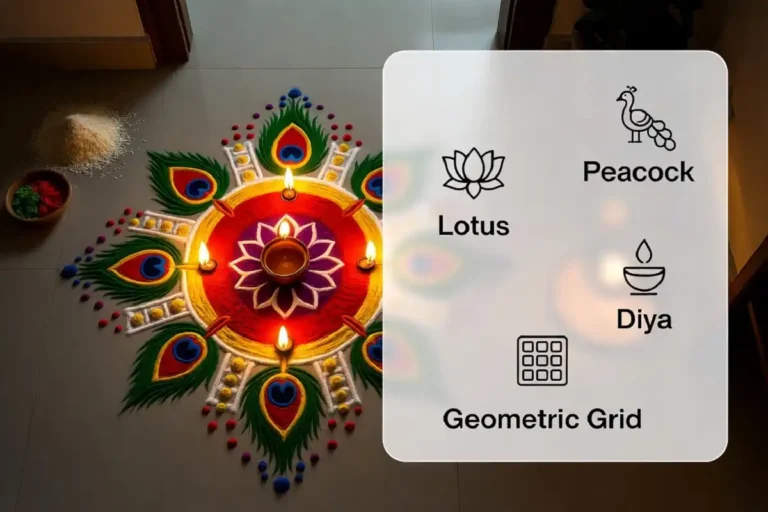
Peacock Motifs
Peacock-themed designs incorporate the bird’s distinctive tail feathers into the dot grid framework. Feather arcs are formed by looping lines through offset dot rows, and the body is drawn as a central teardrop or oval shape.
Peacock dot rangoli designs are particularly popular for Diwali and weddings because the bird is associated with beauty and auspiciousness in Indian tradition. If you want to explore this theme further, the peacock circle rangoli design ideas guide covers patterns worth trying.
Geometric and Star Patterns
Geometric designs use the straight grid to build interlocking triangles, hexagons, and star shapes. These are clean, precise, and well suited to monochrome or two-color palettes that let the geometry speak for itself.
Star patterns made from overlapping triangles are among the most recognizable dot rangoli designs and appear across many regional traditions.
Lotus Designs
The lotus is one of the most culturally significant motifs in Indian art and appears frequently in dot rangoli design for its layered petal structure and symbolic meaning. Building a lotus from a dot grid involves concentric rings of curved petals that expand from a small central cluster.
The lotus rangoli design pattern guide covers festival-specific lotus variations in detail.
Color Choices for Dot Rangoli Design
Color is where a dot rangoli design transforms from a line drawing into something visually striking. Traditional designs use natural materials like rice flour (white), turmeric (yellow), and vermilion (red). Modern rangoli powder is available in a wide spectrum of synthetic colors that are bright, consistent, and easy to work with.
A few practical color principles that work consistently:
- Use white or yellow for the outline and inner detail lines so they stand out against the floor
- Apply contrasting colors in adjacent sections to create visual separation between petals or shapes
- Keep the border a single solid color to frame and unify the whole design
- Use darker shades at the outer edges and lighter tones toward the center to create a sense of depth
According to the Victoria and Albert Museum’s collection notes on Indian folk arts, traditional kolam designs were historically made using rice flour as a daily practice tied to welcoming prosperity into the home, with color being introduced during festivals and special occasions.
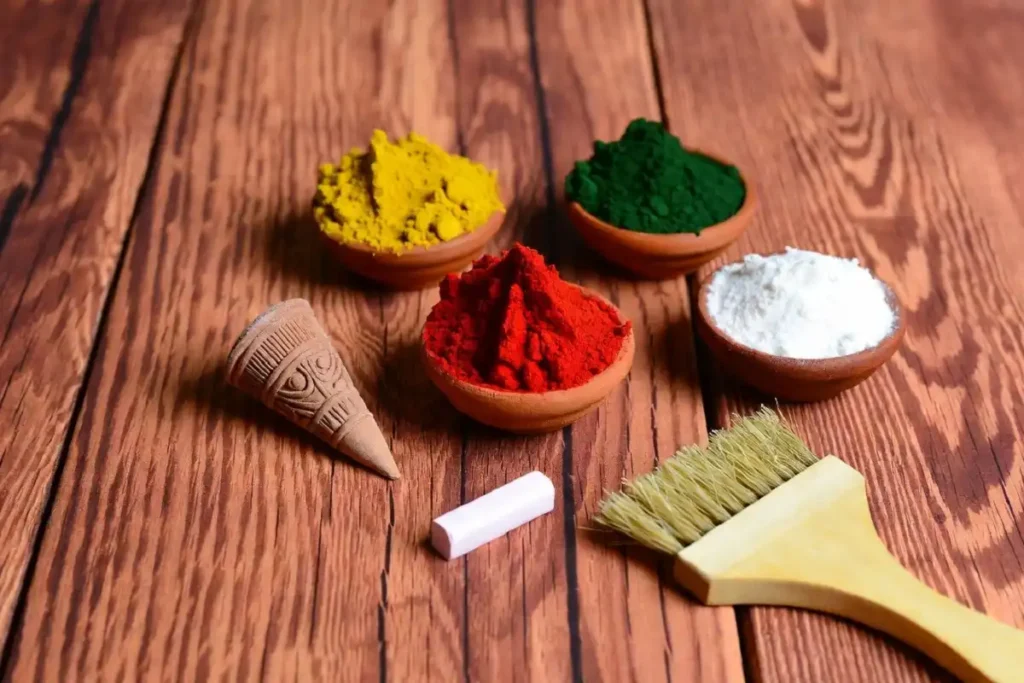
Tools and Materials for Dot Rangoli Design
You do not need much to get started. The basic materials for a dot rangoli design include:
- Chalk or white rangoli powder for placing the dot grid
- Colored rangoli powder in your chosen palette
- A rangoli cone or a small funnel for precise application
- A flat brush or cotton ball for smoothing and blending color edges
- A ruler or pre-made dot stamp stencil for perfectly even grids
Pre-made dot stencils are widely available and useful for keeping spacing consistent, especially for grids larger than 7×7 where freehand placement can drift noticeably.
For digital practice before drawing on a floor, platforms like Google Arts and Culture feature examples of traditional kolam and rangoli art from regional collections that can help you study pattern structures in detail.
FAQs
What is the easiest dot rangoli design for beginners?
A 5×5 straight grid with a simple four-petal floral pattern is the most beginner-friendly starting point. The small dot count keeps proportions manageable, and the four-petal structure requires only basic curved lines to complete a design that looks polished and balanced.
How many dots should a beginner use in a dot rangoli design?
Starting with a 5×5 or 7×7 grid gives beginners enough structure to create a complete pattern without becoming overwhelmed. As confidence grows, moving to a 9×9 or 13×13 grid opens up significantly more complex and detailed design possibilities.
What materials are used to place dots in a dot rangoli design?
Chalk, white rangoli powder, or rice flour are all commonly used to mark the initial dot grid. Some artists use pre-made dot stencils for speed and consistency, particularly on larger grids where freehand spacing errors are more noticeable.
Can a dot rangoli design be made without powder?
Yes, flower petals, colored sand, and even digital drawing apps can all be used to create dot rangoli designs without traditional powder. Petal-based designs are popular for weddings and indoor events because they are easier to clean up and carry a natural fragrance.
How long does it take to complete a dot rangoli design?
A simple 5×5 design with basic coloring takes around fifteen to thirty minutes. Larger, more intricate designs on grids of 13×13 or above with detailed coloring can take several hours. Festival centerpiece designs created by experienced artists may take a full day to complete.
Conclusion
A dot rangoli design is one of the most rewarding forms of traditional Indian art to learn. The dot grid removes the intimidation of freehand work and gives every pattern a naturally balanced structure from the start. Whether you are decorating a home entrance for Diwali, practicing a daily kolam, or exploring Indian folk art as a creative hobby, the dot method gives you a reliable framework that scales from simple to spectacular. Start with a small grid, choose colors that complement each other, and let the pattern grow outward. With each design you complete, the process becomes more intuitive and the results more satisfying.