Best Materials for 3D Rangoli: A Complete Guide
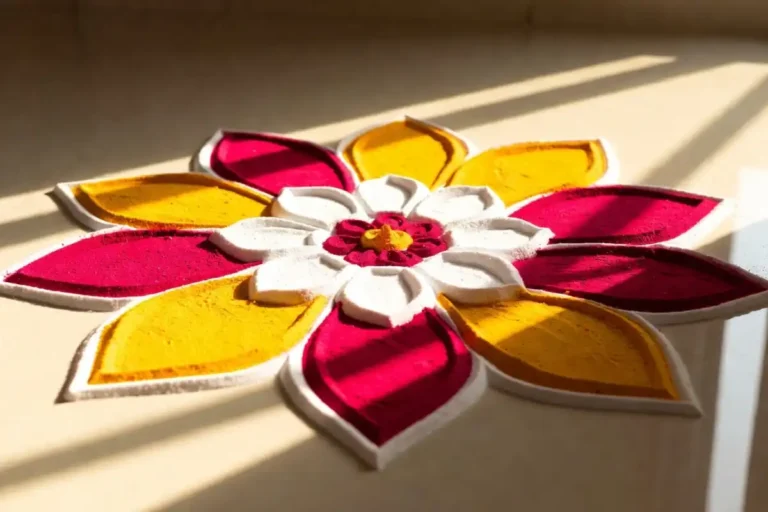
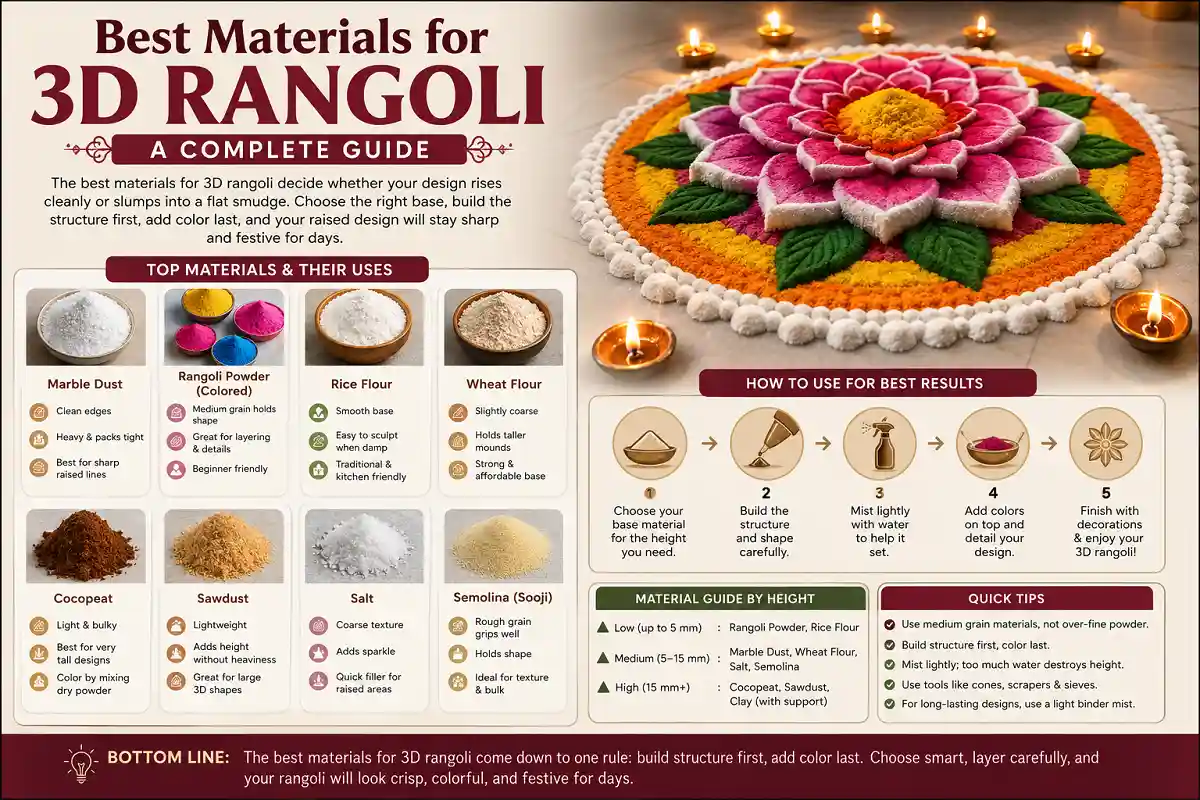
The best materials for 3D rangoli can make a big difference in how well your design holds its shape. If you want raised patterns with clear edges, good height, and a neat finish, choosing the right base material is just as important as choosing the design itself.
Fine white marble dust is a great option for creating smooth, sharp shapes, while sifted rangoli powder works well for adding color and filling smaller details. Wheat or rice flour is an affordable choice for simple raised patterns, and cocopeat is useful when you want extra height without adding too much weight.
You can also layer and shape these materials carefully to create more depth and dimension. A light mist of water can help the base settle and stay in place, but avoid making it too wet. With the right material, a steady hand, and a little patience, your 3D rangoli can stay crisp, colorful, and festive for days.
Why Material Choice Controls the 3D Effect
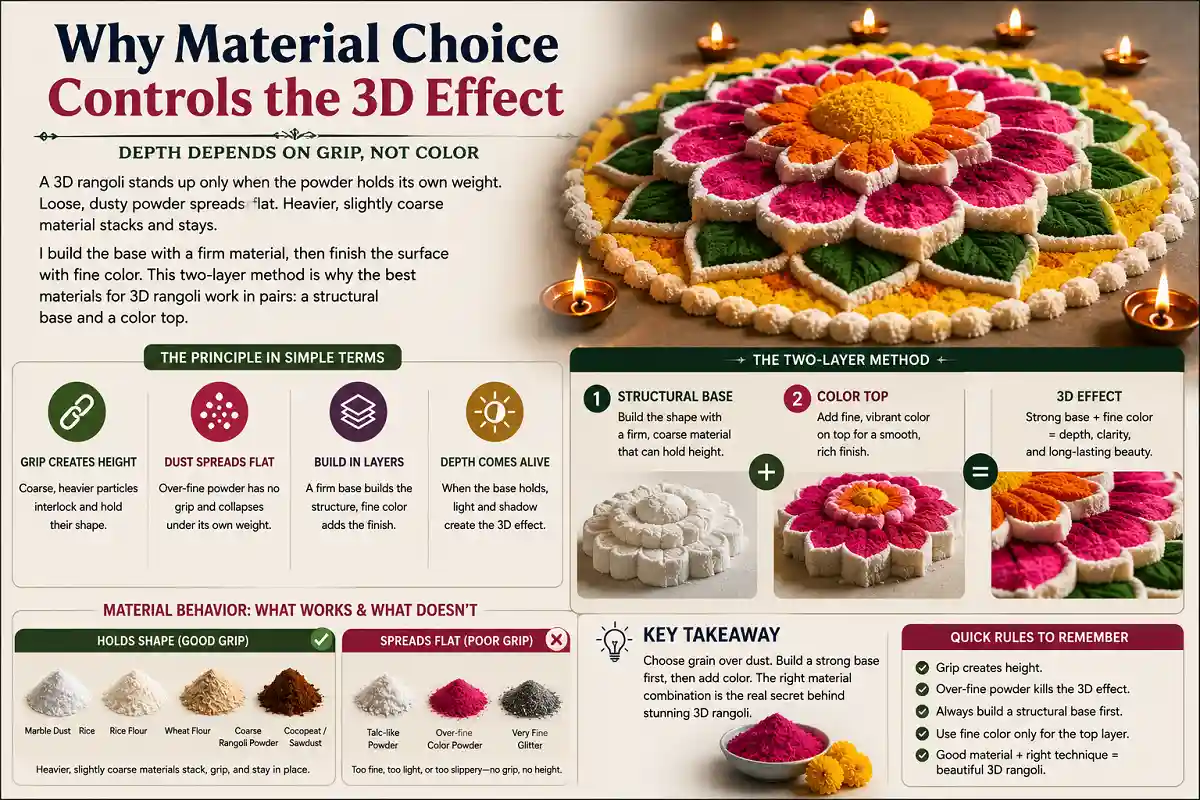
Material choice controls the 3D effect because depth depends on grip, not color. A 3D rangoli stands up only when the powder holds its own weight. Loose, dusty powder spreads flat. Heavier, slightly coarse material stacks and stays. I build the base with a firm material, then finish the surface with fine color. This two-layer method is why the best materials for 3D rangoli work in pairs: a structural base and a color top.
Structural Base
Firm, slightly coarse material that creates height and keeps the shape stable.
Color Top
Fine colored powder that gives the raised structure its finished appearance.
Marble Dust and Marble Powder
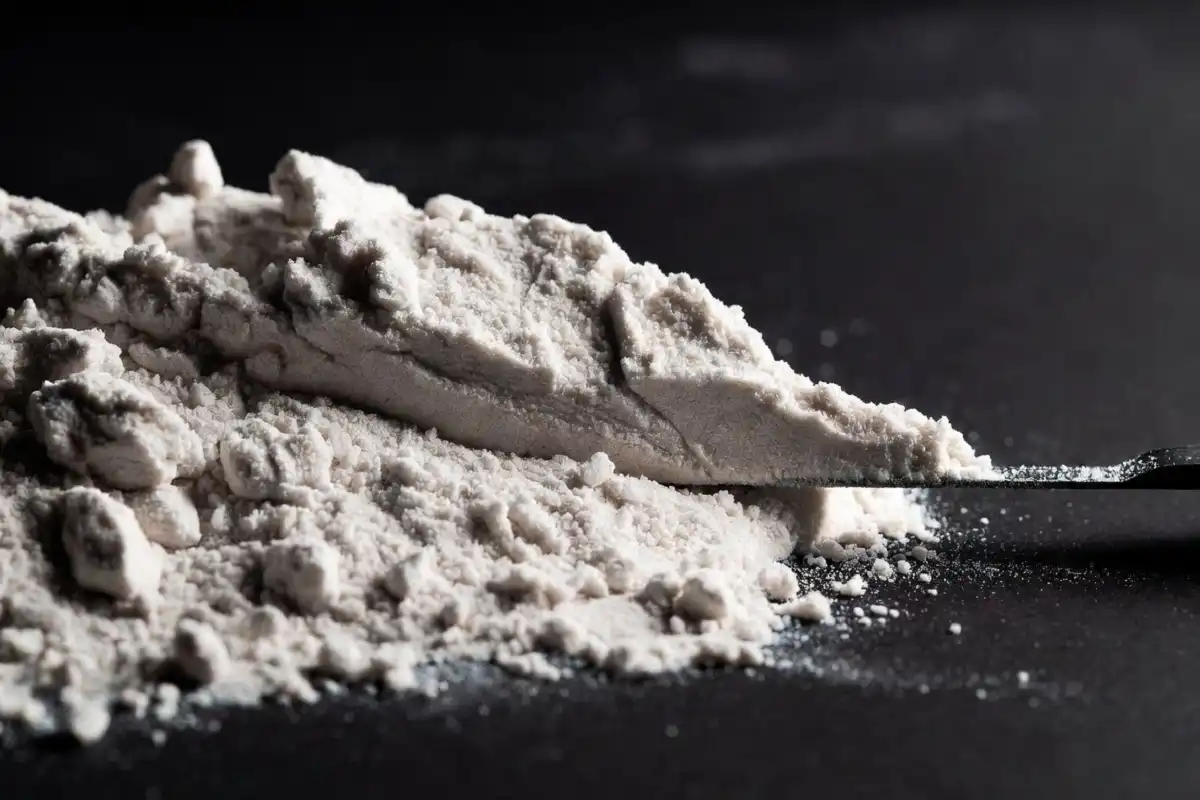
Marble dust gives the cleanest raised edges of any material I use. It is fine, heavy, and packs tight. You can mound it into ridges and it holds the line. White marble powder also reflects light, so raised areas catch highlights and look deeper. Mix a little water for sculpted peaks, or keep it dry for soft mounds. For competition work, marble dust is my first pick among the best materials for 3D rangoli.
Fine and heavy particles pack tightly for clean raised lines.
Dense material holds mounds and sculpted ridges effectively.
White marble catches highlights and enhances the depth effect.
Rangoli Powder and Colored Sand
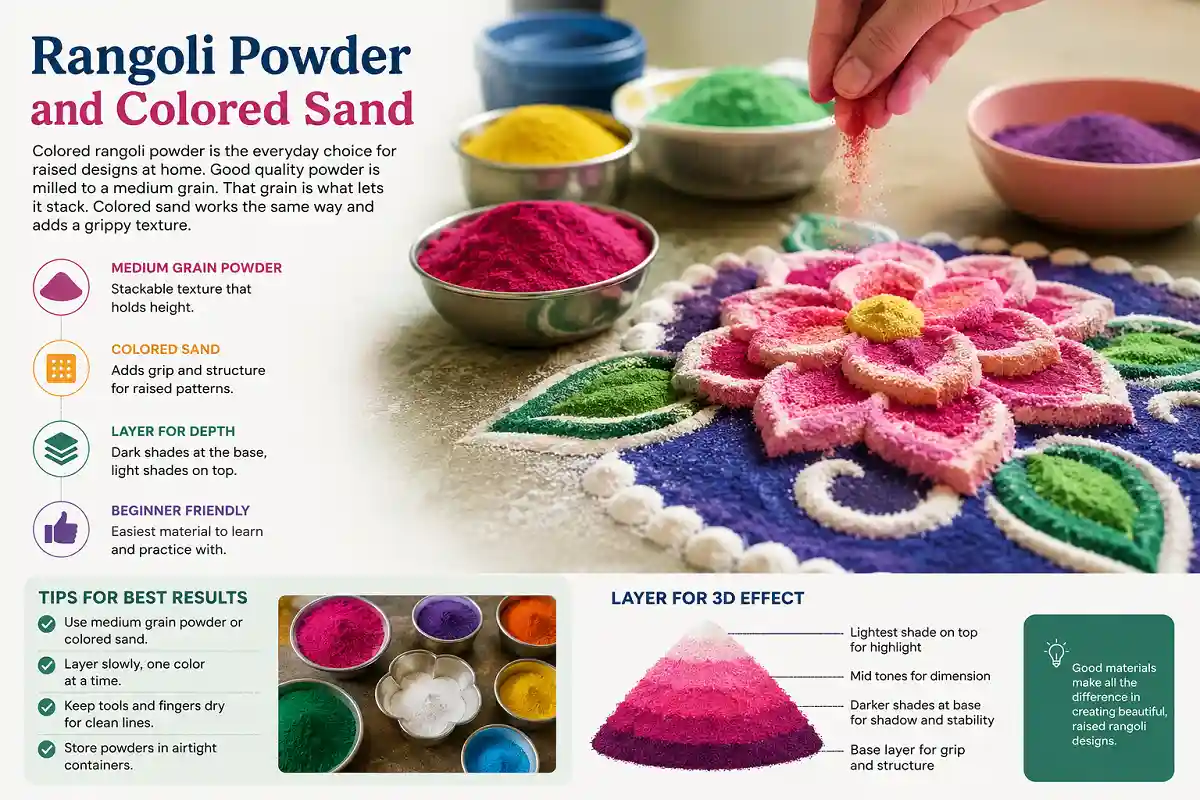
Colored rangoli powder is the everyday choice for raised designs at home. Good quality powder is milled to a medium grain. That grain is what lets it stack. Cheap, over-fine powder behaves like talc and will not hold height. Colored sand works the same way and adds a grippy texture. Layer darker shades low and lighter shades on top to fake shadow and lift. Among the best materials for 3D rangoli, colored powder stays the most beginner friendly.
If you are still learning to raise patterns, this step by step approach to 3D rangoli pairs well with medium-grain powder.
Flour Bases: Rice Flour and Wheat Flour
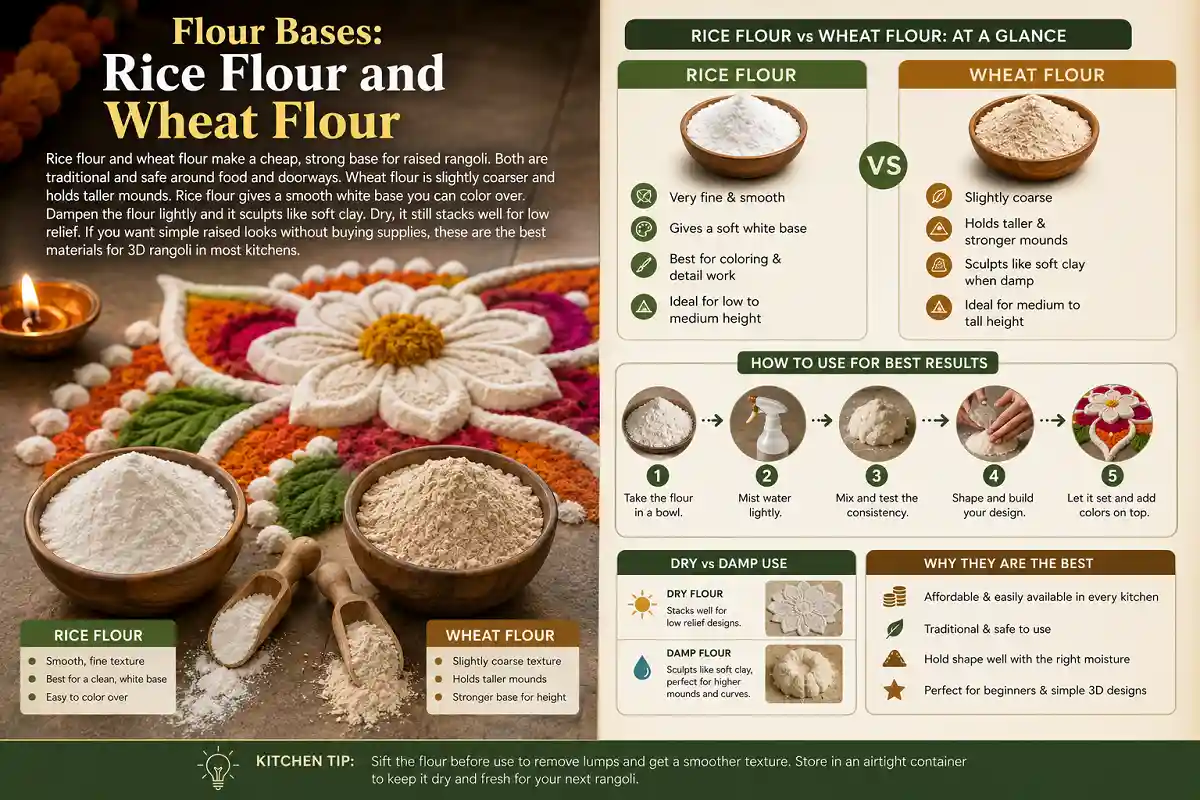
Rice flour and wheat flour make a cheap, strong base for raised rangoli. Both are traditional and safe around food and doorways. Wheat flour is slightly coarser and holds taller mounds. Rice flour gives a smooth white base you can color over. Dampen the flour lightly and it sculpts like soft clay. Dry, it still stacks well for low relief. If you want simple raised looks without buying supplies, these are the best materials for 3D rangoli in most kitchens.
Cocopeat and Sawdust for Tall Builds
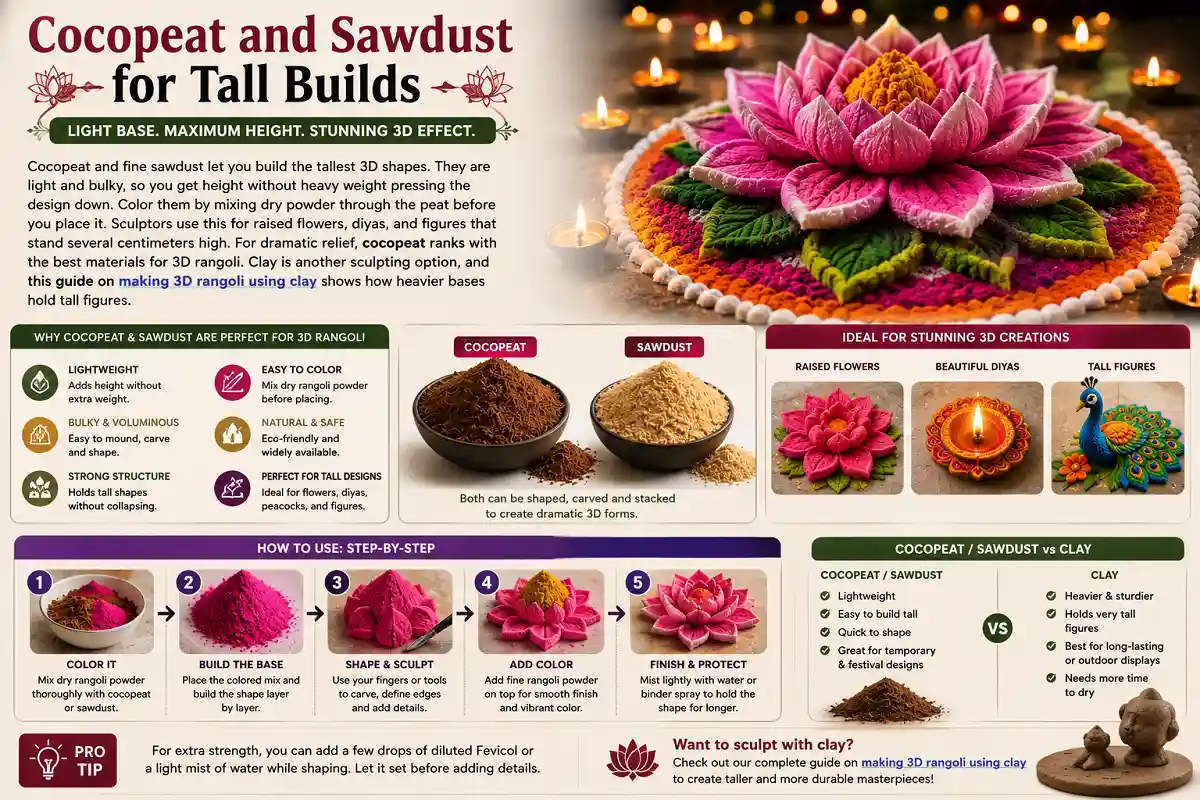
Cocopeat and fine sawdust let you build the tallest 3D shapes. They are light and bulky, so you get height without heavy weight pressing the design down. Color them by mixing dry powder through the peat before you place it. Sculptors use this for raised flowers, diyas, and figures that stand several centimeters high. For dramatic relief, cocopeat ranks with the best materials for 3D rangoli.
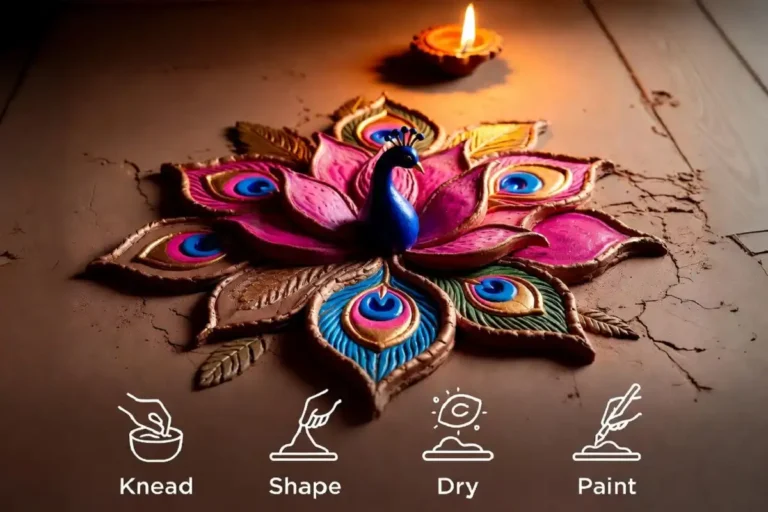
Clay is another sculpting option, and this guide on making 3D rangoli using clay shows how heavier bases hold tall figures.
Salt, Semolina, and Household Fillers
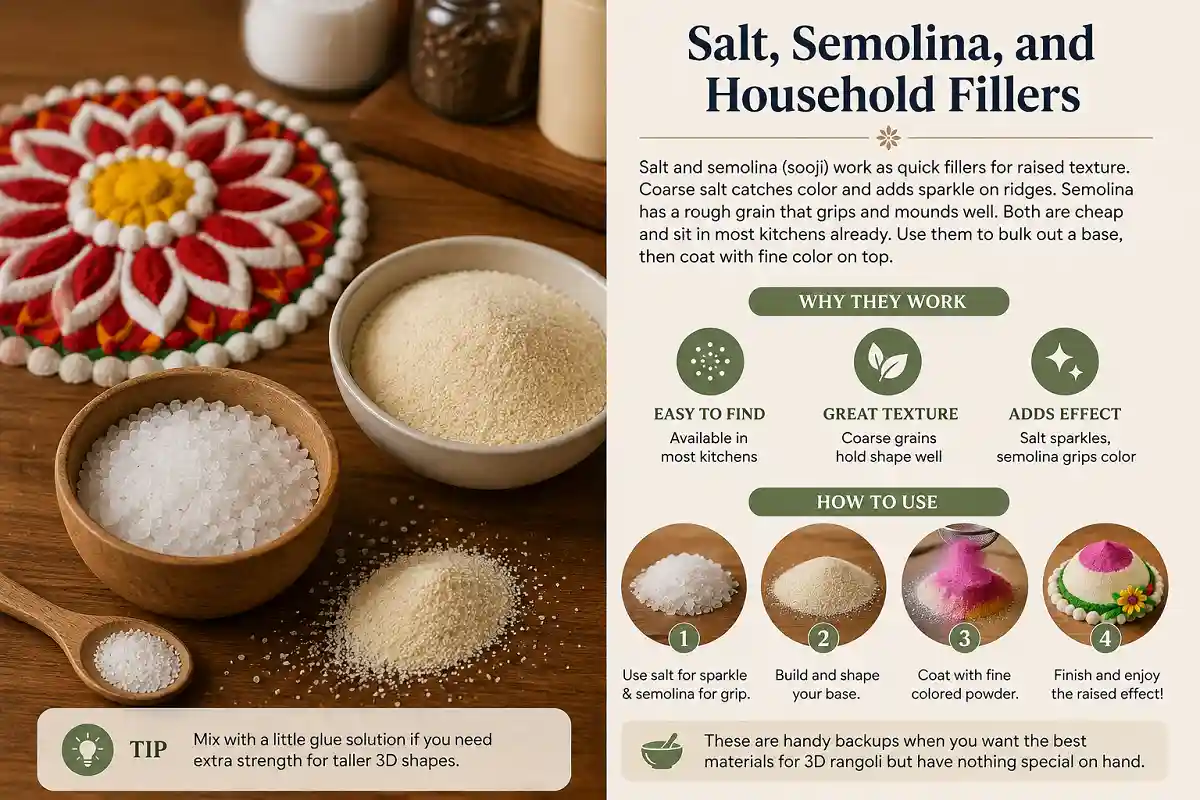
Salt and semolina (sooji) work as quick fillers for raised texture. Coarse salt catches color and adds sparkle on ridges. Semolina has a rough grain that grips and mounds well. Both are cheap and sit in most kitchens already. Use them to bulk out a base, then coat with fine color on top. These are handy backups when you want the best materials for 3D rangoli but have nothing special on hand.
Coarse Salt
Catches color and adds sparkle along raised ridges.
Semolina
Its rough grain provides grip and helps create small mounds.
Binding and Finishing Materials
Binders lock a tall 3D rangoli in place so it survives wind and footsteps. A light water mist sets the surface. Diluted white glue or fixing spray holds competition pieces for judging. Fevicol thinned with water works for figures that must last. Do not soak the design; too much liquid flattens it. A gentle mist over the best materials for 3D rangoli keeps the depth sharp.
A gentle mist can help settle the surface, but too much liquid can flatten raised ridges and destroy the 3D effect.
How to Match Material to Your Design
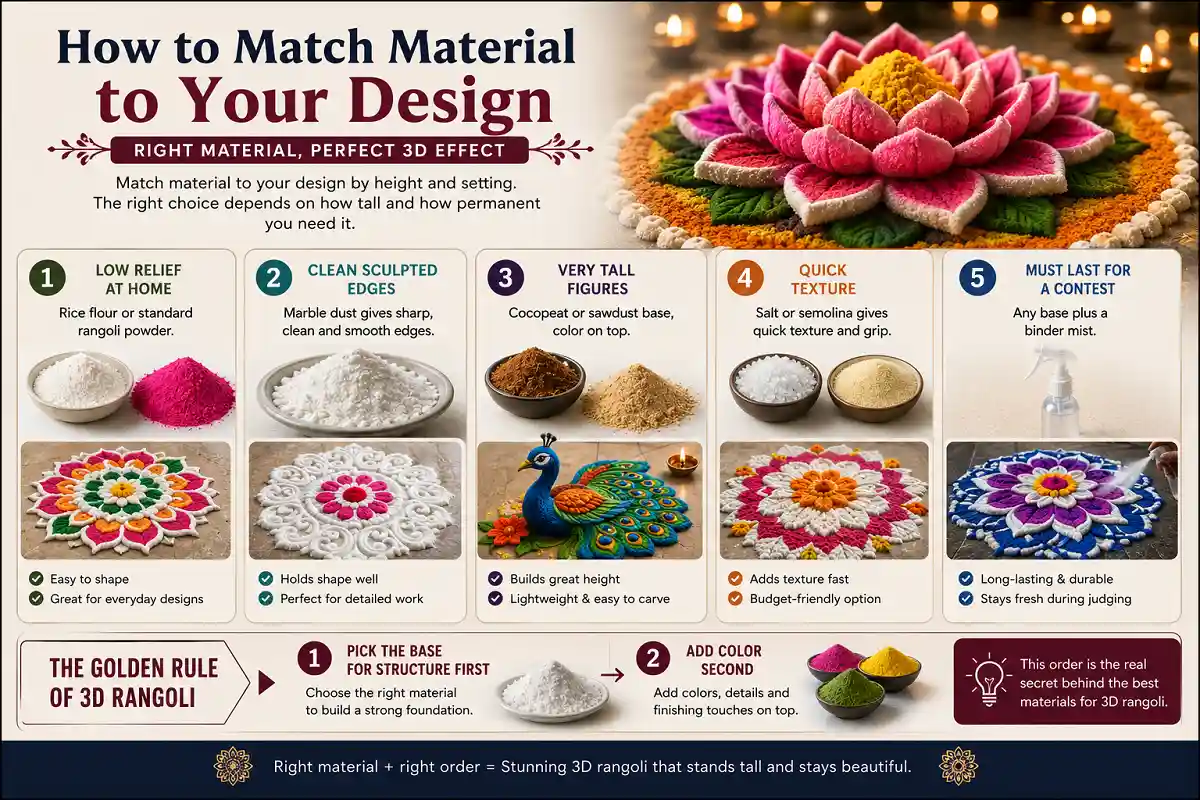
Match material to your design by height and setting. The right choice depends on how tall and how permanent you need it.
- Low relief at home: rice flour or standard rangoli powder.
- Clean sculpted edges: marble dust.
- Very tall figures: cocopeat or sawdust base, color on top.
- Quick texture: salt or semolina.
- Must last for a contest: any base plus a binder mist.
Pick the base for structure first. Add color second. That order is the real secret behind the best materials for 3D rangoli.
Tools That Make Layering Easier
A few simple tools turn good material into clean depth. A cone or funnel places powder in tight ridges. A flat scraper or card sharpens edges. A soft brush blends color between layers. Sieves control grain so only the right texture reaches your design. With the right base and these tools, the best materials for 3D rangoli become far easier to control. Once your materials are sorted, these 3D rangoli ideas with colors give patterns worth building.
Common Mistakes When Choosing the Best Materials for 3D Rangoli
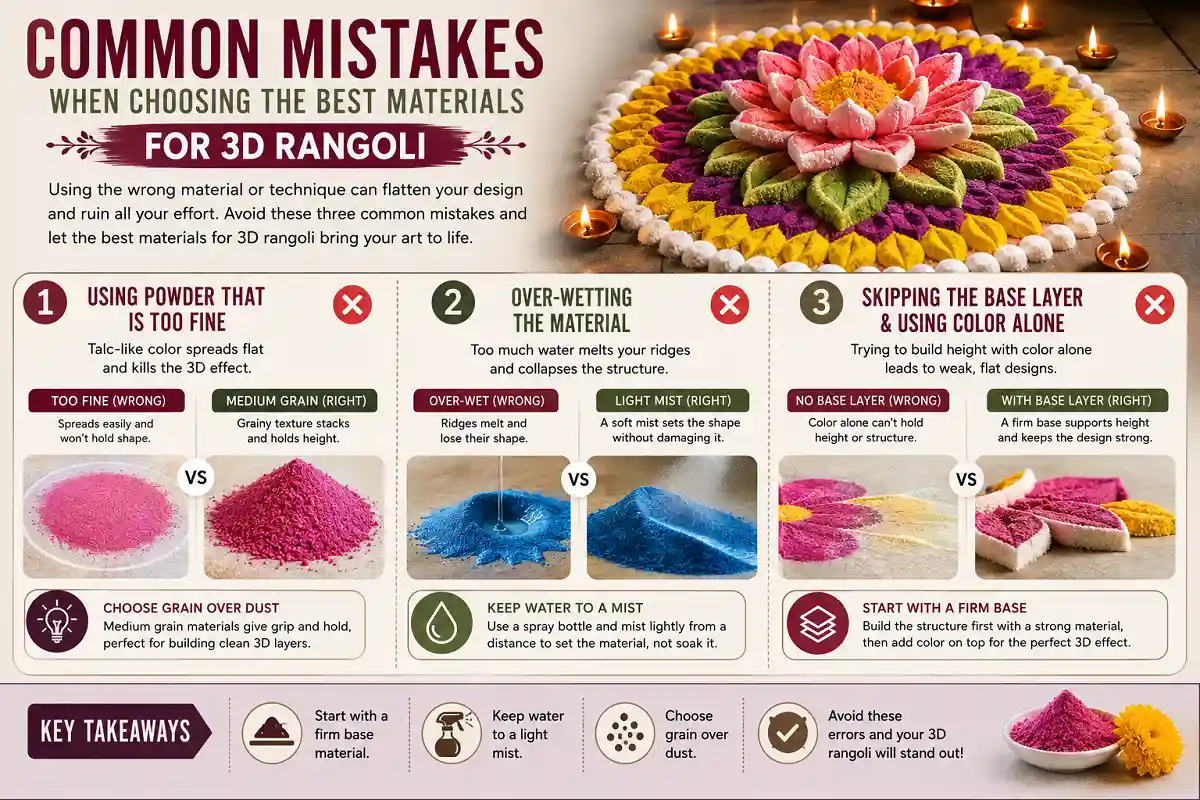
The most common mistake is using powder that is too fine. Talc-like color spreads flat and kills the 3D effect. The second mistake is over-wetting; water melts your ridges. The third is skipping the base layer and trying to build height with color alone. Start with a firm base. Keep water to a mist. Choose grain over dust. Avoid these three errors and the best materials for 3D rangoli do the hard work for you.
Talc-like powder spreads flat instead of holding height.
Too much water softens and flattens raised ridges.
Color alone cannot reliably create strong structural height.
Build the Structure First, Then Add Color
When making a beautiful 3D rangoli, it helps to build the shape and height first and worry about the colors afterward. The best materials for 3D rangoli depend on the kind of texture and finish you want.
Marble dust works well if you want crisp edges and a smooth, clean look. If you’re looking for something inexpensive and easy to work with, flour and cocopeat are great options for creating soft, raised shapes. Rangoli powder and salt can also be useful for covering larger areas without spending too much time.
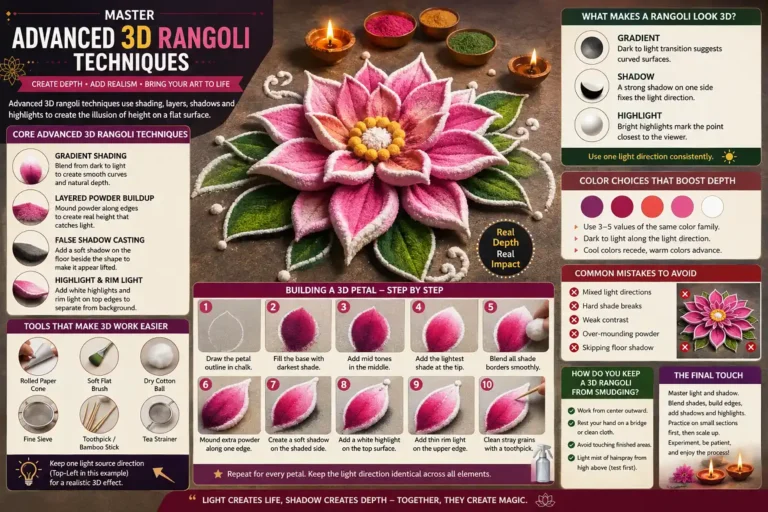
Once you’ve shaped the base, give it a very light mist of water. This helps the material settle and hold its form, but be careful not to make it too wet. After that, add your colored powders, flower petals, or other decorations.
With a good base and a little patience, you can create a raised rangoli that feels colorful, detailed, and festive without making the process too complicated.
FAQs
Can I make 3D rangoli without marble dust? +
Yes. Rice flour, wheat flour, or cocopeat all build height well. Marble dust gives the sharpest edges, but it is not required for good raised designs at home.
Which material is best for beginners? +
Standard colored rangoli powder of medium grain is easiest to start with. It stacks without special skill and needs no water.
Do 3D rangoli materials need water? +
Not always. Most stack dry. A light mist only helps set the surface or hold a tall piece. Never soak the design.
How do I stop my 3D rangoli from collapsing? +
Build on a firm base, keep layers shallow, and finish with a light binder mist. Height comes from stacking, not from wetting.