Traditional Rangoli With Natural Colors: A Complete Step-by-Step Guide
Every festival season, the same question pops up in Indian households: should the rangoli at the door be made with bright synthetic powders, or should it go back to its roots?
If you’ve ever wondered how your grandmother made those glowing floor patterns without a single plastic-based color in sight, you’re about to find out. A traditional rangoli with natural colors isn’t just prettier in a rustic, honest way — it’s kinder to your floor, your lungs, and the sparrows that visit your doorstep.
This guide walks through what natural rangoli colors actually are, how to source and mix them, a simple step-by-step method anyone can follow, and the regional variations that have kept this art alive for centuries.
What Makes a Traditional Rangoli With Natural Colors Different
Most rangoli sold in stores today comes in packets of synthetic powder — cheap, bright, and often loaded with chemical dyes that don’t break down easily.
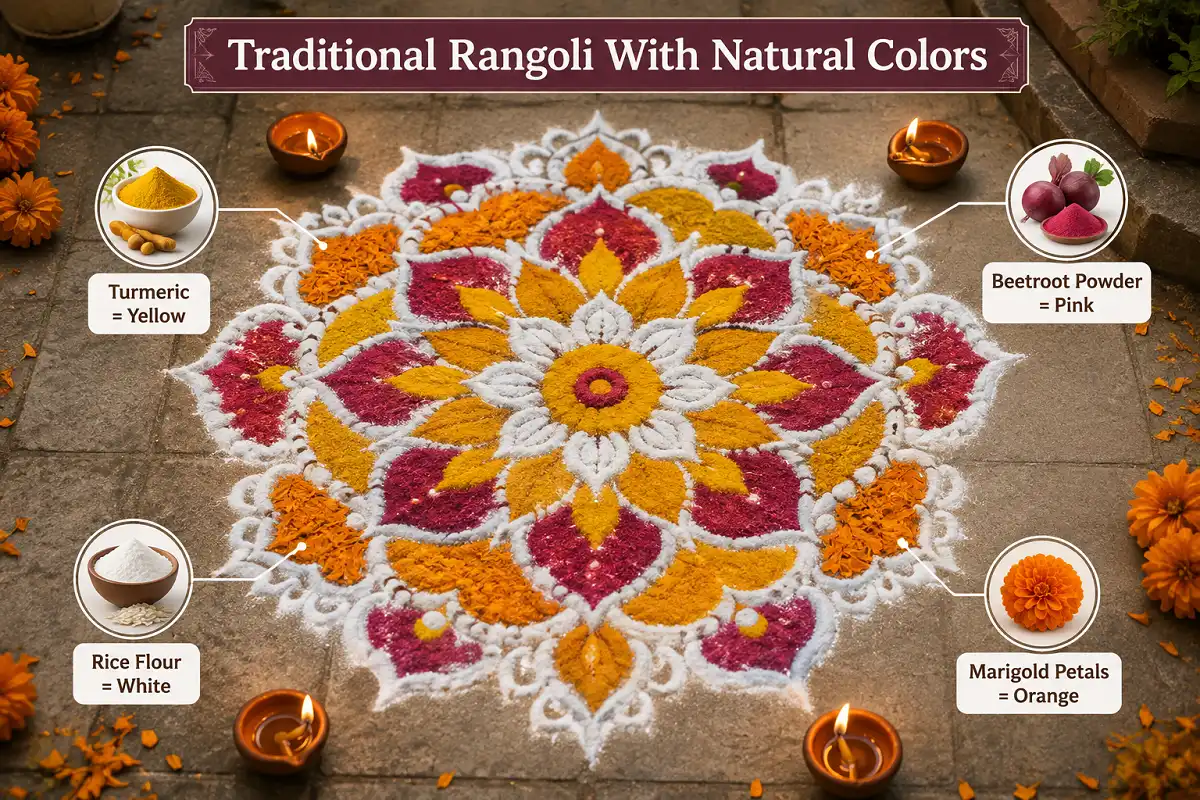
A traditional rangoli with natural colors flips that approach. Instead of manufactured pigment, you’re working with things already sitting in your kitchen or garden: spices, grains, flower petals, and even seeds.
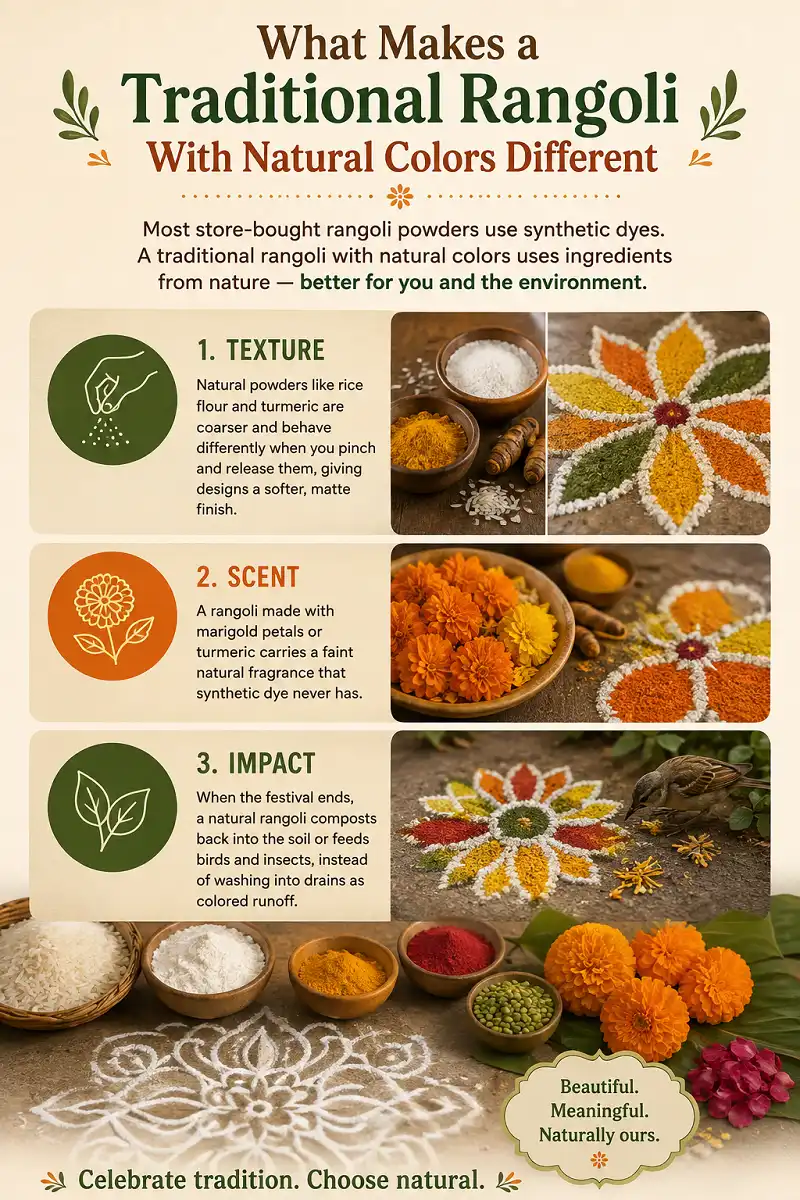
The difference shows up in three ways:
- Texture — natural powders like rice flour and turmeric are coarser and behave differently when you pinch and release them, giving designs a softer, matte finish.
- Scent — a rangoli made with marigold petals or turmeric carries a faint natural fragrance that synthetic dye never has.
- Impact — when the festival ends, a natural rangoli composts back into the soil or feeds birds and insects, instead of washing into drains as colored runoff.
If you grew up watching an elder sketch patterns at dawn with rice paste, you already understand why a traditional rangoli with natural colors feels different from the glitter-dusted versions sold at the market.
A Short History Behind the Practice
Rangoli traces back to the Vedic period, when women drew simple geometric patterns using rice flour at the entrance of homes to welcome deities and guests.
Over time, this ritual spread across regions and took on local names and materials — kolam in Tamil Nadu, muggulu in Andhra Pradesh and Telangana, alpana in Bengal, and aripan in parts of North India.
In nearly every version, the base ingredient stayed the same: something natural, something that could be swept away and returned to the earth without leaving a trace. You can read more general background on the art form on Wikipedia.
That history is exactly why a traditional rangoli with natural colors feels less like a trend and more like a return to how the art was always meant to be practiced.
Common Natural Colors and Where They Come From
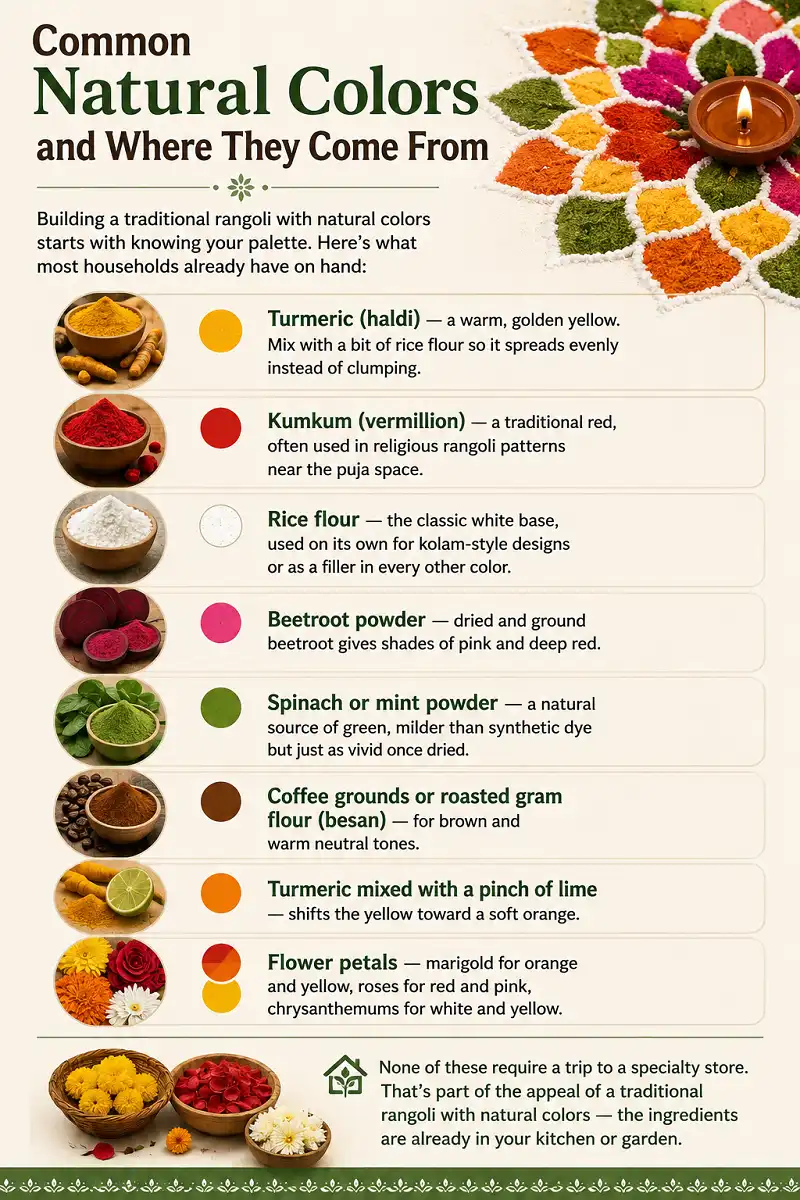
Building a traditional rangoli with natural colors starts with knowing your palette. Here’s what most households already have on hand:
- Turmeric mixed with a pinch of lime shifts the yellow toward a soft orange.
- Flower petals — marigold for orange and yellow, roses for red and pink, chrysanthemums for white and yellow.
None of these require a trip to a specialty store. That’s part of the appeal of a traditional rangoli with natural colors — the ingredients are already in your pantry or your garden.
How to Make a Traditional Rangoli With Natural Colors: Step-by-Step
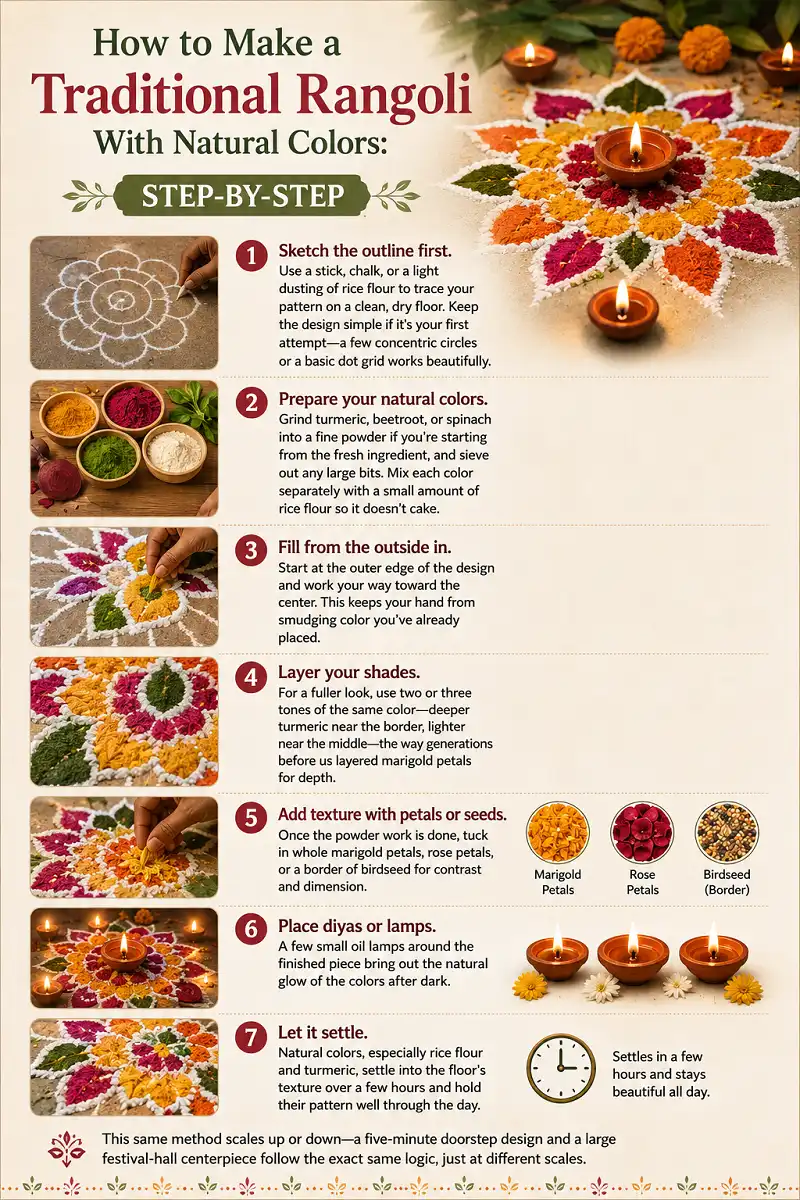
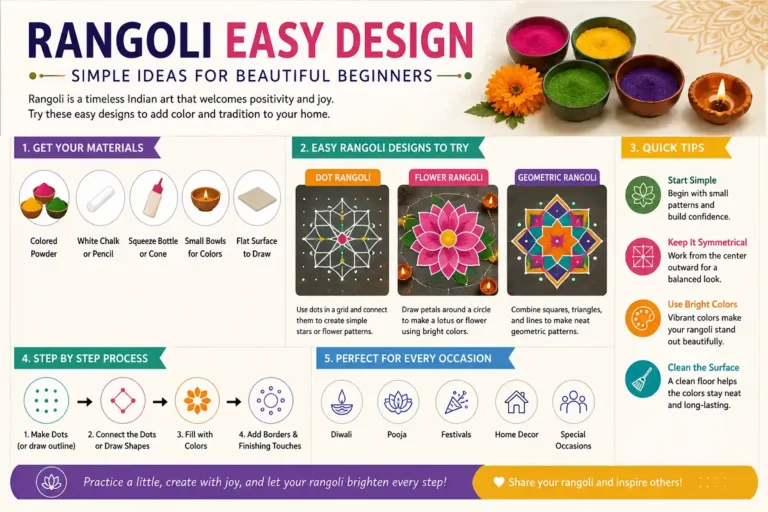
Follow these simple steps to create your own traditional rangoli using natural colors:
Sketch the Outline First
Use a stick, chalk, or a light dusting of rice flour to trace your pattern on a clean, dry floor. Keep the design simple if it’s your first attempt — a few concentric circles or a basic dot grid works beautifully.
Prepare Your Natural Colors
Grind turmeric, beetroot, or spinach into a fine powder if you’re starting from the fresh ingredient, and sieve out any large bits. Mix each color separately with a small amount of rice flour so it doesn’t cake.
Fill From the Outside In
Start at the outer edge of the design and work your way toward the center. This keeps your hand from smudging color you’ve already placed.
Layer Your Shades
For a fuller look, use two or three tones of the same color — deeper turmeric near the border, lighter near the middle — the way generations before us layered marigold petals for depth.
Add Texture With Petals or Seeds
Once the powder work is done, tuck in whole marigold petals, rose petals, or a border of birdseed for contrast and dimension.
Place Diyas or Lamps
A few small oil lamps around the finished piece bring out the natural glow of the colors after dark.
Let It Settle
Natural colors, especially rice flour and turmeric, settle into the floor’s texture over a few hours and hold their pattern well through the day.
Why the Colors Behave Differently (The Science Bit)
Not every natural powder flows or packs the same way, and that’s not just in your head.
Fine turmeric flows easily when you sprinkle it by hand, while a coarser powder like ground rice or beetroot can feel a bit stubborn and clump if the air is humid.
Powders made of smaller, smoother particles glide out of a squeeze bottle more easily, while chunkier, rougher ones resist wind and hold their shape better once pressed onto the floor.
Flow easily and are better suited for detailed work.
Can resist wind and hold their shape better.
Can cause natural powders to clump and become harder to spread.
That’s why an experienced rangoli artist often mixes a “sticky” color like turmeric with a smoother one to get the best of both — easy flow for detail work, and enough grip that the wind doesn’t undo hours of effort.
Knowing this small detail can save you a lot of frustration the first time you try a traditional rangoli with natural colors outdoors on a breezy day.
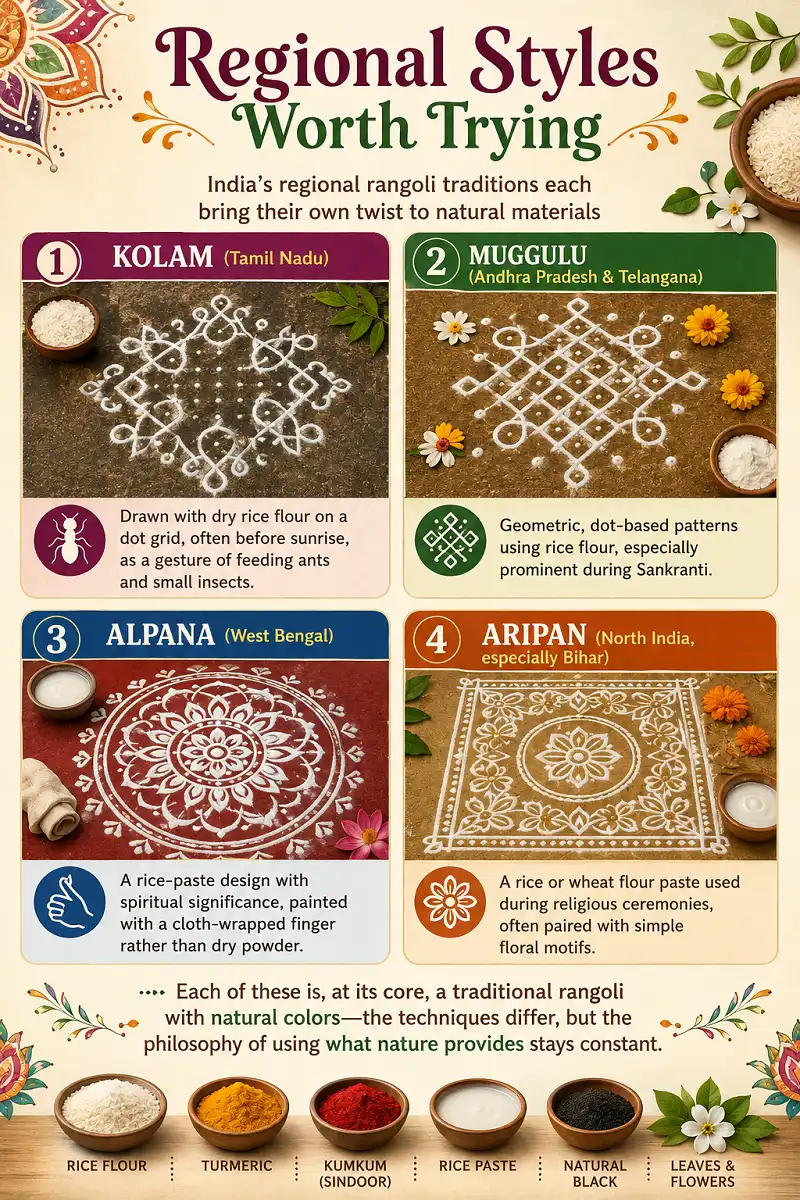
Regional Styles Worth Trying
India’s regional rangoli traditions each bring their own twist to natural materials:
Kolam
Tamil NaduDrawn with dry rice flour on a dot grid, often before sunrise, as a gesture of feeding ants and small insects.
Muggulu
Andhra Pradesh & TelanganaGeometric, dot-based patterns using rice flour, especially prominent during Sankranti.
Alpana
West BengalA rice-paste design with spiritual significance, painted with a cloth-wrapped finger rather than dry powder.
Aripan
North India, especially BiharA rice or wheat flour paste used during religious ceremonies, often paired with simple floral motifs.
Each of these is, at its core, a traditional rangoli with natural colors — the techniques differ, but the philosophy of using what nature provides stays constant across every region.
Tips for Long-Lasting, Vibrant Results
Dry your ingredients thoroughly before grinding; any moisture will make the powder clump and dull the color.
Store each natural color in a separate airtight jar — mixing them early makes touch-ups difficult later.
Work on a clean, dust-free floor; natural powders show dirt and unevenness more than synthetic ones.
If you’re placing your rangoli outdoors, choose a spot sheltered from strong wind, since lighter powders like turmeric scatter more easily than packed synthetic dye.
Add a light layer of diluted rice paste under the design if you want it to hold shape for several days indoors.
Eco-Friendly Variations to Try
If you want to push the natural theme further, consider:
Seed Rangoli
Outline your pattern with sunflower seeds and fill it with millet, flax, or quinoa. Once the festival is over, leave it out for birds.
Leaf Rangoli
Collect fallen leaves in different shapes and colors and arrange them into a pattern; no powder required at all.
Lentil Rangoli
Moong dal, urad dal, and masoor dal each bring a different natural shade and a slightly raised, textured look.
Every one of these variations shares the same spirit as a traditional rangoli with natural colors: nothing wasted, nothing harmful, and everything eventually returning to the earth.
For more design inspiration, you can also explore traditional rangoli made with rice flour, browse rangoli designs made with real flowers, or check out authentic South Indian kolam rangoli designs for more natural-material ideas.
Create Beautiful Rangoli with Natural Colors
A traditional rangoli with natural colors doesn’t ask for anything exotic — just a little patience, a few kitchen staples, and the same steady hands that have shaped this art for generations.
Start small, experiment with turmeric and rice flour, and let the pattern grow more elaborate as you get comfortable with the natural materials.
It’s a quiet, practical way to keep both an old tradition and the environment around your doorstep intact.
FAQs
Is a traditional rangoli with natural colors safe for kids and pets?
 Is a traditional rangoli with natural colors safe for kids and pets?
Yes. Since the base ingredients are food items like turmeric, rice flour, and flower petals, they’re non-toxic even if a curious toddler or pet touches the design.
How long does a natural rangoli last compared to a synthetic one?
A natural rangoli typically holds its shape for a day or two indoors, slightly less than synthetic powder, which is chemically treated to resist moisture. Adding a rice-paste base underneath helps it last longer.
Can I make natural rangoli colors at home without buying anything special?
Absolutely. Turmeric, beetroot, spinach, coffee grounds, and rice flour are common kitchen staples, and flower petals can often be sourced from your own garden or leftover puja flowers.
Why do some natural powders flow more easily than others?
It comes down to particle size and surface texture. Finer, smoother powders like turmeric spread easily, while coarser ones need a bit more pressure or a rice flour mix to move smoothly.
What’s the easiest traditional rangoli with natural colors for a beginner?
Start with a simple dot-grid kolam using plain rice flour. It requires no color mixing, just a steady hand and a light touch.
Do natural rangoli colors fade in sunlight?
Some do, especially beetroot and spinach powder, which are more delicate than mineral-based dyes. Placing your rangoli in a shaded entryway helps the colors stay vivid longer.